Love this? Save it for later!
Share the inspiration with your friends
Introduction
“You have to try this,” my neighbor Lila said one humid Saturday afternoon, waving a small cup across the fence. I was skeptical—tiramisu without an oven? And with strawberries instead of espresso? Honestly, I was expecting something cloying or overly sweet. But that first bite changed everything. The creamy layers melted smoothly, the fresh strawberries added a bright zing, and the whole thing felt like summer in a cup. I mean, who knew tiramisu could be so light and fresh without any baking at all?
Let me tell you, this recipe came out of one of those moments when I had just a handful of ingredients on hand and zero patience for complicated desserts. I was juggling a cracked mixing bowl and a toddler’s “emergency snack” requests, so whipping up something fast but impressive was the goal. Somehow, this creamy strawberry tiramisu cups recipe nailed it perfectly. Maybe you’ve been there—needing a crowd-pleaser that doesn’t require turning on the oven in the heat or spending hours in the kitchen.
Since that day, these no-bake delights have become a staple for weekend brunches, casual dinner parties, and even last-minute celebrations. The best part? You don’t need any fancy equipment or obscure ingredients. It’s the kind of dessert that feels special but is honestly simple enough to make on a weekday evening when you’re craving something sweet but fresh. If you love the idea of traditional tiramisu but want a fruity twist that’s quick to assemble, this one’s for you.
Why You’ll Love This Recipe
After testing this creamy strawberry tiramisu cups recipe more times than I can count (and sharing with friends who insist on the recipe), here’s why it stands out:
- Quick & Easy: You can have these cups ready in under 30 minutes—ideal for busy days or unexpected guests.
- Simple Ingredients: No need to hunt down mascarpone at a specialty store; cream cheese works beautifully, and fresh strawberries add natural sweetness.
- Perfect for Warm Weather: Since there’s no baking involved, it’s a cool, refreshing treat during spring and summer gatherings.
- Crowd-Pleaser: Kids and adults alike rave about the creamy texture combined with the fruity strawberry layers.
- Unbelievably Delicious: The balance between the rich cream and the bright strawberry notes makes this dessert unforgettable.
This isn’t just another tiramisu recipe—it’s a fresh take that feels both indulgent and light. The trick is in folding the cream gently to keep it airy, and soaking the ladyfingers just right so they’re tender but not soggy. I’ve tried versions with other berries, but there’s something about strawberries’ natural sweetness paired with a hint of vanilla that keeps me coming back. Honestly, it’s the kind of dessert that makes you close your eyes after the first bite and smile.
What Ingredients You Will Need
This recipe uses simple, wholesome ingredients to deliver bold flavor and satisfying texture without the fuss. Most are pantry staples, and the fresh strawberries add that seasonal magic.
- For the Cream Layer:
- 8 oz (225 g) cream cheese, softened (I prefer Philadelphia for smoothness)
- 1 cup (240 ml) heavy whipping cream, cold
- 1/2 cup (60 g) powdered sugar, sifted (adjust sweetness to taste)
- 1 tsp pure vanilla extract (adds warmth and depth)
- For the Strawberry Layer:
- 2 cups (300 g) fresh strawberries, hulled and sliced (use ripe but firm berries)
- 2 tbsp granulated sugar (optional, for macerating)
- 1 tbsp fresh lemon juice (brightens the flavor)
- For Assembly:
- 24 ladyfingers (store-bought or homemade; I like Savoiardi for their light texture)
- 1/2 cup (120 ml) strawberry juice or a light strawberry syrup (for soaking ladyfingers)
- Fresh mint leaves (optional, for garnish)
Ingredient tips: If you want a dairy-free version, swap the cream cheese with a plant-based alternative and use coconut cream instead of heavy cream. For a gluten-free option, use gluten-free ladyfingers or substitute with thin almond biscuits. In winter, frozen strawberries work well—just thaw and drain excess liquid before using.
Equipment Needed
- Mixing bowls (one large and one medium-sized)
- Electric hand mixer or stand mixer (to whip cream smoothly)
- Spatula (for folding cream without deflating)
- Measuring cups and spoons
- Serving cups or small dessert glasses (4 to 6 oz / 120–180 ml capacity)
- Knife and cutting board for slicing strawberries
- Optional: fine mesh sieve for sifting powdered sugar
If you don’t have an electric mixer, a whisk will do, but it’ll take more elbow grease to get stiff peaks. I’ve also made these in simple glass jars when I ran out of dessert cups—makes for a charming presentation. Just make sure your mixing bowls are chilled; cold bowls help whip the cream faster and better.
Preparation Method
- Macerate the Strawberries (10 minutes): In a bowl, combine sliced strawberries, granulated sugar, and lemon juice. Mix gently and let sit while you prepare the cream. This step softens the berries and draws out natural juices for soaking ladyfingers.
- Prepare the Cream Layer (10 minutes): In a large bowl, beat the softened cream cheese with powdered sugar and vanilla extract until smooth and creamy. In a separate chilled bowl, whip the heavy cream until stiff peaks form. Gently fold the whipped cream into the cream cheese mixture until fully combined and airy—avoid overmixing to keep it light.
- Soak the Ladyfingers (2 minutes): Quickly dip each ladyfinger into the strawberry juice or syrup for 1-2 seconds—don’t soak too long or they’ll get soggy. Place soaked ladyfingers at the bottom of each serving cup to form the first layer.
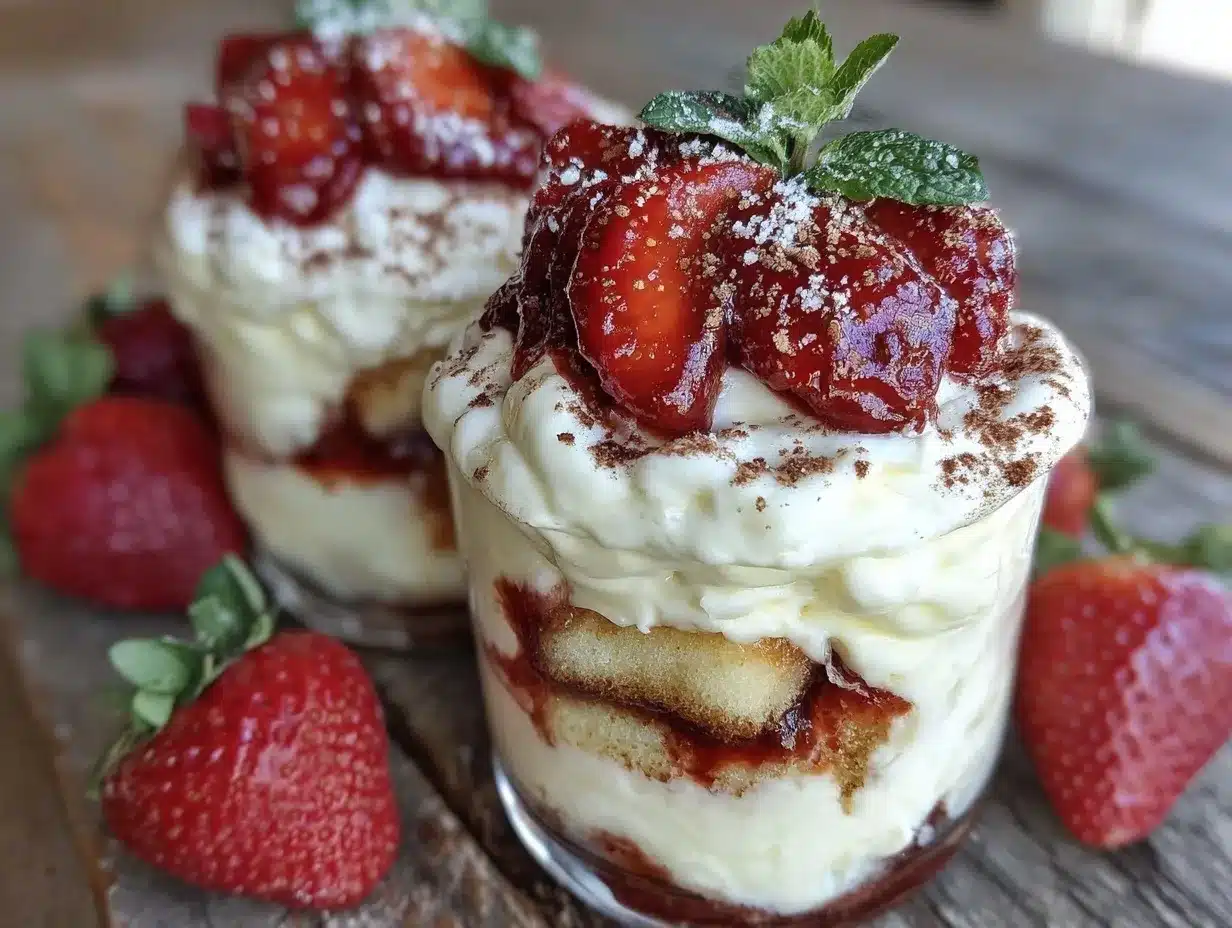
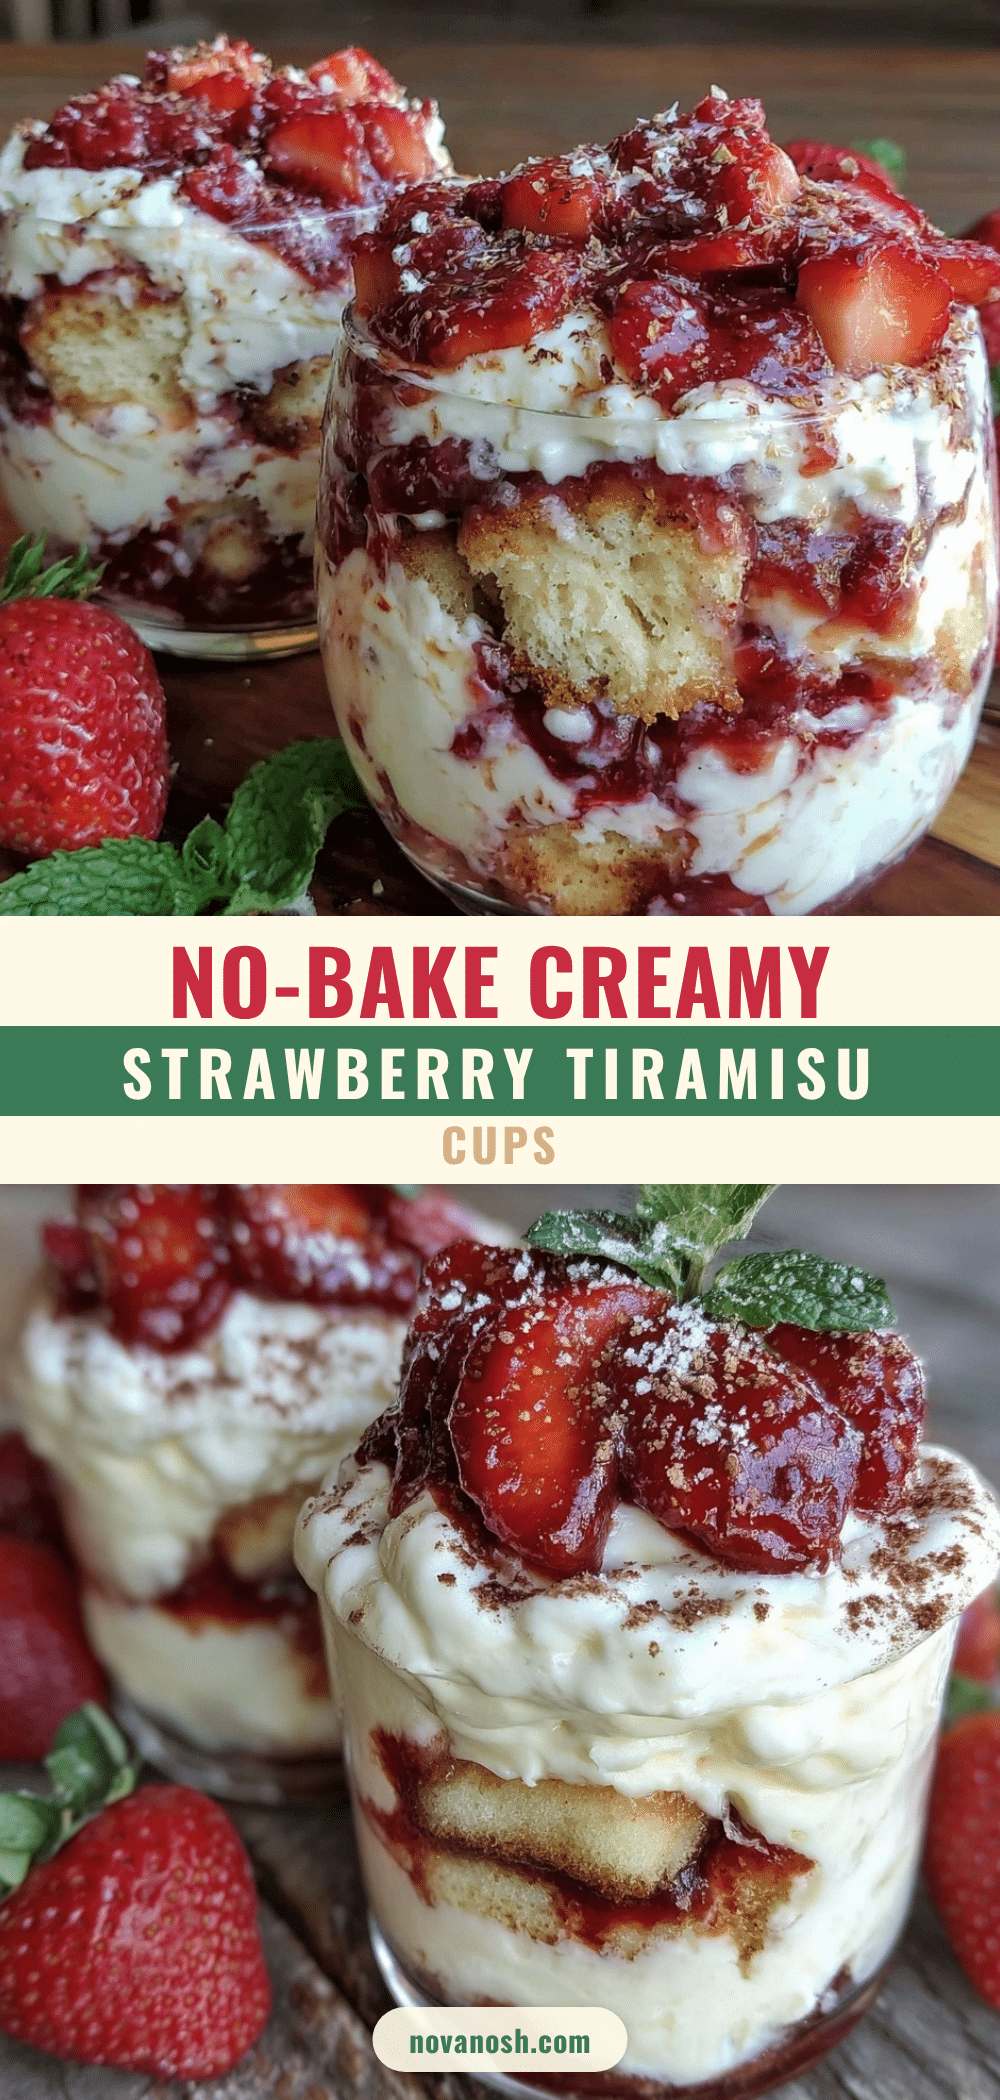
- Assemble the Cups (5 minutes): Spoon a layer of the creamy mixture over the ladyfingers, followed by a layer of macerated strawberries. Repeat with another ladyfinger layer and cream layer, finishing with strawberries on top.
- Chill (at least 2 hours): Refrigerate the cups to let flavors meld and cream set. This step is key for that perfect creamy texture. If you’re impatient like me, 1 hour works in a pinch, but longer is better.
- Garnish and Serve: Just before serving, add fresh mint leaves or a dusting of powdered sugar for a pretty finish.
Pro tip: If the cream feels too soft after chilling, a quick whisk before serving can help fluff it back up. Also, always slice strawberries just before assembling to keep them fresh and juicy.
Cooking Tips & Techniques
When making creamy strawberry tiramisu cups, a few tricks can make a big difference. First, always use cold heavy cream straight from the fridge; warm cream won’t whip properly. I’ve learned the hard way that folding the whipped cream too aggressively deflates the mixture, resulting in a dense dessert. So, take it slow and gentle.
Another common pitfall is soaking ladyfingers for too long—they can turn mushy quickly. A quick dip (1-2 seconds) is enough to infuse flavor without losing texture. Also, don’t skip the maceration step for strawberries; it releases juices that sweeten the whole dish naturally.
Timing-wise, prepping this dessert ahead is a lifesaver. It holds well in the fridge for up to 24 hours, so you can make it in the morning for an evening treat. When multitasking, whip the cream while the strawberries macerate to save time. And, if you’re short on fresh berries, a splash of berry liqueur in the soaking syrup adds a grown-up twist.
Variations & Adaptations
You can easily switch up this recipe to suit your taste or dietary needs. Here are some ideas I’ve tried and loved:
- Berry Mix: Use a mix of raspberries, blueberries, and blackberries instead of just strawberries for a colorful twist.
- Chocolate Strawberry: Add a layer of finely chopped dark chocolate or cocoa powder dusted on top for a richer flavor.
- Vegan Version: Replace cream cheese with vegan cream cheese, use coconut cream whipped to peaks, and opt for vegan ladyfingers or gluten-free biscuits.
If you prefer a different texture, swap ladyfingers with thin sponge cake slices. For a lighter option, substitute some of the cream cheese with Greek yogurt—just note it will be tangier. I once added a hint of almond extract to the cream for a subtle nutty aroma, which was a hit at a small dinner I hosted.
Serving & Storage Suggestions
Serve these creamy strawberry tiramisu cups chilled straight from the fridge. They look lovely in clear dessert glasses or mason jars, letting those layers shine through. Pair with a cup of black coffee or a glass of sparkling rosé for a well-rounded dessert experience.
Leftovers keep well refrigerated for up to 2 days, but the ladyfingers may soften further. To reheat, just let the cups sit at room temperature for 10 minutes to take the chill off—no microwave needed. Flavors tend to deepen after a day, so if you can wait, the next-day taste is even better.
Nutritional Information & Benefits
Each serving of creamy strawberry tiramisu cups is roughly 250-300 calories, depending on portion size. Strawberries bring a good dose of vitamin C, antioxidants, and fiber, while the cream and cream cheese provide calcium and protein. This dessert is gluten-containing unless you use gluten-free ladyfingers.
If you’re mindful of sugar intake, you can reduce the powdered sugar or substitute with a natural sweetener like erythritol. I appreciate that this recipe balances indulgence with fresh fruit, making it a feel-good treat without being overly heavy or sugary.
Conclusion
This creamy strawberry tiramisu cups recipe is a keeper for anyone who loves quick, no-bake desserts that still feel special. It’s flexible, forgiving, and full of bright, fresh flavor with a luscious texture. Whether you’re making it for a casual night in or a small celebration, it’s bound to impress without stress.
Honestly, it’s one of those recipes I keep coming back to—easy enough for weeknights, elegant enough for guests. I’d love to hear how you put your own spin on it, so feel free to share your twists in the comments below. Grab your mixing bowl, and let these no-bake delights brighten your dessert rotation!
FAQs
Can I make these creamy strawberry tiramisu cups ahead of time?
Yes! They taste even better after chilling for a few hours or overnight. Just cover them tightly and keep refrigerated.
What can I use if I can’t find ladyfingers?
Thin sponge cake slices or soft biscuits work well as substitutes. Just soak them briefly in the strawberry syrup.
Is there a dairy-free option for this recipe?
Absolutely. Use vegan cream cheese and coconut cream whipped to stiff peaks, plus vegan or gluten-free biscuits.
How do I prevent the ladyfingers from getting soggy?
Dip them quickly (1-2 seconds) in the soaking liquid. Too long and they’ll become mushy.
Can I use frozen strawberries instead of fresh?
Yes, thaw and drain them well before using to avoid excess moisture in the dessert.
For readers who enjoy desserts with a similar fresh fruit twist, you might also appreciate the lemon blueberry cheesecake bars, or if you’re in the mood for a no-bake treat, the no-bake chocolate peanut butter bars are a classic crowd favorite.
Pin This Recipe!
Creamy Strawberry Tiramisu Cups
A quick and easy no-bake dessert featuring creamy layers of cream cheese and whipped cream combined with fresh macerated strawberries and soaked ladyfingers, perfect for warm weather and casual gatherings.
- Prep Time: 20 minutes
- Cook Time: 0 minutes
- Total Time: 2 hours 20 minutes
- Yield: 6 servings 1x
- Category: Dessert
- Cuisine: Italian-inspired
Ingredients
- 8 oz cream cheese, softened
- 1 cup heavy whipping cream, cold
- 1/2 cup powdered sugar, sifted
- 1 tsp pure vanilla extract
- 2 cups fresh strawberries, hulled and sliced
- 2 tbsp granulated sugar (optional)
- 1 tbsp fresh lemon juice
- 24 ladyfingers
- 1/2 cup strawberry juice or light strawberry syrup
- Fresh mint leaves (optional, for garnish)
Instructions
- Macerate the strawberries by combining sliced strawberries, granulated sugar, and lemon juice in a bowl. Mix gently and let sit for 10 minutes.
- Prepare the cream layer by beating softened cream cheese with powdered sugar and vanilla extract until smooth. In a separate chilled bowl, whip the heavy cream until stiff peaks form. Gently fold the whipped cream into the cream cheese mixture until fully combined and airy.
- Quickly dip each ladyfinger into the strawberry juice or syrup for 1-2 seconds and place them at the bottom of each serving cup.
- Spoon a layer of the creamy mixture over the ladyfingers, followed by a layer of macerated strawberries. Repeat with another ladyfinger layer and cream layer, finishing with strawberries on top.
- Chill the assembled cups in the refrigerator for at least 2 hours to let flavors meld and cream set.
- Just before serving, garnish with fresh mint leaves or a dusting of powdered sugar.
Notes
Use cold heavy cream for best whipping results. Fold whipped cream gently to keep the mixture airy. Dip ladyfingers quickly (1-2 seconds) to avoid sogginess. Macerate strawberries to release natural juices for soaking. Can be made ahead and chilled overnight. For dairy-free, use vegan cream cheese and coconut cream; for gluten-free, use gluten-free ladyfingers or almond biscuits.
Nutrition
- Serving Size: 1 cup (approx. 4 to
- Calories: 275
- Sugar: 18
- Sodium: 150
- Fat: 18
- Saturated Fat: 11
- Carbohydrates: 24
- Fiber: 2
- Protein: 4
Keywords: strawberry tiramisu, no-bake dessert, creamy dessert, easy tiramisu, summer dessert, quick dessert, fresh strawberries, no oven tiramisu