Love this? Save it for later!
Share the inspiration with your friends
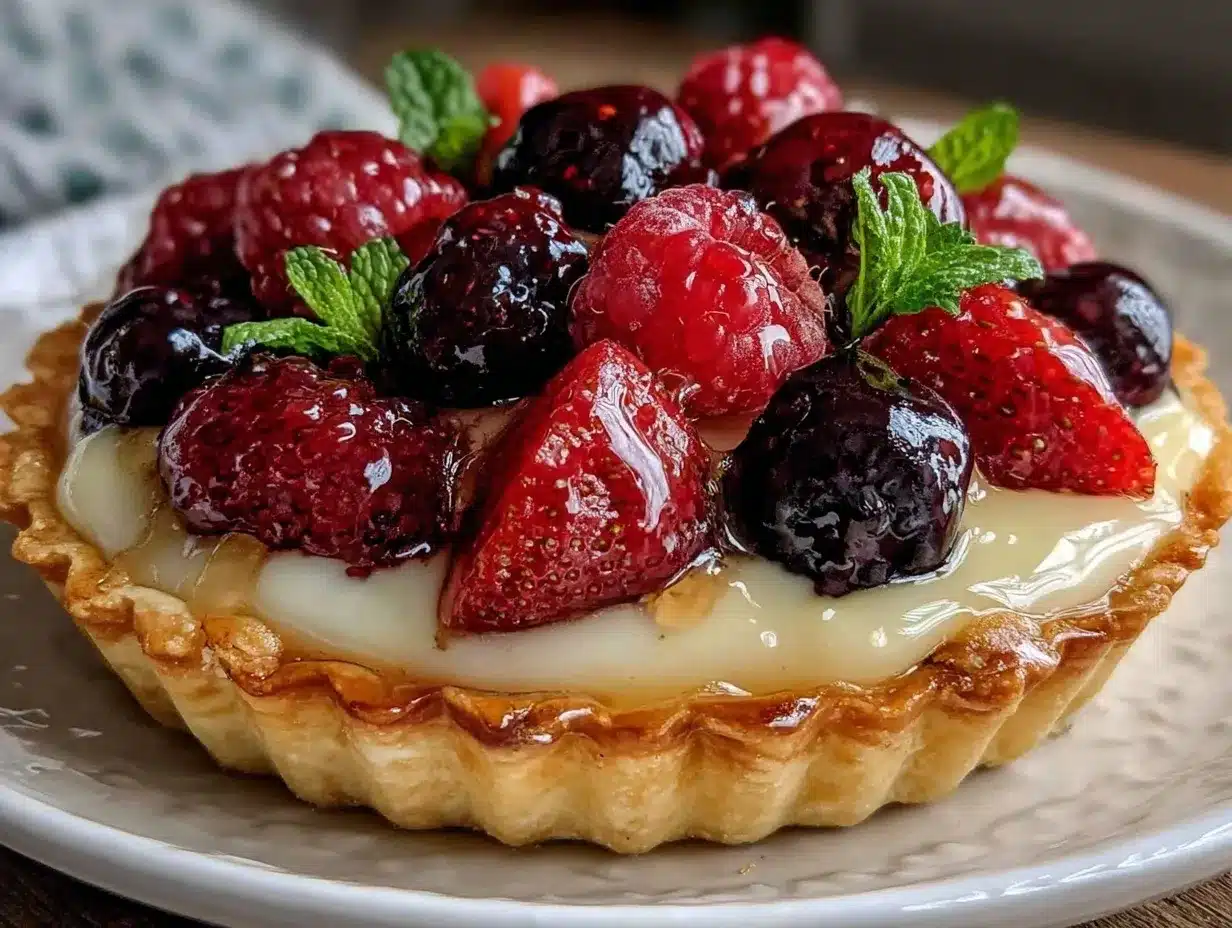
One Saturday afternoon, I found myself elbow-deep in flour and butter, determined to recreate the patisserie fruit tart that had haunted my dreams since my last trip to a quaint French bakery. I’d tried countless fruit tarts before, but none of them ever hit that perfect balance of crisp, buttery crust with the silky, luscious vanilla pastry cream and vibrant fresh fruit on top. Honestly, I was skeptical I could pull it off at home. But after about five test runs (and a few burnt edges), I finally nailed it—the kind of tart your whole family will crave and fight over.
What makes this patisserie fruit tart recipe stand out? It’s the homemade vanilla pastry cream that’s rich, smooth, and not too sweet, paired with a perfectly flaky crust and a colorful arrangement of fresh fruit that looks straight out of a bakery display case. I love how the tart feels fancy enough for a special occasion but is surprisingly doable on a weekend afternoon with just a bit of patience and some love.
If you’ve been intimidated by making pastry cream or worried about creating the perfect tart shell, stick with me. I’ll walk you through every step with all the little tips I learned the hard way. After all, nothing beats the smell of vanilla and butter filling your kitchen while you whip up a dessert that everyone will rave about (and maybe even request for birthdays!).
Why This Recipe Works
This patisserie fruit tart recipe has completely changed how I think about fruit tarts at home. I’ve tested it against every shortcut and store-bought “hacks,” and this homemade version always wins hands down. Here’s why:
- Flaky, buttery crust with just the right crunch — I tweaked the dough recipe after burning a few batches to get a crust that’s tender but holds up under the cream and fruit without sogging.
- Silky homemade vanilla pastry cream — No instant pudding here! It’s made with real vanilla beans and thickened just right. Plus, it chills beautifully and sets up perfectly for slicing.
- Fresh fruit that shines — The fruit topping isn’t just decoration; it adds brightness and freshness that balances the richness of the cream and crust. Plus, the glaze seals it in and gives it that glossy bakery finish.
- Make-ahead friendly — You can prep the crust and pastry cream a day in advance, then assemble right before serving. Perfect for stress-free entertaining.
- Family-approved — From picky kids to dessert enthusiasts, this tart disappears fast. The vanilla cream is subtle and not overly sweet, so it appeals to all taste buds.
I honestly can’t wait for you to try this. There’s something so satisfying about mastering a classic French dessert in your own kitchen, especially when it’s this delicious and crowd-pleasing.
Ingredients Breakdown
Here’s the deal: this recipe looks fancy, but most of the ingredients are pantry staples or easy to find at any grocery store. I’m picky about three parts of this tart—the crust, the vanilla pastry cream, and the fruit glaze—and I’ll explain exactly why.
For the Tart Crust (Pâte Sucrée):
- All-purpose flour (1 ½ cups / 190g) — The base of the crust. I use King Arthur flour for consistent results. It gives a tender but sturdy dough that bakes evenly.
- Powdered sugar (½ cup / 60g) — Adds just enough sweetness without graininess, for that delicate crust flavor.
- Salt (¼ teaspoon) — Enhances the butter’s flavor and balances sweetness.
- Unsalted butter (½ cup / 113g, cold and cubed) — The magic ingredient for flakiness and richness. Keep it cold to get those perfect flaky layers. I never substitute margarine here—it changes the texture.
- Egg yolk (1 large) — Binds the dough and adds richness. Room temperature is best.
- Vanilla extract (1 teaspoon) — Adds subtle depth to the crust flavor. Pure vanilla is worth it here.
For the Vanilla Pastry Cream:
- Whole milk (2 ½ cups / 600ml) — The base of the cream. Whole milk gives the best creaminess and flavor.
- Granulated sugar (⅔ cup / 135g) — Sweetens the cream just right.
- Egg yolks (6 large) — Key to that thick, custardy texture. I separate eggs carefully and whisk constantly to avoid scrambling.
- Cornstarch (¼ cup / 32g) — Thickens the cream smoothly without lumps.
- Unsalted butter (3 tablespoons / 43g) — Adds silkiness and richness at the end.
- Vanilla bean (1, seeds scraped) or 2 teaspoons vanilla extract — For real vanilla flavor, scrape the seeds from the bean pod into the milk. If you don’t have one, pure vanilla extract works too.
For the Fruit Topping:
- Fresh berries (1 cup / about 150g) — I love a mix of strawberries, raspberries, blueberries, and blackberries. They bring color and tartness.
- Kiwi slices (1 medium fruit) — Adds a bright green pop and tangy flavor.
- Peach or nectarine slices (1 medium) — Seasonal sweetness and soft texture.
- Apricot jam (¼ cup / 80g, warmed) — Used to glaze the fruit and give that shiny, professional finish.
If you want to personalize this tart, I’ve found swapping in other fresh fruits like mango or black grapes works wonderfully. Just keep them fresh and firm.
Equipment You’ll Need
You don’t need a professional bakery setup for this, just some basic tools you probably already have:
- 9-inch tart pan with removable bottom — Makes unmolding the tart a breeze. If you don’t have one, a regular pie pan works, but presentation won’t be as perfect.
- Mixing bowls — Two or three, for the dough, pastry cream, and fruit prep.
- Whisk and spatula — For mixing and folding.
- Saucepan — For heating milk and cooking pastry cream.
- Fine mesh sieve — To strain the pastry cream for extra smoothness (optional but worth it).
- Plastic wrap — To press directly on top of the pastry cream when chilling, to prevent a skin from forming.
- Pastry brush — For glazing the fruit with apricot jam.
- Rolling pin — To roll out the tart dough evenly.
If you don’t have a tart pan, you can make muffins or smaller tarts using a muffin tin, but the baking times will vary.
Step-by-Step Instructions
- Make the Tart Dough (15 minutes + chilling)
In a food processor or mixing bowl, pulse together flour, powdered sugar, and salt. Add cold butter cubes and pulse or cut in with a pastry cutter until mixture resembles coarse crumbs with pea-sized bits. Add egg yolk and vanilla extract. Mix just until dough comes together. Flatten into a disk, wrap in plastic, and chill for at least 1 hour. - Preheat and Prepare Pan (5 minutes)
Preheat oven to 350°F (175°C). Roll out the chilled dough on a lightly floured surface to fit your 9-inch tart pan. Press into the pan gently, trimming excess. Prick the bottom with a fork to prevent puffing. - Blind Bake the Crust (20-25 minutes)
Line the dough with parchment paper and fill with pie weights or dried beans. Bake for 15 minutes, then remove weights and paper, bake another 8-10 minutes until golden and set. Cool completely before filling. - Prepare Vanilla Pastry Cream (20 minutes + chilling)
In a saucepan, heat the milk and vanilla bean seeds (and pod) just to a simmer. In a bowl, whisk egg yolks, sugar, and cornstarch until smooth. Slowly pour hot milk into egg mixture while whisking constantly to temper the eggs. Return mixture to saucepan and cook over medium heat, whisking constantly, until thick and bubbly (about 2-3 minutes). Remove from heat, stir in butter and vanilla extract if using. Strain through a sieve into a bowl for smoothness. Press plastic wrap directly on the surface and chill at least 2 hours. - Assemble the Tart (15 minutes)
Spread chilled pastry cream evenly into the cooled tart shell. Arrange fresh fruit beautifully on top—think concentric circles or a colorful mosaic. Warm apricot jam in a small saucepan or microwave, strain if needed, and brush gently over the fruit to glaze. - Chill and Serve (at least 1 hour)
Refrigerate the assembled tart to set the glaze and cream. Serve chilled for the best texture and flavor.
Total time from start to finish is about 3-4 hours, but most of that is hands-off chilling time. The active prep is around 1 hour.
Expert Tips & Troubleshooting
Here’s what I learned after several batches—these tips will save you from common pitfalls:
- Keep the butter cold when making the dough. Warm butter ruins the flaky texture. If your kitchen is warm, chill your mixing bowl and tools too.
- Don’t skip the blind baking. It prevents a soggy crust. Weights stop the dough from puffing up.
- Temper your eggs carefully in the pastry cream. Slowly add hot milk to eggs while whisking to avoid scrambled eggs.
- Strain the pastry cream. It makes the texture silky smooth—worth the extra step.
- Press plastic wrap directly onto the pastry cream. Prevents a skin from forming, which is not fun to eat or look at.
- Use firm, ripe fruit. Soft or overripe fruit will get mushy and watery on the tart.
- Brush the glaze gently. Too much can make the fruit slide around, too little and it won’t shine.
- If your crust cracks while rolling, chill it again and patch with a little water. It’s forgiving.
Variations & Substitutions
Once you’ve nailed this classic, why not play around a bit? Here are some ideas I’ve tested:
- Chocolate Pastry Cream: Add 2 tablespoons cocoa powder to the dry ingredients in the pastry cream. It’s decadent and pairs well with berries.
- Citrus Twist: Add orange or lemon zest to the pastry cream for a bright, fresh flavor.
- Gluten-Free Crust: Substitute the all-purpose flour with a 1:1 gluten-free baking blend. Texture will be a bit different but still delicious.
- Dairy-Free Pastry Cream: Use coconut milk instead of whole milk, and vegan butter or coconut oil in the dough.
- Fruit Mix-Ins: Try tropical fruits like mango or passionfruit, or seasonal favorites like figs or pomegranate seeds.
For a savory contrast, try pairing this tart alongside a refreshing salad like the heirloom tomato panzanella salad—it balances perfectly for a summer brunch.
Serving & Storage
I love serving this patisserie fruit tart slightly chilled, right from the fridge. A few minutes at room temperature brings out the vanilla cream’s flavor even more. Here’s how I typically enjoy it:
- Breakfast or brunch: Slice and serve with a dollop of whipped cream or a side of fresh berries.
- Snack or dessert: Pairs beautifully with a cup of tea or coffee. It’s fancy but approachable.
- Presentation: For guests, I arrange the fruit carefully and serve on a pretty platter. It always gets compliments.
Storage: Keep the tart covered in the fridge and consume within 2-3 days. The crust will soften slightly but still tastes great. Avoid freezing—it’ll ruin the texture of the cream and crust.
If you want a quick shortcut for busy mornings, you can make the pastry cream and crust ahead, then assemble fresh fruit and glaze before serving. This works great for stress-free entertaining.
Nutrition Information
| Nutrient | Per Serving (1/12th tart) |
|---|---|
| Calories | 280 |
| Protein | 5g |
| Total Carbohydrates | 32g |
| Dietary Fiber | 2g |
| Sugars | 18g |
| Total Fat | 14g |
| Saturated Fat | 8g |
| Cholesterol | 95mg |
| Sodium | 95mg |
This is dessert, so yes, it’s indulgent! But the fresh fruit adds fiber and vitamins, and the homemade pastry cream means no weird preservatives or artificial flavors. Compared to store-bought tarts, this is fresher and more wholesome.
Final Thoughts
So that’s my patisserie fruit tart with vanilla pastry cream—the dessert that’s become my go-to for celebrations, family dinners, and anytime I want to impress without stress. I know I’ve shared a lot here, but trust me, every step is worth it for the final result. This tart manages to feel fancy and comforting at the same time, and it’s the kind of recipe you’ll want to make again and again.
Feel free to customize it with your favorite fruits or add a chocolate twist. If you’re curious about making other creamy, comforting dishes, you might enjoy my creamy Tuscan chicken meatballs or the copycat Starbucks vanilla sweet cream cold foam recipe for a coffee treat to pair alongside.
Please leave a comment if you try this tart—I love hearing your variations and questions. Happy baking! And if your kitchen smells anything like mine does right now, you’re in for a real treat.
FAQs
- Can I make the tart crust ahead of time?
- Yes! You can prepare and blind bake the crust up to 2 days in advance. Just wrap it tightly in plastic wrap and keep in the fridge. When ready, chill the pastry cream and assemble fresh fruit just before serving for the best texture.
- What if I don’t have a vanilla bean?
- No worries. Use 2 teaspoons of pure vanilla extract instead. Add it after cooking the pastry cream so the flavor stays bright.
- Can I use frozen fruit for the topping?
- It’s best to use fresh fruit because frozen berries release water and can make the tart soggy. If you must use frozen, thaw completely and drain excess liquid, then pat dry before arranging.
- How do I fix lumpy pastry cream?
- Lumps usually come from eggs cooking too fast or not whisking constantly. Straining the cream through a fine mesh sieve helps smooth it out. Also, make sure to temper the eggs by slowly adding hot milk while whisking.
- Can I double this recipe?
- Absolutely! Double all ingredients and use two tart pans. The baking time stays about the same, but check for doneness using visual cues—golden crust and set pastry cream.
- Is there a vegan alternative for the pastry cream?
- I haven’t tested a fully vegan version, but you can try using coconut milk and a cornstarch-thickened custard base, or a silken tofu-based cream. The crust would need vegan butter substitutes. It won’t be exactly the same but can be delicious.
- How long does the assembled tart keep?
- Best eaten within 2-3 days refrigerated. Fruit and cream freshness decline after that, and the crust can get soggy. Avoid freezing assembled tart as it ruins texture.
Pin This Recipe!
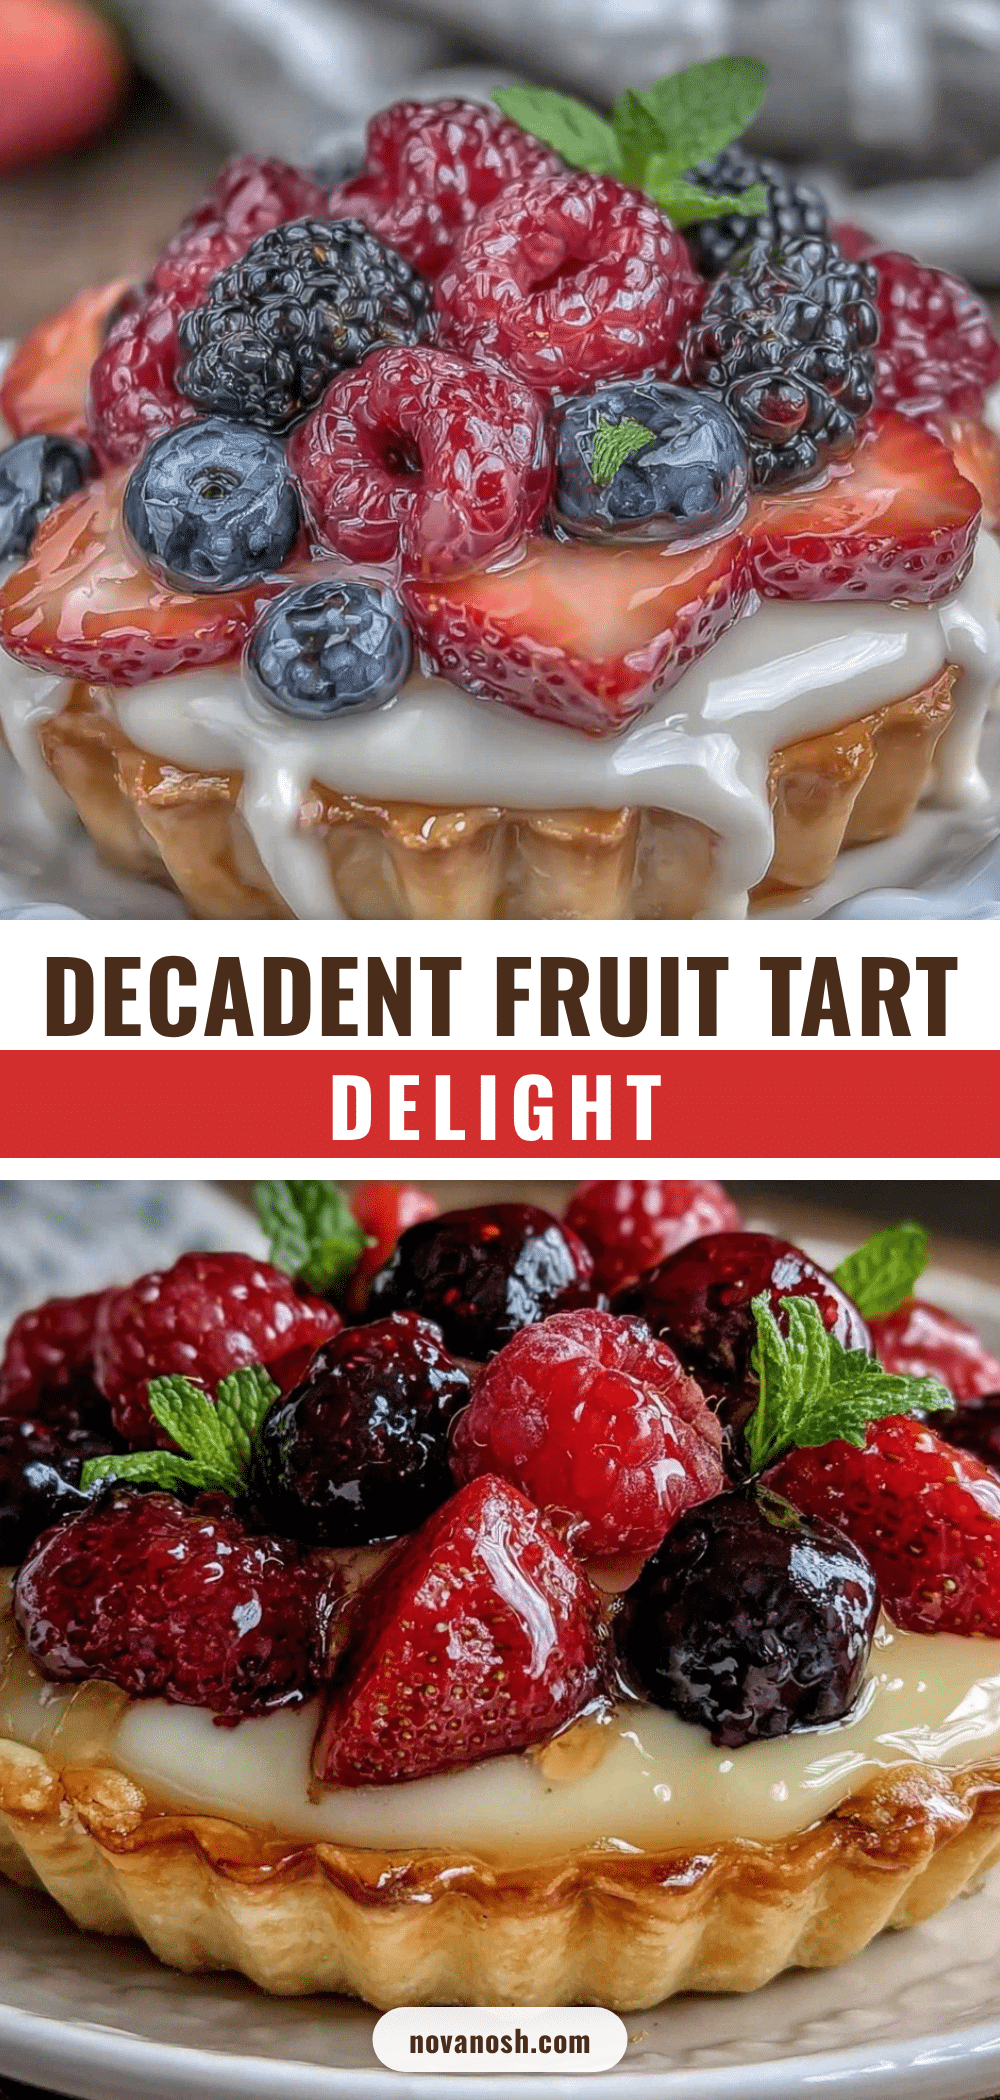
Patisserie Fruit Tart Recipe Easy Homemade Vanilla Pastry Cream Delight

A classic French patisserie fruit tart featuring a flaky buttery crust, silky homemade vanilla pastry cream, and a vibrant fresh fruit topping with a glossy apricot glaze. Perfect for special occasions or weekend baking.
- Prep Time: 20 minutes
- Cook Time: 25 minutes
- Total Time: 3 hours 45 minutes
- Yield: 12 servings 1x
- Category: Dessert
- Cuisine: French
Ingredients
- 1 ½ cups (190g) all-purpose flour
- ½ cup (60g) powdered sugar
- ¼ teaspoon salt
- ½ cup (113g) unsalted butter, cold and cubed
- 1 large egg yolk, room temperature
- 1 teaspoon vanilla extract
- 2 ½ cups (600ml) whole milk
- ⅔ cup (135g) granulated sugar
- 6 large egg yolks
- ¼ cup (32g) cornstarch
- 3 tablespoons (43g) unsalted butter
- 1 vanilla bean, seeds scraped (or 2 teaspoons vanilla extract)
- 1 cup (about 150g) fresh berries (strawberries, raspberries, blueberries, blackberries)
- 1 medium kiwi, sliced
- 1 medium peach or nectarine, sliced
- ¼ cup (80g) apricot jam, warmed
Instructions
- Make the Tart Dough (15 minutes + chilling): In a food processor or mixing bowl, pulse together flour, powdered sugar, and salt. Add cold butter cubes and pulse or cut in with a pastry cutter until mixture resembles coarse crumbs with pea-sized bits. Add egg yolk and vanilla extract. Mix just until dough comes together. Flatten into a disk, wrap in plastic, and chill for at least 1 hour.
- Preheat and Prepare Pan (5 minutes): Preheat oven to 350°F (175°C). Roll out the chilled dough on a lightly floured surface to fit your 9-inch tart pan. Press into the pan gently, trimming excess. Prick the bottom with a fork to prevent puffing.
- Blind Bake the Crust (20-25 minutes): Line the dough with parchment paper and fill with pie weights or dried beans. Bake for 15 minutes, then remove weights and paper, bake another 8-10 minutes until golden and set. Cool completely before filling.
- Prepare Vanilla Pastry Cream (20 minutes + chilling): In a saucepan, heat the milk and vanilla bean seeds (and pod) just to a simmer. In a bowl, whisk egg yolks, sugar, and cornstarch until smooth. Slowly pour hot milk into egg mixture while whisking constantly to temper the eggs. Return mixture to saucepan and cook over medium heat, whisking constantly, until thick and bubbly (about 2-3 minutes). Remove from heat, stir in butter and vanilla extract if using. Strain through a sieve into a bowl f…
- Assemble the Tart (15 minutes): Spread chilled pastry cream evenly into the cooled tart shell. Arrange fresh fruit beautifully on top—think concentric circles or a colorful mosaic. Warm apricot jam in a small saucepan or microwave, strain if needed, and brush gently over the fruit to glaze.
- Chill and Serve (at least 1 hour): Refrigerate the assembled tart to set the glaze and cream. Serve chilled for the best texture and flavor.
Notes
[‘Keep the butter cold when making the dough to ensure flakiness.’, ‘Blind bake the crust to prevent sogginess.’, ‘Temper eggs carefully when making pastry cream to avoid scrambling.’, ‘Strain pastry cream for a silky smooth texture.’, ‘Press plastic wrap directly on pastry cream to prevent skin formation.’, ‘Use firm, ripe fruit to avoid mushy topping.’, ‘Brush glaze gently to avoid sliding fruit.’, ‘If crust cracks while rolling, chill again and patch with a little water.’]
Nutrition
- Serving Size: 1 slice (1/12th of t
- Calories: 280
- Sugar: 18
- Sodium: 95
- Fat: 14
- Saturated Fat: 8
- Carbohydrates: 32
- Fiber: 2
- Protein: 5
Keywords: patisserie fruit tart, vanilla pastry cream, homemade tart, fruit tart recipe, French dessert, flaky tart crust, fresh fruit tart, apricot glaze