Love this? Save it for later!
Share the inspiration with your friends
Introduction
There used to be this tiny dessert shop tucked away on a quiet street near my old college campus that made the most unforgettable Oreo cheesecake cups. When they suddenly closed one chilly November, honestly, it felt like losing a little treasure I didn’t know I’d depended on so much. I spent months trying to nail that exact creamy, crunchy, just-right sweetness combo. After countless attempts—some messy, some downright disappointing—I finally got it. The texture is just like theirs: silky smooth cheesecake filling layered with crushed Oreos that still have a bit of crunch. I mean, you know that feeling when a dessert feels like a warm hug? That’s exactly what these cups give me.
One night, I even forgot to chill them long enough and ended up with a soft, wobbly mess that I ate anyway because, well, sometimes imperfect desserts taste just as good. Maybe you’ve been there, chasing down a recipe that’s more memory than measurement. This creamy no-bake Oreo cheesecake cups recipe stayed with me not just because of its taste but because it’s the perfect little reward after a long day and a nod to that lost café that meant more than just great desserts.
Why You’ll Love This Recipe
This creamy no-bake Oreo cheesecake cups recipe is more than just a dessert—it’s a quick, fuss-free way to bring a bit of joy to your day with minimal effort.
- Quick & Easy: Whip it up in under 5 minutes, making it perfect for those last-minute dessert cravings or busy weeknights.
- Simple Ingredients: You don’t need any fancy ingredients. Most of these are pantry staples, and Oreos are usually a crowd-pleaser.
- Perfect for Any Occasion: Whether it’s a casual get-together, a birthday party, or just a cozy night in, these cups fit right in.
- Crowd-Pleaser: Kids and adults alike rave about the creamy texture combined with those crunchy cookie bits.
- Unbelievably Delicious: The balance between smooth cheesecake and crunchy Oreos is honestly next-level comfort food.
What sets this apart? The secret is gently folding the cream cheese with whipped cream to get that ultra-light yet creamy texture—no dense, heavy cheesecake here! Plus, layering crushed Oreos instead of blending them keeps little bursts of cookie crunch that surprise you with every bite. It’s like a little celebration in a cup, every time. If you’ve ever tried to make no-bake cheesecake and found it too heavy or bland, let me tell you, this recipe is a game-changer.
What Ingredients You Will Need
This recipe uses simple, wholesome ingredients to deliver bold flavor and satisfyingly creamy texture without the fuss. Most are pantry staples, and you can easily find them at your local grocery store.
- For the Cheesecake Filling:
- 8 oz (225g) cream cheese, softened (I prefer Philadelphia for its smooth texture)
- 1 cup (240ml) heavy whipping cream, cold
- 1/2 cup (60g) powdered sugar, sifted
- 1 tsp vanilla extract (pure vanilla extract makes a noticeable difference)
- For the Oreo Layers:
- 20 Oreo cookies, crushed (reserve some larger chunks for texture)
- Optional: 2 tbsp melted butter (if you want to make a more traditional crust base instead of layering)
If you want to swap for a dairy-free version, try using dairy-free cream cheese and coconut whipped cream. For crunch variety, you can also swap Oreos with chocolate wafer cookies or gluten-free sandwich cookies. In summer, fresh berries on top add a nice, tangy contrast.
Equipment Needed
- Mixing bowls – one large for whipping cream, one medium for cream cheese
- Electric hand mixer or stand mixer – essential for whipping cream to stiff peaks and smoothing cream cheese
- Spatula – for folding ingredients gently
- Measuring cups and spoons – to keep your proportions spot on
- Serving cups or small jars – anything from mini mason jars to dessert glasses works great
If you don’t have an electric mixer, a strong whisk and a bit of patience can work, but it’ll take longer and might not get as fluffy. I once tried hand whisking and nearly gave up halfway through—definitely a lesson learned! Budget-friendly mixers like the Hamilton Beach hand mixer do the job without breaking the bank.
Preparation Method
- Crush the Oreos: Place 18 Oreos in a sealed plastic bag and gently crush them with a rolling pin until you have a mix of fine crumbs and small chunks. Reserve 2 Oreos to break into larger pieces for topping. (5 minutes)
- Whip the Cream: In a cold bowl, pour 1 cup (240ml) of heavy whipping cream. Using an electric mixer, whip on medium-high speed until stiff peaks form. This usually takes about 3-4 minutes. Be careful not to overwhip, or it will turn grainy. (5 minutes)
- Mix the Cream Cheese: In a separate bowl, beat 8 oz (225g) softened cream cheese with 1/2 cup (60g) powdered sugar and 1 tsp vanilla extract until smooth and lump-free. If it feels too stiff, a quick 10-second zap in the microwave helps soften it just a bit. (3 minutes)
- Fold Whipped Cream Into Cream Cheese: Gently fold the whipped cream into the cream cheese mixture using a spatula. Use slow, sweeping motions to keep the mixture light and airy. This step is key to that creamy, cloud-like texture. (2 minutes)
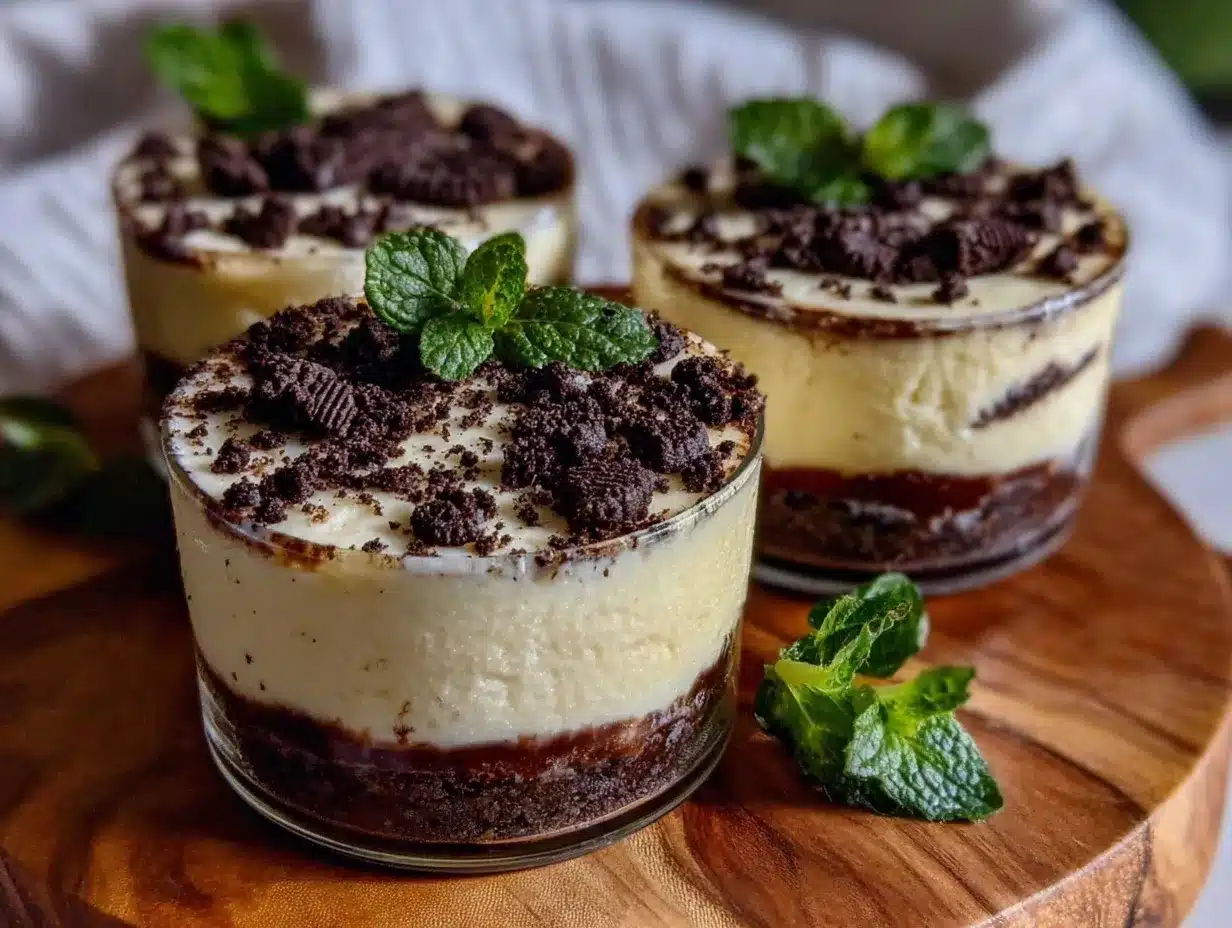
- Assemble the Cups: Spoon a layer of crushed Oreos into the bottom of your serving cups (about 2 tablespoons per cup). Follow with a generous layer of the cheesecake filling (about 3 tablespoons), then repeat the Oreo layer and top off with more cheesecake filling. Leave some space at the top for garnish. (5 minutes)
- Top and Chill: Garnish each cup with the reserved larger Oreo pieces or extra crumbs for crunch. Refrigerate the cups for at least 2 hours to let the flavors meld and the filling set. I sometimes pop them in the freezer for 30 minutes if I’m impatient, which works fine too! (2+ hours)
Quick tip: If your cream cheese isn’t soft enough, lumps can sneak in and ruin that smooth texture. I learned this the hard way—patience with room temp cream cheese is key. Also, don’t rush the chilling step; it makes a big difference in how the flavors come together and the filling firms up just right.
Cooking Tips & Techniques
The magic of this creamy no-bake Oreo cheesecake cups recipe lies in technique rather than cooking.
- Softening Cream Cheese: Always make sure your cream cheese is softened to room temperature. Cold cream cheese lumps up and makes mixing a pain.
- Whipping Cream to Stiff Peaks: Chill your bowl and beaters before whipping cream to help it whip faster and hold shape better.
- Folding, Not Stirring: When mixing whipped cream into cream cheese, fold gently with a spatula. Stirring breaks down the air bubbles and leads to a dense texture.
- Cookie Texture: Don’t crush all Oreos to fine crumbs. Leaving some chunkier bits gives a nice texture contrast in each bite.
- Chilling Time: Patience here is your friend. The cheesecake filling firms up and flavors develop better with a few hours in the fridge.
I once tried blending Oreos directly into the filling and lost that crunchy, satisfying bite. Also, skipping the chilling step led to a runny mess that no one wanted to eat. These little lessons make all the difference!
Variations & Adaptations
- Gluten-Free Version: Use gluten-free sandwich cookies instead of Oreos to keep it safe for gluten-sensitive friends.
- Berry Twist: Add a layer of fresh raspberries or strawberries between the Oreo and cheesecake layers for a fruity pop.
- Peanut Butter Swirl: Fold in 2 tablespoons of creamy peanut butter into the cheesecake filling for a rich, nutty flavor.
- Chocolate Lovers: Mix in mini chocolate chips or drizzle melted dark chocolate on top before chilling.
- Dairy-Free Option: Swap cream cheese and whipping cream with plant-based alternatives like vegan cream cheese and coconut whipped cream.
Personally, I’ve made these cups with a layer of salted caramel sauce for a decadent twist. It’s a bit indulgent but absolutely worth it when I want to treat myself. You can also try assembling in larger dishes as a no-bake cheesecake dessert for sharing!
Serving & Storage Suggestions
Serve these creamy no-bake Oreo cheesecake cups chilled for the best texture and flavor. They’re perfect as a stand-alone dessert or paired with fresh fruit or a drizzle of chocolate sauce.
Leftovers keep well in the refrigerator for up to 3 days. If you want to store longer, freeze them uncovered for 1 hour to set, then cover tightly with plastic wrap and freeze up to 1 month. When ready to eat, thaw in the fridge for a few hours. The texture might be a little denser but still tasty.
Reheating isn’t recommended, but letting them sit at room temperature for 10-15 minutes before serving softens the texture nicely. Flavors tend to deepen after a day, making the cookies even more infused with cheesecake goodness.
Nutritional Information & Benefits
Each serving of these no-bake Oreo cheesecake cups contains approximately:
| Calories | 320 kcal |
|---|---|
| Fat | 22g |
| Carbohydrates | 28g |
| Protein | 4g |
The cream cheese provides a good source of calcium and protein, while Oreos add extra sweetness and crunch. This recipe is not low-calorie but makes a delightful occasional treat. For those watching carbs or dairy intake, swapping ingredients for low-fat or dairy-free alternatives can help.
From a wellness perspective, indulging in a dessert like this reminds me that balance is key—treat yourself often enough to enjoy but mindfully enough to appreciate every bite.
Conclusion
These creamy no-bake Oreo cheesecake cups are worth every minute spent perfecting them. Whether you want a quick dessert fix or a charming treat to impress guests, this recipe delivers on both ease and flavor. I love how customizable and forgiving it is—you can tweak it to suit your tastes or dietary needs without losing that classic cheesecake charm.
Give it a try, and don’t be surprised if it becomes your go-to dessert for weeks to come. If you make any fun adaptations or have tips from your own kitchen adventures, I’d love to hear about them in the comments below. Happy dessert making—here’s to sweet moments and creamy delights!
FAQs
Can I make these Oreo cheesecake cups ahead of time?
Yes! They actually taste better after chilling for a few hours or overnight. Just keep them covered in the fridge.
How long do no-bake cheesecake cups last in the fridge?
They stay fresh for about 3 days when stored in an airtight container.
Can I use other cookies instead of Oreos?
Absolutely! Chocolate wafers, graham crackers, or gluten-free sandwich cookies all work well.
Is it possible to freeze these cheesecake cups?
Yes, freezing is an option. Freeze uncovered for an hour, then cover tightly and freeze up to 1 month. Thaw in the fridge before serving.
What if I don’t have a mixer to whip the cream?
You can hand whisk, but it takes more time and effort. Chilling your bowl and whisk helps speed things up.
For those interested in desserts with a similar creamy, no-bake vibe, you might enjoy my no-bake chocolate peanut butter bars or the easy homemade tiramisu cups, both delicious and quick to prepare.
Pin This Recipe!
Creamy No-Bake Oreo Cheesecake Cups
A quick and easy no-bake dessert featuring silky smooth cheesecake filling layered with crunchy crushed Oreos, perfect for any occasion.
- Prep Time: 15 minutes
- Cook Time: 0 minutes
- Total Time: 2 hours 15 minutes
- Yield: 6 servings 1x
- Category: Dessert
- Cuisine: American
Ingredients
- 8 oz (225g) cream cheese, softened
- 1 cup (240ml) heavy whipping cream, cold
- 1/2 cup (60g) powdered sugar, sifted
- 1 tsp vanilla extract
- 20 Oreo cookies, crushed (reserve some larger chunks for texture)
- Optional: 2 tbsp melted butter (for crust base instead of layering)
Instructions
- Crush 18 Oreos in a sealed plastic bag with a rolling pin until you have a mix of fine crumbs and small chunks. Reserve 2 Oreos to break into larger pieces for topping. (5 minutes)
- In a cold bowl, whip 1 cup (240ml) heavy whipping cream with an electric mixer on medium-high speed until stiff peaks form. (3-4 minutes)
- In a separate bowl, beat 8 oz (225g) softened cream cheese with 1/2 cup (60g) powdered sugar and 1 tsp vanilla extract until smooth and lump-free. (3 minutes)
- Gently fold the whipped cream into the cream cheese mixture using a spatula with slow, sweeping motions to keep it light and airy. (2 minutes)
- Spoon a layer of crushed Oreos (about 2 tablespoons) into the bottom of serving cups. Add a generous layer of cheesecake filling (about 3 tablespoons), then repeat the Oreo layer and top with more cheesecake filling. Leave space at the top for garnish. (5 minutes)
- Garnish each cup with reserved larger Oreo pieces or extra crumbs. Refrigerate for at least 2 hours to let flavors meld and filling set. (2+ hours)
Notes
Ensure cream cheese is softened to room temperature to avoid lumps. Chill bowl and beaters before whipping cream for better results. Fold whipped cream gently into cream cheese to keep texture light and airy. Do not crush all Oreos finely; keep some chunks for texture. Chill for at least 2 hours for best flavor and texture.
Nutrition
- Serving Size: 1 cup
- Calories: 320
- Fat: 22
- Carbohydrates: 28
- Protein: 4
Keywords: no-bake cheesecake, Oreo cheesecake cups, easy dessert, quick dessert, no-bake dessert, Oreo dessert, creamy cheesecake