Love this? Save it for later!
Share the inspiration with your friends
I wasn’t trying to make anything special that Tuesday. Honestly, I’d stopped by my neighbor Jen’s house to borrow a cup of sugar—cliché, I know—and the smell hit me before I even got past her screen door. It was sharp, sweet, and almost medicinal in the best way. Jen was at her kitchen counter, casually spooning something into a mason jar, and she barely looked up. “Oh, it’s just my garlic honey,” she said, like it was no big deal. But let me tell you, that jar was bubbling like a science experiment, and I was completely hooked. Maybe you’ve been there—where you walk into someone’s kitchen and realize they’ve been holding out on a secret weapon. That day, I discovered the magic of Zesty Garlic Honey Fermented Immune Shots.
Jen wasn’t trying to impress anyone. She was just making what her grandma called “winter armor.” She told me she starts every cold season with a batch, and she swears she hasn’t had a sick day in three years. I stood there, a little envious of her effortless routine, while she explained how the garlic and honey work together. It wasn’t a lecture or a recipe card—it was just her life, and I was lucky enough to witness it. I left with a small jar of the stuff, and honestly, I’ve been making it ever since. This isn’t just another wellness trend; it’s a tradition that’s been passed down through kitchens like Jen’s for generations.
What makes these Zesty Garlic Honey Fermented Immune Shots so special is the alchemy that happens inside the jar. The garlic mellows out, the honey becomes almost syrupy, and a little zing from lemon and ginger kicks it up a notch. It’s not a quick fix—it’s a slow, delicious process that rewards your patience. I keep making it because it works, and because it reminds me that the best things in life often come from borrowed sugar and unplanned conversations.
Why You’ll Love This Recipe
Let’s face it—most immune boosters taste like punishment. You choke down a spoonful of something bitter or swallow a horse-sized pill, and you’re supposed to feel grateful? Not with these Zesty Garlic Honey Fermented Immune Shots. This recipe is the real deal, and I’ve tested it through three cold seasons, two bouts of “what is this virus,” and one particularly stubborn head cold. It’s earned its place in my kitchen.
- Quick & Easy: Active prep time is about 10 minutes. The fermentation does the heavy lifting while you go about your day.
- Simple Ingredients: You probably have garlic, honey, lemon, and ginger in your kitchen right now. No trips to a specialty store.
- Perfect for Cold Season: Great for daily prevention or that first tickle in your throat. It’s your kitchen’s first line of defense.
- Crowd-Pleaser: I’ve given jars to friends and family, and they always come back asking for more. Even the kids tolerate it—it’s sweet enough to go down easy.
- Unbelievably Delicious: The fermented honey takes on a complex, almost tangy sweetness that pairs perfectly with the spicy kick of fresh ginger and garlic. It’s not just good for you—it’s genuinely tasty.
What sets this recipe apart from the countless other immune shots out there is the fermentation. It’s not just mixing ingredients together; it’s letting them transform. The natural probiotics from fermentation support your gut health, which is where 70% of your immune system lives. Plus, the honey acts as a natural preservative, so this batch will last in your fridge for months. It’s comfort for your immune system—healthier, faster, and with the same soul-soothing satisfaction as a warm cup of tea.
What Ingredients You Will Need
This recipe uses simple, wholesome ingredients to deliver a potent immune boost without the fuss. Most of these are pantry staples, but a little attention to quality goes a long way here.
- Garlic (1 whole head, cloves separated and peeled): The star of the show. Garlic contains allicin, a compound known for its antimicrobial properties. I recommend using fresh, firm garlic—avoid any cloves that are sprouting or soft. (adds potency)
- Raw Honey (1 cup, or enough to fill the jar): This is non-negotiable. Use raw, unfiltered honey—it contains natural enzymes and beneficial bacteria that pasteurized honey lacks. I personally prefer a local wildflower honey for its complex flavor, but any raw honey works. (use for fermentation)
- Fresh Ginger (a 2-inch piece, peeled and thinly sliced): Ginger adds a zesty warmth and its own anti-inflammatory kick. Look for ginger that’s firm and smooth-skinned. (adds heat and benefits)
- Fresh Lemon (1 medium, thinly sliced): The citrus brightens the whole mixture and adds vitamin C. Use organic if you can, since we’re using the peel. (adds zest and acidity)
- Optional: Cayenne Pepper (a pinch): For an extra metabolism boost and a little fire. Totally optional, but I love it. (adds heat)
- Optional: Turmeric (a 1-inch piece, peeled and sliced): Golden turmeric is a powerhouse anti-inflammatory. It will stain everything yellow, so be careful. (adds color and benefits)
Ingredient Selection Tips: For the garlic, look for heads that are tight and heavy for their size—that means they’re fresh. For honey, check the label; it should say “raw” or “unfiltered.” If it’s clear and runny like syrup, it’s been pasteurized and won’t ferment properly. For ginger, the younger, the better—older ginger can be woody and fibrous. I find that sourcing from a local farmer’s market makes a noticeable difference in flavor, but supermarket ingredients work just fine too.
Substitution Guidance: If you can’t find raw honey, you can use maple syrup, but the flavor will be different and the fermentation may be less active. For a low-FODMAP version, use garlic-infused olive oil instead of whole garlic—though you’ll lose some of the fermentation benefits. You can swap lemon with lime for a different citrus profile. If you’re allergic to ginger, try using a pinch of ground ginger or omit it entirely.
Equipment Needed
You don’t need a fancy kitchen to make these Zesty Garlic Honey Fermented Immune Shots. Here’s what I use, along with some alternatives I’ve tried.
- A Clean Mason Jar (16 oz or pint-sized): This is your fermentation vessel. I prefer wide-mouth jars for easy access. If you don’t have a mason jar, any glass jar with a tight-fitting lid works—just make sure it’s thoroughly cleaned and dried.
- A Sharp Knife and Cutting Board: For slicing your ginger, lemon, and optional turmeric. A chef’s knife is ideal, but any sharp knife will do.
- A Wooden Spoon or Chopstick: For stirring and releasing air bubbles. Avoid metal utensils, as they can react with the acidic honey over time.
- A Small Bowl: For peeling the garlic cloves. I like to smash them slightly with the flat side of my knife—it makes peeling a breeze.
- A Clean Cloth or Paper Towel: For wiping the rim of the jar before sealing. This prevents sticky messes and ensures a good seal.
Budget-Friendly Options: Don’t have a mason jar? Reuse a pasta sauce jar—just make sure you wash it well and remove any lingering smells. No wooden spoon? A plastic chopstick works perfectly. I’ve made this recipe with just a butter knife and a mug before, and it turned out fine. The key is a clean, airtight container.
Personal Tip: I once used a jar with a rusty lid. The whole batch got a metallic taste. Invest in a new lid if yours looks iffy—it’s worth it.
Preparation Method
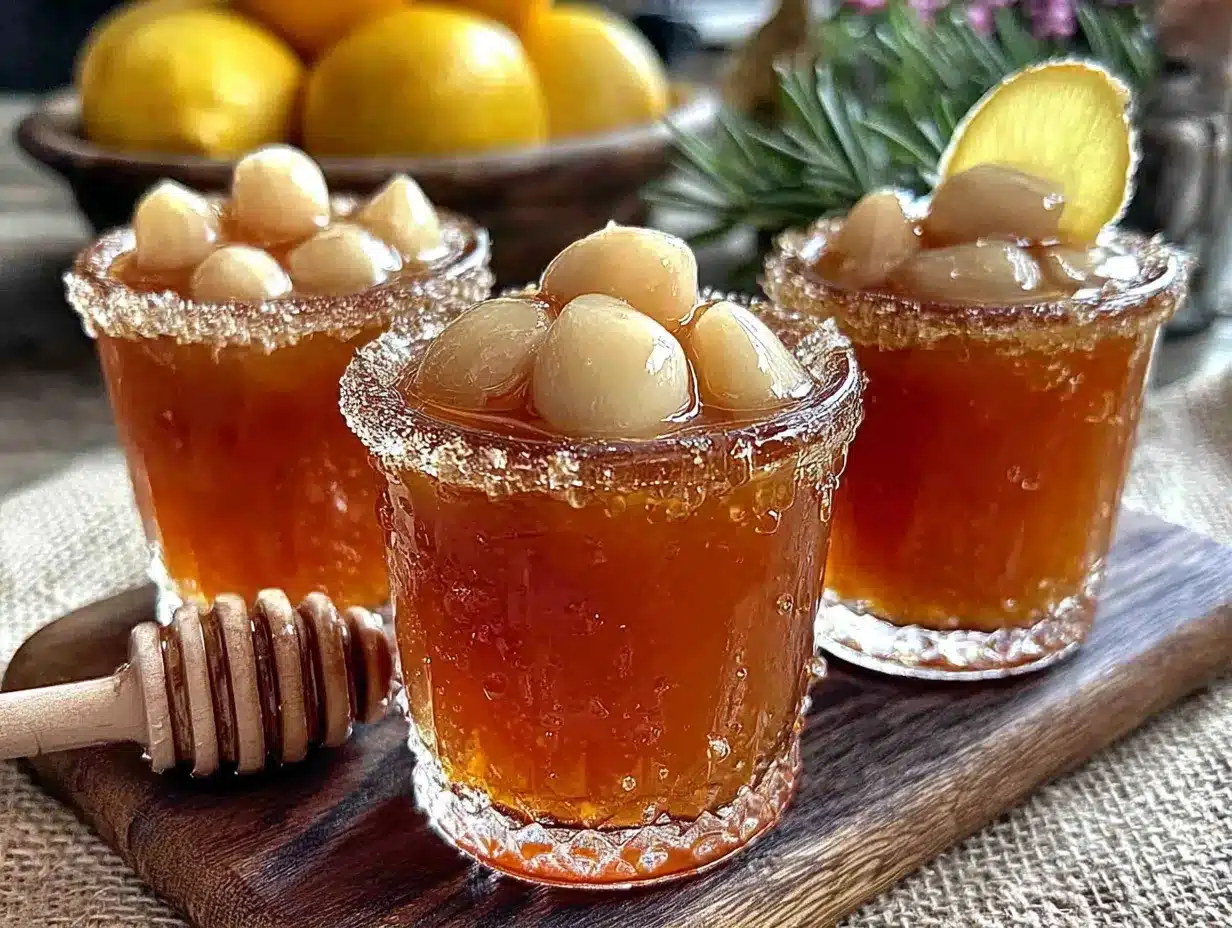
Making these Zesty Garlic Honey Fermented Immune Shots is more about patience than skill. The active work takes about 10 minutes; the magic happens over the next week.
- Prepare your garlic (5 minutes): Separate the cloves from one head of garlic. Place them in a small bowl and smash each clove gently with the flat side of your knife. This cracks the skin and makes peeling effortless. Peel all the cloves and set them aside. You should have about 10-12 cloves. (Tip: If you’re in a rush, buy pre-peeled garlic, but fresh is better for fermentation.)
- Slice your aromatics (3 minutes): Peel a 2-inch piece of fresh ginger and slice it into thin rounds—about 1/8 inch thick. Slice one medium lemon into thin rounds as well. If you’re using turmeric, peel and slice it the same way. (Warning: Turmeric will stain your cutting board and fingers. I learned this the hard way—wear gloves if you care about yellow hands.)
- Layer in the jar (2 minutes): Start with a layer of garlic cloves at the bottom of your clean mason jar. Add a layer of ginger slices, then a layer of lemon slices. Repeat the layers until you’ve used all your ingredients. The jar should be about half to two-thirds full. (Sensory cue: The citrus and ginger should smell bright and invigorating at this point.)
- Pour in the honey (1 minute): Slowly pour your raw honey over the layered ingredients. Use a wooden spoon or chopstick to stir gently, ensuring the honey reaches every nook and cranny. The honey should completely cover the solids—if it doesn’t, add more honey. (Troubleshooting: If your honey is too thick to pour, warm the jar in a bowl of hot water for 5 minutes. Do not microwave it—that kills the beneficial enzymes.)
- Seal and shake (30 seconds): Wipe the rim of the jar clean with a damp cloth. Screw the lid on tightly. Give the jar a good shake to distribute everything evenly. (Personal tip: I label mine with the date and a little drawing of a garlic clove—it helps me remember when to start tasting.)
- Ferment (7-14 days): Place the jar in a cool, dark place—like a cupboard or pantry. Once a day, “burp” the jar by opening the lid slightly to release any built-up gas, then shake it gently. You’ll see bubbles forming after a few days—that’s the fermentation in action! (Sensory cue: The mixture will become more liquid and the honey will thin out. The smell will shift from pure sweet to a complex, tangy-savory aroma.)
- Taste and store (1 minute): After 7 days, start tasting a small spoonful of the honey. If it’s pleasantly tangy and the garlic has mellowed, it’s ready. If you want a stronger flavor, let it go for another week. Once it’s to your liking, transfer the jar to the refrigerator. The cold will slow the fermentation significantly. (Storage note: It will keep for up to 6 months in the fridge, though the flavor will continue to deepen.)
Cooking Tips & Techniques
I’ve made this recipe about a dozen times now, and I’ve learned a few things the hard way. Here’s what I wish someone had told me.
Don’t skip the burping step. I forgot to burp my first batch for three days, and when I finally opened it, honey exploded everywhere. It was like a sticky, garlicky volcano. Set a daily alarm if you have to—it’s that important.
Use the biggest garlic cloves you can find. Smaller cloves can get lost in the honey and are harder to fish out later. Large cloves also tend to be less bitter. I’ve found that elephant garlic works beautifully too—it’s milder and almost buttery after fermentation.
Patience is non-negotiable. I tasted my first batch on day three and was disappointed. It was just garlic in sweet honey. By day ten, it was a completely different beast—complex, tangy, and almost effervescent. Trust the process. The fermentation is what transforms these ingredients into something truly special.
Keep the solids submerged. If any garlic or ginger floats above the honey line, it can mold. I use a small glass fermentation weight, but a clean, food-safe plastic bag filled with water works too. Or, just shake the jar daily to coat everything.
Temperature matters. Fermentation happens faster in warmer environments. If your kitchen is hot (above 80°F), check your batch after 5 days. If it’s cool (below 65°F), it might take up to 3 weeks. I keep mine in the pantry, which sits around 70°F, and 10 days is my sweet spot.
My biggest failure: I once used pasteurized honey because it was all I had. After two weeks, nothing happened. No bubbles, no tanginess—just sad, sweet garlic. The raw honey is what feeds the natural yeasts and bacteria. Don’t compromise on this one ingredient.
Variations & Adaptations
One of the best things about this recipe is how flexible it is. Here are some variations I’ve tried and loved.
- Spicy Fire Cider Shot: Add a pinch of cayenne pepper and a few slices of fresh jalapeño to the jar. The heat cuts through the sweetness beautifully. I make this version when I feel a cold coming on—it clears my sinuses in seconds.
- Golden Turmeric Boost: Add a 1-inch piece of fresh turmeric (peeled and sliced) and a pinch of black pepper. The black pepper helps your body absorb the curcumin in turmeric. This version stains everything yellow, so use an old cutting board. The flavor is earthy and grounding.
- Herbal Garden Shot: Add a few sprigs of fresh rosemary or thyme to the jar. The herbs infuse the honey with a savory, almost piney note. I love this version in the fall—it feels like a warm blanket for your immune system.
- Low-FODMAP Adaptation: For those with garlic sensitivity, use garlic-infused olive oil instead of whole cloves. The oil won’t ferment the same way, but you’ll still get the flavor. Add a bit of fresh chives for a mild allium kick.
- Sweet & Mild Version: Use only half the garlic and double the ginger. The ginger’s spice is less intense than garlic, making this version more kid-friendly. My niece actually asks for this one—she calls it “dragon honey.”
I’ve also experimented with using different honeys. Manuka honey is incredible if you can afford it—its antibacterial properties are legendary. Orange blossom honey adds a floral note that pairs beautifully with the lemon. Each honey variety changes the final flavor in subtle ways, so don’t be afraid to play around.
Serving & Storage Suggestions
These Zesty Garlic Honey Fermented Immune Shots are incredibly versatile. Here’s how I use them throughout the day.
Serving: I take one tablespoon every morning on an empty stomach. It’s a gentle, warming way to start the day. You can also mix it into a mug of hot water (not boiling—heat destroys the probiotics) for a soothing tea. Some days, I drizzle it over yogurt or oatmeal for a sweet-savory twist. The fermented garlic cloves themselves are delicious—they’re soft, almost jammy, and have a mellow garlic flavor. I chop them up and add them to salad dressings or spread them on toast.
Storage: Once your fermentation is complete, store the jar in the refrigerator. The cold will slow the process, but the flavor will continue to deepen. I’ve kept batches for up to 6 months without any issues. If you see any mold on the surface, discard the entire batch—it’s not worth the risk. But if you’ve kept the solids submerged and burped the jar regularly, mold is rare.
Reheating: I don’t recommend heating these shots directly, as high temperatures kill the beneficial probiotics. If you want a warm drink, mix a spoonful into hot water and let it cool slightly before drinking. The honey will dissolve and release its aroma beautifully.
Flavor Development: The flavor peaks around the 2-week mark. After that, it becomes more mellow and complex. The garlic loses its bite and takes on a sweet, almost caramelized quality. The honey becomes thinner and more tangy. I actually prefer my batch after a month—it’s like a fine wine for your immune system.
Nutritional Information & Benefits
While I’m not a nutritionist, I’ve done my research on the ingredients in these Zesty Garlic Honey Fermented Immune Shots. Here’s what makes them a powerhouse for your wellness routine.
Estimated Nutritional Values (per 1 tablespoon serving):
- Calories: 45-60 (varies by honey)
- Carbohydrates: 12-15g
- Sugar: 11-14g (natural)
- Vitamin C: 2-4% DV (from lemon)
- Manganese: 2-4% DV (from ginger)
Health Benefits: Garlic is rich in allicin, a compound known for its antimicrobial and immune-boosting properties. Raw honey contains natural enzymes and antioxidants that support gut health—and since 70% of your immune system lives in your gut, that’s a direct benefit. Ginger is a potent anti-inflammatory that can help soothe sore throats and reduce nausea. Lemon provides a dose of vitamin C and helps alkalize the body. The fermentation process adds probiotics, which further support digestive and immune health.
Dietary Considerations: This recipe is naturally gluten-free, dairy-free, and vegan (if you’re comfortable with honey). It’s paleo-friendly and Whole30-compliant. The main allergen to watch for is honey—if you have a pollen allergy, consult your doctor. The sugar content is natural, but if you’re diabetic, monitor your blood sugar as honey can spike it.
Personal Wellness Perspective: I started taking these shots two winters ago, and I’ve noticed a real difference in how often I get sick. I used to catch every cold that went through my office. Now, if I feel that first tickle in my throat, I double up on my daily dose, and more often than not, the cold never fully develops. It’s not a miracle cure, but it’s a delicious, proactive step that makes me feel empowered about my health.
Conclusion
These Zesty Garlic Honey Fermented Immune Shots are more than just a recipe—they’re a small ritual that connects me to my health in a tangible, delicious way. Every morning, as I take that spoonful, I think of Jen’s casual kitchen and her grandma’s “winter armor.” It’s a reminder that the best things in life are often simple, slow, and shared.
I encourage you to make this recipe your own. Adjust the spice level, try different herbs, or let it ferment a little longer. Trust your instincts and your taste buds. This is your kitchen, after all. I’d love to hear how your batch turns out—drop a comment below and let me know what variations you tried. Did you add cayenne? Did you use Manuka honey? Did your kids actually ask for seconds? Share your story, and let’s keep this tradition alive.
Here’s to your health, one zesty shot at a time.
Frequently Asked Questions
How long do these immune shots last in the fridge?
They’ll keep for up to 6 months in the refrigerator. The flavor will continue to deepen over time, becoming more mellow and complex. Just make sure the solids stay submerged in the honey to prevent mold.
Can I use regular honey instead of raw honey?
I strongly recommend raw, unfiltered honey. Pasteurized honey has been heated to kill bacteria, which also kills the natural yeasts and enzymes needed for fermentation. Without them, you won’t get the probiotic benefits or the tangy flavor.
What if I see bubbles or foam on top?
That’s completely normal—it’s a sign that fermentation is happening! The bubbles are carbon dioxide produced by the beneficial bacteria and yeasts. Just give the jar a gentle shake to redistribute everything. If you see fuzzy mold (green, black, or white), discard the batch immediately.
Can I take these shots if I’m pregnant or nursing?
Consult your healthcare provider first. While the ingredients are generally safe in food amounts, the concentrated nature of these shots and the fermentation process may not be suitable for everyone. It’s always best to get personalized medical advice.
How much should I take daily?
I recommend starting with 1 tablespoon per day. You can take it straight or mix it into warm water. If you’re fighting off a cold, you can increase to 2-3 tablespoons per day, but listen to your body—too much garlic can cause digestive upset for some people.
Pin This Recipe!
Zesty Garlic Honey Fermented Immune Shots

These Zesty Garlic Honey Fermented Immune Shots are a delicious, probiotic-rich way to support your immune system. Made with raw honey, fresh garlic, ginger, and lemon, this easy DIY recipe transforms simple ingredients into a tangy, sweet, and spicy wellness booster.
- Prep Time: 10 minutes
- Cook Time: 0 minutes
- Total Time: 7-14 days (fermentation time)
- Yield: About 1 cup (16 servings of 1 tablespoon each) 1x
- Category: Condiment / Wellness Shot
- Cuisine: American
Ingredients
- 1 whole head garlic, cloves separated and peeled
- 1 cup raw honey (or enough to fill the jar)
- 2-inch piece fresh ginger, peeled and thinly sliced
- 1 medium lemon, thinly sliced
- Pinch cayenne pepper (optional)
- 1-inch piece fresh turmeric, peeled and sliced (optional)
Instructions
- Prepare your garlic: Separate the cloves from one head of garlic. Place them in a small bowl and smash each clove gently with the flat side of your knife to crack the skin. Peel all the cloves and set aside.
- Slice your aromatics: Peel a 2-inch piece of fresh ginger and slice it into thin rounds (about 1/8 inch thick). Slice one medium lemon into thin rounds. If using turmeric, peel and slice it the same way.
- Layer in the jar: Start with a layer of garlic cloves at the bottom of a clean 16-ounce mason jar. Add a layer of ginger slices, then a layer of lemon slices. Repeat layers until all ingredients are used. The jar should be about half to two-thirds full.
- Pour in the honey: Slowly pour raw honey over the layered ingredients. Use a wooden spoon or chopstick to stir gently, ensuring the honey reaches every nook and cranny. The honey should completely cover the solids; if not, add more honey.
- Seal and shake: Wipe the rim of the jar clean with a damp cloth. Screw the lid on tightly. Give the jar a good shake to distribute everything evenly.
- Ferment: Place the jar in a cool, dark place (like a cupboard or pantry). Once a day, ‘burp’ the jar by opening the lid slightly to release built-up gas, then shake it gently. Bubbles will form after a few days.
- Taste and store: After 7 days, start tasting a small spoonful of the honey. If it’s pleasantly tangy and the garlic has mellowed, it’s ready. For a stronger flavor, let it ferment for up to 14 days. Once ready, transfer the jar to the refrigerator.
Notes
Do not skip the daily burping step to prevent pressure buildup. Use the largest garlic cloves possible for best results. Keep solids submerged in honey to prevent mold. Fermentation time varies with temperature; check after 5 days in warm kitchens (above 80°F) or up to 3 weeks in cool kitchens (below 65°F). Raw honey is essential for fermentation—pasteurized honey will not work. Store in the refrigerator for up to 6 months.
Nutrition
- Serving Size: 1 tablespoon
- Calories: 4560
- Sugar: 1114
- Carbohydrates: 1215
Keywords: garlic honey, fermented immune shots, immune booster, raw honey, garlic, ginger, lemon, probiotic, wellness shot, DIY immune support


