Love this? Save it for later!
Share the inspiration with your friends
I was standing in my kitchen last Tuesday, staring into the fridge at 10 PM, and honestly, I just couldn’t face another morning of scrambling for breakfast. You know that feeling when you’re already tired before the day even starts? The oatmeal container was staring back at me, and I had this sudden, almost desperate thought: why don’t I just make breakfast tonight when I actually have energy?
That’s how this overnight oats obsession started. I’d tried them before, sure, but they were always kind of… boring. Gloopy. Sad, even. But I was determined to figure out the trick—the right liquid-to-oats ratio, the perfect mix-ins, the flavors that would actually make me excited to wake up. I mean, if I’m going to meal prep, it better be worth it, right?
So I grabbed five mason jars (the ones I’d been hoarding for no good reason), and I started experimenting. Three failed batches later—one that was soupy, one that was basically concrete, and one that tasted like cardboard with cinnamon—I finally cracked the code. These five flavors? They’re the ones that survived my taste-testing rampage. They’re creamy, they’re packed with flavor, and they actually keep you full until lunch. Maybe you’ve been there, staring at that same sad oatmeal packet, wondering if breakfast could be something you actually look forward to. Let me tell you—it can.
Why You’ll Love This Recipe
These easy overnight oats aren’t just another breakfast idea—they’re a genuine game-changer for anyone who’s ever skipped breakfast because they ran out of time. I’ve tested these ratios more times than I care to admit, and I promise, this is the version that works every single time.
- Quick & Easy: Five minutes of prep tonight, and you’ve got breakfast sorted for the whole work week. No cooking, no cleanup in the morning.
- Simple Ingredients: You probably already have rolled oats, milk, and yogurt in your kitchen right now. No fancy health food store runs required.
- Perfect for Meal Prep: These mason jars stack beautifully in the fridge, making them ideal for busy mornings, office breakfasts, or grab-and-go situations.
- Crowd-Pleaser: With five different flavors, there’s something for everyone—the chocolate lover, the fruit fanatic, the peanut butter purist.
- Unbelievably Delicious: The texture is where these shine. They’re creamy, not gloopy, with perfectly softened oats that still have a little bite. Honestly, cold oatmeal has never tasted this good.
What makes these different from every other overnight oats recipe out there? It’s the ratios, plain and simple. I spent weeks tweaking the milk-to-oats balance, testing different yogurt fat contents, and figuring out which mix-ins hold up overnight without getting weird. This isn’t just another version—it’s the version that made my neighbor, who swore she hated oatmeal, ask for the recipe three times.
This recipe is the kind that makes you close your eyes after the first bite. It’s comfort food reimagined—healthier, faster, and honestly more satisfying than a bowl of hot oatmeal ever was. Perfect for impressing your coworkers at the office breakfast table, or turning a chaotic morning into something calm and delicious.
What Ingredients You Will Need
This recipe uses simple, wholesome ingredients that work together to create creamy, flavorful oats every single time. Most of these are pantry staples, which makes this meal prep actually realistic for busy weeks.
For the Base (Every Flavor Needs This):
- Rolled oats – 1/2 cup per jar (use old-fashioned rolled oats, not instant or steel-cut; I prefer Quaker or Bob’s Red Mill for the best texture)
- Milk – 1/2 cup per jar (whole milk gives the creamiest results, but 2% works great too; for dairy-free, oat milk or unsweetened almond milk are my go-tos)
- Greek yogurt – 1/4 cup per jar (plain, full-fat Greek yogurt adds protein and tang; Fage or Chobani are my favorites for thickness)
- Chia seeds – 1 tablespoon per jar (these are the secret to that pudding-like texture; don’t skip them)
- Maple syrup or honey – 1 tablespoon per jar (adjust based on your sweetness preference)
- Vanilla extract – 1/2 teaspoon per jar (pure vanilla extract makes a noticeable difference over imitation)
- Pinch of salt – just a tiny one per jar (it balances the sweetness and brings out the oat flavor)
For the 5 Flavors (Pick Your Adventure):
1. Classic Blueberry Maple:
- 1/4 cup fresh or frozen blueberries (if using frozen, no need to thaw)
- 1 extra tablespoon maple syrup (for that extra maple kick)
- Optional: 1 teaspoon lemon zest (adds brightness, trust me)
2. Chocolate Peanut Butter Dream:
- 1 tablespoon unsweetened cocoa powder (I recommend Hershey’s Special Dark for depth)
- 1 1/2 tablespoons creamy peanut butter (or almond butter, if that’s your thing)
- 1 teaspoon mini chocolate chips (for texture; use dairy-free if needed)
3. Apple Cinnamon Crunch:
- 1/4 cup finely diced apple (Honeycrisp or Fuji hold up best overnight)
- 1/2 teaspoon cinnamon
- 1 tablespoon chopped pecans or walnuts (add these in the morning for crunch)
4. Tropical Mango Coconut:
- 1/4 cup diced mango (fresh or frozen; thaw frozen slightly)
- 1 tablespoon shredded coconut (unsweetened, toasted if you’re feeling fancy)
- 1 teaspoon lime juice (fresh squeezed, please)
5. Strawberry Banana Bliss:
- 1/4 cup sliced strawberries (fresh is best, but frozen works in a pinch)
- 1/2 small banana, sliced (add banana just before eating to avoid mushiness)
- 1 teaspoon strawberry jam or preserves (optional, for extra sweetness)
Ingredient Selection Tips: Look for rolled oats that are labeled “old-fashioned” for the best texture—instant oats turn to mush, and steel-cut oats stay too hard. For the yogurt, full-fat Greek yogurt is non-negotiable for creaminess, but if you’re dairy-free, use a thick coconut yogurt instead. And please, use real maple syrup, not pancake syrup. Your taste buds will thank you.
Equipment Needed
You don’t need a fancy kitchen to make these overnight oats work. Here’s what you’ll actually use:
- Mason jars – 5 wide-mouth 16-ounce jars are perfect (the wide mouth makes eating and cleaning so much easier; I learned this the hard way with narrow jars and a spoon that wouldn’t fit)
- Measuring cups and spoons – standard set will do, but a liquid measuring cup for the milk is helpful
- Small mixing bowl – for whisking the base ingredients together before dividing
- Whisk or fork – to mix the base until smooth (a fork works in a pinch, but a small whisk is faster)
- Cutting board and knife – for dicing apples and slicing bananas
- Funnel – optional, but honestly, it saves so much mess when pouring the liquid base into jars (I bought one for $3 and it was worth every penny)
- Spatula – small rubber spatula to scrape every last bit of the base mixture
Budget-Friendly Alternatives: Don’t have mason jars? Any airtight container works—glass meal prep containers, plastic deli containers, even repurposed pasta sauce jars (just wash them really well). No funnel? Roll a piece of parchment paper into a cone shape. No whisk? A fork and some elbow grease will get the job done.
Preparation Method
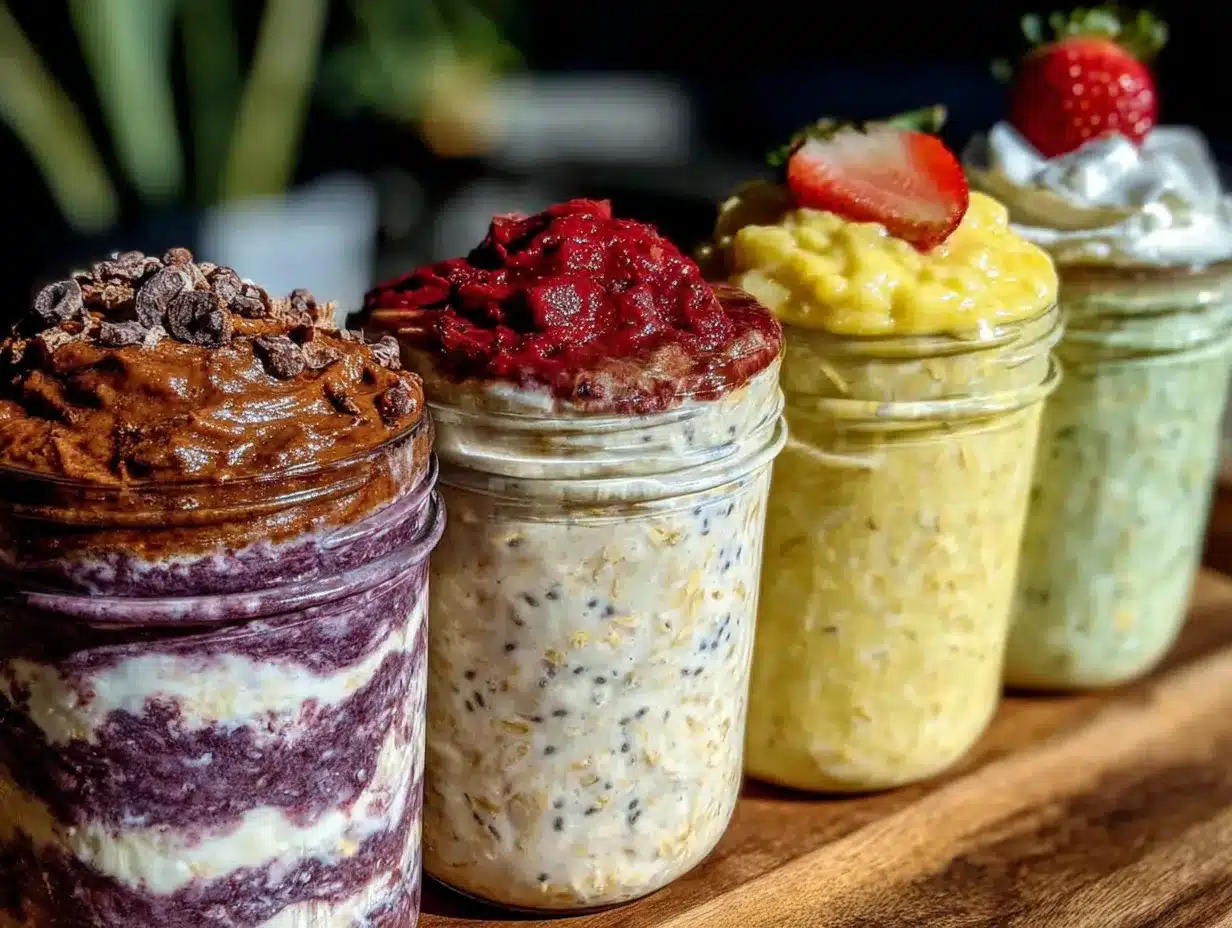
Alright, let’s get into the actual making of these overnight oats. I’ve broken this down so even a beginner can nail it on the first try.
- Make the base mixture (5 minutes): In a medium mixing bowl, combine 2 1/2 cups rolled oats, 2 1/2 cups milk, 1 1/4 cups Greek yogurt, 5 tablespoons chia seeds, 5 tablespoons maple syrup or honey, 2 1/2 teaspoons vanilla extract, and a generous pinch of salt. Whisk everything together until smooth and well-combined. The mixture should look like a thick, slightly lumpy batter—that’s perfect. Don’t worry if the chia seeds start to clump; they’ll distribute as they sit.
- Divide the base among jars (2 minutes): Place your 5 mason jars on the counter. Using a ladle or a measuring cup with a spout, divide the base mixture evenly among the jars. Each jar should get about 3/4 cup of the base. If you’re using a funnel, now’s the time to grab it—it’ll keep the rims clean and make your life easier.
- Add your flavor mix-ins (3 minutes per jar): Now for the fun part. For each jar, add the specific flavor ingredients listed above. For the Blueberry Maple jar, drop in the blueberries and extra maple syrup. For the Chocolate Peanut Butter jar, sprinkle in the cocoa powder and dollop the peanut butter on top. Don’t stir yet—just layer everything on top of the base.
- Stir each jar thoroughly (1 minute per jar): This step is crucial. Using a small spoon or a chopstick, stir each jar until the flavor ingredients are fully incorporated into the base. For the chocolate one, make sure there are no dry cocoa powder pockets—I’ve had that happen, and it’s not pleasant. For the apple cinnamon, really work the diced apple into the oats so it softens overnight.
- Seal and refrigerate (overnight): Screw the lids on tightly and place the jars in the refrigerator. Let them sit for at least 6 hours, but overnight (8-12 hours) is ideal. The chia seeds need time to absorb liquid and create that pudding-like texture. Don’t rush this—4 hours won’t cut it.
- Add toppings before serving (2 minutes per jar): In the morning, grab your jar, give it a quick stir, and add any last-minute toppings. For the Apple Cinnamon Crunch, sprinkle the chopped pecans or walnuts on top right before eating so they stay crunchy. For the Strawberry Banana Bliss, slice the banana and stir it in just before serving—if you add it overnight, it gets brown and mushy. Trust me on this one.
- Enjoy cold or warm: These are designed to be eaten cold, straight from the fridge, but if you prefer warm oatmeal, microwave the jar (lid off!) for 60-90 seconds, stirring halfway through. Just know that the texture will be slightly different—still creamy, but warmer and more porridge-like.
Sensory Cues: When you open the jar in the morning, you should smell the oats and your chosen flavor immediately. The texture should be thick but spoonable—like a pudding, not soup. If it looks too thick, stir in a splash of milk. If it looks too thin, it probably needed more chia seeds or more time.
Personal Tip: I always make these on Sunday evening while I’m waiting for dinner to cook. It’s a five-minute task that saves me twenty minutes every single morning. And honestly, having breakfast already made feels like a gift to Future Me.
Cooking Tips & Techniques
After making these overnight oats roughly forty-seven times (yes, I counted), I’ve picked up a few tricks that make a real difference:
The Ratio is Everything: The perfect overnight oats ratio is 1:1 oats to milk, plus 1/4 cup yogurt and 1 tablespoon chia seeds per serving. Too much milk and you get soup. Too little and you get cement. I learned this when I tried to eyeball it one morning and ended up with oats that could have been used as wall putty.
Don’t Skip the Chia Seeds: I know they’re not strictly necessary, but they’re the secret to that thick, pudding-like texture. Without them, your oats will be watery and sad. If you don’t have chia seeds, you can substitute 1 tablespoon ground flaxseed per jar, but the texture will be slightly different—more gelatinous, less creamy.
Layer Smart, Not Hard: When you’re adding your flavor ingredients, don’t just dump them on top and hope for the best. Take the extra 30 seconds to stir them in thoroughly. I’ve had mornings where I bit into a pocket of straight cocoa powder, and let me tell you, it’s not a pleasant wake-up call.
Temperature Matters: For the creamiest texture, use cold milk straight from the fridge. Warm milk will start to soften the oats immediately, and you’ll lose that perfect overnight texture. Also, let the jars sit at room temperature for 5 minutes before eating—cold oats straight from the fridge can be a shock to the system.
Multitasking Strategy: While you’re making the base, prep your fruit. Dice the apple, slice the strawberries, measure the blueberries. It saves you from having to wash the cutting board twice. And if you’re making all five flavors, label your jars with a piece of masking tape and a marker—otherwise you’ll be playing a very confusing guessing game in the morning.
Variations & Adaptations
One of the best things about this recipe is how flexible it is. Here are some variations I’ve tried and loved:
Vegan Version: Swap the Greek yogurt for a thick coconut yogurt or silken tofu. Use maple syrup instead of honey, and choose a plant-based milk like oat or almond. The texture will be slightly less tangy, but still incredibly creamy. I’ve made this for my vegan sister-in-law, and she couldn’t tell the difference.
Gluten-Free Adaptation: Use certified gluten-free rolled oats. Most oats are naturally gluten-free, but they’re often processed in facilities that handle wheat, so if you have celiac disease, look for the certified label. Everything else in the recipe is naturally gluten-free.
High-Protein Boost: Add a scoop of vanilla or unflavored protein powder to the base mixture. You’ll need to add an extra 2-3 tablespoons of milk to keep the right consistency. I’ve done this with collagen peptides and whey protein, and both work well—just make sure you stir thoroughly to avoid protein clumps.
Seasonal Flavor Swaps: In the fall, try a Pumpkin Pie flavor with 2 tablespoons pumpkin puree, 1/2 teaspoon pumpkin pie spice, and a tablespoon of maple syrup. In the summer, a Peach Ginger flavor with diced fresh peaches and a pinch of crystallized ginger is absolutely divine.
Different Sweeteners: Not a maple syrup fan? Use honey, agave nectar, or even a mashed ripe banana for natural sweetness. For a lower-sugar option, try 1-2 tablespoons of sugar-free syrup or a few drops of stevia. Just know that the sweetness level will vary, so adjust to your taste.
My Personal Favorite Variation: I once added a tablespoon of espresso powder to the Chocolate Peanut Butter version, and it was life-changing. It deepened the chocolate flavor and gave me a little caffeine boost. Just don’t do this at night if you’re sensitive to caffeine—I made that mistake and was up until 2 AM staring at the ceiling.
Serving & Storage Suggestions
These overnight oats are designed for convenience, but a little attention to serving and storage makes all the difference.
Serving Temperature: I prefer these cold, straight from the fridge—the texture is thick and almost like a pudding. But if you’re a hot oatmeal person, microwave the jar (lid off!) for 60-90 seconds. Just know that the chia seeds will soften further, so the texture becomes more porridge-like. Both ways are delicious, just different.
Presentation Ideas: If you’re serving these for brunch or to guests, layer the toppings artfully on top instead of stirring them in. A drizzle of peanut butter, a sprinkle of granola, a few fresh berries—it looks beautiful and makes people think you put in way more effort than you actually did. I’ve served these in mason jars with a ribbon tied around the neck for a friend’s baby shower, and everyone raved about them.
Complementary Additions: These oats are a complete meal on their own, but if you want to round things out, serve with a side of fresh fruit, a hard-boiled egg for extra protein, or a cup of coffee with a splash of cinnamon. For a heartier breakfast, top with a dollop of nut butter and a handful of granola.
Storage Instructions: These overnight oats will keep in the refrigerator for up to 5 days. I usually make them on Sunday and eat them through Thursday. Don’t try to freeze them—the texture gets weird and watery when thawed. If you’re meal prepping for a longer period, make the base without the fruit and add fresh fruit each morning.
Reheating Tips: If you’re eating them cold, just grab a jar and go. If you want them warm, microwave in 30-second intervals, stirring between each, until heated through. Add a splash of milk if they’ve thickened too much in the fridge. And please, for the love of breakfast, don’t microwave the jar with the metal lid on—I’ve seen it happen, and it’s not pretty.
Flavor Development: Here’s a fun thing I noticed: the flavors actually get better on day 2 and 3. The chia seeds have fully absorbed the liquid, the fruit flavors have melded with the oats, and the overall texture is at its peak. So if you’re making these for the week, day 1 is good, but day 3 is amazing.
Nutritional Information & Benefits
Here’s a rough nutritional breakdown for one serving of the base recipe (without mix-ins):
- Calories: Approximately 350-400 calories per jar
- Protein: 18-20 grams (thanks to the Greek yogurt and milk)
- Fiber: 8-10 grams (from the oats and chia seeds)
- Fat: 10-12 grams (mostly healthy fats from chia seeds and yogurt)
- Carbohydrates: 45-50 grams (complex carbs from oats, simple carbs from maple syrup)
- Sugar: 15-18 grams (naturally occurring from maple syrup and fruit; adjust sweetener to reduce)
Health Benefits: Rolled oats are packed with beta-glucan, a type of soluble fiber that helps lower cholesterol and keeps you full for hours. Chia seeds are tiny powerhouses of omega-3 fatty acids, fiber, and protein. Greek yogurt adds probiotics for gut health and calcium for bone health. Honestly, this is one of the most balanced breakfasts you can meal prep—it’s got protein, fiber, healthy fats, and complex carbs all in one jar.
Dietary Considerations: This recipe can easily be made dairy-free, gluten-free (with certified GF oats), and vegan. It’s naturally nut-free if you skip the peanut butter and pecan toppings. The main allergens are dairy and gluten, but both are easy to swap out.
Personal Wellness Perspective: I’m not a nutritionist, but I’ve found that starting my day with this breakfast keeps my energy stable until lunch. No mid-morning crash, no hangry episodes. It’s the kind of breakfast that makes you feel like you’ve got your life together, even if the rest of your day is chaos.
Conclusion
Look, I get it—meal prep can feel like a chore. But these overnight oats are the kind of recipe that actually makes your life easier without sacrificing flavor or quality. Five flavors, five minutes of prep, and a whole week of breakfasts that you’ll actually look forward to eating.
I’ve made these for busy work weeks, lazy weekends, brunch with friends, and even road trips (they travel surprisingly well). Every time, someone asks for the recipe. And every time, I tell them the same thing: the secret is in the ratios, the chia seeds, and the willingness to experiment with flavors.
So go ahead—grab those mason jars, raid your pantry, and make breakfast your new favorite meal of the day. And when you find your perfect flavor combination (or invent a new one), I’d love to hear about it. Drop a comment below, share your creation on Pinterest, or tag me in your overnight oats masterpiece. Because honestly, the best recipes are the ones we share.
Now go make some breakfast magic. Your future mornings will thank you.
Frequently Asked Questions
Can I use steel-cut oats instead of rolled oats?
I wouldn’t recommend it. Steel-cut oats don’t soften enough overnight—they stay crunchy and chewy, which isn’t the texture you want for overnight oats. Stick with old-fashioned rolled oats for the best results. If you’re in a pinch, quick oats will work, but the texture will be mushier.
How long do these overnight oats last in the fridge?
They’ll stay fresh for up to 5 days in an airtight container. I usually make mine on Sunday and eat them through Thursday. After day 5, the texture starts to break down and the oats can become a bit slimy. Trust me, you’ll notice the difference.
Can I make these without yogurt?
Absolutely! If you’re dairy-free or just don’t have yogurt on hand, you can substitute an equal amount of milk or a dairy-free yogurt alternative. The texture will be slightly less creamy and tangy, but still delicious. You could also use mashed banana or applesauce for a different twist.
Why are my overnight oats watery?
This usually happens for one of three reasons: you used too much liquid, you didn’t add enough chia seeds, or you didn’t let them sit long enough. The chia seeds need at least 6 hours to absorb the liquid and create that thick texture. If they’re still watery after that, try adding an extra tablespoon of chia seeds next time.
Can I heat these up in the morning?
Yes! If you prefer warm oats, just pop the jar (lid off!) in the microwave for 60-90 seconds, stirring halfway through. You can also transfer them to a small saucepan and heat on the stovetop over medium heat for 3-4 minutes. Just add a splash of milk if they’ve thickened too much overnight.
Pin This Recipe!
Easy Overnight Oats Meal Prep: 5 Best Mason Jar Flavors

Five minutes of prep tonight gives you a whole week of creamy, flavorful overnight oats. With five delicious mason jar flavors, this meal prep breakfast is perfect for busy mornings and keeps you full until lunch.
- Prep Time: 5 minutes
- Cook Time: 0 minutes
- Total Time: 5 minutes plus 6-12 hours refrigeration
- Yield: 5 servings 1x
- Category: Breakfast
- Cuisine: American
Ingredients
- 2 1/2 cups rolled oats (old-fashioned)
- 2 1/2 cups milk (whole or 2%; or oat/almond milk for dairy-free)
- 1 1/4 cups plain Greek yogurt (full-fat; or thick coconut yogurt for dairy-free)
- 5 tablespoons chia seeds
- 5 tablespoons maple syrup or honey
- 2 1/2 teaspoons vanilla extract
- 1 pinch salt
- For Classic Blueberry Maple: 1/4 cup fresh or frozen blueberries, 1 extra tablespoon maple syrup, 1 teaspoon lemon zest (optional)
- For Chocolate Peanut Butter Dream: 1 tablespoon unsweetened cocoa powder, 1 1/2 tablespoons creamy peanut butter, 1 teaspoon mini chocolate chips
- For Apple Cinnamon Crunch: 1/4 cup finely diced apple (Honeycrisp or Fuji), 1/2 teaspoon cinnamon, 1 tablespoon chopped pecans or walnuts (add in morning)
- For Tropical Mango Coconut: 1/4 cup diced mango (fresh or frozen), 1 tablespoon shredded coconut (unsweetened), 1 teaspoon lime juice (fresh)
- For Strawberry Banana Bliss: 1/4 cup sliced strawberries, 1/2 small banana (sliced, add just before eating), 1 teaspoon strawberry jam or preserves (optional)
Instructions
- Make the base mixture: In a medium mixing bowl, combine rolled oats, milk, Greek yogurt, chia seeds, maple syrup or honey, vanilla extract, and a pinch of salt. Whisk until smooth and well-combined.
- Divide the base among jars: Place 5 wide-mouth 16-ounce mason jars on the counter. Divide the base mixture evenly among the jars (about 3/4 cup per jar).
- Add your flavor mix-ins: For each jar, add the specific flavor ingredients listed above. Layer them on top of the base without stirring yet.
- Stir each jar thoroughly: Using a small spoon or chopstick, stir each jar until the flavor ingredients are fully incorporated into the base. Ensure no dry pockets remain.
- Seal and refrigerate: Screw the lids on tightly and refrigerate for at least 6 hours, but ideally overnight (8-12 hours).
- Add toppings before serving: In the morning, stir the oats and add any last-minute toppings (e.g., nuts for crunch, fresh banana slices).
- Enjoy cold or warm: Eat straight from the fridge, or microwave (lid off!) for 60-90 seconds for warm oats.
Notes
The ratio is key: 1:1 oats to milk, plus 1/4 cup yogurt and 1 tablespoon chia seeds per serving. Don’t skip chia seeds—they create the pudding-like texture. For best results, use cold milk and let jars sit at room temperature for 5 minutes before eating. Flavors improve on day 2 and 3. Store in fridge for up to 5 days; do not freeze.
Nutrition
- Serving Size: 1 jar
- Calories: 350400
- Sugar: 1518
- Sodium: 150200
- Fat: 1012
- Saturated Fat: 34
- Carbohydrates: 4550
- Fiber: 810
- Protein: 1820
Keywords: overnight oats, meal prep, mason jar breakfast, healthy breakfast, easy breakfast, blueberry maple, chocolate peanut butter, apple cinnamon, tropical mango, strawberry banana


