Love this? Save it for later!
Share the inspiration with your friends
My friend Jenna watched me stare at the grocery store display of hot dogs for a solid five minutes last October. I was hosting my first Halloween party, and I had grand plans—a cheese board shaped like a spider web, punch that changed color, the whole bit. But I kept coming back to the hot dogs. I needed something easy, something that would vanish before the punch even got poured. She didn’t say anything at first. Then she grabbed a pack of crescent rolls from the next aisle over, tossed them in my cart, and said, “Mummy dogs. You’ll thank me later.” That was it. No recipe card, no complicated instructions. Just a nod and a wink, like she was letting me in on a secret. And honestly? She was.
I went home, rolled up my sleeves, and made the first batch. The dough tore in a few places. I overbaked one tray by a minute, and the “bandages” got a little too brown. But you know what? Nobody cared. They disappeared. The kids grabbed them by the little mustard eyes, and the adults went back for seconds (and thirds). That night, I realized something important: the best Halloween recipes aren’t the ones that look perfect on Instagram. They’re the ones that make people laugh, grab another napkin, and lean over to ask, “Can I have the recipe?”
These Easy Mummy Pigs in a Blanket are that recipe. They’re ridiculously simple to throw together, they look adorable on a platter, and they taste exactly like the comforting, buttery, salty goodness you remember from childhood—just with a spooky twist. I’ve made them for three Halloweens in a row now, and every single time, someone asks for the details. So here they are. My version, with a few tweaks I’ve picked up along the way. If you’ve ever stood in a grocery store aisle wondering how to pull off a party without losing your mind, this one’s for you.
Why You’ll Love This Recipe
Let me tell you why this recipe has become my go-to for Halloween parties, movie nights, and even casual October dinners. It’s not just about the cuteness factor—though that definitely helps.
- Quick & Easy: These come together in under 25 minutes. Seriously. From fridge to table in less than half an hour. Perfect for those last-minute Halloween gatherings when you realize you forgot to plan something.
- Simple Ingredients: You probably already have everything in your kitchen. Hot dogs, crescent roll dough, and a little mustard for the eyes. That’s it. No specialty stores, no weird ingredients you’ll never use again.
- Perfect for Halloween Parties: They’re the ultimate finger food. No plates needed, no forks required. Guests can grab one, dip it in ketchup, and keep mingling. They’re also great for classroom parties, potlucks, or just a fun dinner with the kids.
- Crowd-Pleaser: I’ve served these to kids, adults, picky eaters, and even a few self-proclaimed “food snobs.” Every single person went back for more. There’s something about the combination of salty hot dog and flaky, buttery dough that nobody can resist.
- Unbelievably Delicious: The texture is what gets me. The dough gets golden and crispy on the outside, while the hot dog stays juicy on the inside. And the little mustard eyes? They add just a tiny tang that cuts through the richness. It’s simple comfort food at its best.
What makes this recipe different from the hundreds of other versions out there? It’s the technique. I’ve learned that how you wrap the dough matters more than you’d think. Too loose, and the “bandages” fall off during baking. Too tight, and the dough doesn’t puff up properly. I’ll show you exactly how to get it right every time. And I’ve tested this with different types of hot dogs and doughs, so I can tell you what works and what doesn’t. This isn’t just another version—it’s the one I’ve perfected over three Halloweens of trial and error.
Honestly, this recipe is the kind that makes you close your eyes after the first bite. It’s comfort food reimagined—cute enough for a party, but satisfying enough for a regular Tuesday night. Perfect for impressing guests without any stress, or turning a simple snack into something memorable.
What Ingredients You Will Need
This recipe uses simple, everyday ingredients to deliver maximum flavor and adorable presentation. The beauty of it is that you probably already have most of these in your kitchen right now. Here’s what you’ll need:
For the Mummy Dogs
- 1 can (8 ounces) refrigerated crescent roll dough — I recommend Pillsbury for consistent results, but any brand works. The key is to get the kind that comes in the tube, not the pre-rolled sheets. You want the perforated triangles for easy separation.
- 8 hot dogs — Use your favorite brand. I’ve tested this with beef, turkey, and even vegetarian hot dogs. All work well. If you can find the mini hot dogs or cocktail sausages, those are perfect for bite-sized mummies.
- Mustard for the eyes — Yellow mustard works best for that classic mummy look. The bright yellow color shows up nicely against the golden dough. You can also use sriracha or ketchup if you prefer, but mustard gives the most “mummy” vibe.
Optional Add-Ons
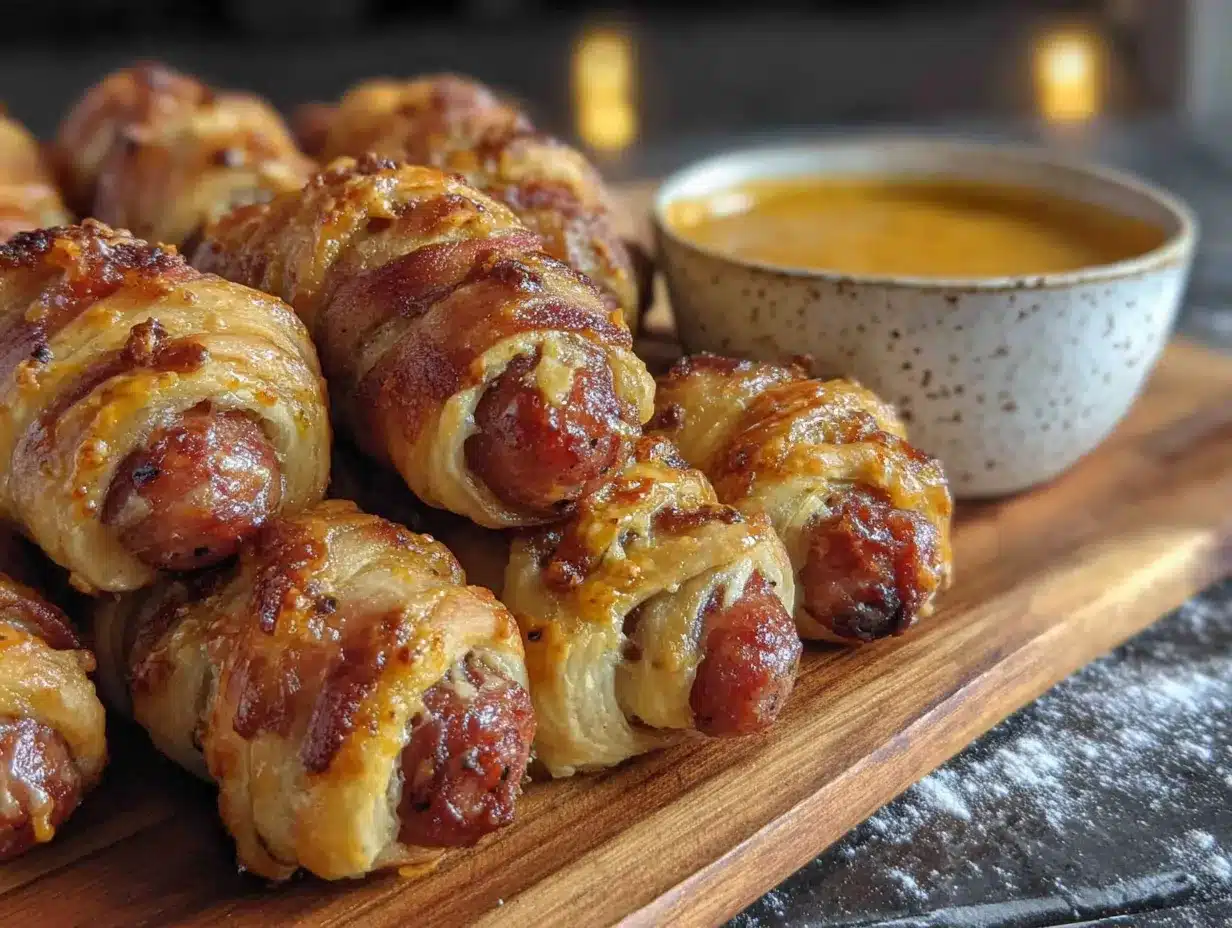
- Egg wash — 1 egg beaten with 1 tablespoon of water. This gives the dough a beautiful golden-brown finish. Not strictly necessary, but it makes them look extra polished.
- Sesame seeds or poppy seeds — Sprinkle these on before baking for a little extra texture and visual interest. They look like little mummy dust particles.
- Dipping sauces — Ketchup, honey mustard, ranch dressing, or even queso. The possibilities are endless.
Now, a few notes on ingredient selection. For the hot dogs, I personally prefer all-beef because they have a richer flavor and hold up better during baking. But turkey dogs work great if you’re watching your fat intake. Just make sure they’re fully cooked—you’re not actually cooking the hot dog, just warming it through and crisping up the dough.
For the crescent roll dough, I’ve tried the store-brand versions, and honestly, they work fine. The texture might be slightly different, but the results are still good. The key is to make sure the dough is cold when you work with it. If it gets too warm, it becomes sticky and hard to cut into strips. Pop it in the fridge for 10 minutes if your kitchen is warm.
And here’s a little substitution guidance: if you want a gluten-free option, you can use gluten-free crescent roll dough. It’s available at most major grocery stores now. The texture will be a bit different—a little more crumbly—but the taste is still delicious. For a dairy-free version, check the labels on your dough and hot dogs. Most crescent roll dough contains butter, but there are dairy-free alternatives out there.
Equipment Needed
You don’t need a lot of fancy equipment for this recipe, which is part of why I love it. Here’s what you’ll need:
- Baking sheet — A standard half-sheet pan works perfectly. Line it with parchment paper or a silicone baking mat for easy cleanup.
- Sharp knife or pizza cutter — You’ll need something to cut the crescent roll dough into strips. A pizza cutter works like a dream. A sharp knife works just as well.
- Small bowl — For the egg wash, if you’re using it.
- Pastry brush — Optional, but helpful for applying the egg wash. You can also use a paper towel in a pinch.
- Toothpicks — These come in handy if you need to secure the dough strips while baking. I rarely need them, but it’s good to have them on hand.
If you don’t have a pizza cutter, don’t worry. I’ve used a butter knife in a pinch, and it worked fine. The strips don’t need to be perfectly straight—in fact, slightly uneven strips look more like real mummy bandages. I actually prefer the rustic look.
One thing I learned the hard way: make sure your baking sheet has a rim. I once used a flat cookie sheet, and the butter from the dough dripped all over the bottom of my oven. Smoked up the whole kitchen. So yeah, rimmed baking sheet is the way to go.
For cleaning, I recommend soaking your baking sheet in warm soapy water right after baking. The butter residue can get sticky if it cools completely. A silicone baking mat is a lifesaver here—everything slides right off, and you just rinse it clean.
Preparation Method
Alright, let’s get to the fun part. Here’s how to make these adorable mummy dogs step by step. I’ve included all the little tricks I’ve picked up along the way, so pay attention to the details.
- Preheat your oven to 375°F (190°C). Line a baking sheet with parchment paper or a silicone baking mat. This is non-negotiable—the butter from the dough will stick to bare metal, and you’ll be scrubbing for days.
- Open the can of crescent roll dough. Here’s a tip: pop the can against the edge of your counter, not a knife. It’s safer, and honestly, it’s kind of satisfying. Unroll the dough and separate it along the perforated lines. You should have 8 triangles.
- Cut the dough into strips. Take each triangle and use a sharp knife or pizza cutter to cut it lengthwise into 3-4 thin strips. The strips should be about 1/4 to 1/2 inch wide. Don’t worry if they’re not perfectly even—mummy bandages are supposed to look a little messy. I usually get 3 strips from each triangle, but if you want more “bandages,” go for 4.
- Prepare the hot dogs. Pat them dry with a paper towel. This helps the dough stick better. If you’re using full-size hot dogs, you can leave them whole or cut them in half crosswise for shorter mummies. For bite-sized mummies, use cocktail sausages or cut full-size hot dogs into thirds.
- Wrap the mummies. Take a hot dog and start wrapping a dough strip around it, slightly overlapping as you go. Leave a small gap near the top for the eyes. The dough should cover most of the hot dog, but you want the top to peek through. Don’t wrap too tightly—the dough needs room to puff up as it bakes. If the dough feels too sticky, dust your fingers with a little flour.
- Place on the baking sheet. Arrange the wrapped hot dogs on the prepared baking sheet, leaving about 1 inch of space between each one. The dough will expand slightly as it bakes.
- Optional: Apply egg wash. In a small bowl, beat 1 egg with 1 tablespoon of water. Brush this mixture lightly over the dough strips. This gives them a beautiful golden-brown color. Don’t skip this step if you want them to look bakery-perfect.
- Bake for 12-15 minutes. Keep an eye on them. The dough should be golden brown and puffed up. The hot dogs should be heated through. If the dough starts to brown too quickly, tent the baking sheet loosely with aluminum foil for the last few minutes.
- Cool slightly. Let the mummy dogs cool on the baking sheet for 2-3 minutes. This allows the dough to set so it doesn’t fall apart when you move them.
- Add the eyes. Using a toothpick or the tip of a knife, dab a tiny amount of mustard onto the exposed hot dog to create eyes. You can make them look in different directions for a silly effect. A little mustard goes a long way—start with less than you think you need.
Here’s a sensory cue for you: when the mummy dogs are done, the kitchen should smell like buttery, salty goodness. The dough will be golden with slightly darker edges. If you tap the top of a mummy, it should feel firm but not hard. The hot dog should be warm all the way through—you can test this by inserting a toothpick into the center for a few seconds and then touching it to your lip.
One more thing: if the dough strips come loose during baking, don’t panic. Use a toothpick to hold them in place while they cool. Once the dough sets, you can remove the toothpick. I’ve had to do this maybe twice in three years, so it’s not a common issue.
Cooking Tips & Techniques
After making these mummy dogs more times than I can count, I’ve learned a few things the hard way. Let me save you some trouble.
The biggest mistake people make is wrapping the dough too tightly. I did this my first time, and the dough ripped in the oven. It looked like my mummies had been in a fight. The dough needs room to expand, so leave a little slack between the layers. Think of it like wrapping a gift—you want it snug but not suffocating.
Another common issue is the dough getting too soft. If your kitchen is warm, the crescent roll dough can become sticky and hard to handle. Pop it in the fridge for 10 minutes before cutting. This makes the dough firmer and easier to slice into clean strips. I learned this trick after a particularly hot October afternoon when my dough turned into a sticky mess.
Timing is everything. These bake quickly, so don’t walk away. Set a timer for 10 minutes and check them. The difference between perfectly golden and slightly burnt is about 90 seconds. I’ve burned a batch while answering the door for trick-or-treaters. Learn from my mistake.
For the mustard eyes, use a toothpick, not a squeeze bottle. A toothpick gives you way more control. Dip it in mustard and then dot it onto the hot dog. You can make the eyes as big or as small as you want. I like to make them look in different directions—it gives the mummies personality.
If you’re making a big batch, work in stages. Don’t try to wrap all 24 mummies at once. The dough will warm up and become harder to work with. Wrap one tray’s worth, bake it, and then wrap the next tray while the first one is in the oven. This keeps the dough cold and the process manageable.
One more tip from experience: if you’re serving these at a party, make them ahead of time and reheat them. They actually reheat beautifully. Just pop them in a 350°F oven for 5 minutes. The dough crisps right back up. I’ve done this for every Halloween party I’ve hosted, and nobody has ever complained.
Variations & Adaptations
One of the best things about this recipe is how easy it is to customize. Here are some variations I’ve tried and loved.
Spicy Mummy Dogs: Use spicy Italian sausages or chorizo instead of regular hot dogs. The spicy kick pairs beautifully with the buttery dough. I made these for a grown-up Halloween party, and they were the first thing to disappear. Serve with a cool ranch dipping sauce to balance the heat.
Cheese-Stuffed Mummies: Before wrapping, use a sharp knife to cut a slit lengthwise down the center of each hot dog. Stuff the slit with a thin strip of cheddar cheese or a cheese stick. Wrap as usual and bake. The cheese melts into the hot dog and creates a gooey, delicious surprise. Just be careful—the cheese gets hot and can burn your mouth if you bite in too quickly.
Vegetarian Mummies: Use vegetarian hot dogs or even carrot sticks for a lighter option. For carrot mummies, blanch the carrots first for 2 minutes to soften them slightly. Then wrap and bake as usual. They’re not as indulgent, but they’re surprisingly good, and kids love them.
Breakfast Mummies: Swap the hot dogs for breakfast sausages. Use the same crescent roll dough and bake as directed. These are perfect for a Halloween morning breakfast or brunch. Serve with maple syrup for dipping. I made these for a Halloween sleepover, and the kids devoured them.
Sweet Mummies: This one’s a little unconventional, but hear me out. Use chocolate croissant dough instead of crescent roll dough. Wrap it around banana chunks or marshmallows. Bake as directed, then drizzle with melted white chocolate to look like spider webs. It’s a fun dessert twist that’s perfect for kids.
I’ve also tried making these with puff pastry instead of crescent roll dough. It works, but the texture is different—more flaky and less soft. If you go this route, cut the puff pastry into thin strips and bake at 400°F for about 15 minutes. The result is a more elegant, almost fancy version of the classic.
Serving & Storage Suggestions
These mummy dogs are best served warm, right out of the oven. The dough is at its peak flakiness, and the hot dog is perfectly heated through. Arrange them on a platter with a small bowl of dipping sauce in the center. I like to use a Halloween-themed platter for extra fun, but any white plate works great—it makes the mummies pop.
For dipping sauces, here are my top recommendations:
- Ketchup: The classic. You can’t go wrong.
- Honey mustard: The sweetness complements the salty hot dog perfectly.
- Ranch dressing: Cool and creamy, great for balancing the richness.
- Queso or nacho cheese: For an indulgent twist.
- BBQ sauce: Smoky and tangy, adds a whole new flavor dimension.
If you have leftovers (which rarely happens in my house), here’s how to store them. Let them cool completely, then place them in an airtight container. They’ll keep in the refrigerator for up to 3 days. The dough will soften slightly, but they’re still delicious.
To reheat, I recommend using the oven or an air fryer. The microwave works in a pinch, but the dough gets soggy. For the oven, preheat to 350°F and bake for 5-7 minutes. For the air fryer, 350°F for 3-4 minutes. The air fryer actually crisps the dough back up beautifully—sometimes even better than the original bake.
You can also freeze these. Arrange the baked and cooled mummy dogs on a baking sheet and freeze until solid. Then transfer them to a freezer bag. They’ll keep for up to 2 months. To reheat from frozen, bake at 350°F for 10-12 minutes, or air fry at 350°F for 6-8 minutes. No need to thaw first.
One thing I’ve noticed: the flavors actually improve slightly after a day in the fridge. The mustard eyes seep into the hot dog just a little, and the dough absorbs some of the savory flavors. So don’t worry if you’re making these a day ahead—they’ll still be fantastic.
Nutritional Information & Benefits
Let’s be real—these are not health food. They’re a fun Halloween treat. But here’s the nutritional breakdown for one mummy dog (based on standard ingredients):
| Nutrient | Amount per serving |
|---|---|
| Calories | 180 |
| Total Fat | 12g |
| Saturated Fat | 5g |
| Cholesterol | 25mg |
| Sodium | 480mg |
| Total Carbohydrates | 14g |
| Dietary Fiber | 0g |
| Sugars | 3g |
| Protein | 6g |
Now, the good news: hot dogs do contain some protein, and the crescent roll dough provides carbohydrates for energy. If you use turkey hot dogs, you can reduce the fat and calories by about 30%. And if you use the vegetarian option, you’ll get more fiber and less saturated fat.
This recipe is not suitable for gluten-free diets unless you use gluten-free crescent roll dough. It also contains dairy (butter in the dough) and eggs (if you use the egg wash). If you have allergies, check the labels carefully.
My personal perspective? I don’t make these every day. They’re a treat, and that’s okay. Food is about joy, connection, and celebration. These mummy dogs bring people together, make kids laugh, and turn an ordinary October evening into something special. That’s a kind of nutrition too.
Conclusion
So there you have it. Easy Mummy Pigs in a Blanket that are cute, delicious, and ridiculously simple to make. I’ve been making these for three years now, and they’ve never let me down. They’re the recipe I turn to when I want to impress without stress, when I need something that kids and adults will both love, and when I want to add a little Halloween magic to an ordinary evening.
Here’s what I want you to take away from this: don’t overthink it. The dough doesn’t have to be perfect. The mustard eyes can be a little crooked. The bandages can be messy. That’s what makes them charming. Your mummies will have personality, and that’s exactly the point.
I’d love to hear how yours turn out. Did you try a variation? Did your kids help wrap them? Did they disappear before the party even started? Drop a comment below and let me know. And if you share them on social media, tag me—I love seeing your creations. These mummy dogs have become a tradition in my house, and I hope they become one in yours too.
Now go on. Grab some hot dogs and crescent rolls. Your Halloween party is about to get a whole lot more fun.
Frequently Asked Questions
Can I make these mummy dogs ahead of time?
Absolutely! You can assemble them up to 24 hours in advance. Just wrap the hot dogs with the dough strips, place them on the baking sheet, cover with plastic wrap, and refrigerate. Bake them right before serving. If they’re cold from the fridge, add 2-3 minutes to the baking time.
Can I use puff pastry instead of crescent roll dough?
Yes, you can. Puff pastry gives a flakier, more buttery texture. Thaw the puff pastry according to package directions, cut it into thin strips, and wrap as usual. Bake at 400°F instead of 375°F, and check them at 12 minutes. They brown faster than crescent roll dough.
How do I keep the dough strips from unrolling during baking?
Make sure you’re not wrapping too tightly—tight wrapping actually makes the strips more likely to pop off. Also, press the end of the dough strip gently against the wrapped layers to seal it. If you’re still having trouble, use a toothpick to secure the end. Remove the toothpick after baking.
Can I use mini hot dogs or cocktail sausages?
Yes! Mini hot dogs or cocktail sausages work great for bite-sized mummies. Cut the crescent roll dough into thinner strips (about 1/4 inch wide) and wrap as usual. Reduce the baking time to 10-12 minutes since they’re smaller. These are perfect for kids’ parties or appetizer platters.
What can I use instead of mustard for the eyes?
You have options! Ketchup works well and gives a red-eyed mummy look. Sriracha adds a spicy kick. You can also use small dots of cream cheese or sour cream for a milder flavor. For a totally different look, use tiny candy eyes from the baking aisle—just press them on after baking while the dough is still warm.
Pin This Recipe!
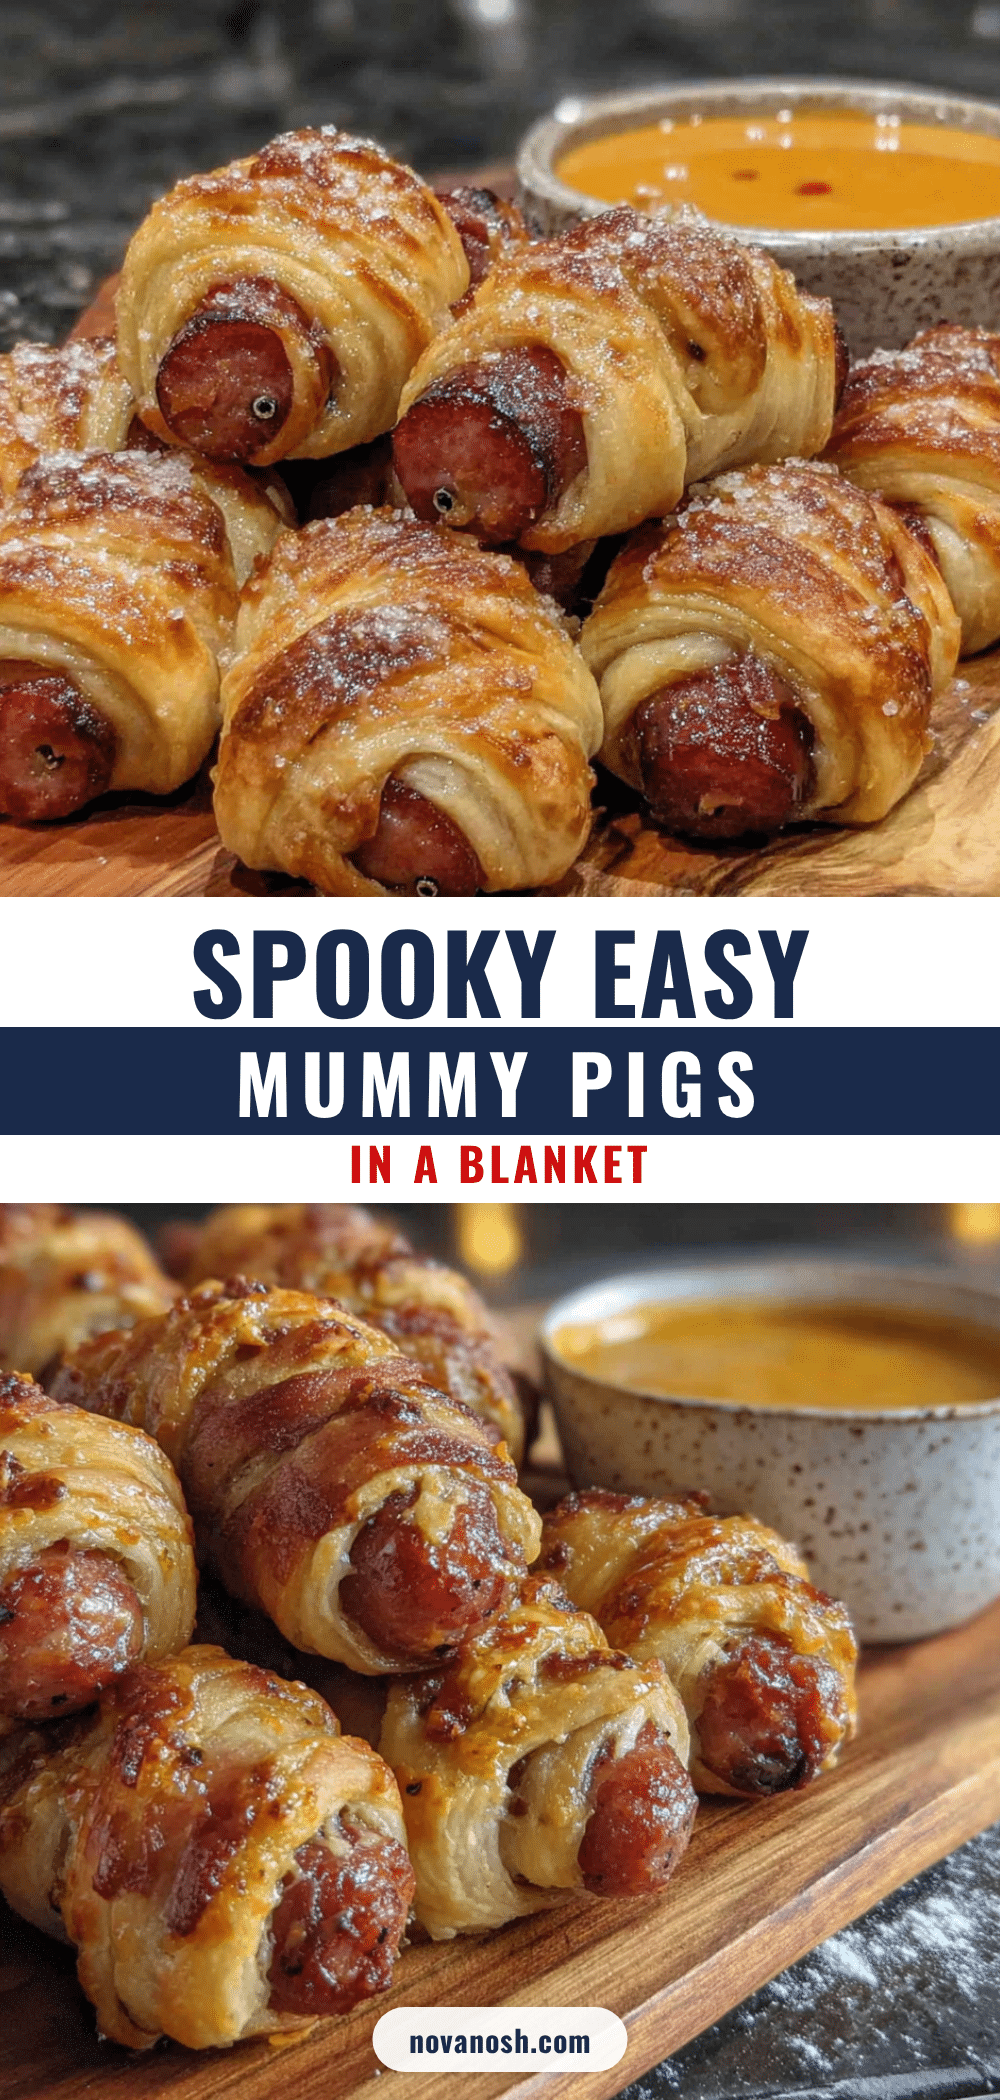
Easy Mummy Pigs in a Blanket: Best Halloween Appetizer

These Easy Mummy Pigs in a Blanket are a fun and simple Halloween appetizer made with hot dogs wrapped in crescent roll dough, baked until golden, and finished with mustard eyes. Perfect for parties, they come together in under 25 minutes and are always a crowd-pleaser.
- Prep Time: 10 minutes
- Cook Time: 15 minutes
- Total Time: 25 minutes
- Yield: 8 servings 1x
- Category: Appetizer
- Cuisine: American
Ingredients
- 1 can (8 ounces) refrigerated crescent roll dough
- 8 hot dogs
- Mustard for the eyes
- 1 egg (for egg wash, optional)
- 1 tablespoon water (for egg wash, optional)
- Sesame seeds or poppy seeds (optional)
- Dipping sauces (ketchup, honey mustard, ranch dressing, queso, BBQ sauce, optional)
Instructions
- Preheat your oven to 375°F (190°C). Line a baking sheet with parchment paper or a silicone baking mat.
- Open the can of crescent roll dough. Unroll the dough and separate it along the perforated lines to get 8 triangles.
- Cut each triangle lengthwise into 3-4 thin strips, about 1/4 to 1/2 inch wide.
- Pat the hot dogs dry with a paper towel. Leave whole or cut in half crosswise for shorter mummies.
- Take a hot dog and wrap a dough strip around it, slightly overlapping as you go. Leave a small gap near the top for the eyes. Do not wrap too tightly.
- Place the wrapped hot dogs on the prepared baking sheet, leaving about 1 inch of space between each.
- Optional: In a small bowl, beat 1 egg with 1 tablespoon of water. Brush this mixture lightly over the dough strips.
- Bake for 12-15 minutes, until the dough is golden brown and puffed up and the hot dogs are heated through.
- Let the mummy dogs cool on the baking sheet for 2-3 minutes.
- Using a toothpick or the tip of a knife, dab a tiny amount of mustard onto the exposed hot dog to create eyes.
Notes
For best results, keep the dough cold. If your kitchen is warm, refrigerate the dough for 10 minutes before cutting. Do not wrap the dough too tightly; it needs room to expand. For a golden finish, use an egg wash. The mustard eyes can be added with a toothpick for better control. These can be assembled up to 24 hours in advance and refrigerated. Reheat in a 350°F oven for 5-7 minutes or in an air fryer at 350°F for 3-4 minutes.
Nutrition
- Serving Size: 1 mummy dog
- Calories: 180
- Sugar: 3
- Sodium: 480
- Fat: 12
- Saturated Fat: 5
- Carbohydrates: 14
- Protein: 6
Keywords: Halloween appetizer, mummy dogs, pigs in a blanket, easy Halloween recipe, party food, hot dog recipe, crescent roll recipe


