Love this? Save it for later!
Share the inspiration with your friends
My youngest had claimed to hate hard-boiled eggs for as long as I could remember. Years. Then last October, I found him standing on a stool at the kitchen counter, quietly arranging olive halves onto a platter of deviled eggs I was making for a block party. He wasn’t just tolerating them—he was carefully placing each olive “leg” with the kind of focus he usually reserved for LEGO instructions. “These are spider eggs,” he informed me, not looking up. “They’re not the same as regular eggs.” And honestly? He wasn’t wrong. That’s the thing about Halloween food—it gets a pass on all the usual rules. Maybe you’ve seen that happen at your own table, where a spooky name transforms something ordinary into something irresistible.
I’d been making these Halloween deviled eggs with olive spiders for years before that moment, but I never really thought about why they worked so well with kids. I mean, I knew they were fun to look at, but I didn’t fully appreciate the magic until I watched a certified egg-skeptic eat three of them in a row without complaint. The trick, I’ve learned, is that the olives do more than just look like spiders—they add a briny, salty pop that balances the creamy yolk filling perfectly. It’s not just a gimmick. These deviled eggs actually taste better than the plain version I grew up making for Easter.
The whole thing started because I needed something quick for a school Halloween party that didn’t involve more candy. I was tired, running late, and honestly out of ideas. I grabbed eggs from the fridge, a jar of black olives from the pantry, and figured I’d make it work. The first batch was a little messy—some legs fell off, a few spiders looked more like blobs—but the kids went absolutely nuts for them. Now I make them every year, and they disappear faster than anything else on the table. It’s funny how a little creativity can turn a simple snack into the star of the show.
Why You’ll Love This Recipe
Let me tell you why these spooky deviled eggs have become my go-to Halloween dish year after year. They solve so many of the problems that come with feeding a crowd on a holiday that’s mostly about sugar.
- Budget-Friendly & Simple: Eggs and olives are two of the cheapest ingredients you can buy. You don’t need specialty items or expensive decorations—just basic pantry staples that won’t blow your grocery budget before Halloween.
- Quick & Easy: These come together in about 30 minutes, and most of that time is hands-off while the eggs boil. You can make them the night before, too, which is a lifesaver when you’re juggling costumes and last-minute candy runs.
- Kid-Approved: I’ve served these at four different Halloween parties now, and kids consistently pick them over chips, cookies, and even some candy. The olive spiders are just fun enough to win over picky eaters without being intimidating.
- Naturally Gluten-Free & Low-Carb: If you’re watching carbs or feeding someone with dietary restrictions, these fit right in. No flour, no weird substitutes—just real food that happens to look like spiders.
- Always a Conversation Starter: People can’t help but comment on these. They’re unexpected, clever, and just creepy enough to be fun without being gross. I’ve had adults ask me for the recipe more times than I can count.
What makes this version different from other Halloween deviled eggs is the technique. I’ve tested a dozen ways to keep the olive legs attached, and I’ve landed on a method that actually works—no toothpicks, no falling apart, no frustration. The filling is also intentionally simple, because the olives do a lot of the heavy lifting flavor-wise. You don’t need to overcomplicate things when the presentation is already doing the work.
These eggs are the kind of recipe that makes you look like you put in way more effort than you actually did. That’s my favorite kind of cooking, honestly—smart shortcuts that deliver big results. Plus, they reheat beautifully if you make them ahead, and the flavors actually get better after a few hours in the fridge.
What Ingredients You Will Need
This recipe uses simple, everyday ingredients to create something that looks far more complicated than it really is. The magic is all in how you put them together.
- Large eggs (12) – You’ll want the standard large size, not extra-large or jumbo. They cook more evenly and fit nicely on a serving platter. If you can, use eggs that are about a week old—they peel much easier than super fresh ones.
- Black olives (1 can, about 6 ounces) – Whole black olives are essential here. You need the round shape to make the spider bodies, and the pitted ones are easiest to work with. I’ve tried sliced olives and they just don’t look right. Stick with whole.
- Mayonnaise (1/3 cup) – Full-fat mayo gives the creamiest texture, but light works in a pinch. I prefer Hellmann’s or Duke’s for flavor, but any brand will do. If you’re dairy-free, check labels—most mayo is naturally dairy-free anyway.
- Yellow mustard (1 teaspoon) – This adds that classic deviled egg tang and a little color. You can use Dijon for a sharper flavor, but yellow mustard is what most kids are used to.
- White vinegar (1 teaspoon) – A tiny splash brightens everything up without making the filling too acidic. Apple cider vinegar works too if that’s what you have.
- Salt (1/4 teaspoon) – Just basic table salt. I’ve tried kosher salt, and it doesn’t dissolve as evenly in the filling.
- Black pepper (1/8 teaspoon) – Freshly ground is nice, but pre-ground works perfectly fine for this recipe.
- Paprika (for garnish) – Smoked paprika adds a deeper flavor, but regular paprika gives that classic deviled egg look. Either way, a light dusting makes them look finished.
- Optional: Sriracha or hot sauce (1/2 teaspoon) – I add this when I’m making them for adults only. It gives a tiny kick without overwhelming the other flavors.
A quick note on olives: I’ve tested this with both canned and jarred olives, and canned whole black olives are actually the best choice. They’re softer and easier to cut, and the flavor is mild enough that kids won’t complain. The fancy gourmet olives from the olive bar are too firm and have a stronger taste that can clash with the creamy filling.
If you’re feeding a crowd, double the recipe without any issues. The eggs keep well for a couple of days, and the olives don’t get soggy if you store them properly. Just don’t add the paprika until right before serving, or it’ll soak into the filling and lose that pretty red color.
Equipment Needed
You don’t need anything fancy for this recipe, which is part of why I love it. Here’s what you’ll want on hand:
- Medium saucepan – Big enough to hold a dozen eggs in a single layer without stacking them. I use a 3-quart pot and it works perfectly.
- Mixing bowls – One small bowl for the egg yolks and another for the filling. I’ve used the same two bowls for years—nothing special needed.
- Sharp knife and cutting board – You’ll need a good knife to slice the olives cleanly. A dull blade will squish them and make the spiders look messy.
- Small spoon or piping bag – A teaspoon works fine for filling the eggs, but a piping bag with a star tip makes them look fancier. I usually just use a zip-top bag with the corner snipped off—it’s cheaper and works just as well.
- Slotted spoon – For lifting the eggs out of the boiling water. Tongs work too, but a slotted spoon is gentler on the shells.
- Serving platter – Any flat dish will do. I like using a dark-colored platter so the white eggs and black olives pop visually.
If you don’t have a piping bag, honestly, just use a spoon. The filling doesn’t have to be perfect—kids aren’t judging your presentation skills. I’ve made these with a butter knife before when all my spoons were dirty, and they still turned out great.
Preparation Method
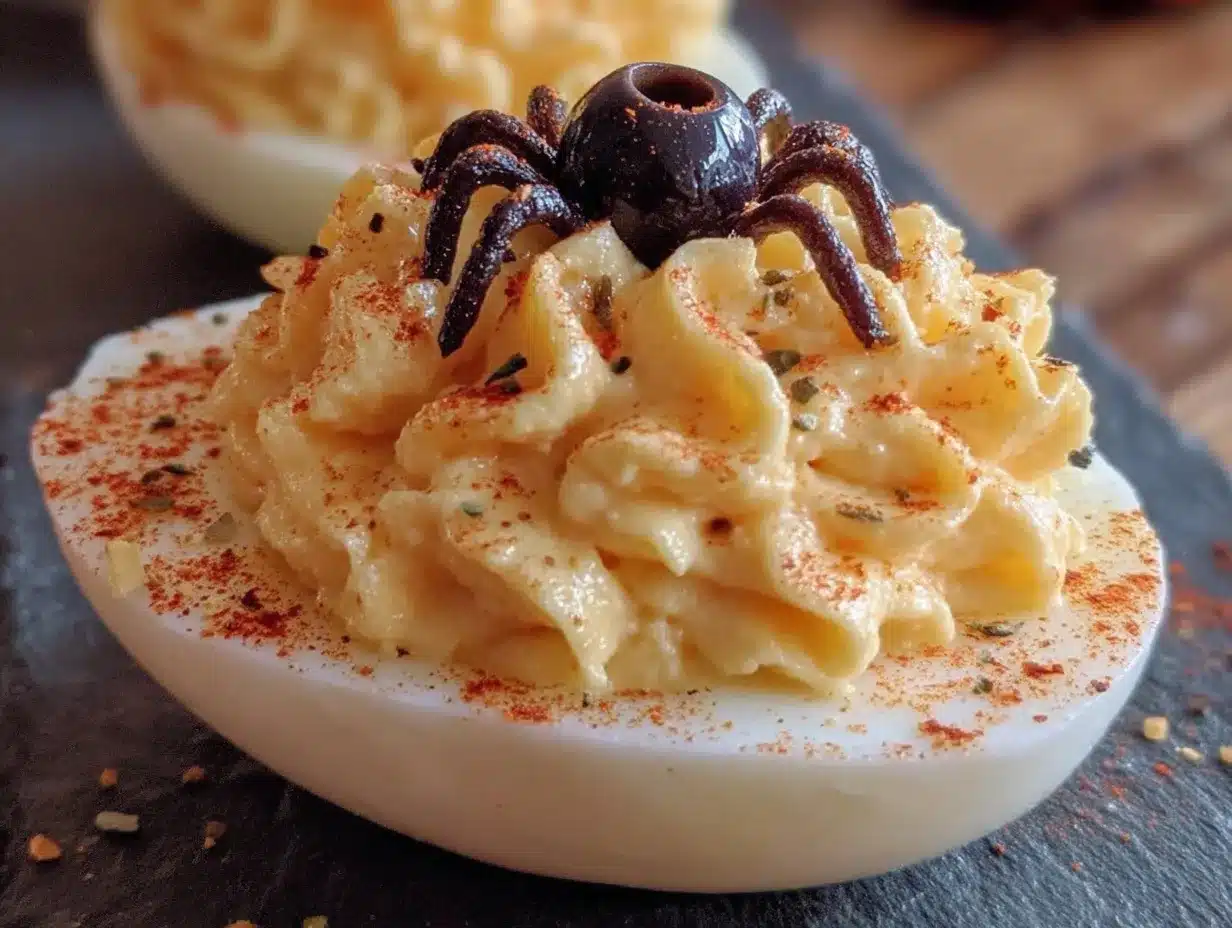
Let me walk you through this step by step. I’ve made these enough times to know exactly where things can go wrong, so I’ll point out the trouble spots as we go.
- Boil the eggs. Place your eggs in a single layer in the saucepan and cover them with cold water by about an inch. Bring the water to a rolling boil over high heat, then cover the pot, turn off the heat, and let it sit for exactly 12 minutes. This method gives you fully cooked yolks without that weird green ring around the outside.
- Ice bath. While the eggs are sitting, fill a large bowl with ice and cold water. As soon as the 12 minutes are up, use your slotted spoon to transfer the eggs to the ice bath. Let them chill for at least 10 minutes. This stops the cooking and makes peeling way easier—trust me on this one.
- Peel carefully. Tap each egg gently on the counter to crack the shell all over, then roll it between your palms to loosen things up. Start peeling from the wider end where the air pocket is. I usually peel them under running water to help remove any stubborn shell bits.
- Slice the eggs. Cut each peeled egg in half lengthwise. Wipe your knife clean between cuts to keep the yolks from smearing everywhere. Gently pop the yolks out into a small bowl. Arrange the egg white halves on your serving platter.
- Make the filling. Mash the yolks with a fork until they’re crumbly with no big chunks. Add the mayonnaise, mustard, vinegar, salt, and pepper. Stir until everything is smooth and creamy. Taste it and adjust the salt or mustard if needed. This is where you’d add hot sauce if you’re using it.
- Fill the eggs. Spoon the filling into a piping bag or a zip-top bag with a tiny corner snipped off. Pipe the filling into each egg white half, mounding it slightly in the center. If you’re using a spoon, just divide the filling evenly and smooth it out.
- Make the spiders. This is the fun part. Take your whole black olives and slice them in half lengthwise. One half becomes the spider body. For the legs, slice the other half into thin strips—you want about 6 to 8 thin slices per spider. Don’t stress about making them perfect; spiders have irregular legs in real life.
- Assemble the spiders. Place one olive half (cut side down) on top of the filling in the center of each egg. Then arrange 4 to 5 olive leg slices on each side of the body, pressing them gently into the filling so they stay put. The filling acts like glue, so don’t skip this step.
- Dust with paprika. Sprinkle a light layer of paprika over the whole platter. This adds color and a little smoky flavor. Go easy—you can always add more, but you can’t take it away.
- Chill before serving. Pop the platter in the fridge for at least 30 minutes before serving. This helps everything set and makes the spiders less likely to fall apart when people grab them.
A few things I’ve learned the hard way: Don’t overmix the filling, or it’ll get too thin and runny. If that happens, add another yolk from a hard-boiled egg if you have one. Also, make extra olive legs—some will break, and kids love having extras to snack on while they wait.
Cooking Tips & Techniques
After making these Halloween deviled eggs more times than I can count, I’ve picked up a few tricks that make the process smoother and the results better. Let me share what I’ve learned.
The perfect hard-boiled egg every time. The 12-minute sit method I mentioned is non-negotiable. I used to boil eggs for 15 minutes straight, and they always had that unappealing gray-green ring around the yolk. It’s not harmful, but it doesn’t look appetizing. The residual heat method gives you bright yellow yolks that look beautiful against the black olives.
Peeling without the pain. Fresh eggs are a nightmare to peel. If you can, buy your eggs a week ahead of time and let them sit in the fridge. The pH of the egg white changes as it ages, making the membrane less sticky. I’ve also found that starting the peel at the wider end—where the air pocket is—helps you get under the membrane more easily.
Keeping the legs attached. This was my biggest struggle early on. The olive legs would slide off or fall sideways, and my spiders looked more like sad blobs. The trick is to press them firmly into the filling, not just lay them on top. The mayonnaise acts as an adhesive, but you have to give it a little help. If your filling is too thick to hold them, add a tiny bit more mayo to loosen it up.
Making ahead without disaster. You can absolutely make these the night before. Just assemble everything except the paprika, cover the platter tightly with plastic wrap, and refrigerate. Add the paprika right before serving. The olives might darken slightly overnight, but nobody’s going to notice at a Halloween party.
Timing your multitasking. While the eggs are boiling and cooling, use that time to slice your olives and get your filling ingredients measured out. It saves you from rushing later. I’ve also started making the filling while the eggs are in the ice bath, which shaves about 10 minutes off the total prep time.
Variations & Adaptations
One of the best things about this recipe is how easy it is to tweak based on what you have or who you’re feeding. Here are some variations I’ve tried over the years.
Spicy version for adults. Add a teaspoon of sriracha or chipotle powder to the filling. The smoky heat pairs surprisingly well with the briny olives. I made this version for a Halloween party where most guests were adults, and they disappeared even faster than the regular ones.
Avocado twist. Replace half the mayonnaise with mashed ripe avocado. It makes the filling creamier and adds a pretty green tint that looks great against the black olives. Just be aware that avocado-based filling doesn’t keep as long—serve within a few hours of making.
Add some crunch. Mix a tablespoon of finely chopped celery or water chestnuts into the filling. It adds texture and a little freshness that cuts through the richness. My kids actually prefer this version now, even though I thought they’d hate the crunch.
Dairy-free option. Use vegan mayonnaise and skip the butter. Most vegan mayo brands work perfectly and nobody will notice the difference. I’ve served these to dairy-free guests without mentioning the swap, and they never knew.
Different olive colors. If you can find them, try using kalamata olives for the spider bodies. They’re a little firmer and have a more intense flavor. The purple-black color looks almost spooky against the yellow filling. I found these at a Mediterranean grocery store, and they made the spiders look even more realistic.
Mini spider version. Use quail eggs instead of chicken eggs for tiny, bite-sized spiders. They’re perfect for appetizer platters and look incredibly cute. The boiling time drops to about 4 minutes, and you’ll need smaller olives—try the small black olives sold in cans.
Serving & Storage Suggestions
These deviled eggs are best served chilled, straight from the fridge. The cold filling contrasts nicely with the room-temperature olive spiders, and everything holds together better when it’s cold. I like to arrange them on a dark platter or a tray lined with black lettuce leaves—it makes the spiders pop visually and adds to the Halloween vibe.
For presentation, I sometimes add a few fake spider webs around the edges of the platter. You can buy stretchy web material at any party store, or just use a little bit of pulled-apart cotton candy for a fun, edible touch. Just make sure whatever you use doesn’t touch the eggs directly if it’s not food-safe.
These pair beautifully with other Halloween snacks. I often serve them alongside a bowl of pumpkin soup, some roasted pumpkin seeds, and a plate of cheese cubes cut into bat shapes. For drinks, apple cider or a simple punch works well—nothing too heavy that would compete with the eggs.
Storage: Leftover deviled eggs keep in the refrigerator for up to 2 days. Store them in an airtight container with a layer of paper towels on the bottom to absorb any moisture. Don’t freeze them—the texture of the filling gets grainy and unpleasant.
Reheating: You don’t need to reheat these at all. If they’ve been sitting out for more than 2 hours, just return them to the fridge until you’re ready to serve again. The flavors actually deepen overnight, so day-old deviled eggs can taste even better than fresh ones.
One thing I’ve noticed: the olive legs might soften a little after a day in the fridge, but they’ll still hold their shape. If you’re making these for a party the next day, I recommend adding the legs fresh right before serving for the best look.
Nutritional Information & Benefits
Here’s a rough estimate of the nutritional breakdown per deviled egg (based on 24 halves from 12 eggs):
| Nutrient | Amount |
|---|---|
| Calories | 65 |
| Protein | 5g |
| Fat | 4.5g |
| Carbohydrates | 1g |
| Fiber | 0g |
| Sugar | 0.5g |
| Sodium | 120mg |
Eggs are a fantastic source of high-quality protein, which makes these a satisfying snack that won’t send kids on a sugar high. They also contain choline, which supports brain health—a nice bonus for school-aged kids. The olives add healthy monounsaturated fats and a little vitamin E.
For anyone watching their carb intake, these are practically carb-free. They’re also naturally gluten-free and nut-free, making them safe for most common allergies. Just double-check your mayonnaise label if you’re avoiding eggs—most mayo is made with eggs, so you’ll need a vegan alternative for egg allergies.
I personally love that these deviled eggs give me a way to offer something protein-rich at a party that’s usually dominated by candy and chips. It’s not about being a health nut—it’s about having options that keep everyone happy and full.
Conclusion
These Halloween deviled eggs with olive spiders have become such a staple in our house that my kids now request them for non-Halloween parties too. They’ve asked for “spider eggs” at birthday parties, Easter brunch, and even a Fourth of July barbecue. I’m not sure if they love the taste or the look more, but honestly, it doesn’t matter. The point is that a simple, affordable recipe can bring that much joy to a table.
I hope you give these a try, even if you’re not usually a deviled egg person. They’re forgiving, flexible, and almost impossible to mess up in a way that matters. If your olives fall off or your filling gets a little lumpy, nobody’s going to care—they’ll be too busy picking spiders off the platter and eating them.
If you make these, I’d love to hear how they turned out. Drop a comment below and let me know if your kids went for the spiders or if you came up with a fun variation I haven’t tried. And if you’re looking for another easy Halloween snack, check out my spooky Halloween pumpkin hummus—it uses a lot of the same ingredients and comes together just as fast.
Happy Halloween, and happy cooking. You’ve got this.
Frequently Asked Questions
Can I make these deviled eggs a day ahead?
Absolutely. Assemble the eggs completely, cover them tightly with plastic wrap, and refrigerate. Just hold off on the paprika until right before serving so it stays bright and doesn’t soak into the filling. The olive legs might soften slightly overnight, but they’ll still hold their shape.
How do I keep the olive legs from falling off?
Press the leg slices firmly into the filling rather than just resting them on top. The mayonnaise acts as a natural adhesive. If your filling is too thick to hold them, add a tiny bit more mayo to loosen it up. You can also make the legs slightly thicker—thin slices are more likely to break or slide off.
Can I use a different type of olive?
Yes, but stick with whole, pitted black olives for the best look. Kalamata olives work for a more gourmet version, but they’re firmer and have a stronger flavor. Green olives would look less spider-like but could still work if that’s what you have. Just avoid sliced olives—they won’t give you the right shape.
How long do these last at a party?
Deviled eggs should not sit out at room temperature for more than 2 hours. If you’re serving them at a party, keep the platter on ice or in the fridge until serving time. After 2 hours, any leftovers should be refrigerated immediately. They’ll keep in the fridge for up to 2 days.
Can I make these with fewer eggs?
Of course. The recipe scales down easily. Just use 6 eggs instead of 12, and adjust the filling ingredients proportionally. The cooking time stays the same regardless of how many eggs you boil, as long as they’re in a single layer in the pot.
Pin This Recipe!
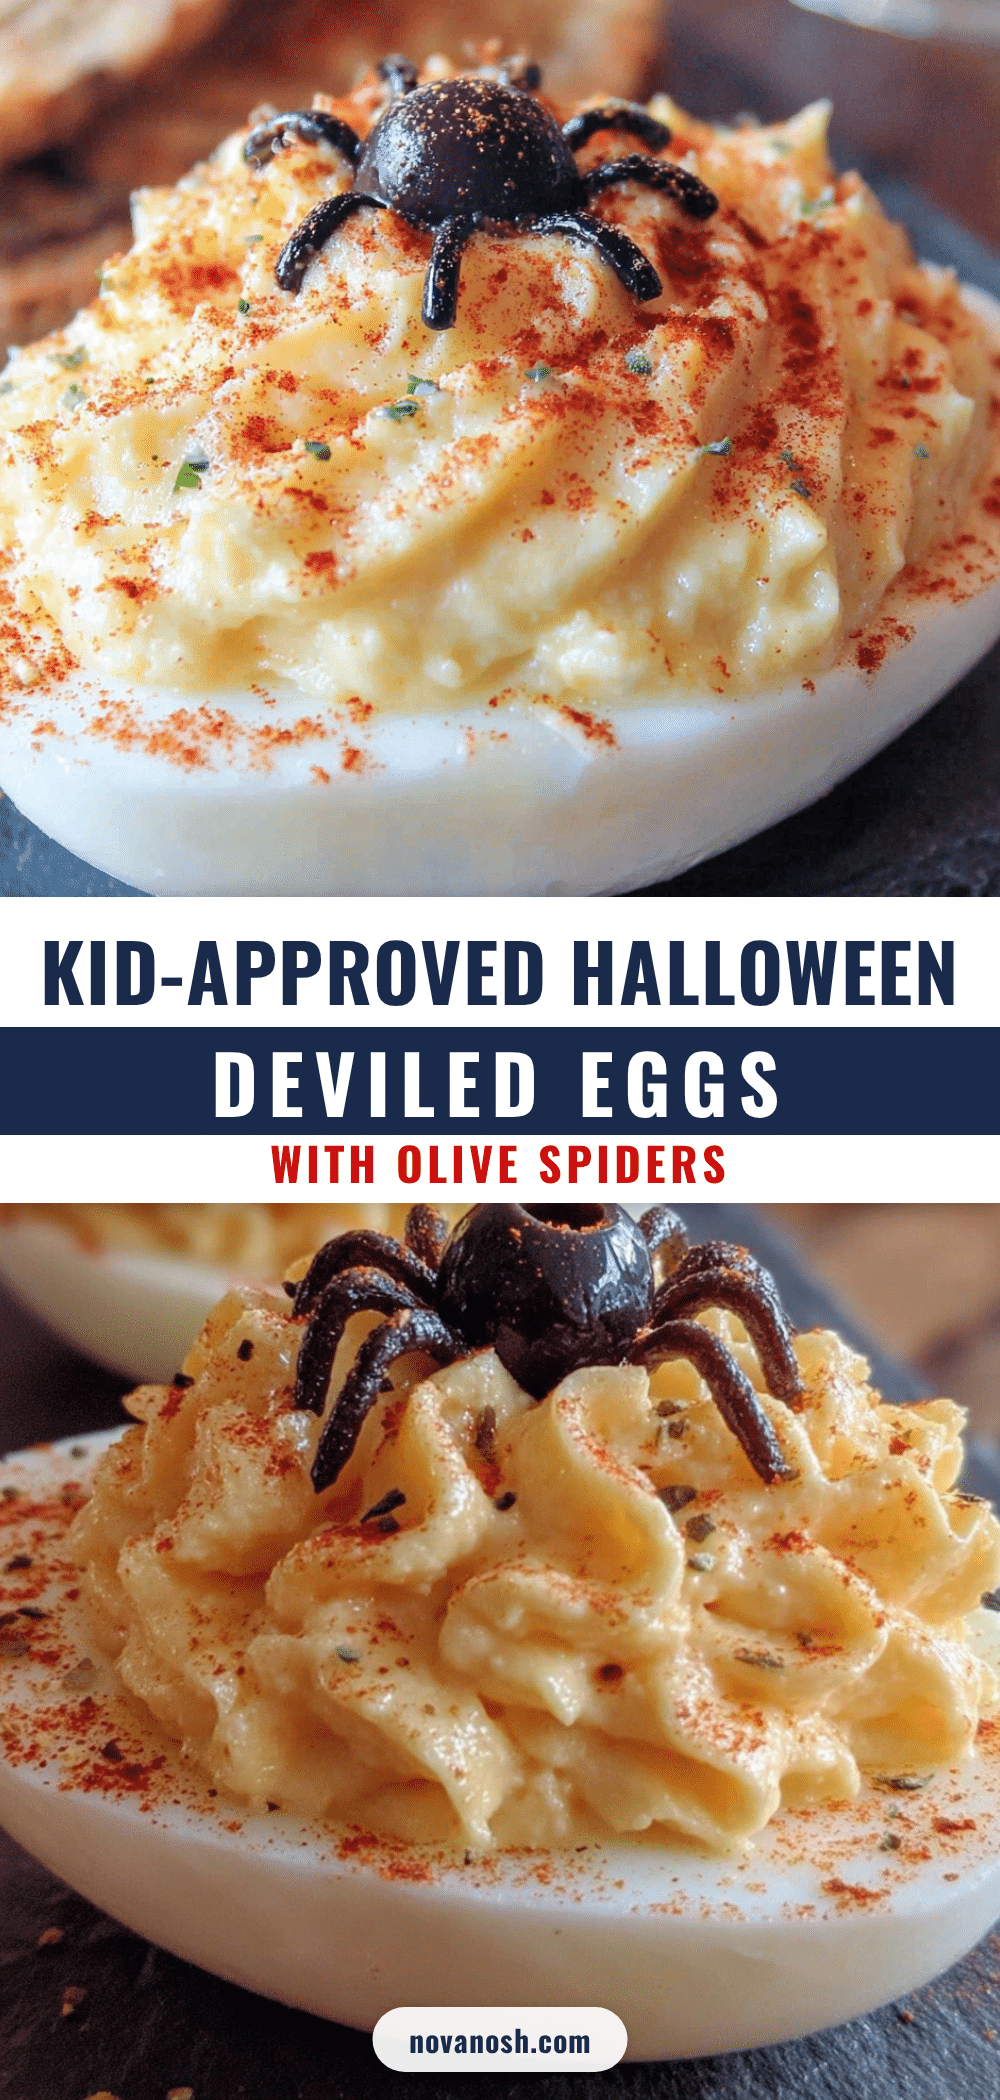
Kid-Approved Halloween Deviled Eggs with Olive Spiders
These spooky deviled eggs feature black olive spiders perched on a creamy yolk filling. They’re a fun, budget-friendly Halloween snack that kids love and adults can’t resist.
- Prep Time: 15 minutes
- Cook Time: 12 minutes
- Total Time: 27 minutes
- Yield: 24 deviled eggs (12 servings of 2 each) 1x
- Category: Appetizer
- Cuisine: American
Ingredients
- 12 large eggs
- 1 can (6 ounces) whole black olives
- 1/3 cup mayonnaise
- 1 teaspoon yellow mustard
- 1 teaspoon white vinegar
- 1/4 teaspoon salt
- 1/8 teaspoon black pepper
- Paprika for garnish
- 1/2 teaspoon sriracha or hot sauce (optional)
Instructions
- Place eggs in a single layer in a saucepan and cover with cold water by about an inch. Bring to a rolling boil over high heat, then cover, turn off heat, and let sit for exactly 12 minutes.
- While eggs sit, fill a large bowl with ice and cold water. Transfer eggs to ice bath and chill for at least 10 minutes.
- Peel eggs carefully under running water, starting from the wider end.
- Slice each peeled egg in half lengthwise. Remove yolks to a small bowl and arrange egg white halves on a serving platter.
- Mash yolks with a fork until crumbly. Add mayonnaise, mustard, vinegar, salt, and pepper. Stir until smooth and creamy. Add hot sauce if using.
- Spoon filling into a piping bag or zip-top bag with a corner snipped off. Pipe filling into each egg white half, mounding slightly.
- Slice whole black olives in half lengthwise. One half becomes the spider body. Slice the other half into thin strips (6-8 per spider) for legs.
- Place one olive half (cut side down) on the filling in the center of each egg. Arrange 4-5 olive leg slices on each side, pressing gently into the filling.
- Lightly dust the platter with paprika.
- Refrigerate for at least 30 minutes before serving.
Notes
For best peeling, use eggs that are about a week old. Press olive legs firmly into the filling to keep them attached. Make ahead without paprika; add paprika just before serving. Leftovers keep in the fridge for up to 2 days.
Nutrition
- Serving Size: 2 deviled eggs
- Calories: 130
- Sugar: 1
- Sodium: 240
- Fat: 9
- Saturated Fat: 2.5
- Carbohydrates: 2
- Protein: 10
Keywords: Halloween deviled eggs, spider deviled eggs, olive spiders, spooky appetizer, kid-friendly Halloween snack, gluten-free appetizer, low-carb snack


