Love this? Save it for later!
Share the inspiration with your friends
It was 11:47 PM on a random Wednesday in October, and I was possessed by the very specific need to bake something that looked like it had crawled out of a haunted house but tasted like a cloud. The problem? I had already used up all my good butter on a batch of cookies that morning, and the only thing left in the fridge was a half-empty carton of buttermilk and some cream cheese that was about to turn. I didn’t have a proper Halloween cupcake recipe memorized, but I had this crazy idea that if I whipped the batter enough, I could get a cupcake so light it might actually float off the cooling rack.
So there I was, standing in my kitchen in my pajamas, measuring flour by the dim light of the stove hood, whispering to myself, “This is either going to be brilliant or a total disaster.” I forgot to preheat the oven. I spilled vanilla extract on the counter. At one point, I was pretty sure I was just making a really fancy pancake batter. But something about the late hour loosened all my usual baking rules. I didn’t overthink it. I just… went with it.
The result was honestly a little ridiculous. These cupcakes came out of the oven looking so pale and pillowy, and when I bit into one—still warm, no frosting, just pure curiosity—it was like biting into a sweet, vanilla-scented dream. That first bite had this unexpected airiness that made me close my eyes. That’s when I knew I had to turn them into ghosts. It was too perfect. These Light & Fluffy Ghost Vanilla Cupcakes were born from a midnight whim and a shortage of butter, and now I can’t imagine Halloween without them. Maybe you’ve been there, too—staring into your pantry at 11 PM, convinced you can make something magical out of almost nothing. Trust me, you can.
Why You’ll Love This Recipe
Let me tell you, after testing this recipe about four times in one week (my neighbors were very happy, my jeans were not), I can say with absolute confidence that these are not your average Halloween cupcakes. They are something special. Here is why this recipe is going to become your go-to for spooky season and beyond.
- Unbelievably Light & Fluffy: The texture is the star here. Thanks to a clever technique of whipping the egg whites separately and folding them in, you get a crumb so tender it practically dissolves on your tongue. It’s not dense or heavy like some vanilla cupcakes can be. It’s airy, like a vanilla-scented cloud.
- Simple Ingredients, No Fuss: You don’t need a trip to a specialty baking store. Butter, sugar, flour, eggs, vanilla—these are all pantry staples. The secret ingredient that makes them so moist? A little bit of buttermilk, which you can easily make at home with milk and lemon juice if you don’t have any on hand.
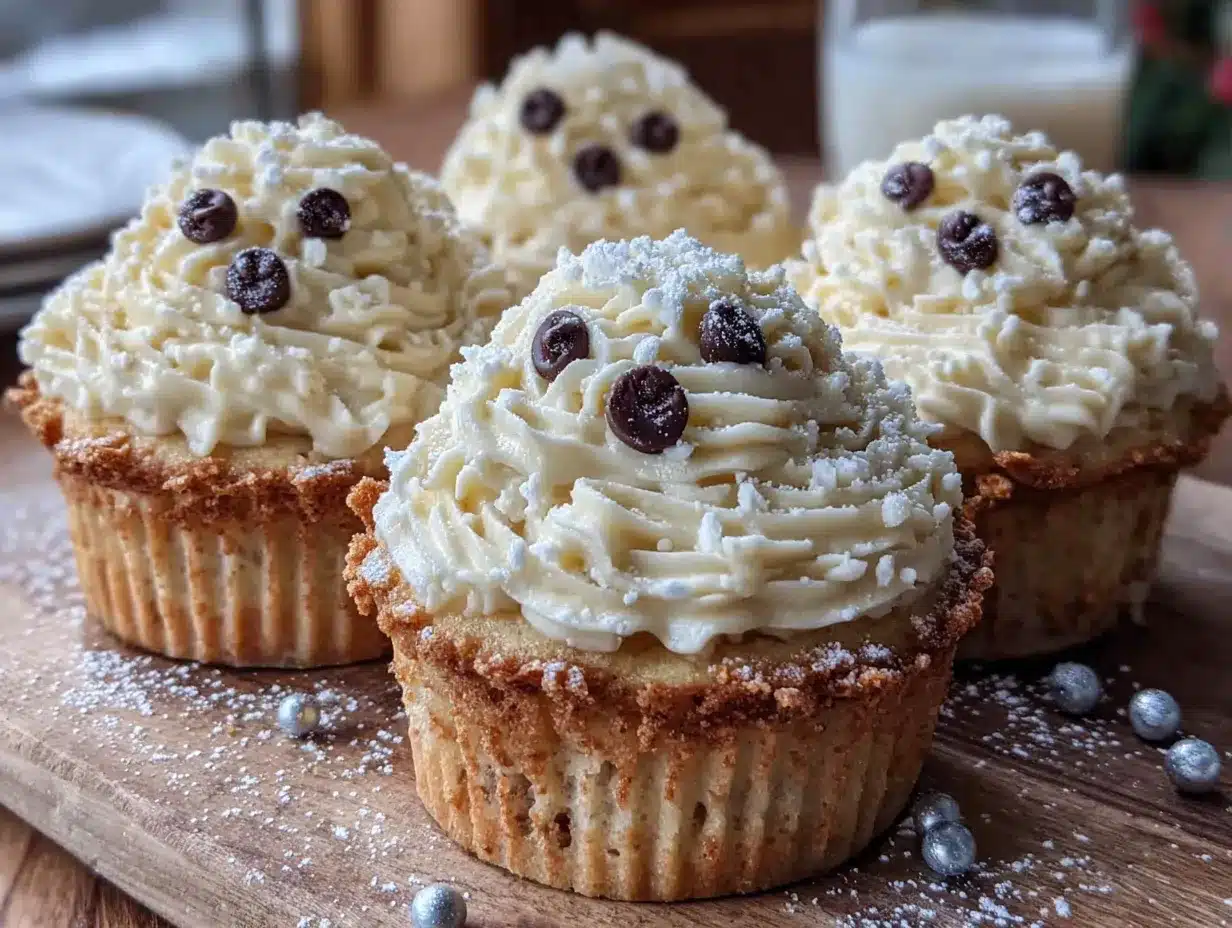
- Perfect for Halloween Fun: These are designed to be decorated as adorable (or spooky!) little ghosts. The pale, fluffy crumb is the perfect canvas for a simple white buttercream or cream cheese frosting. It’s a crowd-pleaser that kids and adults will both go crazy for at your Halloween party.
- Easier Than You Think: I know separating eggs can feel a little fussy, but I promise the extra step is worth it. I’ve included all my tips and tricks in the method below to make sure your egg whites whip up perfectly every time. No more weeping meringues!
- Next-Level Comfort Food: This isn’t just another vanilla cupcake. The flavor is perfectly balanced—not too sweet, with a deep, warm vanilla note that feels like a hug. It’s the kind of cupcake that makes you take a second bite just to be sure it was that good.
Honestly, what makes this recipe different from the rest is that it proves you can have a show-stopping, themed dessert without sacrificing quality. You don’t have to choose between a fun decoration and a genuinely delicious cake. These cupcakes are both. They are the kind that makes you close your eyes after the first bite, even if you’re wearing a silly ghost costume at the time.
What Ingredients You Will Need
This recipe uses simple, wholesome ingredients to deliver that signature light and fluffy texture and bold vanilla flavor. Most of these are likely already in your pantry, which makes these perfect for a last-minute Halloween craving.
For the Cupcakes
- 1 ½ cups (190g) all-purpose flour: Spoon and level your flour for best results. Scooping directly from the bag can pack in too much, making the cupcakes dense.
- 1 ½ teaspoons baking powder: This is our primary leavening agent. Make sure it’s fresh for the best rise.
- ¼ teaspoon baking soda: Helps with browning and tenderness, especially since we’re using buttermilk.
- ½ teaspoon salt: Balances the sweetness and enhances the vanilla flavor.
- ½ cup (113g) unsalted butter, softened: I prefer using unsalted so I can control the salt level. Let it sit out for about an hour to reach room temperature.
- ¾ cup (150g) granulated sugar: White sugar gives the cupcakes a clean sweetness and a tender crumb.
- 2 large eggs, separated: This is the magic trick. The yolks go into the batter for richness, and the whites are whipped separately for that incredible lift and fluffiness.
- 2 teaspoons pure vanilla extract: Don’t skimp here! Use real vanilla extract, not imitation, for the best flavor. I like Nielsen-Massey.
- ½ cup (120ml) buttermilk, room temperature: The acid in buttermilk reacts with the baking soda to create a tender crumb. If you don’t have buttermilk, add 1 ½ teaspoons of lemon juice or white vinegar to a ½ cup of regular milk and let it sit for 5 minutes.
For the Ghost Frosting & Decoration
- 1 cup (226g) unsalted butter, softened: The base of our creamy frosting.
- 3-4 cups (360-480g) powdered sugar: Adjust for desired consistency.
- 2-3 tablespoons heavy cream or milk: To thin the frosting to a pipe-able consistency.
- 1 teaspoon vanilla extract: For flavor.
- Pinch of salt: To cut the sweetness.
- Black gel food coloring: For the ghost faces. I prefer gel over liquid as it doesn’t thin the frosting.
Equipment Needed
You don’t need a professional bakery setup to make these ghost cupcakes, but having the right tools makes the process much smoother. Here is what you’ll need:
- 12-cup Standard Muffin Tin: For baking the cupcakes. A light-colored metal pan works best for even browning.
- Cupcake Liners: I like using white or pale grey liners for a ghostly look, but any color works.
- Two Mixing Bowls: One large for the batter and one medium, perfectly clean bowl for whipping the egg whites. Any trace of grease or yolk will prevent the whites from whipping.
- Electric Hand Mixer or Stand Mixer: You can whip the egg whites by hand, but an electric mixer makes it much easier and gives more consistent results. I use my trusty KitchenAid stand mixer for the frosting and a hand mixer for the whites.
- Rubber Spatula: Essential for gently folding in the whipped egg whites without deflating them.
- Piping Bags & Tips: A large round tip (like a Wilton 1A) is perfect for piping the ghost bodies. A small round tip (like a Wilton 2) or a tiny piping bag with a snipped corner works for the faces.
- Wire Cooling Rack: To cool the cupcakes completely before frosting.
Preparation Method
Alright, let’s get to the fun part. Follow these steps carefully, and you’ll have a batch of the fluffiest, most adorable ghost cupcakes you’ve ever seen.
- Preheat & Prepare (5 minutes): Preheat your oven to 350°F (175°C). Line your muffin tin with 12 cupcake liners. This seems simple, but I’ve forgotten to preheat before and let me tell you, waiting for the oven while your batter sits is nerve-wracking!
- Whisk Dry Ingredients (2 minutes): In a medium bowl, whisk together the all-purpose flour, baking powder, baking soda, and salt. Set this aside. Whisking aerates the flour and ensures the leaveners are evenly distributed.
- Cream Butter and Sugar (3-4 minutes): In a large bowl using a hand mixer or a stand mixer with the paddle attachment, beat the softened butter and granulated sugar together until light and fluffy. You want it to look pale in color and feel airy. Scrape down the sides of the bowl once or twice.
- Add Yolks and Vanilla (2 minutes): Add the two egg yolks (save the whites!) and the vanilla extract to the butter mixture. Beat until well combined. The mixture might look a little curdled at this point—don’t panic, that’s normal.
- Alternate Dry and Wet Ingredients (3 minutes): With the mixer on low speed, add about one-third of the flour mixture to the butter mixture, mixing until just combined. Add half of the buttermilk, mixing again. Repeat, ending with the final third of the flour mixture. Mix until just combined. Over-mixing at this stage will develop gluten and make your cupcakes tough.
- Whip the Egg Whites (5-7 minutes): This is the crucial step. In a completely clean, grease-free bowl, beat the two egg whites with a hand mixer or clean whisk attachment on medium-high speed. Beat until they form stiff peaks. This means when you lift the beater, the egg white stands up straight and doesn’t flop over. Don’t over-whip them or they’ll become dry and grainy. A small pinch of cream of tartar can help stabilize them, but it’s not essential.
- Fold in the Whites (3 minutes): Take a big spoonful of the whipped egg whites and stir it into the batter. This is called “sacrificing” some of the whites—it lightens the batter so it’s easier to fold in the rest without deflating them. Then, using a rubber spatula, gently fold in the remaining egg whites. Fold in a “J” motion: cut down through the center of the batter, scrape along the bottom of the bowl, and bring the spatula up and over the top. Turn the bowl a quarter turn and repeat. Do this until no white streaks remain. Be gentle! You want to keep as much air in the batter as possible.
- Fill and Bake (18-20 minutes): Divide the batter evenly among the 12 prepared cupcake liners. Fill each about ⅔ to ¾ full. Bake for 18-20 minutes, or until a toothpick inserted into the center of a cupcake comes out clean or with a few moist crumbs. The tops should be lightly golden and spring back when touched. Let them cool in the pan for 5 minutes, then transfer them to a wire rack to cool completely. Do not frost them while they are still warm—the frosting will melt into a sad puddle.
- Make the Frosting (10 minutes): While the cupcakes cool, make the frosting. In a large bowl, beat the softened butter until smooth and creamy. Gradually add the powdered sugar, one cup at a time, beating on low speed. Add the vanilla and a pinch of salt. Add the heavy cream or milk, one tablespoon at a time, until the frosting is smooth and pipe-able. You want it stiff enough to hold a shape, but soft enough to pipe smoothly.
- Assemble the Ghosts (15 minutes): Once the cupcakes are completely cool, fit a piping bag with a large round tip and fill it with the frosting. Pipe a tall, teardrop-shaped swirl of frosting onto each cupcake to form the ghost body. Start at the base, apply steady pressure, and pull straight up as you release pressure to create a little peak. For the faces, use a small piping bag with a tiny round tip (or a zip-top bag with a tiny corner snipped off) and the black gel food coloring to pipe two eyes and a small “O” mouth on each ghost. Get creative! Some can be spooky, some can be silly.
Cooking Tips & Techniques
I’ve made a lot of cupcakes in my time, and I’ve definitely had my share of failures. Here are the hard-earned lessons I’ve learned so you can skip the frustrating parts.
- The Egg White Secret: The single most important thing for fluffy cupcakes is properly whipped egg whites. Make sure your bowl and beaters are spotless. Any speck of grease from the yolks or butter will prevent the whites from whipping. If you’re nervous, wipe the bowl with a little lemon juice or vinegar on a paper towel first.
- Room Temperature is Real: This isn’t just a suggestion from fancy cookbooks. Room temperature butter (around 65°F / 18°C) creams much better with sugar, trapping air bubbles that make the cake light. Cold butter won’t cream properly, and melted butter won’t hold air. Same goes for the buttermilk and eggs. Take them out of the fridge about an hour before you start baking.
- Don’t Over-mix the Batter: Once you add the flour, stop mixing as soon as it’s combined. Over-mixing develops gluten, which will make your cupcakes tough and dense instead of light and tender. This is why we mix on low speed and only until the flour disappears.
- The “J” Fold: When folding in the egg whites, use a gentle, deliberate motion. Don’t stir or beat. Imagine you are cutting through the center of the batter, scooping up from the bottom, and laying the batter on top. It takes a minute or two, but it’s the only way to keep all that precious air in the batter.
- Consistency is Key: For the ghost effect, your frosting needs to be the right consistency. If it’s too stiff, it will be hard to pipe a smooth ghost body. If it’s too thin, it will slump into a puddle. The perfect consistency is like a thick, spreadable paste. Add your milk one tablespoon at a time to get it just right.
Variations & Adaptations
One of the best things about this recipe is how easily it adapts. Don’t be afraid to make it your own. Here are a few of my favorite twists.
- Gluten-Free Ghosts: Swap the all-purpose flour with a good quality 1:1 gluten-free baking flour blend that contains xanthan gum. I’ve had great results with Bob’s Red Mill 1-to-1 Baking Flour. The texture will be slightly more delicate, so be extra gentle when folding.
- Dairy-Free & Vegan Version: You can make these dairy-free by using a high-quality vegan butter stick (like Miyoko’s or Earth Balance) and substituting the buttermilk with unsweetened almond milk mixed with 1 ½ teaspoons of lemon juice. For the egg whites, you can use the liquid from a can of chickpeas (aquafaba). Whip 3 tablespoons of aquafaba with a pinch of cream of tartar until stiff peaks form. It works like magic!
- Chocolate Ghosts: For a spookier twist, replace ¼ cup (30g) of the flour with ¼ cup (25g) of unsweetened cocoa powder. You’ll have chocolate ghost cupcakes that are just as light and fluffy. They look amazing with the white frosting.
- Spooky Flavor Infusions: Add a teaspoon of pumpkin pie spice or a pinch of cinnamon to the dry ingredients for a fall-inspired flavor. You can also use a vanilla bean paste instead of extract for those beautiful vanilla bean specks in the batter.
- Different Decorating Styles: Not into piping ghosts? No problem! You can make a simple ghost by placing a large marshmallow on top of the frosted cupcake and draping a piece of white fondant over it. Or, just frost the cupcakes with a knife and use candy eyes to make simple little monsters.
Serving & Storage Suggestions
These cupcakes are best enjoyed at room temperature, where the crumb is most tender and the frosting is perfectly creamy. Here is how to serve and store them for maximum deliciousness.
Serving: Arrange the ghost cupcakes on a platter for your Halloween party. They look amazing on a dark slate board or a black cake stand. For a fun presentation, place them on a bed of shredded coconut to look like a graveyard scene. They are perfect alongside a warm mug of apple cider or a glass of cold milk.
Storage: Store any leftover cupcakes in an airtight container at room temperature for up to 2 days. If your kitchen is warm, you can store them in the refrigerator, but let them sit out for about 20 minutes before serving to bring back their soft texture. The frosting can get a little firm in the fridge.
Freezing: You can freeze the unfrosted cupcakes for up to 3 months. Wrap them individually in plastic wrap and place them in a freezer-safe bag. When you’re ready to serve, thaw them at room temperature, then make the frosting and decorate. The frosted cupcakes don’t freeze as well, as the frosting can separate when thawed.
Nutritional Information & Benefits
Let’s be real—these are a treat, and they are meant to be enjoyed as part of a balanced life. But that doesn’t mean they can’t have some redeeming qualities. Here is a rough estimate of the nutritional breakdown for one cupcake (with frosting).
| Nutrient | Amount per Cupcake |
|---|---|
| Calories | ~380 kcal |
| Fat | 22g |
| Saturated Fat | 14g |
| Carbohydrates | 44g |
| Sugar | 33g |
| Protein | 3g |
From a wellness perspective, using real butter and eggs provides some fat-soluble vitamins and protein. The buttermilk adds a bit of calcium and probiotics. By making them at home, you are in control of the ingredients—no artificial preservatives or stabilizers like you’d find in a store-bought mix. Plus, the joy of baking and sharing them with loved ones is a pretty good benefit for the soul!
Conclusion
So there you have it—my midnight creation turned into a Halloween classic. These Light & Fluffy Ghost Vanilla Cupcakes are proof that the best recipes often come from a little bit of chaos and a whole lot of curiosity. They are fun to make, even more fun to decorate, and an absolute joy to eat. Whether you’re hosting a spooky soiree or just want to surprise your family with a treat that looks like it floated in from a haunted bakery, these cupcakes are the perfect choice.
I would love to see your ghost creations! Don’t be shy—get weird with the faces, try a different color frosting, or add a sprinkle of edible glitter for a magical touch. The best part about baking is making a recipe your own. Please leave a comment below and let me know how they turned out, or tag me in your photos on social media. Until next time, happy baking, and may your ghosts be fluffy and your Halloween be sweet!
Frequently Asked Questions
Can I make these cupcakes ahead of time?
Absolutely! You can bake the cupcakes up to 2 days in advance. Store them in an airtight container at room temperature. Make the frosting and decorate them on the day you plan to serve them for the best presentation.
Why did my egg whites not get stiff?
This is almost always due to a little bit of fat or grease getting into the whites. Make sure your bowl and beaters are perfectly clean. Also, be careful when separating the eggs—even a tiny bit of yolk can ruin the whites. If you’re worried, separate each egg into a small bowl first before adding the white to your main bowl.
Can I use a different type of frosting?
Of course! A simple cream cheese frosting works beautifully with these vanilla cupcakes. For a lighter option, you can use a stabilized whipped cream. Just make sure whichever frosting you choose is stiff enough to hold the ghost shape.
How do I get the ghost shape perfect?
Practice makes perfect, but a good tip is to pipe the frosting starting from the bottom edge of the cupcake. Apply steady, even pressure as you go around the base, then pull the piping bag straight up towards the center while slowly releasing the pressure. Finish with a quick flick of the wrist to create a little peak on top.
My cupcakes came out dense. What went wrong?
Dense cupcakes are usually a sign of over-mixing the batter after adding the flour, or not whipping the egg whites enough. It could also mean your baking powder is old and not giving enough lift. Make sure your leavening agents are fresh and handle the batter with a light touch.
Pin This Recipe!
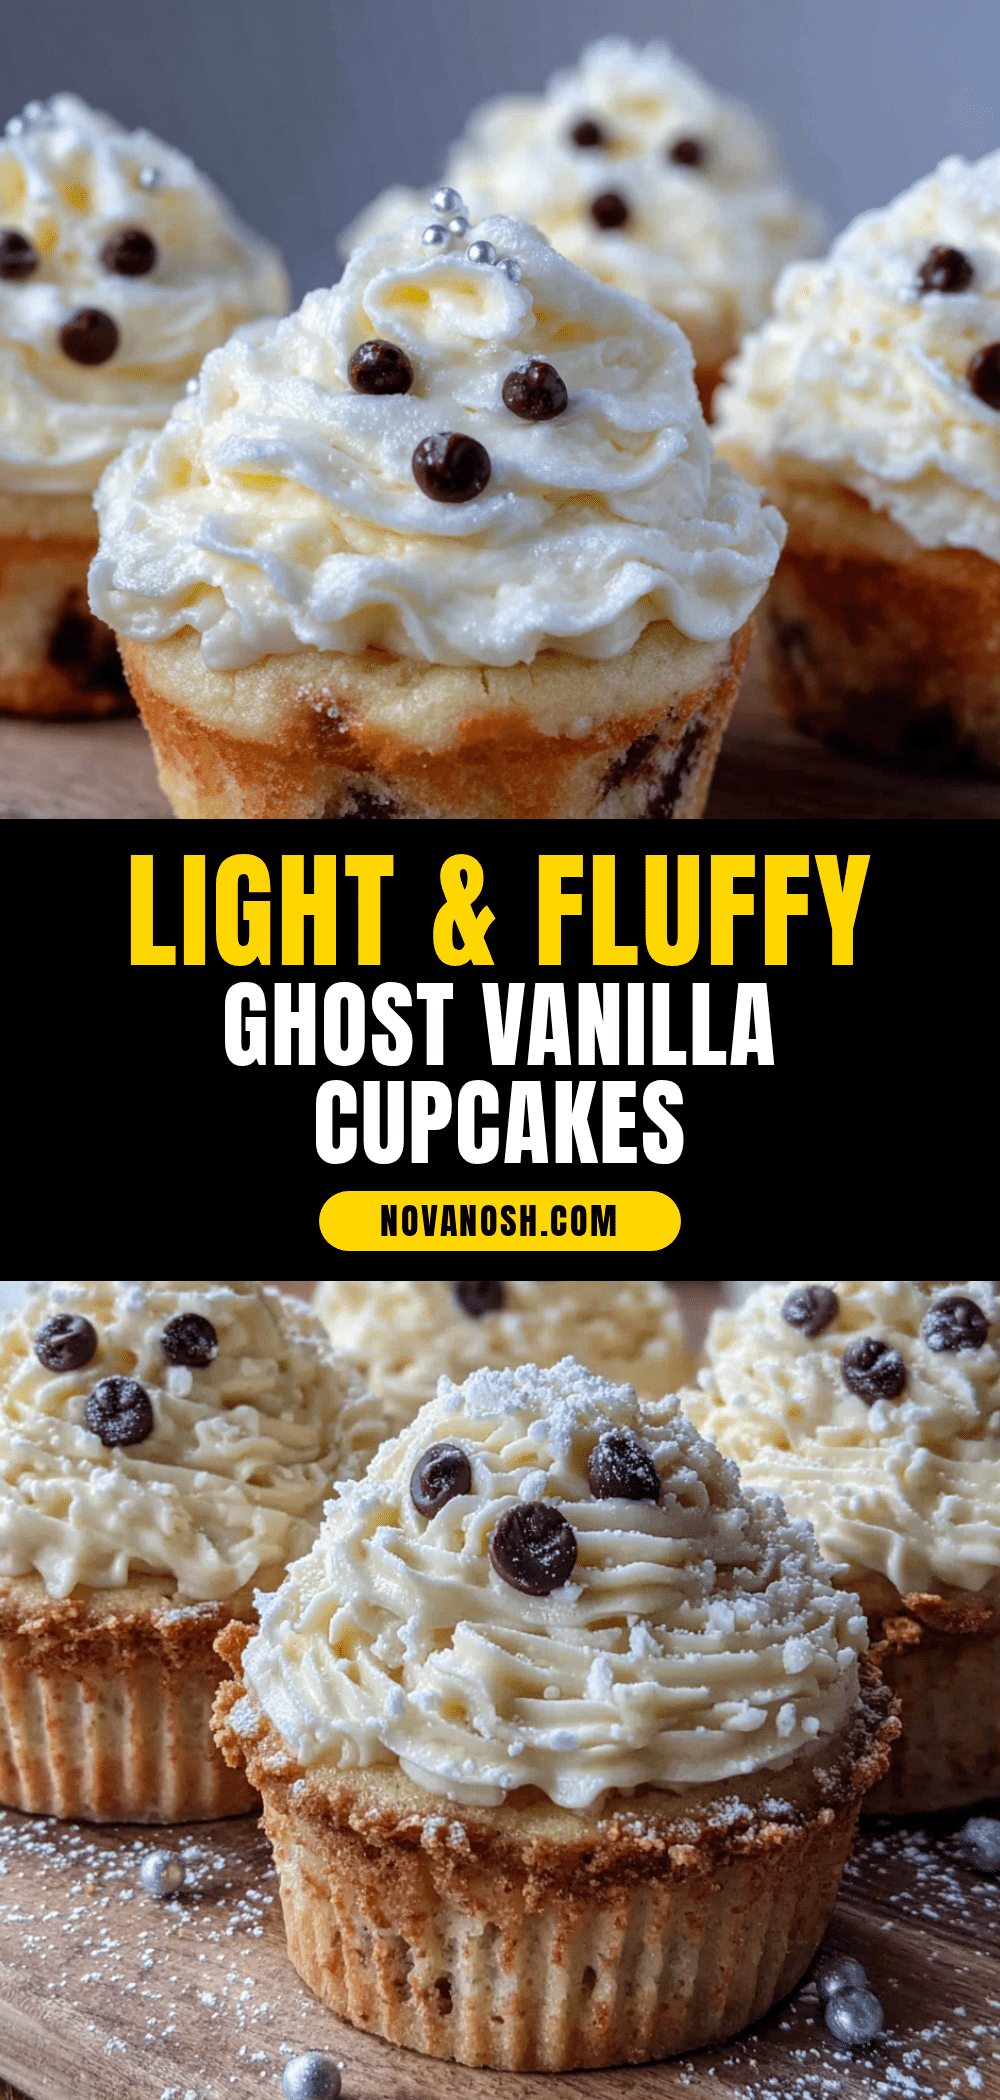
Light & Fluffy Ghost Vanilla Cupcakes: Easy Halloween Treat
These Light & Fluffy Ghost Vanilla Cupcakes are a Halloween dream—unbelievably airy vanilla cupcakes topped with creamy white frosting and decorated as adorable ghosts. Perfect for spooky parties, they’re easy to make with simple ingredients and guaranteed to delight kids and adults alike.
- Prep Time: 20 minutes
- Cook Time: 20 minutes
- Total Time: 40 minutes
- Yield: 12 cupcakes 1x
- Category: Dessert
- Cuisine: American
Ingredients
- 1 ½ cups (190g) all-purpose flour
- 1 ½ teaspoons baking powder
- ¼ teaspoon baking soda
- ½ teaspoon salt
- ½ cup (113g) unsalted butter, softened
- ¾ cup (150g) granulated sugar
- 2 large eggs, separated
- 2 teaspoons pure vanilla extract
- ½ cup (120ml) buttermilk, room temperature
- 1 cup (226g) unsalted butter, softened (for frosting)
- 3–4 cups (360-480g) powdered sugar
- 2–3 tablespoons heavy cream or milk
- 1 teaspoon vanilla extract (for frosting)
- Pinch of salt (for frosting)
- Black gel food coloring
Instructions
- Preheat oven to 350°F (175°C). Line a 12-cup muffin tin with cupcake liners.
- In a medium bowl, whisk together flour, baking powder, baking soda, and salt. Set aside.
- In a large bowl, beat softened butter and granulated sugar with an electric mixer until light and fluffy (3-4 minutes).
- Add egg yolks and vanilla extract; beat until well combined.
- With mixer on low, add one-third of the flour mixture, mixing until just combined. Add half the buttermilk, mix. Repeat, ending with the final third of flour. Mix until just combined; do not overmix.
- In a clean, grease-free bowl, beat the 2 egg whites on medium-high speed until stiff peaks form (5-7 minutes).
- Fold one spoonful of whipped egg whites into the batter to lighten it. Gently fold in the remaining whites using a J-shaped motion until no white streaks remain.
- Divide batter evenly among the 12 liners, filling each ⅔ to ¾ full. Bake for 18-20 minutes, until a toothpick inserted in the center comes out clean. Cool in pan 5 minutes, then transfer to a wire rack to cool completely.
- For frosting: Beat 1 cup softened butter until smooth. Gradually add powdered sugar, one cup at a time, beating on low. Add vanilla, salt, and heavy cream/milk one tablespoon at a time until smooth and pipeable.
- Once cupcakes are cool, fit a piping bag with a large round tip and fill with frosting. Pipe a tall teardrop-shaped swirl onto each cupcake to form the ghost body. Use a small piping bag with black gel food coloring to pipe two eyes and an ‘O’ mouth on each ghost.
Notes
For best results, ensure all ingredients (butter, buttermilk, eggs) are at room temperature. The egg whites must be whipped in a completely clean, grease-free bowl to achieve stiff peaks. Do not overmix the batter after adding flour to avoid dense cupcakes. Frosting should be stiff enough to hold a ghost shape but soft enough to pipe smoothly.
Nutrition
- Serving Size: 1 cupcake
- Calories: 380
- Sugar: 33
- Sodium: 180
- Fat: 22
- Saturated Fat: 14
- Carbohydrates: 44
- Protein: 3
Keywords: Halloween cupcakes, ghost cupcakes, vanilla cupcakes, fluffy cupcakes, easy Halloween treat, spooky cupcakes, homemade cupcakes


