Love this? Save it for later!
Share the inspiration with your friends
There used to be a little bakery on the corner of Oak and Elm in my old neighborhood—the one with the crooked awning and the chalkboard sign that always had a pun on it. Every October, they’d put out a tray of Halloween Rice Krispie Treats that were less a dessert and more a monument. They had these enormous, glossy candy eyes staring up at you from a sea of orange and black sprinkles. When the bakery closed three years ago—the owner retired to Florida, lucky her—I actually felt a pang of grief. I mean, I had built an entire October ritual around grabbing one of those treats after my morning coffee.
After twelve tries—and I’m not kidding, my kitchen looked like a sticky, marshmallowy crime scene—I finally got it. These Easy Halloween Rice Krispie Treats with Candy Eyes are the exact replica of that bakery’s masterpiece. The trick, honestly, is in the butter-to-marshmallow ratio and not overcooking the mixture. I cracked a bowl on attempt number eight, and let me tell you, cleaning melted marshmallow off the floor is a workout you don’t need. But I kept going because that first bite of the real thing was pure October magic. Maybe you’ve been there—obsessed with a food memory you just couldn’t let go of. This is the recipe that brought it back.
Why You’ll Love This Recipe
Let’s be real—most Halloween treats are either a sugar bomb that tastes artificial or they’re so complicated you need a pastry degree. These Easy Halloween Rice Krispie Treats with Candy Eyes are neither. They’re the perfect sweet spot between fun and genuinely delicious. I’ve tested this with my neighbor’s kids, my picky cousin, and even a group of adults at a Halloween party who pretended they were “just having one” and then ate three. Trust me, this recipe delivers.
- Quick & Easy: You’re looking at about 15 minutes of active time. Seriously. From start to finish, these are on your table faster than you can say “trick or treat.” Perfect for last-minute Halloween parties or a fun afternoon project with the kids.
- Simple Ingredients: You probably already have everything in your pantry right now. Butter, marshmallows, Rice Krispies cereal, and a few candy eyes. No weird specialty items or trips to three different stores.
- Perfect for Halloween: These are the undisputed stars of any Halloween gathering. They’re portable, they’re fun, and they disappear faster than anything else on the dessert table. I’ve brought them to school parties, office potlucks, and neighborhood get-togethers.
- Crowd-Pleaser: Kids go absolutely bonkers for the candy eyes. Adults secretly love them too. It’s that nostalgic Rice Krispie treat texture you remember, but with a festive, spooky upgrade that makes everyone smile.
- Unbelievably Delicious: The texture is everything—crispy, chewy, and perfectly buttery. The candy eyes add a fun crunch, and the chocolate or frosting you use to stick them on gives a little extra sweetness. It’s next-level comfort food without the fuss.
What makes this recipe different from the dozens of other Halloween treat recipes out there? It’s the technique. Most recipes tell you to just melt everything together and press it into a pan. My version has a specific method for toasting the cereal slightly before mixing, which gives it a deeper, nuttier flavor. Plus, I’ve perfected the marshmallow-to-butter ratio so your treats are never rock-hard or greasy. This isn’t just another version—it’s the best version.
What Ingredients You Will Need
This recipe uses simple, pantry-friendly ingredients that come together to create something truly special. The magic is in how they interact, not in a long, complicated shopping list. You’ll be surprised how a few basic things can turn into a Halloween showstopper.
- 3 tablespoons unsalted butter (I prefer Land O’Lakes for its consistent quality. Cut it into small cubes so it melts evenly. Salted butter works in a pinch, just reduce any added salt.)
- 1 package (10 ounces) marshmallows (Jet-Puffed is my go-to brand. Mini marshmallows melt faster and more evenly than the big ones, but either works. For a slightly less sweet treat, you can use a 7-ounce bag and it still works beautifully.)
- 6 cups Rice Krispies cereal (Don’t substitute with a generic crisp rice cereal here—the texture and size of the Krispies matter. Generic brands can sometimes be too dense or not crispy enough. I’ve made that mistake, and the treats came out sad and chewy.)
- 1/4 teaspoon vanilla extract (Pure vanilla extract is worth the splurge. It adds a warmth that cuts through the sweetness. Imitation vanilla works, but the flavor is noticeably less complex.)
- Pinch of salt (A tiny pinch of flaky sea salt like Maldon is my secret weapon. It balances the sugar and makes the butter flavor pop. Don’t skip this—it’s not about making them salty, it’s about making them taste more like themselves.)
- 50-60 candy eyes (These are the star of the show! You can find them at craft stores, party supply shops, or online. Look for the ones with a flat back—they stick better. I like the Wilton brand for their size and clarity.)
- 1/4 cup chocolate chips or candy melts (For “glue” to attach the eyes. Semi-sweet chocolate chips work great, or use orange candy melts for a more festive look. White chocolate is also a good neutral option.)
- Optional: Orange and black sprinkles, edible glitter, or orange food coloring (For extra decoration. A few drops of orange gel food coloring mixed into the marshmallow mixture gives the treats a subtle Halloween hue. Totally optional, but fun.)
Equipment Needed
You don’t need a professional kitchen for this, but having the right tools makes the process smoother. Here’s what you’ll need:
- Large pot or Dutch oven: A heavy-bottomed pot is key for even heat distribution. I use my 5-quart Le Creuset for everything, but any large, sturdy pot works. Avoid thin nonstick pans—they can create hot spots that scorch the marshmallows.
- Wooden spoon or silicone spatula: A wooden spoon is my preference because it’s sturdy and doesn’t scratch the pot. A silicone spatula is great for scraping every last bit of marshmallow mixture out.
- 9×13-inch baking dish: This is the standard size for a full batch. If you want thicker treats, use an 8×8-inch dish. If you want thinner, more “bakery-style” treats, use a 10×15-inch jelly roll pan.
- Parchment paper: Non-negotiable. Line your baking dish with parchment paper, leaving some overhang on the sides. This makes lifting the whole block of treats out a breeze. You’ll thank me later.
- Small microwave-safe bowl: For melting the chocolate or candy melts to attach the eyes. A glass measuring cup works perfectly too.
- Sharp knife or pizza cutter: A pizza cutter makes clean cuts through the treats without crushing them. A sharp chef’s knife works too, just wipe it clean between cuts.
- Cooling rack: Letting the treats cool completely on a rack before cutting prevents them from getting soggy on the bottom.
If you don’t have a 9×13-inch dish, you can use a large rimmed baking sheet. Just shape the mixture into a rectangle with your hands (lightly butter them first!). I’ve done this in a pinch, and it works perfectly.
Preparation Method
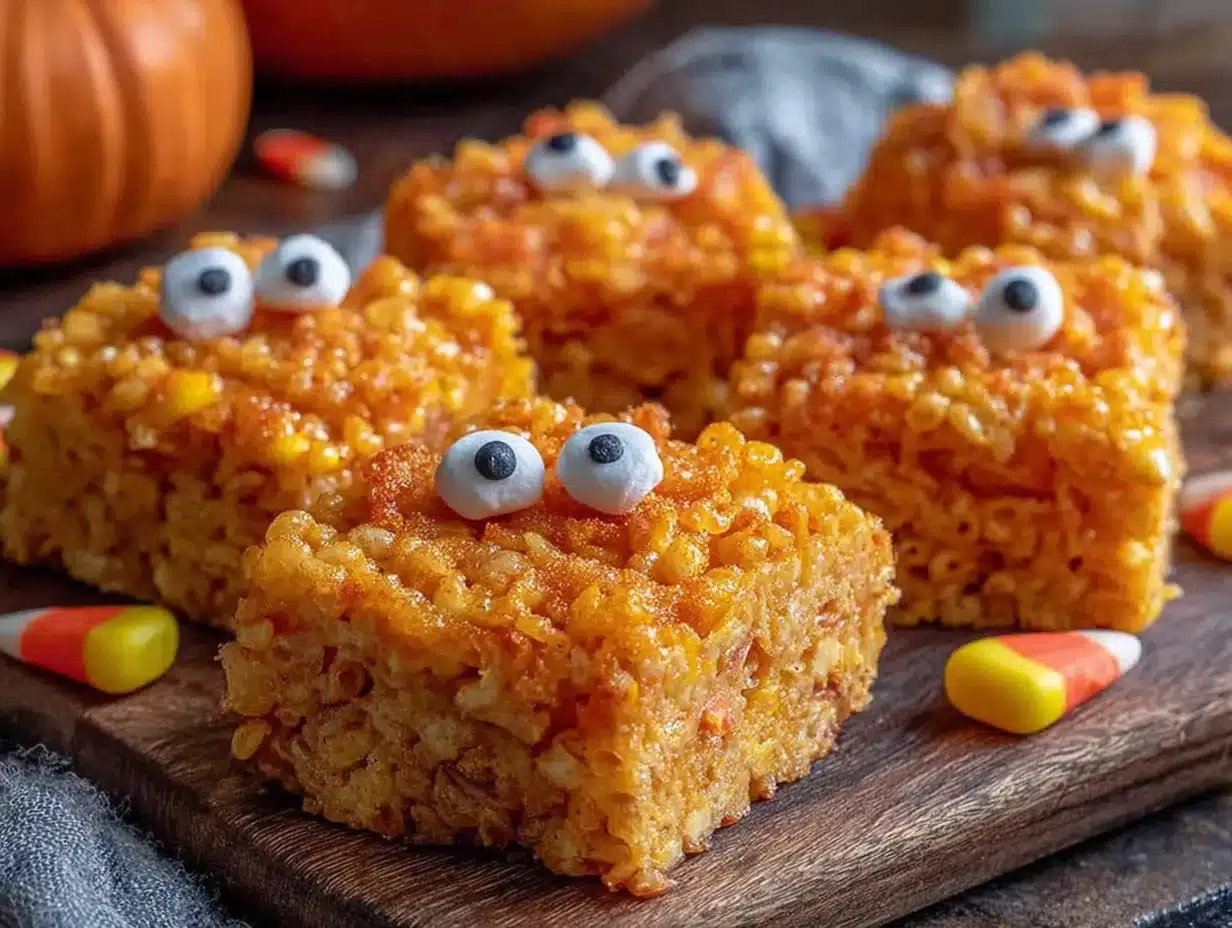
Alright, let’s make these Easy Halloween Rice Krispie Treats with Candy Eyes. Follow these steps, and you’ll have a tray of spooky, delicious treats that would make that old bakery proud.
- Prep your pan. Line a 9×13-inch baking dish with parchment paper, leaving a 2-inch overhang on two opposite sides. Lightly spray the parchment with nonstick cooking spray. This is your insurance policy against stuck treats.
- Toast the cereal (optional, but recommended). Spread the 6 cups of Rice Krispies cereal on a large baking sheet. Bake at 350°F (175°C) for 3-4 minutes, stirring once. You want them just barely golden and fragrant—not brown. This step adds a toasty, nutty depth that elevates the whole treat. I stumbled on this trick after burning a batch of marshmallows and having to start over.
- Melt the butter. In your large pot, melt the 3 tablespoons of unsalted butter over medium-low heat. Swirl the pot occasionally. You want it fully melted but not bubbling or browning. If it starts to foam, turn the heat down.
- Add the marshmallows. Dump in the entire 10-ounce bag of marshmallows. Stir constantly with your wooden spoon or silicone spatula. The key here is low and slow. You want the marshmallows to melt into a smooth, glossy puddle. This takes about 5-7 minutes. Don’t rush it—high heat will make the mixture grainy.
- Season the mixture. Once the marshmallows are completely melted and smooth, remove the pot from the heat. Stir in the 1/4 teaspoon of vanilla extract and the pinch of salt. Stir until fully incorporated. You’ll smell the vanilla bloom—that’s your cue.
- Add the cereal. Pour the toasted Rice Krispies into the pot. Using a folding motion, gently incorporate the cereal into the marshmallow mixture. Don’t stir vigorously—you’ll crush the cereal and end up with dense, tough treats. Fold until every piece of cereal is coated. It will look like a sticky, glorious mess.
- Press into the pan. Scrape the mixture into your prepared baking dish. Now, here’s the trick: lightly wet your hands with cold water (or spray them with nonstick spray). Then press the mixture evenly into the pan. The water prevents sticking. Don’t press too hard—you want them compact but not compressed into a brick. Aim for an even layer.
- Cool completely. Let the treats cool in the pan on a cooling rack for at least 30 minutes. They need to be fully set before you cut them. If you try to cut them warm, they’ll squish and stick to your knife. Patience, my friend.
- Cut into squares. Once cool, lift the entire block of treats out of the pan using the parchment overhang. Place it on a cutting board. Use a sharp knife or pizza cutter to cut into 12-16 squares. Wipe the blade clean between cuts for neat edges.
- Attach the candy eyes. This is the fun part. Melt 1/4 cup of chocolate chips or candy melts in a small microwave-safe bowl in 20-second intervals, stirring in between, until smooth. Dip the flat back of a candy eye into the melted chocolate, then press it gently onto a treat. Repeat for all the treats. You can do one big eye per square, or two for a googly-eyed monster look. Get creative!
- Add extra decorations (optional). While the chocolate is still wet, you can sprinkle on orange and black sprinkles or a little edible glitter. Let the chocolate set completely before stacking or serving—about 15 minutes.
Cooking Tips & Techniques
I’ve made more batches of these than I care to count, and I’ve learned a few things the hard way. Here are my best tips for perfect Easy Halloween Rice Krispie Treats with Candy Eyes every single time.
Don’t over-melt the marshmallows. This is the number one mistake. You want them just melted and smooth. If you cook them too long, the sugar starts to caramelize, and your treats will be hard and brittle instead of soft and chewy. The moment they’re smooth, pull them off the heat. I learned this on attempt number three when my treats came out like edible hockey pucks.
Use fresh marshmallows. Stale marshmallows don’t melt as smoothly. They get grainy and won’t coat the cereal evenly. If your bag has been open for a while, just buy a new one. It’s worth it.
Butter your spatula. When you’re pressing the mixture into the pan, your hands or spatula will get sticky. A light coat of butter or nonstick spray on your tools makes the job infinitely easier. I keep a stick of butter next to the stove just for this purpose.
Work quickly. The marshmallow mixture starts to set as it cools. Once you add the cereal, you need to work fast to get it into the pan and pressed down. Have everything ready before you start melting.
Let them cool completely before adding eyes. If the treats are still warm, the heat will melt the chocolate you use to attach the eyes, and they’ll slide right off. Patience is a virtue, especially with Halloween treats.
For cleaner cuts, use a pizza cutter. A sharp pizza cutter glides through the treats without squishing them. If you use a knife, wipe it clean with a damp paper towel between each cut. This prevents the sticky marshmallow from dragging and tearing the edges.
Variations & Adaptations
One of the best things about this recipe is how easy it is to adapt. Here are a few ways to make these Easy Halloween Rice Krispie Treats with Candy Eyes your own.
- Chocolate Lover’s Version: Melt 1/2 cup of chocolate chips with the butter and marshmallows. This gives the whole treat a rich, chocolatey base. Use white candy eyes for a spooky contrast. I tried this for a friend who claims to “not like plain marshmallow treats,” and she ate four.
- Peanut Butter Monster: Stir in 1/4 cup of creamy peanut butter with the vanilla extract. It adds a savory, nutty note that pairs beautifully with the sweet marshmallow. Use chocolate candy eyes for a double-chocolate hit. This one’s a crowd-favorite at my house.
- Spooky Spider Web: After pressing the treats into the pan, drizzle melted white chocolate over the top in a zigzag pattern. Then use a toothpick to drag the chocolate into a web pattern. Place a single candy eye in the center of each square. It looks incredibly impressive for minimal effort.
- Gluten-Free Friendly: This recipe is naturally gluten-free if you use certified gluten-free Rice Krispies (the original recipe contains malt flavoring, which has gluten). Or substitute with a gluten-free crisp rice cereal. The texture is identical.
- Vegan Option: Use vegan butter (like Earth Balance) and vegan marshmallows (Dandies brand is excellent). The rest of the ingredients are naturally plant-based. The flavor is slightly different, but still delicious. My vegan sister-in-law gave these her official seal of approval.
Serving & Storage Suggestions
These Easy Halloween Rice Krispie Treats with Candy Eyes are best served at room temperature. The texture is perfectly chewy and the candy eyes stay firmly attached. If you’ve just decorated them, let the chocolate set for about 15 minutes before serving.
For a Halloween party, arrange them on a platter lined with orange or black napkins. They look amazing next to a bowl of candy corn or alongside a plate of pumpkin-shaped cookies. I like to serve them with a glass of cold milk or a warm apple cider—the contrast is perfect.
Storing: Store leftover treats in an airtight container at room temperature for up to 5 days. Layer them between sheets of parchment paper to prevent sticking. Do not refrigerate—the cold will make them hard and dry. If your kitchen is very humid, they might get a little sticky, but they’ll still taste great.
Freezing: You can freeze these treats for up to 3 months. Wrap each square individually in plastic wrap, then place them in a freezer-safe bag or container. To thaw, just leave them at room temperature for about 30 minutes. The candy eyes might lose a bit of their shine, but the flavor is perfectly preserved. I always make a double batch and freeze half for last-minute Halloween emergencies.
Honestly, these treats taste even better the next day. The flavors meld together, and the texture becomes perfectly chewy. So if you can resist eating them all immediately, they’re worth the wait.
Nutritional Information & Benefits
Let’s be honest—these are a treat, not a health food. But knowing what’s in them helps you enjoy them mindfully. Here’s the estimated nutritional breakdown per serving (based on 16 servings):
| Nutrient | Amount per Serving |
|---|---|
| Calories | 180 |
| Total Fat | 5g |
| Saturated Fat | 3g |
| Carbohydrates | 34g |
| Sugar | 18g |
| Protein | 1g |
| Sodium | 135mg |
While these aren’t packed with nutrients, there are a few silver linings. Rice Krispies are fortified with iron and B vitamins, so you’re getting a tiny boost there. The butter provides a small amount of vitamin A. And honestly, the biggest benefit is the joy factor—sharing these with family and friends is good for the soul. Everything in moderation, right?
If you’re watching your sugar intake, you can use a sugar-free marshmallow alternative, but the texture will be slightly different. For a lower-fat version, you can reduce the butter to 2 tablespoons, but the treats will be a bit less tender.
Conclusion
These Easy Halloween Rice Krispie Treats with Candy Eyes are everything I loved about that little bakery’s version—crispy, chewy, buttery, and just the right amount of spooky fun. They’re the kind of treat that makes you feel like a kid again, even if you’re just making them for yourself on a quiet October evening. I mean, who doesn’t need a little whimsy in their life?
I hope you give these a try and make them your own. Maybe you’ll add extra eyes for a truly monstrous look, or maybe you’ll keep it simple with just one big googly eye per square. Either way, I’d love to hear how they turn out. Drop a comment below and let me know your favorite Halloween candy to add—I’m always looking for new ideas. And if you share a photo on Pinterest or Instagram, tag me so I can see your spooky creations!
Happy Halloween, and happy snacking. You’ve got this.
Frequently Asked Questions
Can I use a different cereal instead of Rice Krispies?
Absolutely! You can use Cocoa Krispies for a chocolate version, or even Fruity Pebbles for a colorful twist. Just keep in mind that different cereals have different textures and sweetness levels, so the final treat might be slightly different. I’ve tried it with Cocoa Krispies, and it’s delicious.
How do I keep the candy eyes from falling off?
Make sure the treats are completely cool before attaching the eyes. Use melted chocolate or candy melts as “glue,” and let it set fully before moving the treats. If you’re in a hurry, you can pop them in the fridge for 5 minutes to speed up the setting process.
Can I make these ahead of time for a party?
Yes! You can make them up to 2 days in advance. Store them in an airtight container at room temperature. I actually think they taste better the next day. Just wait to add the candy eyes until the day you’re serving them so they stay fresh and shiny.
My treats came out too hard. What went wrong?
This usually happens when the marshmallows are overcooked. They should be just melted and smooth—not bubbling or browned. Also, make sure you’re not pressing the mixture too hard into the pan. Gentle pressure is all you need.
Can I double this recipe?
Definitely! Just double all the ingredients and use a larger pan or two 9×13-inch pans. You might need to work in batches if your pot isn’t big enough. I’ve made a triple batch for a school Halloween party, and it worked perfectly.
Pin This Recipe!
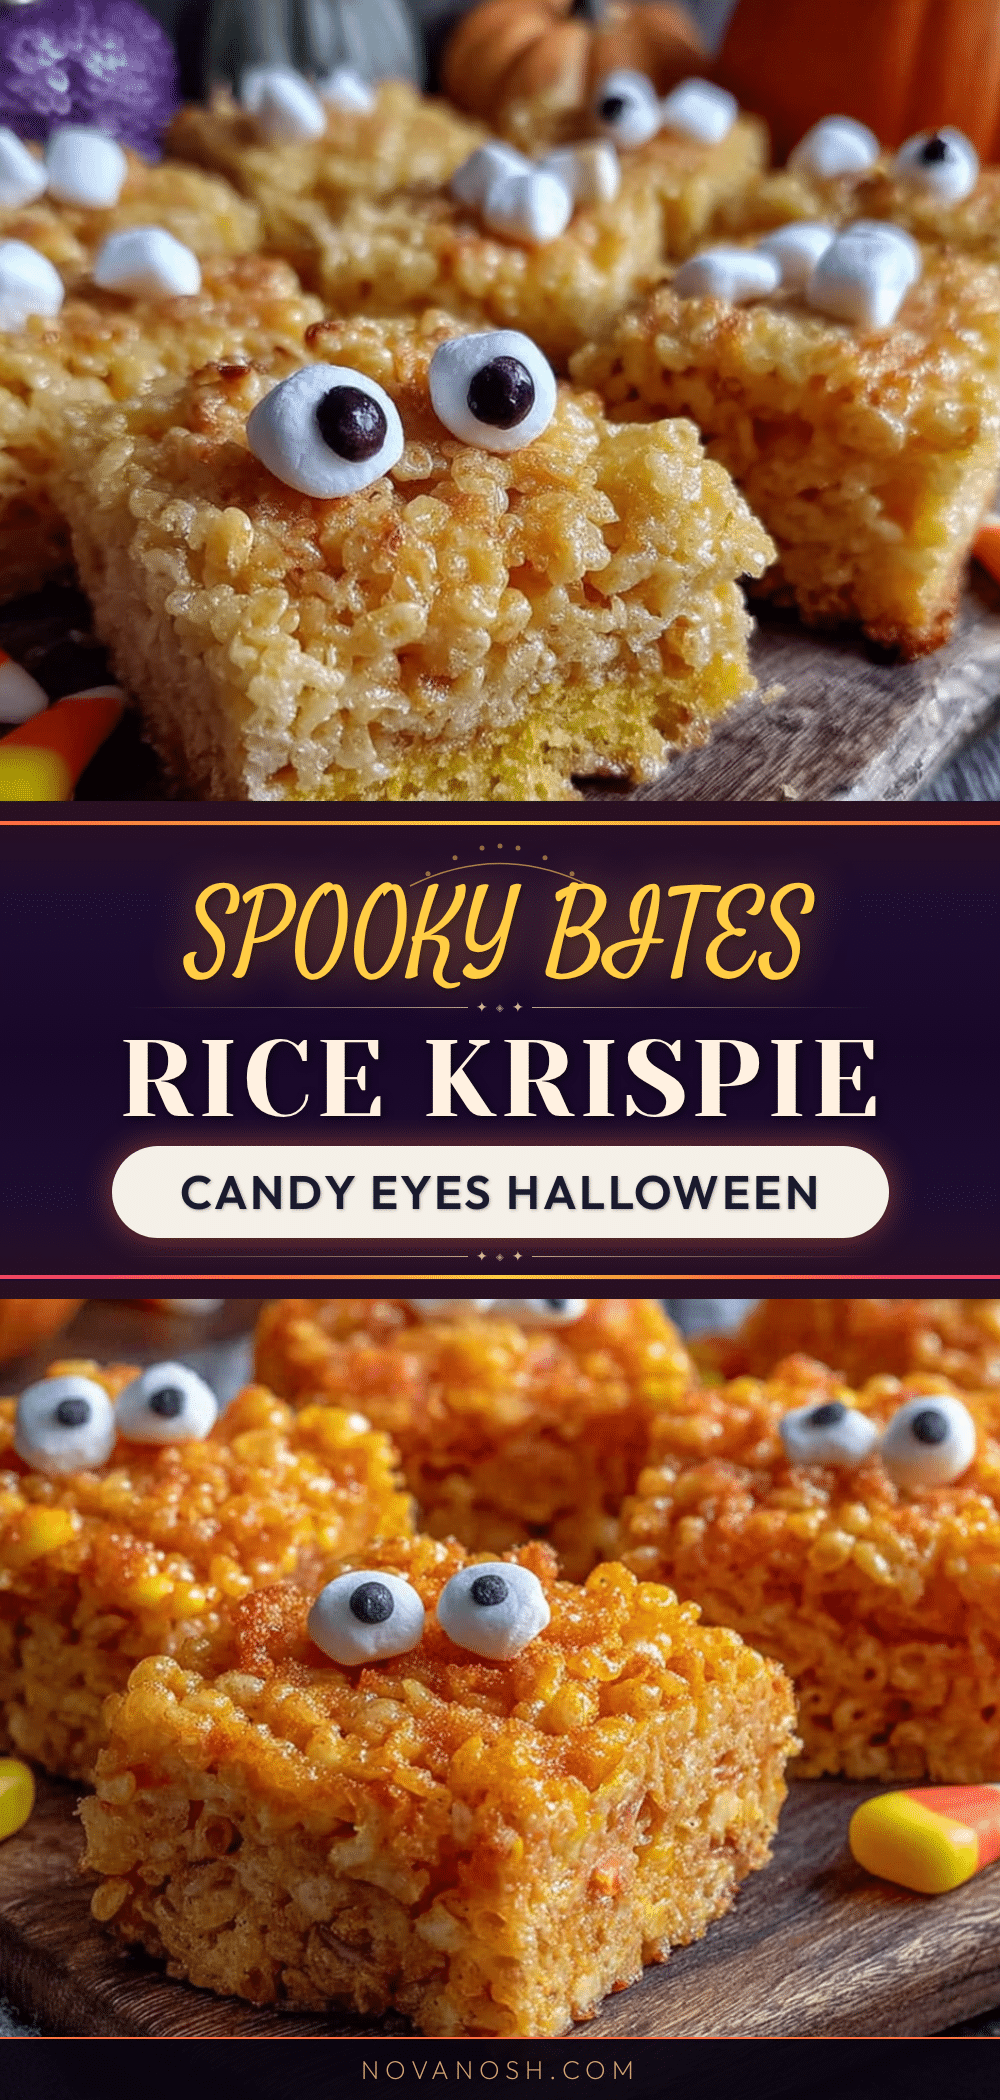
Easy Halloween Rice Krispie Treats with Candy Eyes
These Easy Halloween Rice Krispie Treats with Candy Eyes are crispy, chewy, buttery, and just the right amount of spooky fun. They’re the perfect sweet spot between fun and genuinely delicious, making them the undisputed stars of any Halloween gathering.
- Prep Time: 15 minutes
- Cook Time: 10 minutes
- Total Time: 55 minutes
- Yield: 12-16 servings 1x
- Category: Dessert
- Cuisine: American
Ingredients
- 3 tablespoons unsalted butter
- 1 package (10 ounces) marshmallows
- 6 cups Rice Krispies cereal
- 1/4 teaspoon vanilla extract
- Pinch of salt
- 50–60 candy eyes
- 1/4 cup chocolate chips or candy melts
- Optional: Orange and black sprinkles, edible glitter, or orange food coloring
Instructions
- Prep your pan. Line a 9×13-inch baking dish with parchment paper, leaving a 2-inch overhang on two opposite sides. Lightly spray the parchment with nonstick cooking spray.
- Toast the cereal (optional, but recommended). Spread the 6 cups of Rice Krispies cereal on a large baking sheet. Bake at 350°F (175°C) for 3-4 minutes, stirring once. You want them just barely golden and fragrant—not brown.
- Melt the butter. In your large pot, melt the 3 tablespoons of unsalted butter over medium-low heat. Swirl the pot occasionally. You want it fully melted but not bubbling or browning.
- Add the marshmallows. Dump in the entire 10-ounce bag of marshmallows. Stir constantly with your wooden spoon or silicone spatula. The key here is low and slow. You want the marshmallows to melt into a smooth, glossy puddle. This takes about 5-7 minutes.
- Season the mixture. Once the marshmallows are completely melted and smooth, remove the pot from the heat. Stir in the 1/4 teaspoon of vanilla extract and the pinch of salt. Stir until fully incorporated.
- Add the cereal. Pour the toasted Rice Krispies into the pot. Using a folding motion, gently incorporate the cereal into the marshmallow mixture. Fold until every piece of cereal is coated.
- Press into the pan. Scrape the mixture into your prepared baking dish. Lightly wet your hands with cold water (or spray them with nonstick spray). Then press the mixture evenly into the pan. Don’t press too hard—you want them compact but not compressed into a brick.
- Cool completely. Let the treats cool in the pan on a cooling rack for at least 30 minutes. They need to be fully set before you cut them.
- Cut into squares. Once cool, lift the entire block of treats out of the pan using the parchment overhang. Place it on a cutting board. Use a sharp knife or pizza cutter to cut into 12-16 squares. Wipe the blade clean between cuts for neat edges.
- Attach the candy eyes. Melt 1/4 cup of chocolate chips or candy melts in a small microwave-safe bowl in 20-second intervals, stirring in between, until smooth. Dip the flat back of a candy eye into the melted chocolate, then press it gently onto a treat. Repeat for all the treats.
- Add extra decorations (optional). While the chocolate is still wet, you can sprinkle on orange and black sprinkles or a little edible glitter. Let the chocolate set completely before stacking or serving—about 15 minutes.
Notes
Don’t over-melt the marshmallows or they’ll become hard. Use fresh marshmallows for best results. Butter your spatula to prevent sticking. Work quickly as the mixture sets fast. Let treats cool completely before adding eyes. For cleaner cuts, use a pizza cutter. Store in an airtight container at room temperature for up to 5 days. Freeze for up to 3 months.
Nutrition
- Serving Size: 1 square
- Calories: 180
- Sugar: 18
- Sodium: 135
- Fat: 5
- Saturated Fat: 3
- Carbohydrates: 34
- Protein: 1
Keywords: Halloween Rice Krispie treats, candy eyes, easy Halloween dessert, no-bake treats, spooky snacks, Rice Krispie treats with eyes


