Love this? Save it for later!
Share the inspiration with your friends
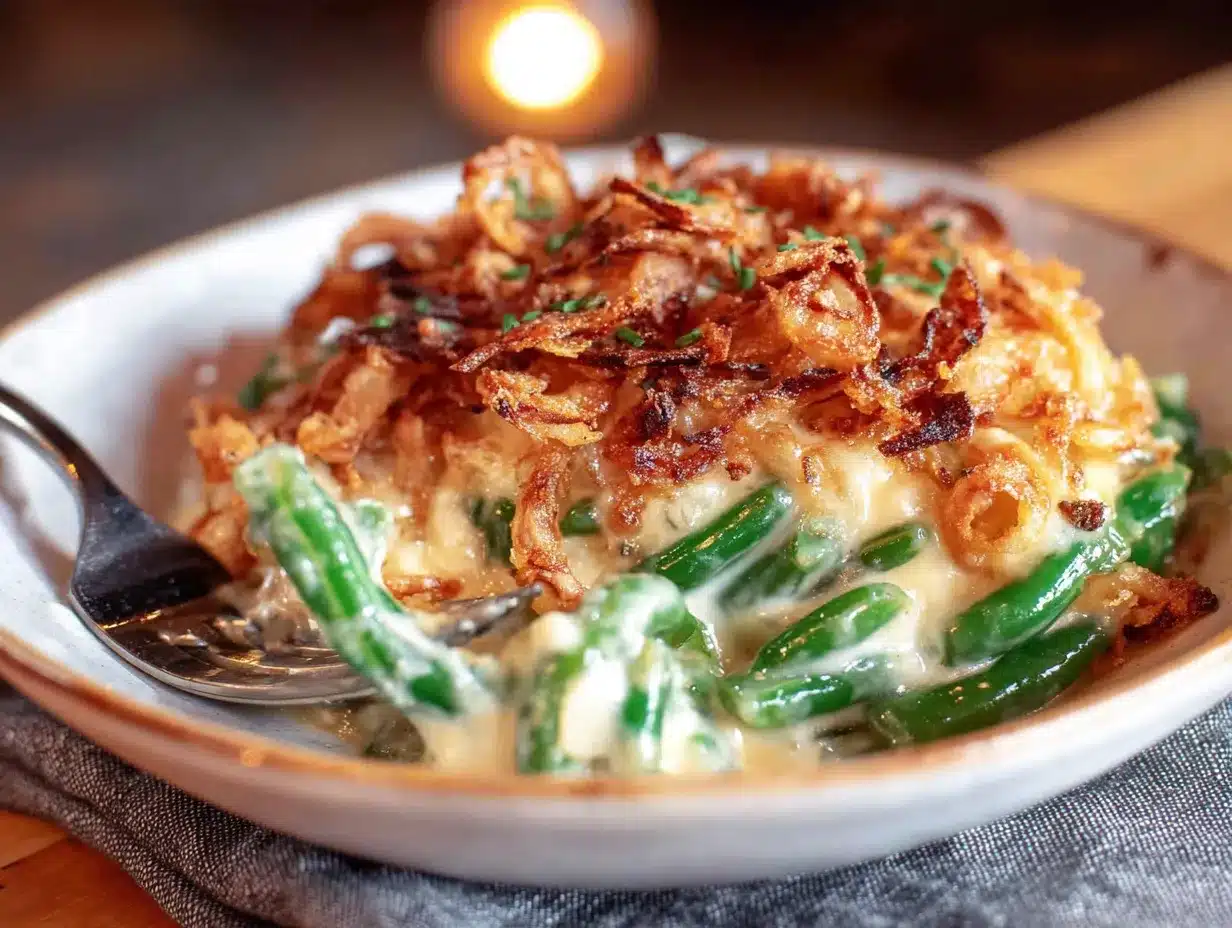
There used to be this little diner off Route 9, called Millie’s, that made the most incredible green bean casserole. It wasn’t the gloopy, canned-soup version you’d expect at a potluck. No, Millie’s had these perfectly tender green beans in a rich, creamy sauce, topped with a mountain of crispy fried onions that were so good you’d pick them off one by one. When Millie retired and the diner closed in 2019, I honestly felt a little lost. I mean, where was I supposed to get that fix?
After maybe a dozen tries — some with soggy onions, some with a sauce that was way too thin — I finally cracked the code. This quick green bean casserole with crispy fried onions is it. It’s the one that finally made me stop missing Millie’s. The secret? It’s not about fancy techniques. It’s about a few smart shortcuts and actually making those fried onions from scratch. I know, I know — it sounds like extra work. But trust me, it takes less than ten minutes, and the payoff is a casserole that tastes like you spent hours in the kitchen.
Honestly, the first time I nailed it, I just stood there over the baking dish, fork in hand, eating it straight from the pan. Maybe you’ve been there — that moment when a recipe just clicks. This is that recipe. It’s quick enough for a Tuesday night but impressive enough for Thanksgiving. Let me tell you, getting that crunchy, savory topping to stay crispy even after baking was my white whale for a while. But now? I’ve got it down, and I’m so excited to share it with you.
Why You’ll Love This Recipe
Let’s be real for a second. Most green bean casseroles are either a sad, mushy mess or they take forever to put together. This one is neither. I’ve tested this version more times than I care to count, tweaking the sauce consistency and the onion frying time until everything was just right. It’s been family-approved at three different holiday dinners and a random Tuesday night when I just needed some comfort food fast.
- Quick & Easy: From start to finish, this is on the table in about 35 minutes. No standing over a hot stove for an hour.
- Simple Ingredients: You probably have the cream of mushroom soup, milk, and soy sauce in your pantry right now.
- Perfect for Weeknights & Holidays: It’s fancy enough for a Thanksgiving spread but simple enough for a Wednesday dinner with meatloaf.
- Crowd-Pleaser: I’ve served this to picky kids and foodie adults, and the dish is always scraped clean.
- Unbelievably Delicious: The contrast between the creamy, savory green beans and the super crunchy, salty fried onions is pure magic.
What makes this different from every other recipe out there? It’s the fresh, homemade fried onions. I’m not knocking the canned ones — they have their place — but making them fresh takes this dish from “good” to “I-can’t-stop-eating-this” good. The sauce is also perfectly seasoned, not bland or pasty. This isn’t just another version of green bean casserole. It’s the best version.
This is the kind of side dish that makes you close your eyes after the first bite. It’s comfort food, pure and simple — faster than you’d think, but with all the soul-soothing satisfaction you’re craving. Perfect for impressing guests without any stress.
What Ingredients You Will Need
This recipe uses simple, mostly pantry-stable ingredients to deliver that classic, comforting flavor. The fresh green beans and homemade onions are the stars, but the supporting cast is just as important.
For the Green Bean Casserole
- Fresh green beans, 1 ½ pounds — trimmed and cut into 2-inch pieces. I prefer fresh over frozen here for the best texture. Look for bright, firm beans that snap when you bend them.
- Condensed cream of mushroom soup, 1 can (10.5 ounces) — this is our shortcut to a creamy, savory sauce. I like the Campbell’s brand for consistency, but any store brand works fine.
- Whole milk, ¾ cup — adds richness to the sauce. You can use 2% or even unsweetened almond milk in a pinch, but whole milk gives the creamiest result.
- Soy sauce, 1 tablespoon — this is the secret ingredient that adds depth and umami. Don’t skip it! It doesn’t make the casserole taste like soy sauce; it just makes everything taste more savory.
- Black pepper, ½ teaspoon — freshly ground is best.
- Garlic powder, ¼ teaspoon — for a subtle savory note.
For the Crispy Fried Onions
- Large yellow onion, 1 — sliced thinly into rings. A mandoline slicer makes this job super fast and ensures even slices.
- Buttermilk, ½ cup — this helps the flour coating stick and adds a slight tang. No buttermilk? Add 1 tablespoon of lemon juice or vinegar to ½ cup of regular milk and let it sit for 5 minutes.
- All-purpose flour, ¾ cup — for the coating.
- Salt, 1 teaspoon — for seasoning the coating.
- Paprika, ½ teaspoon — adds color and a mild, sweet flavor.
- Vegetable or canola oil, for frying — about 2 cups, enough for shallow frying. You need an oil with a high smoke point.
Ingredient Selection Tip: For the green beans, I recommend buying them from the farmers’ market or the loose bin at the grocery store so you can pick the nicest ones. Avoid any that are limp, discolored, or have brown spots. For the onion, a standard yellow onion is perfect. It has the right balance of sharpness and sweetness that mellows out beautifully when fried.
Substitution Guidance: Need a gluten-free option? Use a gluten-free all-purpose flour blend for the onions and a gluten-free cream of mushroom soup. For a dairy-free version, swap the milk for unsweetened oat milk and the buttermilk for a dairy-free buttermilk alternative (milk + lemon juice).
Equipment Needed
You don’t need a ton of fancy gadgets for this one, which is part of the beauty of it. Here’s what you’ll need:
- Large pot — for blanching the green beans. Any 4- to 6-quart pot works.
- Large bowl of ice water — for shocking the beans after blanching. This stops the cooking process and keeps them bright green.
- Large skillet or frying pan — for frying the onions. A cast-iron skillet is ideal because it holds heat so well, but a heavy-bottomed stainless steel pan works great too.
- Slotted spoon or spider strainer — for removing the onions from the hot oil.
- Paper towels — for draining the fried onions.
- 9×13-inch baking dish — for assembling and baking the casserole. A 2-quart casserole dish also works.
- Mixing bowl — for combining the sauce ingredients.
- Whisk — for a smooth sauce.
Budget-Friendly Options: If you don’t have a slotted spoon, a regular spoon works — just be careful and let the excess oil drip off. No 9×13 dish? Use a 10-inch cast-iron skillet for the whole thing, from assembly to baking. It looks rustic and pretty on the table, too.
Personal Experience: I used to use a nonstick pan for frying the onions, but I found the coating didn’t get as crispy. Switching to cast iron was a game-changer. It’s worth the investment if you don’t have one — a good cast-iron skillet will last you a lifetime.
Preparation Method
Alright, let’s get cooking. This whole process moves pretty fast, so it helps to have everything prepped and ready to go before you start. I like to trim my green beans and slice my onion first.
- Preheat your oven to 375°F (190°C). This gives it time to get nice and hot while you work on the other components.
- Blanch the green beans. Bring a large pot of salted water to a rolling boil. Add the trimmed green beans and cook for 3-4 minutes, until they are bright green and just tender-crisp. Do not overcook them — they will bake later. While they cook, prepare a large bowl of ice water. Use a slotted spoon to immediately transfer the beans to the ice water to stop the cooking. Let them sit for 2-3 minutes, then drain them well. Pat them dry with a clean kitchen towel or paper towels. Getting them dry is important so the sauce isn’t watered down.
- Make the crispy fried onions. While the beans are blanching, set up your dredging station. In a shallow bowl, pour the buttermilk. In another shallow bowl, whisk together the flour, salt, and paprika. Take your sliced onion rings and dip them first in the buttermilk, letting any excess drip off, then coat them in the seasoned flour mixture. Shake off any excess flour.
- Fry the onions. In your large skillet, heat about ½ inch of vegetable oil over medium-high heat. The oil is ready when a pinch of flour sizzles immediately when dropped in. Working in batches (don’t crowd the pan!), carefully add the coated onion rings. Fry for 2-3 minutes per side, until they are deep golden brown and crispy. Use your slotted spoon to transfer them to a paper towel-lined plate to drain. Sprinkle with a tiny pinch of salt while they’re still hot. Set them aside.
- Make the sauce. In a large mixing bowl, whisk together the cream of mushroom soup, whole milk, soy sauce, black pepper, and garlic powder until smooth. The sauce should be creamy and well-combined.
- Assemble the casserole. Add the drained, dry green beans to the bowl with the sauce. Gently fold everything together until the beans are evenly coated. Pour the mixture into your greased 9×13-inch baking dish and spread it into an even layer.
- Bake. Place the dish in the preheated oven and bake for 20 minutes, until the sauce is bubbly and hot all the way through.
- Add the topping and finish. Remove the dish from the oven. Sprinkle your homemade crispy fried onions evenly over the top. Return the casserole to the oven and bake for another 5-7 minutes, just until the onions are heated through and extra fragrant. Do not overbake at this stage, or the onions will lose their crunch.
- Rest and serve. Let the casserole sit on the counter for about 5 minutes before serving. This allows the sauce to thicken slightly. Serve hot.
Sensory Cue: When you pull the casserole out of the oven, you should see the sauce gently bubbling around the edges. The onions on top should be a deep golden brown and smell incredibly savory and toasty. The green beans underneath should be tender but still have a slight bite to them.
Personal Efficiency Tip: I like to make the fried onions while the beans are blanching and cooling. That way, I’m using my time efficiently, and the onions are ready to go when I need them. Also, don’t be tempted to skip the ice water bath for the beans. It’s a tiny bit of extra effort that keeps them from turning into mush.
Cooking Tips & Techniques
I’ve made this quick green bean casserole with crispy fried onions probably thirty times by now, and I’ve made every mistake in the book. Here’s what I’ve learned so you don’t have to repeat my errors.
The Biggest Mistake: Soggy Onions. The first few times I made this, my homemade onions were a sad, oily mess. The trick is threefold. First, make sure your oil is hot enough before you add the onions. If it’s not hot, the coating soaks up oil like a sponge. Second, don’t overcrowd the pan. If you add too many rings at once, the temperature drops, and you get greasy onions. Third, drain them immediately on paper towels. Letting them sit in the pan even for an extra minute makes them lose their crunch.
Timing Strategy: This recipe is perfect for multitasking. While the beans are blanching, you can slice the onion and mix the flour coating. While the onions are frying, you can whisk together the sauce. If you’re organized, the whole thing comes together in about 20 minutes of active time.
Consistency Tip: For the absolute best texture, do not skip the step of drying the blanched green beans. Water is the enemy of a creamy casserole. If the beans are wet, they’ll water down the sauce, and you’ll end up with a thin, soupy mess instead of a rich, creamy one.
Professional Technique: To get those perfectly thin, even onion slices, use a mandoline slicer. It’s fast and gives you uniform rings that cook evenly. Just watch your fingers — I learned that lesson the hard way! If you don’t have a mandoline, a sharp knife and a steady hand will do the job.
My Biggest Failure: One Thanksgiving, I was rushing and forgot to add the soy sauce to the cream sauce. The casserole was so bland and flat. No one said anything, but I knew. That little tablespoon of soy sauce is non-negotiable. It’s the backbone of the whole dish.
Variations & Adaptations
One of the best things about this recipe is how flexible it is. You can tweak it to fit almost any diet or flavor preference. Here are a few of my favorite ways to change it up.
- Add Protein: Make it a main dish by adding 1 ½ cups of shredded rotisserie chicken or cooked, crumbled bacon to the sauce before baking. It turns a side dish into a complete, satisfying meal.
- Mushroom Lover’s Version: Sauté 8 ounces of sliced cremini mushrooms in a little butter until they’re golden and tender. Stir them into the sauce along with the green beans. It doubles down on the earthy, savory flavor.
- Cheesy Green Bean Casserole: Stir 1 cup of shredded sharp cheddar cheese into the sauce before adding the green beans. Sprinkle another ½ cup of cheese on top before adding the fried onions. It’s decadent and delicious.
- Spicy Kick: Add ¼ teaspoon of cayenne pepper to the flour coating for the onions and a dash of hot sauce to the cream sauce. The heat pairs beautifully with the creamy, savory flavors.
- Make It Dairy-Free: Use unsweetened oat milk or canned coconut milk (the kind in a carton, not a can) in the sauce. For the onions, use a dairy-free buttermilk substitute (milk + lemon juice). The result is just as creamy and delicious.
- Air Fryer Onions: For a lighter version, skip the shallow frying. Toss the coated onion rings in a little oil spray and air fry at 375°F for 6-8 minutes, shaking halfway through, until golden and crispy. They won’t be quite as crunchy as the fried version, but they’re still really good.
Personal Variation: My favorite way to make this is with a handful of fresh thyme leaves stirred into the sauce. It adds a subtle, earthy, almost lemony note that I just love. I also like to use a mix of yellow and red onions for the topping — the red onions get a little sweeter when fried.
Serving & Storage Suggestions
This casserole is best served hot, straight from the oven. Let it rest for about 5 minutes after baking so the sauce can set up a little. It’s the perfect side dish for roast chicken, turkey, meatloaf, or a simple pan-seared steak. I also love it alongside a slice of crusty bread to soak up any extra creamy sauce from the plate.
Storage: Got leftovers? Lucky you. Let the casserole cool completely, then transfer it to an airtight container. It will keep in the refrigerator for up to 3 days. The fried onions will lose some of their crunch, but the flavor will still be amazing.
Reheating: The best way to reheat this is in the oven. Place the casserole in a 350°F oven for about 15-20 minutes, until it’s heated through. If you want to re-crisp the onions, you can pop it under the broiler for the last 1-2 minutes — just watch it closely so it doesn’t burn. The microwave works in a pinch, but the onions will be soft.
Freezing: You can freeze the assembled, unbaked casserole (without the fried onions on top) for up to 3 months. Wrap the dish tightly in plastic wrap and then foil. When you’re ready to bake, thaw it overnight in the refrigerator, then bake as directed, adding the fresh fried onions at the end. Do not freeze the baked casserole — the texture of the green beans will suffer.
Flavor Development: Honestly, this casserole tastes even better the next day. The flavors have a chance to meld together, and the sauce gets even creamier. It’s one of those rare dishes that’s just as good (if not better) as leftovers.
Nutritional Information & Benefits
While this is definitely a comfort food dish, it does have some redeeming qualities. Green beans are a great source of fiber, vitamins A, C, and K, and folate. Onions are packed with antioxidants and have anti-inflammatory properties. The protein from the milk and soup helps make this a more balanced side dish.
Estimated Nutritional Values (per serving, based on 8 servings):
| Nutrient | Amount |
|---|---|
| Calories | 210 |
| Total Fat | 11g |
| Saturated Fat | 3g |
| Cholesterol | 10mg |
| Sodium | 680mg |
| Total Carbohydrates | 22g |
| Dietary Fiber | 4g |
| Sugars | 6g |
| Protein | 5g |
Dietary Considerations: This recipe can be made gluten-free and dairy-free with simple substitutions (see Variations section). It is not suitable for a low-FODMAP diet due to the onions and garlic. It is naturally nut-free and egg-free.
Personal Wellness Perspective: Look, I’m not saying this is a health food. But I do believe that comfort food has a place in a balanced diet. Using fresh green beans and homemade onions means you’re controlling the ingredients and skipping the preservatives and additives found in many canned versions. That counts for something.
Conclusion
There it is — my quick green bean casserole with crispy fried onions, the one that finally let me stop missing Millie’s. It’s everything a good side dish should be: creamy, crunchy, savory, and satisfying. And the best part? It comes together in about 35 minutes, which means you can have a taste of that nostalgic diner magic any night of the week.
I really hope you give this one a try. Don’t be afraid to make it your own — throw in some cheese, add a little heat, or pile on extra onions. That’s the beauty of cooking. And when you do make it, I’d love to hear how it turned out. Drop a comment below and let me know if this became your new go-to side dish. Did you make any fun adaptations? Did your family fight over the last crispy onion? Share it all!
Thanks so much for stopping by. Now go make some magic in your kitchen. You’ve got this.
Frequently Asked Questions
Can I use frozen green beans instead of fresh?
Yes, you can. If using frozen green beans, do not thaw them first. Add them directly to the boiling water and blanch for 2-3 minutes, then proceed with the ice water bath. Frozen beans tend to be a bit softer, so keep that in mind.
Can I make the fried onions ahead of time?
Absolutely. You can fry the onions up to 2 days in advance. Store them in an airtight container at room temperature. To re-crisp them, spread them on a baking sheet and bake at 350°F for 3-4 minutes before adding them to the casserole.
Why did my sauce turn out runny?
The most common reason is that the green beans were too wet when you added them to the sauce. Make sure you dry them thoroughly after the ice water bath. Also, let the casserole rest for 5 minutes after baking so the sauce can thicken up.
Can I use canned fried onions instead of making my own?
You sure can. This recipe works great with store-bought crispy fried onions. Just skip the steps for making the homemade ones and sprinkle about 1 ½ cups of the canned variety on top before the final bake. The homemade version is definitely more impressive, but the canned version is a solid shortcut.
How do I keep the fried onions crispy on top?
The key is to add them for the last 5-7 minutes of baking only. If you bake them for the full 25 minutes, they will soften. Also, make sure your fried onions are completely cool and dry before you add them to the casserole. Any residual oil or moisture will make them soggy.
Pin This Recipe!

Quick Green Bean Casserole with Best Crispy Fried Onions

A quick and easy green bean casserole with homemade crispy fried onions, creamy sauce, and tender green beans. Perfect for weeknights or holidays.
- Prep Time: 15 minutes
- Cook Time: 30 minutes
- Total Time: 45 minutes
- Yield: 8 servings 1x
- Category: Side Dish
- Cuisine: American
Ingredients
- 1 ½ pounds fresh green beans, trimmed and cut into 2-inch pieces
- 1 can (10.5 ounces) condensed cream of mushroom soup
- ¾ cup whole milk
- 1 tablespoon soy sauce
- ½ teaspoon black pepper, freshly ground
- ¼ teaspoon garlic powder
- 1 large yellow onion, sliced thinly into rings
- ½ cup buttermilk
- ¾ cup all-purpose flour
- 1 teaspoon salt
- ½ teaspoon paprika
- Vegetable or canola oil, for frying (about 2 cups)
Instructions
- Preheat your oven to 375°F (190°C).
- Blanch the green beans: Bring a large pot of salted water to a rolling boil. Add the trimmed green beans and cook for 3-4 minutes until bright green and tender-crisp. Prepare a large bowl of ice water. Transfer the beans to the ice water to stop the cooking. Let sit for 2-3 minutes, then drain well and pat dry.
- Make the crispy fried onions: In a shallow bowl, pour the buttermilk. In another shallow bowl, whisk together the flour, salt, and paprika. Dip the sliced onion rings in the buttermilk, letting excess drip off, then coat in the seasoned flour mixture. Shake off excess flour.
- Fry the onions: In a large skillet, heat about ½ inch of vegetable oil over medium-high heat. Working in batches, fry the coated onion rings for 2-3 minutes per side until deep golden brown and crispy. Transfer to a paper towel-lined plate to drain. Sprinkle with a tiny pinch of salt while hot. Set aside.
- Make the sauce: In a large mixing bowl, whisk together the cream of mushroom soup, whole milk, soy sauce, black pepper, and garlic powder until smooth.
- Assemble the casserole: Add the drained, dry green beans to the bowl with the sauce. Gently fold until the beans are evenly coated. Pour into a greased 9×13-inch baking dish and spread into an even layer.
- Bake: Place the dish in the preheated oven and bake for 20 minutes until the sauce is bubbly and hot.
- Add the topping and finish: Remove the dish from the oven. Sprinkle the homemade crispy fried onions evenly over the top. Return to the oven and bake for another 5-7 minutes until the onions are heated through and fragrant.
- Rest and serve: Let the casserole sit on the counter for about 5 minutes before serving. Serve hot.
Notes
For the best texture, dry the blanched green beans thoroughly to avoid a watery sauce. The fried onions can be made up to 2 days ahead and stored at room temperature; re-crisp in a 350°F oven for 3-4 minutes before adding to the casserole. For a gluten-free version, use gluten-free all-purpose flour and gluten-free cream of mushroom soup. For dairy-free, use unsweetened oat milk and a dairy-free buttermilk substitute.
Nutrition
- Serving Size: 1 serving
- Calories: 210
- Sugar: 6
- Sodium: 680
- Fat: 11
- Saturated Fat: 3
- Carbohydrates: 22
- Fiber: 4
- Protein: 5
Keywords: green bean casserole, crispy fried onions, quick, easy, Thanksgiving side dish, comfort food