Love this? Save it for later!
Share the inspiration with your friends
Last October, I was at my friend Jenna’s annual pumpkin-carving party, and let me tell you—the snack table was a disaster. Chips, store-bought cookies, and a sad veggie platter that nobody touched. I’d brought a batch of these Candy Corn Jello Cups, mostly because I wanted something that looked festive without taking up precious oven space. Jenna watched me set them down, and she didn’t say anything at first. Then she picked one up, held it to the light, and said, “Wait—you made these? They look like little stained glass windows.”
Honestly, that moment stuck with me. Not because it was complicated or dramatic, but because it was the kind of exchange that happens when food connects people without trying too hard. She wasn’t a foodie or a baker—she was just someone who appreciated the effort. And that’s exactly the energy these Candy Corn Jello Cups bring. They’re not fussy, they don’t require a ton of skill, and yet they show up looking like you spent hours. Which, between you and me, is always a good trick to have in your back pocket.
I’ve been making layered jello desserts for years, and I’ll be honest—I’ve had my share of disasters. Layers that refused to set, colors that bled into each other, that one time I forgot the second layer entirely and ended up with a very confused two-tone situation. But these Candy Corn Jello Cups? They’ve been tested, tweaked, and perfected. The trick is patience between layers (I know, I know—waiting is the worst) and using the right proportions so each stripe stays crisp. Maybe you’ve been there, staring at a jello recipe that promises rainbow layers but delivers a muddy mess. This one delivers on the promise.
The reason I keep coming back to this recipe isn’t just because it’s cute—though, let’s face it, the candy corn colors are pure nostalgia. It’s because it fits into eating well without sacrifice. These cups are light, low in sugar compared to most Halloween treats, and made with ingredients you can feel good about. No artificial shortcuts, no guilt. Just a fun, festive dessert that actually tastes clean and refreshing. And after that party, Jenna texted me the next day asking for the recipe. That’s when I knew it was a keeper.
Why You’ll Love This Recipe
Let’s be real for a second—there are a lot of Halloween desserts out there that look amazing but taste like sugary cardboard. These Candy Corn Jello Cups are not that. They’re light, refreshing, and surprisingly satisfying without weighing you down. Here’s why they’ve become my go-to for fall gatherings:
- Quick & Easy: Comes together in about 20 minutes of active time. The hardest part is waiting for the layers to set, which is more about patience than skill.
- Simple Ingredients: You probably have most of these in your pantry right now. No specialty stores, no obscure extracts—just jello, gelatin, and a few pantry staples.
- Perfect for Fall Parties: Whether it’s a Halloween bash, a Friendsgiving, or just a Tuesday that needs a little color, these cups fit right in.
- Crowd-Pleaser: Kids love the candy corn colors, adults appreciate that they’re not overly sweet, and everyone thinks you worked way harder than you did.
- Unbelievably Delicious: The texture is silky and light, with just enough sweetness to feel indulgent without the sugar crash.
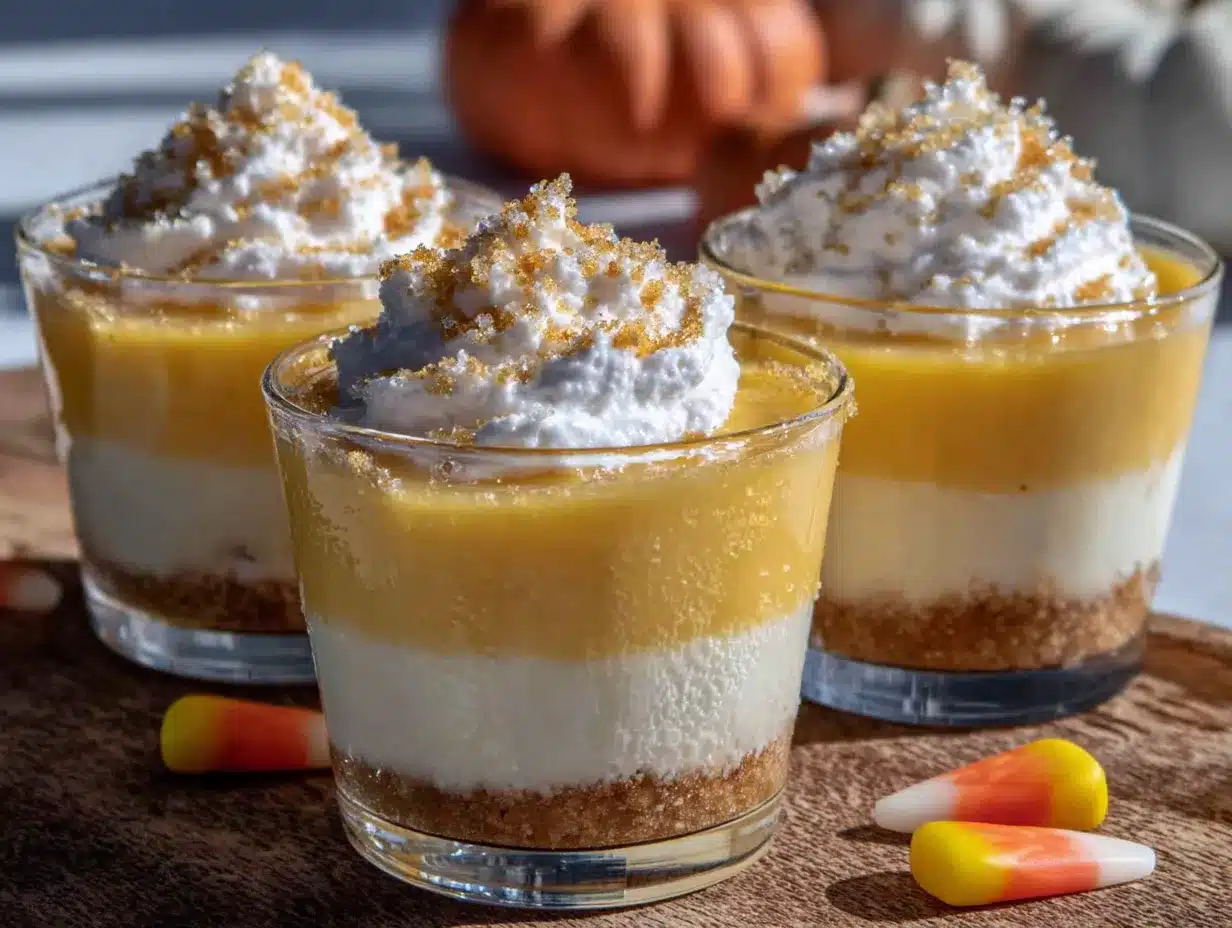
What makes these different from the jello cups you’ve seen before? It’s the technique. Instead of using heavy cream or artificial thickeners, I use a touch of unflavored gelatin to keep the layers stable without making them rubbery. The result is a dessert that’s firm enough to hold its shape but melts on your tongue. Plus, the flavor balance is spot-on—the orange layer has a bright citrus note, the yellow is mellow and vanilla-tinged, and the white top is creamy without being heavy.
This recipe isn’t just good—it’s the kind that makes people close their eyes after the first bite. I’ve seen it happen. It’s comfort food reimagined: lighter, fresher, but with the same soul-soothing satisfaction you want from a fall treat. Perfect for impressing guests without stress, or turning a simple dessert into something memorable.
What Ingredients You Will Need
This recipe uses simple, clean ingredients to create those iconic candy corn stripes without any artificial aftertaste. Most of these are pantry staples, and I’ve included notes on substitutions so you can adapt based on what you have on hand.
For the Orange Layer (Bottom)
- 1 box (3 oz) orange-flavored gelatin (I prefer Jell-O brand for consistent results, but store brands work fine)
- 1 packet (about 2 tsp) unflavored gelatin (Knox is my go-to—it dissolves cleanly without clumps)
- 1 cup boiling water
- 1/2 cup cold water
For the Yellow Layer (Middle)
- 1 box (3 oz) lemon-flavored gelatin
- 1 packet (about 2 tsp) unflavored gelatin
- 1 cup boiling water
- 1/2 cup cold water
- 1/2 tsp vanilla extract (adds warmth and rounds out the citrus)
For the White Layer (Top)
- 1 packet (about 2 tsp) unflavored gelatin
- 1/2 cup cold water
- 1/2 cup boiling water
- 1/2 cup sweetened condensed milk (this is what gives it that creamy, candy corn-esque sweetness)
- 1/2 tsp vanilla extract
Ingredient Selection Tips: For the clearest layers, use powdered gelatin rather than sheet gelatin—it dissolves more evenly in small batches. If you’re using a different brand of flavored gelatin, check the sugar content; some sugar-free versions can have a slightly different set. I’ve tested this with Great Value and Target brands, and they work perfectly. Just avoid the “berry” flavors for the orange and yellow layers—stick with citrus to keep the flavor profile bright and clean.
Substitution Guidance: If you need a dairy-free version, swap the sweetened condensed milk for full-fat coconut cream mixed with 2 tablespoons of honey or agave. The texture will be slightly less creamy but still delicious. For a lower-sugar option, use sugar-free gelatin mixes and replace the sweetened condensed milk with a combination of 1/2 cup heavy cream (or coconut cream) and 2 tablespoons of powdered erythritol. The layers won’t be quite as firm, so add an extra half packet of unflavored gelatin to compensate.
Pantry Note: The unflavored gelatin is the unsung hero here. It’s what gives these cups their structure without making them taste like candy. I always keep a box of Knox in my baking drawer—it’s cheap, lasts forever, and shows up in everything from panna cotta to marshmallows. If you’re new to working with gelatin, don’t be intimidated. It’s forgiving, and I’ll walk you through the blooming process step by step.
Equipment Needed
One of the best things about this recipe is that it doesn’t require any fancy equipment. Here’s what you’ll need:
- Small clear cups or ramekins (6 to 8, depending on size—I use 6-ounce plastic cups for parties, but glass looks prettier)
- 3 small mixing bowls (one for each layer—glass or ceramic works best)
- Measuring cups and spoons
- Whisk or fork (for stirring gelatin)
- Kettle or microwave (for boiling water)
- Refrigerator space (clear a shelf before you start)
- A small saucepan (if you prefer to heat water on the stove)
Budget-Friendly Alternatives: Don’t have ramekins? Use shot glasses for a fun, party-friendly size. No whisk? A fork works just fine for dissolving gelatin. If you don’t have a kettle, microwave the water in a Pyrex measuring cup for 2-3 minutes. I’ve made these in a hotel room with a coffee maker for hot water—trust me, it works.
Personal Experience: I’ve tried making these in silicone muffin cups, and while they do pop out easily, the layers tend to look less defined because the cups are wider. Stick with narrow, straight-sided cups for the cleanest stripes. Also, avoid metal bowls for the gelatin—it can sometimes react and leave a metallic taste. Glass or ceramic all the way.
Preparation Method
Let’s get into the nitty-gritty. This recipe has three layers, and each one needs time to set before you add the next. Plan for about 4 hours total, but most of that is inactive chilling time. Here’s how to nail it:
Step 1: Prepare Your Workspace
Before you touch a single ingredient, arrange your 6 to 8 cups on a small baking sheet or tray. This makes it easy to move them in and out of the fridge without spills. Trust me—I learned this the hard way after carrying individual cups and nearly dropping three of them. Clear a shelf in your fridge so the tray fits flat.
Step 2: Make the Orange Layer (Bottom)
In a small bowl, combine the orange-flavored gelatin and the unflavored gelatin. Pour in 1 cup of boiling water and whisk for about 2 minutes until everything is fully dissolved. You shouldn’t see any granules floating around. Add 1/2 cup of cold water and stir gently. Let it cool for 5 minutes—it should be warm but not hot. Pour evenly into your cups, filling each about one-third full. Place the tray in the fridge and let it set for at least 1 hour, or until firm to the touch. (If you poke it gently, it should feel solid, not jiggly.)
Step 3: Make the Yellow Layer (Middle)
Once the orange layer is set, it’s time for the yellow. In a second bowl, combine the lemon gelatin and unflavored gelatin. Add 1 cup of boiling water and whisk until dissolved. Stir in the vanilla extract and 1/2 cup cold water. Let it cool for 5 minutes—this is important! If the liquid is too hot, it can melt the orange layer underneath. Test it by touching the bowl; it should feel warm, not hot. Gently pour the yellow mixture over the orange layer, using the back of a spoon to break the fall so you don’t disturb the bottom layer. Fill each cup another third. Return to the fridge for another hour until set.
Step 4: Make the White Layer (Top)
For the final layer, bloom the unflavored gelatin in 1/2 cup cold water. Let it sit for 5 minutes—it will look like a spongy, opaque mass. That’s good. Then add 1/2 cup boiling water and stir until the gelatin is completely dissolved. Whisk in the sweetened condensed milk and vanilla extract until smooth. Let this cool for 10 minutes—the condensed milk makes it thicker, so it needs a bit more time to come to room temperature. Pour it over the yellow layer, again using a spoon to cushion the pour. Fill to the top. Refrigerate for at least 2 hours, or overnight for the cleanest cuts.
Step 5: Unmold or Serve
If you’re serving in cups, you’re done—just garnish and go. If you want to unmold them for a fancy presentation, run a thin knife around the edge and dip the cup in warm water for 10 seconds. Invert onto a plate. The layers should hold their shape beautifully. If they don’t, don’t panic—just serve them in the cups and call it rustic. I’ve done that more times than I care to admit.
Sensory Cues: When the orange layer is set, it should feel firm but still have a slight give, like a memory foam mattress. The yellow layer should look translucent and bright, like a lemon drop. The white layer should be opaque and creamy, with a slight sheen. If any layer looks cloudy or has bubbles, you whisked too vigorously—next time, stir gently.
Cooking Tips & Techniques
After making these Candy Corn Jello Cups more times than I can count, I’ve collected a few hard-won lessons. Here’s what I wish someone had told me:
Patience is not optional. I know, I know—waiting is the worst. But rushing the layers is the number one reason these fail. If you pour a warm layer over one that’s not fully set, you’ll get a muddy, tie-dye effect instead of clean stripes. Set a timer. Walk away. Read a book. Do literally anything except open the fridge every five minutes to check on them.
Bloom your gelatin properly. For the white layer, letting the unflavored gelatin sit in cold water for 5 minutes is non-negotiable. This step, called blooming, ensures the gelatin dissolves evenly and gives you a smooth, silky texture. If you skip it or rush it, you’ll end up with grainy bits. I learned this the hard way when I made a batch for a potluck and ended up with what my friend politely called “textured jello.”
Temperature matters. Each layer needs to cool before you pour it over the previous one. Hot liquid will melt the set gelatin underneath. Lukewarm is your friend. I test by touching the bowl to my wrist—if it feels warm but not hot, it’s ready. If it’s still steaming, wait. This is especially important for the white layer, which has condensed milk and takes longer to cool.
Don’t over-whisk. Vigorous whisking incorporates air bubbles, which will rise to the surface and create a cloudy, unappealing layer. Stir gently and patiently. If you do get bubbles, you can pop them with a toothpick before the layer sets, or just accept them as part of the homemade charm.
Multitasking strategy: While the orange layer is setting, clean your bowls and measure out ingredients for the next layers. This cuts down on active time and keeps you from scrambling. I also like to set my timer for 55 minutes so I have a 5-minute buffer to prep the next layer before it’s time to pour.
Variations & Adaptations
One of the best things about this recipe is how easy it is to customize. Here are some variations I’ve tried and loved:
Dietary Adaptations
Vegan Version: Replace the flavored gelatin with agar-agar (use about 1 tablespoon per layer, dissolved in boiling water). Use coconut cream instead of sweetened condensed milk, and add 2 tablespoons of maple syrup for sweetness. The texture will be slightly firmer and less creamy, but the layers hold beautifully. I’ve tested this for a friend’s vegan birthday party, and nobody guessed it was plant-based.
Low-Sugar Version: Use sugar-free gelatin mixes and replace the sweetened condensed milk with 1/2 cup heavy cream mixed with 2 tablespoons of powdered monk fruit sweetener. Add an extra half packet of unflavored gelatin to the white layer to compensate for the missing sugar, which helps with structure.
Flavor Twists
Spiced Pumpkin: For a fall twist, add 1/2 teaspoon pumpkin pie spice to the white layer and replace the orange gelatin with peach or apricot flavor. It gives a subtle autumnal warmth without being overwhelming.
Tropical Version: Use pineapple gelatin for the yellow layer, mango for the orange, and add a splash of coconut extract to the white layer. It tastes like a vacation in a cup—perfect for summer parties or when you need a little sunshine in October.
Presentation Variations
Layered in a Dish: Instead of individual cups, make this in a 9×9 glass dish. You’ll need to double the recipe, but it’s great for feeding a crowd. Cut into squares and serve on a platter.
Shot Glass Style: Use 2-ounce shot glasses for a party-friendly, bite-sized version. You’ll get about 12-14 servings, and they’re adorable for Halloween gatherings.
Serving & Storage Suggestions
These Candy Corn Jello Cups are best served cold, straight from the fridge. The contrast between the cool, silky texture and the bright flavors is what makes them so refreshing. Here are my favorite ways to serve them:
Garnish Ideas: Top each cup with a dollop of whipped cream and a few candy corn pieces for extra festivity. Or, for a more refined look, add a tiny mint leaf or a sprinkle of orange zest. I’ve also done a drizzle of white chocolate on top—it adds a nice crunch and looks gorgeous.
Pairing Suggestions: These pair beautifully with a warm cup of chai tea or a pumpkin spice latte. The cool, bright jello balances the warmth of spiced drinks. For a party, serve them alongside other finger foods like mini quiches or fruit skewers.
Storage Instructions: Keep the cups covered in the refrigerator for up to 5 days. I use a large container with a lid or wrap each cup individually in plastic wrap. Do not freeze—the texture will become watery and grainy when thawed.
Reheating: These are meant to be served cold, so no reheating needed. If you’ve stored them for a few days and they’ve softened slightly, pop them in the fridge for 30 minutes before serving to firm them up again.
Flavor Development: Interestingly, the flavors meld and deepen after a day in the fridge. The citrus notes become more rounded, and the vanilla in the white layer becomes more pronounced. I actually prefer these on day two. So if you’re making them for a party, prepare them the day before—your future self will thank you.
Nutritional Information & Benefits
Per serving (based on 8 servings using regular gelatin and sweetened condensed milk):
- Calories: 145
- Fat: 3g
- Carbohydrates: 28g
- Protein: 4g
- Sugar: 24g
Health Highlights: Gelatin is a great source of collagen, which supports joint health and skin elasticity. The citrus flavors provide a small dose of vitamin C, and using moderate portions keeps this dessert light compared to traditional Halloween treats like candy bars or brownies. If you use the low-sugar version above, you can cut the sugar content in half while keeping the flavor intact.
Dietary Considerations: This recipe contains dairy (in the sweetened condensed milk) and is not suitable for vegans in its original form. It is gluten-free and nut-free. For a dairy-free option, use the coconut cream substitution mentioned in the variations section.
Personal Wellness Perspective: I love that this dessert lets me enjoy something festive without the heavy, overly sweet feeling that often comes with holiday treats. It’s proof that you can have your candy corn and eat it too—just in a lighter, more balanced way. For me, that’s what eating well is all about: finding the sweet spot between indulgence and nourishment.
Conclusion
These Light & Festive Candy Corn Jello Cups are more than just a pretty dessert—they’re a little piece of fall nostalgia that you can feel good about eating. They’re bright, refreshing, and surprisingly simple to make, even if you’ve never worked with gelatin before. The layers take a bit of patience, but I promise, the first time you see those clean orange, yellow, and white stripes, you’ll feel like a kitchen magician.
What I love most about this recipe is how adaptable it is. You can tweak the flavors, swap in dietary substitutions, or change up the presentation to fit any occasion. It’s the kind of recipe that grows with you—the more you make it, the more you’ll find ways to make it your own. And honestly, that’s the best kind of recipe to have in your back pocket.
So go ahead—give these a try for your next fall gathering, or just because it’s Tuesday and you deserve something pretty. If you make them, I’d love to hear how they turn out. Drop a comment below and let me know your favorite variation, or share a photo of your layers. Happy cooking, and here’s to desserts that bring a little extra color to the table!
Frequently Asked Questions
Can I use sugar-free gelatin for this recipe?
Absolutely! Sugar-free gelatin works perfectly. Just note that the layers may be slightly less firm, so add an extra half packet of unflavored gelatin to each layer to help with structure. The flavor will still be bright and delicious.
How long do these jello cups last in the fridge?
They’ll keep for up to 5 days when stored covered in the refrigerator. The layers will stay firm and the flavors will actually meld and deepen over time. Just make sure they’re sealed so they don’t absorb any fridge odors.
Can I make these without unflavored gelatin?
You can, but the layers won’t be as stable or defined. The unflavored gelatin is what gives the cups their structure and helps the layers stay separate. If you skip it, expect a softer, more jiggly texture that might bleed into each other.
Why did my layers mix together?
This usually happens when you pour the next layer too soon or when the liquid is too hot. Make sure each layer is fully set (firm to the touch) and that the next layer has cooled to lukewarm before pouring. Using a spoon to break the pour also helps prevent mixing.
Can I use different flavors for the layers?
Definitely! The candy corn colors are the star here, so stick with orange and yellow for the bottom two layers. For the top, keep it white with a neutral flavor like vanilla or coconut. Avoid dark-colored flavors like berry or grape, as they’ll muddy the color scheme.
Pin This Recipe!
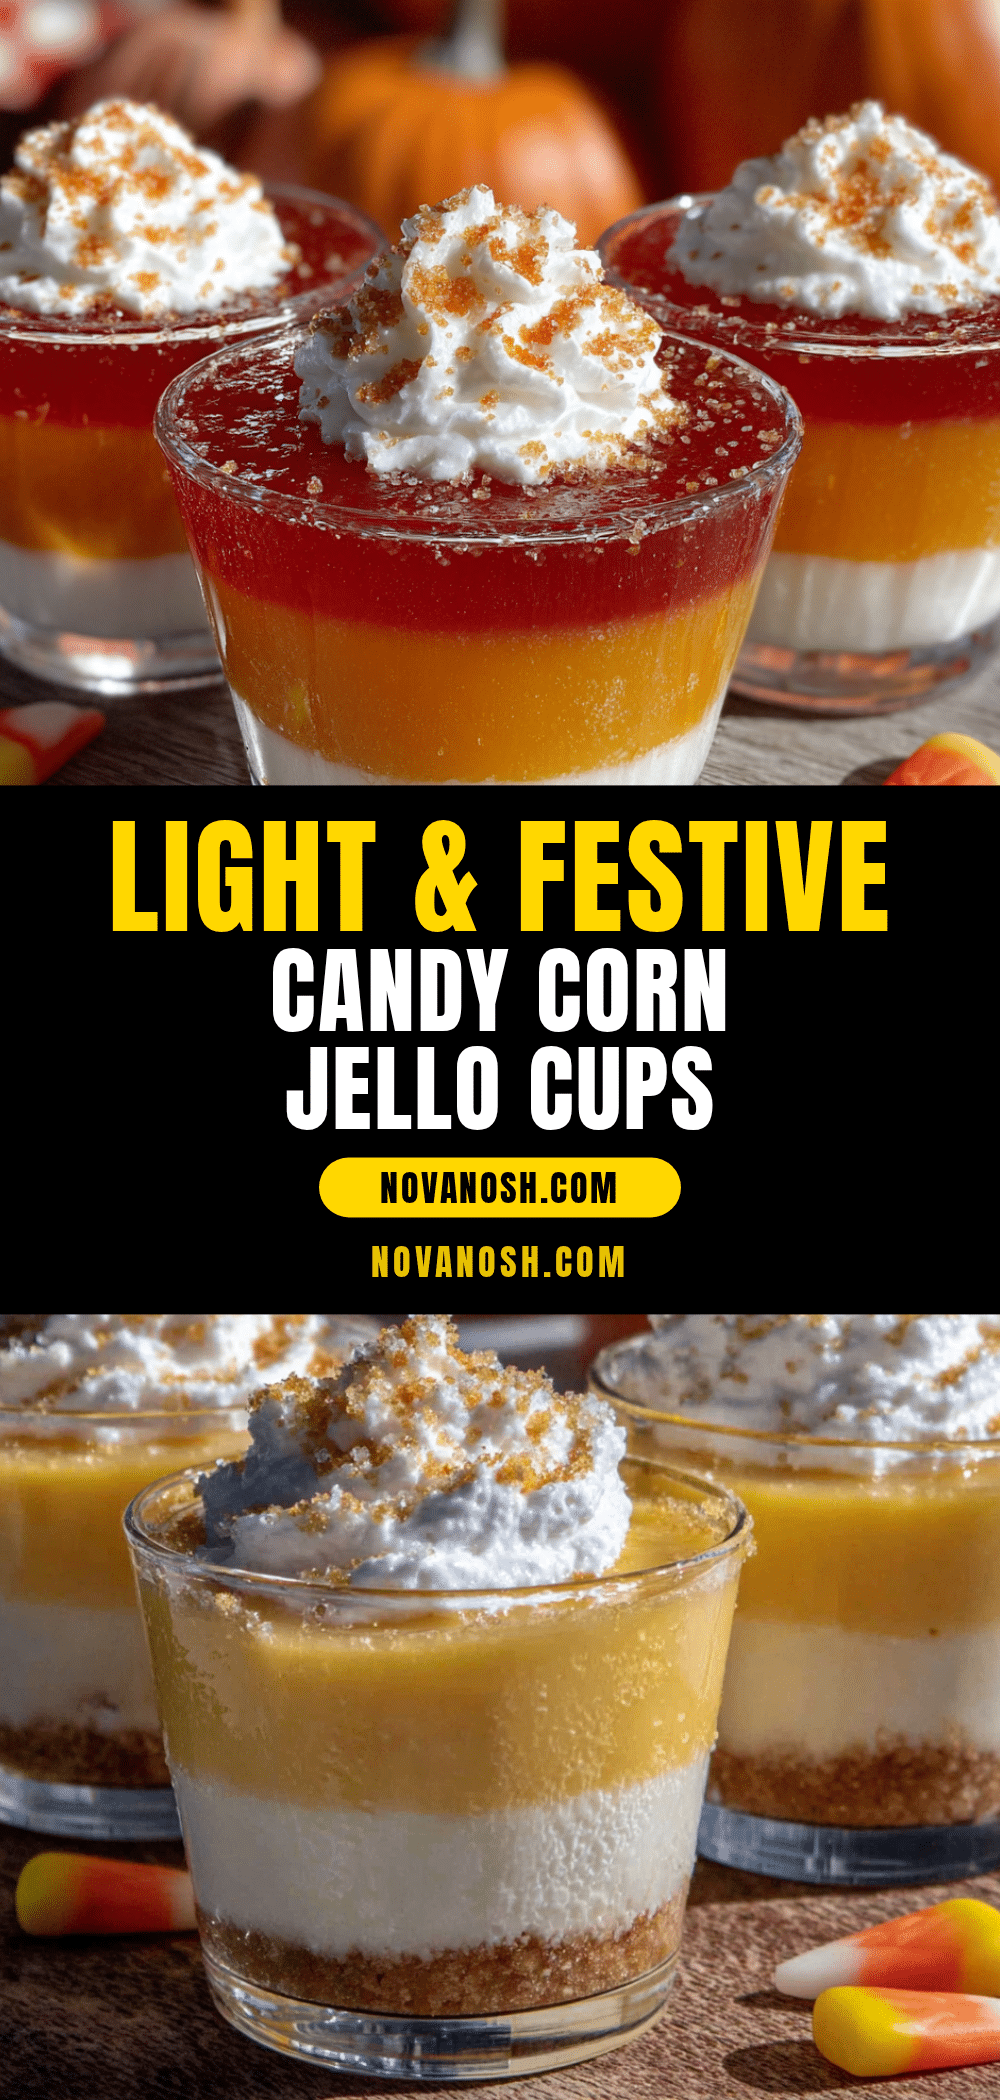
Light & Festive Candy Corn Jello Cups: Easy 3-Layer Dessert
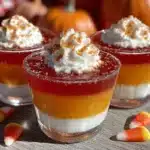
These light and festive Candy Corn Jello Cups are a fun, easy 3-layer dessert perfect for fall parties. With bright orange, yellow, and white stripes, they’re a crowd-pleaser that looks impressive but requires minimal effort.
- Prep Time: 20 minutes
- Cook Time: 0 minutes
- Total Time: 4 hours 20 minutes (includes chilling)
- Yield: 8 servings 1x
- Category: Dessert
- Cuisine: American
Ingredients
- 1 box (3 oz) orange-flavored gelatin
- 1 packet (about 2 tsp) unflavored gelatin
- 1 cup boiling water
- 1/2 cup cold water
- 1 box (3 oz) lemon-flavored gelatin
- 1 packet (about 2 tsp) unflavored gelatin
- 1 cup boiling water
- 1/2 cup cold water
- 1/2 tsp vanilla extract
- 1 packet (about 2 tsp) unflavored gelatin
- 1/2 cup cold water
- 1/2 cup boiling water
- 1/2 cup sweetened condensed milk
- 1/2 tsp vanilla extract
Instructions
- Prepare your workspace: Arrange 6 to 8 small clear cups or ramekins on a baking sheet. Clear a shelf in the refrigerator.
- Make the orange layer: In a small bowl, combine orange-flavored gelatin and 1 packet unflavored gelatin. Add 1 cup boiling water and whisk for 2 minutes until fully dissolved. Stir in 1/2 cup cold water. Let cool for 5 minutes. Pour evenly into cups, filling each about one-third full. Refrigerate for at least 1 hour until firm.
- Make the yellow layer: In a second bowl, combine lemon gelatin and 1 packet unflavored gelatin. Add 1 cup boiling water and whisk until dissolved. Stir in 1/2 tsp vanilla extract and 1/2 cup cold water. Let cool for 5 minutes. Gently pour over the orange layer using the back of a spoon to break the fall. Fill each cup another third. Refrigerate for 1 hour until set.
- Make the white layer: In a third bowl, bloom 1 packet unflavored gelatin in 1/2 cup cold water for 5 minutes. Add 1/2 cup boiling water and stir until dissolved. Whisk in 1/2 cup sweetened condensed milk and 1/2 tsp vanilla extract until smooth. Let cool for 10 minutes. Pour over the yellow layer using a spoon to cushion the pour. Fill to the top. Refrigerate for at least 2 hours or overnight.
- Serve: If serving in cups, garnish as desired. To unmold, run a thin knife around the edge, dip the cup in warm water for 10 seconds, and invert onto a plate.
Notes
Patience between layers is key. Ensure each layer is fully set before adding the next. Let each layer cool to lukewarm before pouring to prevent melting. For clearest layers, use powdered gelatin and avoid over-whisking to prevent bubbles. The flavors meld and deepen after a day in the fridge.
Nutrition
- Serving Size: 1 cup
- Calories: 145
- Sugar: 24
- Sodium: 85
- Fat: 3
- Saturated Fat: 2
- Carbohydrates: 28
- Protein: 4
Keywords: candy corn, jello cups, layered dessert, Halloween dessert, fall dessert, easy jello recipe