Love this? Save it for later!
Share the inspiration with your friends
“You have to try these!” my neighbor, Carla, said as she handed me a small, vibrant red cake pop last Fourth of July. I was skeptical — cake pops aren’t usually my go-to party treat. But honestly, the moment I bit into that Firecracker Red Velvet Cake Pop, I was hooked. The pop of color and the subtle hint of cocoa mixed with just enough tang from the cream cheese coating made it impossible to stop at one.
Carla wasn’t some fancy baker; she just loved making festive treats that wowed without the fuss. That afternoon, as fireworks boomed in the background, her little kitchen was alive with laughter, melted chocolate, and sprinkles flying everywhere — including on the floor, thanks to her playful toddler. Maybe you’ve been there, trying something last minute for a party and realizing it’s better than anything you’d planned.
What makes these Firecracker Red Velvet Cake Pops truly irresistible is their perfect balance of rich, moist cake and creamy frosting, all wrapped up in a crunchy, colorful shell. And the best part? They’re easy enough for anyone to make, even when you’re juggling a million things—like Carla was, with a grill smoking outside and kids asking for s’mores.
Every time I make these, I remember that chaotic, joyful day and why these little treats have become my go-to festive dessert. Whether it’s a summer barbecue, birthday bash, or holiday gathering, these cake pops bring a touch of fun and a burst of flavor that’s hard to beat.
Why You’ll Love This Recipe
After testing numerous red velvet cake pop recipes, I can tell you this one stands out. It’s simple, fast, and consistently delicious — no weird textures or dry bites here. Honestly, I’ve brought these to potlucks and even picky eaters went back for seconds.
- Quick & Easy: Ready in under an hour, perfect when you need a last-minute festive treat.
- Simple Ingredients: No need for exotic items; most are pantry staples or easy to find.
- Perfect for Any Celebration: From Independence Day to birthdays, these pops add a festive pop of color and flavor.
- Crowd-Pleaser: Kids love the fun shape and adults appreciate the balance of sweet and tangy.
- Unbelievably Delicious: The cream cheese frosting mixed into the cake keeps it moist and flavorful.
What sets these apart? I blend the cream cheese frosting right into the cake crumbs until smooth, ensuring no dryness. The coating is thin but sturdy, so you get that satisfying crunch without overwhelming sweetness. Plus, the festive red color and sprinkles make them truly eye-catching — almost too pretty to eat (but trust me, you want to!).
What Ingredients You Will Need
This recipe uses simple, wholesome ingredients to deliver bold flavor and satisfying texture without the fuss. Most are pantry staples, and substitutions are easy if needed.
- For the Red Velvet Cake:
- All-purpose flour (2 cups / 240g) – I prefer King Arthur for consistency
- Sugar (1 ½ cups / 300g) – granulated
- Unsweetened cocoa powder (2 tbsp / 15g) – use Dutch-processed if possible for richer flavor
- Baking soda (1 tsp)
- Salt (½ tsp)
- Buttermilk (1 cup / 240ml) – room temperature; or 1 cup milk + 1 tbsp lemon juice as a substitute
- Vegetable oil (½ cup / 120ml) – adds moisture without flavor interference
- Eggs (2 large, room temperature)
- Vanilla extract (1 tsp)
- Red food coloring (2 tbsp) – gel works best for vivid color without thinning batter
- White vinegar (1 tsp)
- For the Cream Cheese Frosting:
- Cream cheese (8 oz / 225g), softened – I recommend Philadelphia brand for smoothness
- Unsalted butter (¼ cup / 60g), softened
- Powdered sugar (2 cups / 240g), sifted
- Vanilla extract (1 tsp)
- For the Coating & Decoration:
- White chocolate or vanilla-flavored candy melts (12 oz / 340g)
- Red, white, and blue sprinkles (optional but perfect for festive flair)
- Wax paper or parchment for drying
- Optional: Lollipop sticks or sturdy toothpicks
If you want a dairy-free option, swap cream cheese with a plant-based cream cheese and use dairy-free candy melts. For a gluten-free twist, almond flour can replace the all-purpose flour, but the texture will be slightly different.
Equipment Needed
- Mixing bowls – I like a large glass bowl for the cake batter and a medium one for the frosting
- Electric mixer or stand mixer – speeds up frosting preparation and mixing the batter
- Baking pan (9×13 inches / 23×33 cm) – for baking the cake evenly
- Wire rack – to cool the cake completely before crumbling
- Food processor or fork – to crumble the cake finely
- Microwave-safe bowl – for melting candy melts
- Styrofoam block or cake pop stand – handy for drying the pops upright
- Measuring cups and spoons – accurate measurements make all the difference
- Lollipop sticks or sturdy toothpicks
If you don’t have a stand mixer, a handheld electric beater works just fine. For melting chocolate, a double boiler is nice but the microwave method is quicker (just zap in short bursts, stirring frequently). I’ve found a simple Styrofoam block from the craft store works better than a cake pop stand if you’re on a budget.
Preparation Method
- Preheat your oven to 350°F (175°C). Grease and flour your 9×13-inch pan or line it with parchment paper for easy cake removal. This step usually takes about 10 minutes including prep.
- Mix the dry ingredients: In a large bowl, sift together 2 cups (240g) all-purpose flour, 1 ½ cups (300g) sugar, 2 tbsp (15g) cocoa powder, 1 tsp baking soda, and ½ tsp salt. Whisk them well to combine evenly.
- Combine wet ingredients: In a separate bowl, whisk 1 cup (240ml) buttermilk, ½ cup (120ml) vegetable oil, 2 large eggs, 1 tsp vanilla extract, 2 tbsp red food coloring, and 1 tsp white vinegar. Mixing the vinegar and baking soda will help the cake rise and give it that signature red velvet texture.
- Mix wet into dry: Gradually add the wet ingredients to the dry mix, stirring gently until just combined. Don’t overmix or your cake might become dense. The batter should be smooth and vibrant red.
- Bake: Pour the batter into your prepared pan and smooth the top with a spatula. Bake for 30-35 minutes, or until a toothpick inserted near the center comes out clean. The kitchen will smell heavenly, and you’ll notice the cake pulling slightly from the edges.
- Cool completely: Let the cake cool in the pan for 10 minutes, then transfer it to a wire rack to cool fully. This can take about an hour, but it’s crucial so the cake doesn’t crumble unevenly when making pops.
- Prepare the cream cheese frosting: Using a mixer, beat 8 oz (225g) softened cream cheese with ¼ cup (60g) softened unsalted butter until smooth. Gradually add 2 cups (240g) powdered sugar and 1 tsp vanilla extract. Beat until creamy and fluffy.
- Crumble the cake: Once cooled, break the cake into fine crumbs using your hands or pulse gently in a food processor. You want it fine enough to mix smoothly with frosting.
- Mix frosting and cake crumbs: Add about ½ cup (120g) of frosting to the crumbs and combine thoroughly. Adjust the amount so the mixture holds together without being too sticky or dry. It should form a dough-like consistency.
- Form the cake pops: Roll the mixture into 1-inch (2.5 cm) balls and place them on a baking sheet lined with parchment. Chill in the refrigerator for at least 30 minutes to firm up.
- Prepare the candy coating: Melt 12 oz (340g) white chocolate or vanilla candy melts in a microwave-safe bowl in 30-second intervals, stirring each time until smooth.
- Assemble the pops: Dip the tip of each lollipop stick into the melted candy, then insert it halfway into a chilled cake ball. This helps the stick stay put. Dip the ball fully into the coating, tap off excess, and quickly decorate with red, white, and blue sprinkles before the coating sets.
- Dry and serve: Stick each pop upright into a Styrofoam block or cake pop stand. Let them dry completely at room temperature or chill briefly to set faster. Enjoy within 2-3 days for best freshness.
Cooking Tips & Techniques
Making cake pops can be a little tricky at first, but a few tips will save you a lot of headaches. First, chilling the cake balls before dipping is key — it prevents them from falling apart when dunked in warm chocolate. Trust me, I learned this the hard way when several pops disintegrated mid-dip during a family party.
Use gel food coloring for that vibrant red without affecting the batter’s consistency. If you use liquid, it might thin the batter and change baking time. Also, don’t overmix the batter; it keeps the cake tender and moist.
When melting candy melts, patience is your friend. Heat in short bursts with stirring in between; overheating can cause the chocolate to seize, and nobody wants a grainy coating.
Lastly, work quickly when decorating with sprinkles — the coating hardens fast! If you plan to make lots, set up an assembly line: dip, sprinkle, place, repeat. Multitasking like this saves time and keeps the pops looking fresh and festive.
Variations & Adaptations
- Chocolate Lover’s Version: Swap out the white candy melts for dark or milk chocolate for a richer flavor. Add mini chocolate chips inside the cake mixture for extra chocolate bursts.
- Gluten-Free Option: Use almond flour or a gluten-free flour blend instead of all-purpose flour. Be mindful that texture might be slightly denser.
- Seasonal Twist: For winter holidays, add a pinch of cinnamon and nutmeg to the cake batter and decorate with crushed peppermint candies instead of sprinkles.
- Vegan Adaptation: Substitute eggs with flax eggs (1 tbsp ground flaxseed + 3 tbsp water per egg), use plant-based butter and cream cheese, and dairy-free candy melts.
- Personal Favorite: I once added a tablespoon of espresso powder to the batter to deepen the cocoa flavor — it was a hit at a coffee-themed brunch.
Serving & Storage Suggestions
Serve these cake pops chilled or at room temperature for the best texture. They look fantastic displayed upright in a decorated Styrofoam block or festive jar. Pair them with a cold glass of milk, iced tea, or even a light sparkling wine for grown-up celebrations.
Store leftover cake pops in an airtight container in the refrigerator for up to 3 days. For longer storage, freeze them in a single layer on a baking sheet, then transfer to a freezer-safe container for up to a month. To thaw, leave them in the refrigerator overnight — avoid microwaving as it can melt the coating.
Fun fact: the flavors actually deepen and meld a bit after a day, so if you can resist, they taste even better the next day!
Nutritional Information & Benefits
Each Firecracker Red Velvet Cake Pop contains approximately 150-180 calories depending on size and ingredients. They provide a modest amount of protein from the eggs and cream cheese, and the cocoa powder offers antioxidants that support heart health.
This recipe can be tailored for dietary needs — swapping in gluten-free flour or dairy-free alternatives makes it accessible for many. Just note that the cake pops do contain common allergens like eggs, dairy, and wheat unless substitutions are made.
From a wellness perspective, these cake pops are a joyful occasional treat that deliver comfort without going overboard. The combination of cream cheese and cocoa gives a satisfying richness that feels indulgent but balanced.
Conclusion
If you’re looking for a festive treat that’s charming, delicious, and surprisingly simple to make, these Firecracker Red Velvet Cake Pops should be on your list. They bring that perfect pop of color and flavor that makes celebrations special — and honestly, they make great gifts too!
Feel free to customize with your favorite colors, flavors, or decorations to fit any occasion. I love that this recipe is flexible yet reliably tasty, making it a staple in my kitchen.
Give it a try, and don’t be shy about sharing your own twists or stories in the comments — I’d love to hear how your Firecracker Red Velvet Cake Pops turn out. Happy baking and celebrating!
Frequently Asked Questions
Can I make these cake pops ahead of time?
Yes! You can prepare the cake pops a day or two in advance and keep them refrigerated. Just store them in an airtight container to maintain freshness.
What if I don’t have lollipop sticks?
Sturdy toothpicks work as a substitute, but the pops might be a bit harder to hold. Alternatively, serve them as bite-sized cake balls without sticks.
How do I prevent the cake pops from falling off the sticks?
Dipping the stick tip in melted chocolate before inserting into the cake ball helps secure it. Also, chilling the cake balls before dipping provides a firmer base.
Can I use boxed red velvet cake mix?
Absolutely! Using a boxed mix can save time. Just follow the package instructions, then crumble and mix with cream cheese frosting as directed.
What’s the best way to melt the candy coating?
Microwave in 30-second bursts, stirring each time until smooth. Avoid overheating to prevent seizing. Alternatively, use a double boiler for gentle melting.
For a festive dessert that’s both fun and flavorful, these red velvet cupcakes and chocolate dipped strawberries pair beautifully on any dessert table!
Pin This Recipe!
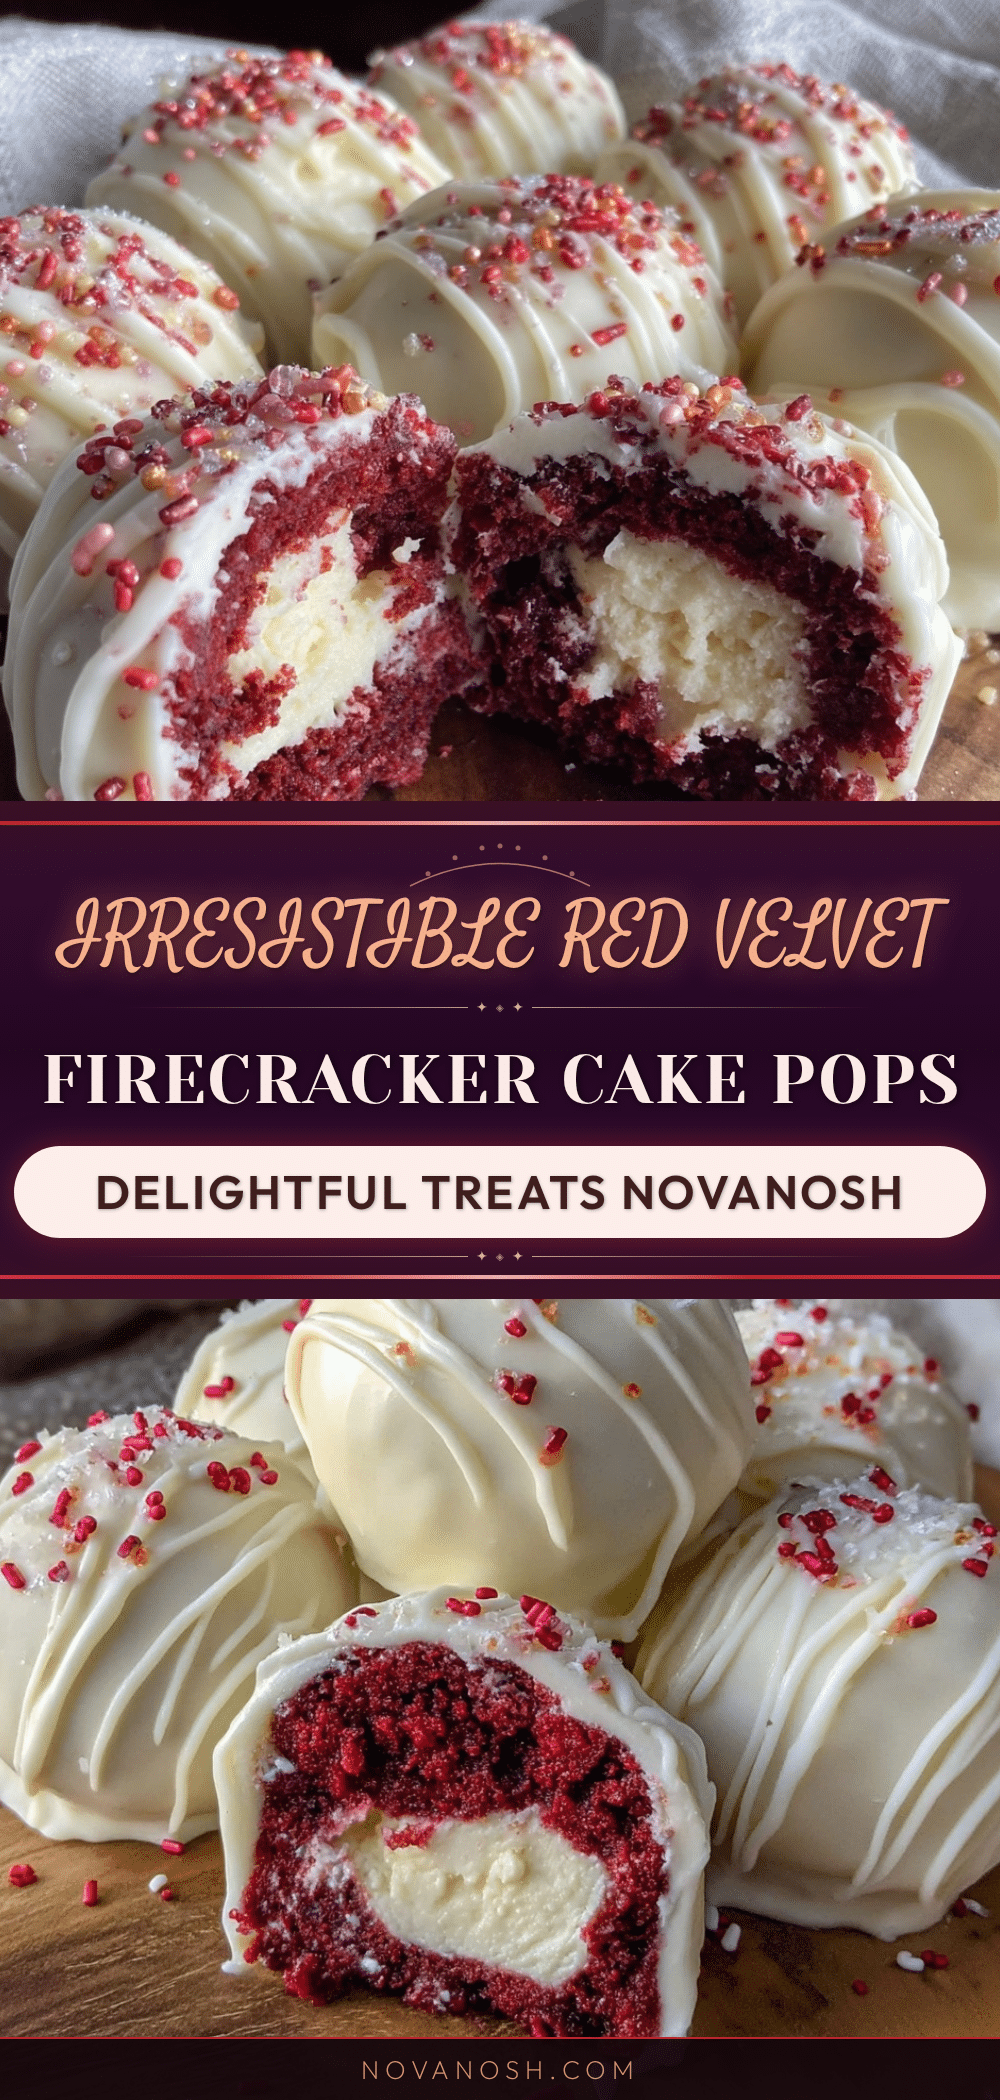
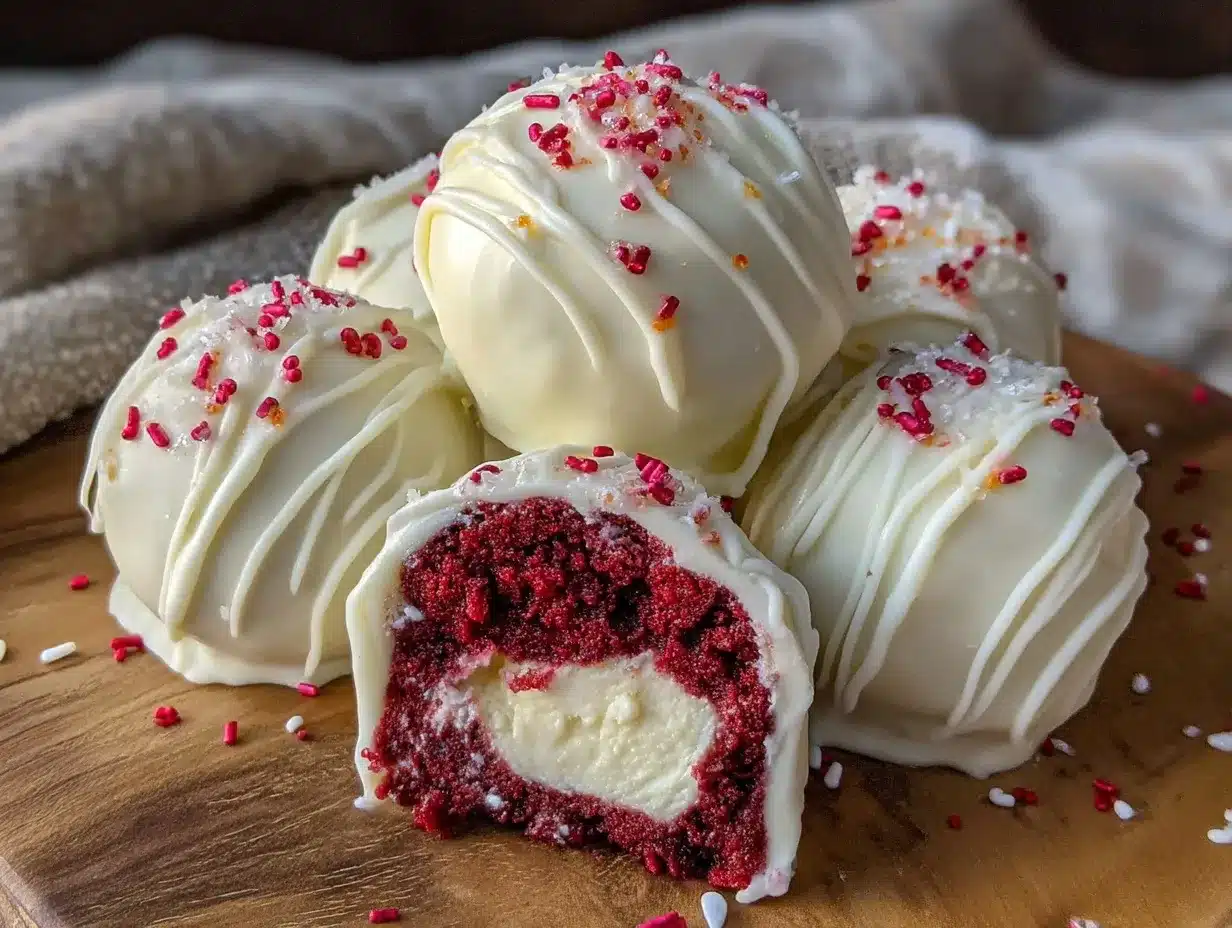
Firecracker Red Velvet Cake Pops
These vibrant red velvet cake pops combine moist cake with creamy cream cheese frosting and a crunchy candy coating, making a festive and easy-to-make treat perfect for any celebration.
- Prep Time: 20 minutes
- Cook Time: 35 minutes
- Total Time: 1 hour 45 minutes
- Yield: 24 cake pops 1x
- Category: Dessert
- Cuisine: American
Ingredients
- 2 cups (240g) all-purpose flour
- 1 ½ cups (300g) granulated sugar
- 2 tbsp (15g) unsweetened cocoa powder (preferably Dutch-processed)
- 1 tsp baking soda
- ½ tsp salt
- 1 cup (240ml) buttermilk (room temperature) or 1 cup milk + 1 tbsp lemon juice as substitute
- ½ cup (120ml) vegetable oil
- 2 large eggs (room temperature)
- 1 tsp vanilla extract
- 2 tbsp red food coloring (gel preferred)
- 1 tsp white vinegar
- 8 oz (225g) cream cheese, softened
- ¼ cup (60g) unsalted butter, softened
- 2 cups (240g) powdered sugar, sifted
- 1 tsp vanilla extract
- 12 oz (340g) white chocolate or vanilla-flavored candy melts
- Red, white, and blue sprinkles (optional)
- Wax paper or parchment for drying
- Optional: Lollipop sticks or sturdy toothpicks
Instructions
- Preheat oven to 350°F (175°C). Grease and flour a 9×13-inch pan or line with parchment paper.
- In a large bowl, sift together flour, sugar, cocoa powder, baking soda, and salt. Whisk to combine.
- In a separate bowl, whisk together buttermilk, vegetable oil, eggs, vanilla extract, red food coloring, and white vinegar.
- Gradually add wet ingredients to dry ingredients, stirring gently until just combined. Do not overmix.
- Pour batter into prepared pan and smooth the top. Bake for 30-35 minutes or until a toothpick inserted near the center comes out clean.
- Cool cake in pan for 10 minutes, then transfer to a wire rack to cool completely (about 1 hour).
- Prepare cream cheese frosting by beating cream cheese and butter until smooth. Gradually add powdered sugar and vanilla extract; beat until creamy and fluffy.
- Crumble cooled cake into fine crumbs using hands or food processor.
- Mix about ½ cup (120g) frosting into cake crumbs until mixture holds together like dough.
- Roll mixture into 1-inch (2.5 cm) balls and place on parchment-lined baking sheet. Chill in refrigerator for at least 30 minutes.
- Melt candy melts in microwave-safe bowl in 30-second intervals, stirring until smooth.
- Dip tip of each lollipop stick into melted candy, then insert halfway into chilled cake ball to secure.
- Dip cake ball fully into melted candy coating, tap off excess, and decorate quickly with sprinkles before coating sets.
- Place pops upright in Styrofoam block or cake pop stand to dry completely at room temperature or chill briefly to set faster.
- Enjoy within 2-3 days for best freshness.
Notes
Chill cake balls before dipping to prevent them from falling apart. Use gel food coloring for vibrant color without thinning batter. Melt candy melts in short bursts to avoid seizing. Work quickly when decorating with sprinkles as coating hardens fast. Store cake pops in airtight container in refrigerator up to 3 days or freeze for up to a month.
Nutrition
- Serving Size: 1 cake pop
- Calories: 165
- Sugar: 16
- Sodium: 110
- Fat: 8
- Saturated Fat: 4
- Carbohydrates: 22
- Fiber: 1
- Protein: 2
Keywords: red velvet cake pops, cake pops recipe, festive treats, cream cheese frosting, party desserts, easy cake pops