Love this? Save it for later!
Share the inspiration with your friends
It was 10:47 PM on a random Wednesday, and I was starving. Not the polite kind of hungry where you can wait until morning—the kind where your stomach is making noises that sound like a dying animal and you’re pretty sure the kitchen is empty. I had just finished a late editing session for a client’s cookbook (yes, I read recipe books for fun at midnight), and my energy was completely gone. I didn’t have the energy to make a proper snack, but I had a jar of peanut butter that was almost empty, a half-eaten bag of old-fashioned oats, and a desperate idea that arrived out of nowhere: what if I just… mixed things together and hoped for the best?
Honestly, the first batch was a mess. Too sticky, too dry, too everything. But that’s the thing about late-night kitchen experiments—you’re not trying to impress anyone, so you just keep tweaking. By the third attempt (over the course of a week, because I’m not a maniac who eats that many protein balls in one sitting), I had it down. These Easy 5-Minute Peanut Butter Protein Balls are the result of those weird, sleepy, determined hours. No baking, no fancy equipment, no stress. Just a bowl, a spoon, and ten minutes of your life that you’ll never regret.
Maybe you’ve been there—standing in front of your pantry at an unreasonable hour, craving something that feels both indulgent and responsible. These little guys are that. They’re the snack you make when you need fuel, comfort, and a tiny victory all at once. And let me tell you, they’ve saved me from ordering takeout more times than I can count.
Why You’ll Love This Recipe
I’ve tested this recipe more times than I care to admit—probably ten batches over the last few months, tweaking ratios, trying different add-ins, and even messing up a batch so badly I had to throw it away (too much honey, don’t ask). But now, this version is the one I keep coming back to. It’s the one my neighbor asked for after I casually left a few on her doorstep. It’s the one that got me through a chaotic holiday season without losing my mind.
- Quick & Easy: Five minutes of active time, no oven, no blender. Just your hands and a mixing bowl. Perfect for those days when you need a win.
- Simple Ingredients: You probably already have everything in your pantry. No weird protein powders or specialty items required—though I’ll share my favorite brands if you want to level up.
- Perfect for Meal Prep: Make a batch on Sunday, and you’ve got snacks for the whole week. They keep beautifully in the fridge or freezer.
- Crowd-Pleaser: Kids, adults, gym rats, and couch potatoes all love these. I’ve yet to meet someone who doesn’t grab a second one.
- Unbelievably Delicious: The texture is soft, chewy, and just a little bit sticky. The flavor is peanut butter heaven with a hint of sweetness and salt. It’s comfort food that actually fuels you.
What makes this recipe different from the dozens of others out there? It’s the ratio. I spent way too long figuring out the perfect balance of wet to dry ingredients so that these balls hold together without being greasy or crumbly. Plus, I use a secret ingredient—a tiny pinch of flaky sea salt on top—that makes all the difference. Trust me, it’s not just another protein ball recipe. It’s the one.
This recipe isn’t just good—it’s the kind that makes you close your eyes after the first bite. It’s fuel that feels like a treat, which is exactly what I need in my life.
Ingredients You Will Need
This recipe uses simple, wholesome ingredients that come together to create something truly satisfying. No fancy shopping trips required—just your pantry staples and a few minutes.
- 1 cup old-fashioned rolled oats (use gluten-free certified if needed; quick oats work too, but the texture will be softer)
- 1/2 cup creamy peanut butter (I prefer natural peanut butter with no added sugar—just peanuts and salt. Skippy or Jif work too, but the texture will be slightly different. Let me know if you use crunchy—it’s a whole different experience!)
- 1/3 cup honey or maple syrup (honey gives a richer flavor; maple syrup makes them a bit softer. Both work beautifully)
- 1/4 cup protein powder (vanilla or unflavored; I like Orgain or Vital Proteins for clean ingredients. If you skip this, add an extra 1/4 cup oats)
- 1/4 cup dark chocolate chips (optional but highly recommended—mini chips distribute better. I use Enjoy Life for dairy-free)
- 1 tablespoon chia seeds or flaxseed meal (adds fiber and helps bind the mixture. Both work, but flax gives a slightly nuttier flavor)
- 1/2 teaspoon vanilla extract (pure, not imitation—trust me, it makes a difference)
- Pinch of salt (omit if your peanut butter is already salted)
- Flaky sea salt for topping (optional but life-changing—Maldon is my go-to)
Ingredient Tips: If your peanut butter is super runny (like some natural brands), you might need to add an extra tablespoon of oats to firm things up. Conversely, if your peanut butter is very thick, add a teaspoon of warm water or coconut oil to help the mixture come together. I’ve learned this the hard way—my first batch with super-stiff peanut butter was basically a crumbly mess.
For a nut-free version, swap the peanut butter for sunflower seed butter or tahini. The flavor will be different, but still delicious. Just note that sunflower seed butter can turn green when combined with baking soda (we’re not using any here, so you’re safe), but it might still react with the honey. I’ve tried it—it’s fine, just a little earthy.
Equipment Needed
You don’t need much for this recipe, which is honestly my favorite part. Here’s what you’ll need:
- Large mixing bowl (any size works, but a medium-to-large bowl makes mixing easier without flinging oats everywhere)
- Measuring cups and spoons (I use standard US measures; a kitchen scale is great if you have one, but not necessary)
- Rubber spatula or wooden spoon (for initial mixing—your hands will do the final work)
- Cookie scoop or tablespoon (for portioning evenly; I use a 1.5-tablespoon scoop for consistent sizes)
- Parchment paper or silicone baking mat (for rolling and storing—keeps things from sticking)
- Small bowl of water (for wetting your hands—trust me, this is a game-changer for preventing sticky fingers)
I’ve made these with just a fork and a bowl before—no joke, during a camping trip. It’s totally doable, though your hands will get messy. If you have a food processor, you can pulse the oats first for a finer texture, but I prefer the chewiness of whole oats. My silicone mat has saved my countertops countless times—worth every penny.
Preparation Method
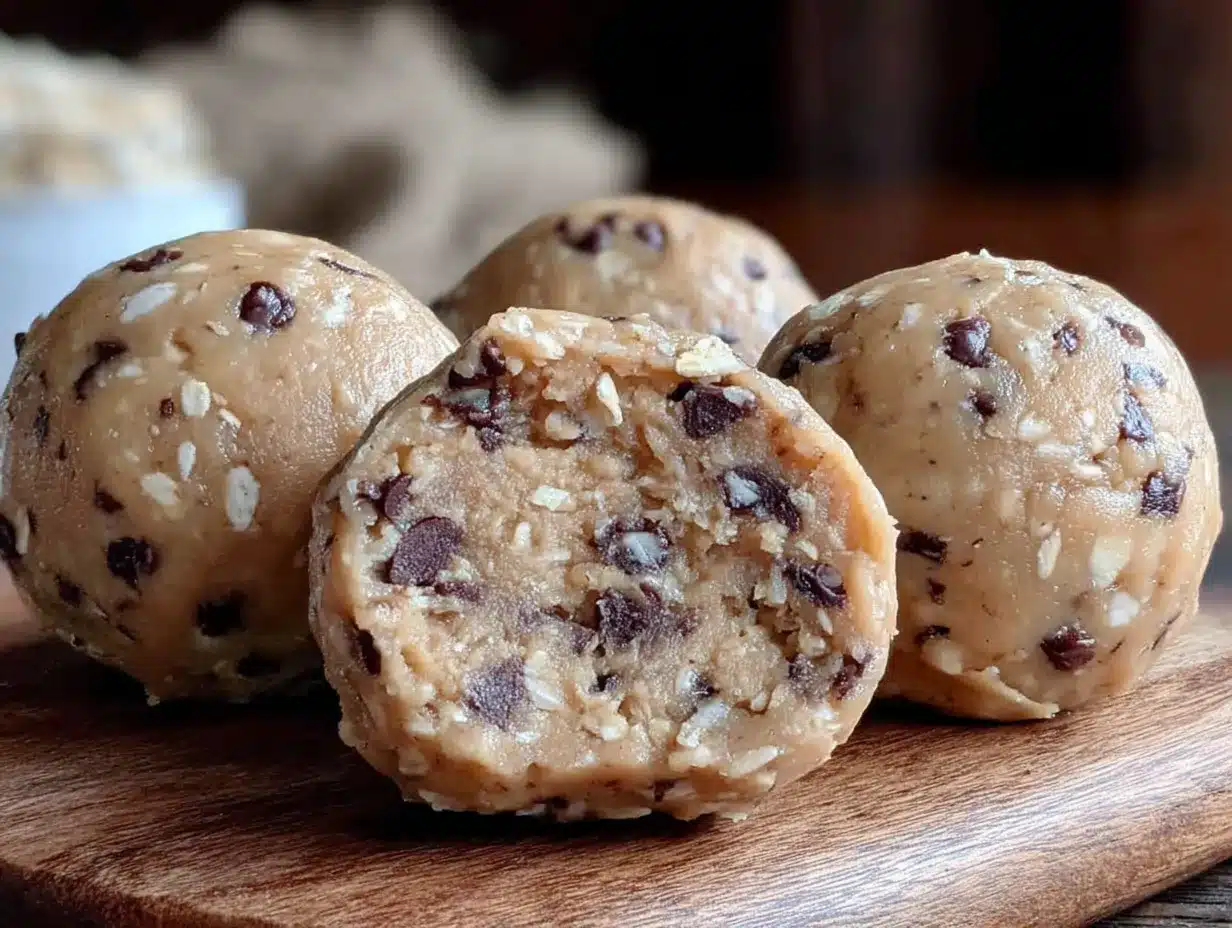
- Combine the dry ingredients. In your large mixing bowl, add the rolled oats, protein powder, chia seeds (or flaxseed meal), and a pinch of salt if using. Give everything a quick stir with your spatula to distribute evenly. This step takes about 30 seconds, but it ensures you don’t end up with a pocket of pure protein powder later. (I learned this the hard way—trust me, you don’t want a chalky bite.)
- Add the wet ingredients. Spoon in the peanut butter, honey (or maple syrup), and vanilla extract. Don’t dump them all in one spot—spread them around a bit so mixing is easier. If your peanut butter is cold from the fridge, microwave it for 10-15 seconds to soften. It makes a world of difference.
- Mix until combined. Start stirring with your spatula, pressing the mixture against the sides of the bowl. It will look dry and crumbly at first—don’t panic. Keep mixing. After about 30 seconds, it should start coming together. If it’s still too dry, add a teaspoon of warm water or a tiny drizzle of honey. If it’s too wet (sticking to the bowl like glue), add a tablespoon of oats. The texture should be like a soft dough that holds together when pressed between your fingers.
- Fold in the chocolate chips. Once the base mixture is uniform, gently fold in the dark chocolate chips. Don’t overmix—you want them evenly distributed, not melted into the dough. If you’re using mini chips, they’ll stay put better. Regular chips work too, but they might fall out of the balls more easily.
- Chill the mixture (optional but recommended). Pop the bowl in the fridge for 10-15 minutes. This makes rolling way easier and less sticky. If you’re in a hurry, skip this step—just wet your hands before rolling. I usually chill it because I’m a messy roller otherwise.
- Roll into balls. Lightly wet your hands with water (this is the secret to non-sticky rolling!). Scoop out about 1.5 tablespoons of mixture and roll it between your palms into a smooth ball. Place on a parchment-lined plate or baking sheet. Repeat until all the mixture is used. You should get 12-14 balls, depending on size.
- Add the finishing touch. While the balls are still slightly tacky, sprinkle a tiny pinch of flaky sea salt on top of each one. Press gently to adhere. This step is optional, but honestly, it’s what makes these taste like an expensive snack from a fancy cafe. Don’t skip it if you have the salt on hand.
- Set and serve. Place the rolled balls in the fridge for at least 20 minutes to firm up. This helps them hold their shape. After that, they’re ready to eat! Store in an airtight container in the fridge for up to a week, or freeze for up to three months.
Sensory Cues: The mixture should feel like a soft, slightly sticky dough that holds together when squeezed. It shouldn’t be crumbly or greasy. If it feels too dry, add a tiny bit more honey or peanut butter. If it’s too wet, add oats a tablespoon at a time. The smell is pure peanut butter heaven—warm, nutty, and slightly sweet.
Troubleshooting: If your balls are falling apart, the mixture is too dry. Add a teaspoon of honey or warm water. If they’re too sticky to roll, wet your hands more or chill the mixture longer. If they’re greasy, you may have used too much peanut butter or a very oily brand. Next time, try a natural peanut butter with less oil separation.
Cooking Tips & Techniques
I’ve made these protein balls at least twenty times, and I’ve learned a few things along the way. Here are my best tips for perfect results every time:
- Wet hands are your best friend. I cannot stress this enough. Keep a small bowl of water nearby and dip your fingers before rolling each ball. It prevents the mixture from sticking to your hands and makes the process so much faster. I learned this after my first batch ended up looking like I’d wrestled a bear made of peanut butter.
- Chill the mixture if you’re in a hurry. Even 10 minutes in the fridge makes rolling significantly easier. If you’re making these with kids, definitely chill it first—otherwise, little hands will get very sticky, very fast.
- Don’t overmix. Once the ingredients are combined, stop. Overmixing can make the texture dense and tough. You want them soft and tender, not like rocks. Trust the process.
- Use room temperature ingredients. Cold peanut butter straight from the fridge is a nightmare to mix. Let it sit out for 15 minutes, or microwave it for 10 seconds. Your hands will thank you.
- Toast the oats first (optional but amazing). Spread the oats on a baking sheet and toast at 350°F for 5-7 minutes until golden and fragrant. Let them cool completely before using. This adds a nutty, toasty flavor that takes these balls to another level. I do this when I’m feeling fancy.
- Measure your protein powder correctly. Scoop it lightly into the measuring cup and level it off. Don’t pack it down, or you’ll end up with dry, chalky balls. If your protein powder is very dense, you might need to add an extra tablespoon of oats to compensate.
- Make a double batch. These disappear fast. I always make at least double now because single batches last about two days in my house. Plus, they freeze beautifully, so you can grab one straight from the freezer when a craving hits.
Variations & Adaptations
One of the best things about this recipe is how flexible it is. Here are some of my favorite variations, all tested in my own kitchen:
- Chocolate Peanut Butter: Swap 1 tablespoon of oats for 1 tablespoon of unsweetened cocoa powder. You’ll get a rich, chocolatey version that tastes like a healthier Reese’s. Add an extra teaspoon of honey to balance the bitterness of the cocoa.
- Coconut Almond: Replace the peanut butter with almond butter, and add 1/4 cup unsweetened shredded coconut. Roll the finished balls in more shredded coconut for a tropical twist. My sister-in-law loves this version—she says it reminds her of a macaroon.
- Vegan & Gluten-Free: Use certified gluten-free oats and maple syrup instead of honey. The rest of the ingredients are naturally vegan (check your chocolate chips—some contain milk). I’ve made this version for friends with dietary restrictions, and nobody could tell the difference.
- High-Protein Boost: Add an extra tablespoon of protein powder and reduce the oats by a tablespoon. You might need to add a teaspoon of water to balance the moisture. This version is great for post-workout snacks.
- Spiced Pumpkin: Replace the chocolate chips with dried cranberries and add 1/2 teaspoon pumpkin pie spice. This fall-inspired version is perfect for cozy afternoons. I made these for a Thanksgiving road trip, and they were a hit.
- Nut-Free School-Safe: Use sunflower seed butter or WowButter instead of peanut butter. The texture will be slightly different—sunflower butter can be a bit more oily—but the flavor is still delicious. Just be aware that sunflower butter can react with certain ingredients and turn green (it’s safe to eat, just not pretty).
Serving & Storage Suggestions
These protein balls are incredibly versatile when it comes to serving. Here’s how I like to enjoy them:
Serving: Serve them straight from the fridge for the best texture—firm but still soft and chewy. They’re perfect as a pre-workout snack, an afternoon pick-me-up, or a healthy dessert. I love packing them in lunchboxes for my niece, or serving them on a platter at brunch alongside fresh fruit and coffee. They also travel well—just toss a few in a container and they’re good for road trips, hikes, or long days at the office.
Storage: Store the balls in an airtight container in the refrigerator for up to one week. Honestly, they rarely last that long in my house—they’re usually gone within three days. For longer storage, place them in a freezer-safe bag or container and freeze for up to three months. I like to freeze them in a single layer on a baking sheet first, then transfer to a bag, so they don’t stick together.
Reheating: You don’t need to reheat these—they’re meant to be eaten cold or at room temperature. If you freeze them, let them thaw in the fridge for about 30 minutes, or eat them straight from the freezer (they’re a bit firmer, but still delicious). I actually prefer them frozen in the summer—they’re like a healthy ice cream bite.
Flavor Development: These actually get better after a day or two in the fridge. The flavors meld together, and the texture becomes more uniform. I always try to make them a day ahead if I’m serving them to guests. The peanut butter flavor deepens, and the oats soften just a bit.
Nutritional Information & Benefits
Here’s the approximate nutritional breakdown per ball (based on 12 balls using the ingredients listed):
| Nutrient | Amount per Ball |
|---|---|
| Calories | 165 |
| Protein | 8g |
| Carbohydrates | 18g |
| Fiber | 3g |
| Fat | 8g |
| Sugar | 9g |
| Sodium | 85mg |
These little balls pack a serious nutritional punch. The oats provide complex carbohydrates for sustained energy, while the peanut butter and protein powder deliver a solid dose of protein to keep you full and support muscle recovery. Chia seeds add omega-3 fatty acids and fiber, which are great for heart health and digestion. Dark chocolate chips bring antioxidants and a little bit of joy—because life is too short for sad snacks.
This recipe is naturally gluten-free (if you use certified oats), vegetarian, and can easily be made vegan and dairy-free. The main allergens are peanuts and oats—if you’re serving these to a crowd, just be sure to label them clearly. I personally love that these give me a guilt-free way to satisfy my sweet tooth while actually nourishing my body.
Conclusion
These Easy 5-Minute Peanut Butter Protein Balls have become a staple in my kitchen for a reason. They’re quick, forgiving, and endlessly customizable. Whether you need a post-workout snack, a lunchbox treat, or a way to use up that half-empty jar of peanut butter, this recipe delivers every single time.
I love that I can make a batch in the time it takes to brew a cup of coffee, and that I can tweak the ingredients based on whatever I have on hand. They’ve saved me from countless hangry moments and last-minute takeout orders. Honestly, they’ve become my go-to gift for friends who are stressed, busy, or just need a little edible hug.
Now I want to hear from you! Have you tried making these? What variations did you come up with? Drop a comment below and let me know—I love seeing your creative twists. And if you make a batch, tag me on social media so I can cheer you on. Happy rolling, friends!
Frequently Asked Questions
Can I use quick oats instead of rolled oats?
Yes, absolutely! Quick oats will work just fine, though the texture will be a bit softer and less chewy. The balls might also be slightly more crumbly, so you may need to add an extra tablespoon of peanut butter or honey to help them hold together. I’ve used both, and honestly, I prefer rolled oats for the texture, but quick oats are a great substitute in a pinch.
How do I make these without protein powder?
No problem at all! Simply omit the protein powder and add an extra 1/4 cup of rolled oats to maintain the right consistency. You might also need to add a teaspoon of honey or peanut butter if the mixture feels too dry. The protein content will be lower, but they’ll still be delicious and satisfying.
Can I use crunchy peanut butter?
You sure can! Crunchy peanut butter adds a lovely texture and extra peanut pieces throughout the balls. Just keep in mind that the texture will be a bit more rustic, and the balls might be slightly less cohesive since the peanut pieces can create small gaps. If you’re using crunchy, I’d recommend adding an extra tablespoon of honey or a teaspoon of coconut oil to help everything stick together.
How long do these keep at room temperature?
These are best stored in the refrigerator, but they can be kept at room temperature for up to 2 days in an airtight container. After that, the texture starts to soften, and they may become too sticky. If you’re taking them on a road trip or packing them in a lunchbox, they’ll be fine for a few hours at room temperature—just don’t leave them in a hot car!
Can I make these nut-free for school lunches?
Absolutely! Swap the peanut butter for sunflower seed butter, WowButter, or tahini. Keep in mind that sunflower seed butter can sometimes turn a greenish color when combined with certain ingredients (it’s a natural reaction and completely safe to eat), so don’t be alarmed if that happens. I’d also recommend adding an extra tablespoon of honey or maple syrup to balance the slightly bitter flavor of sunflower seed butter.
Pin This Recipe!
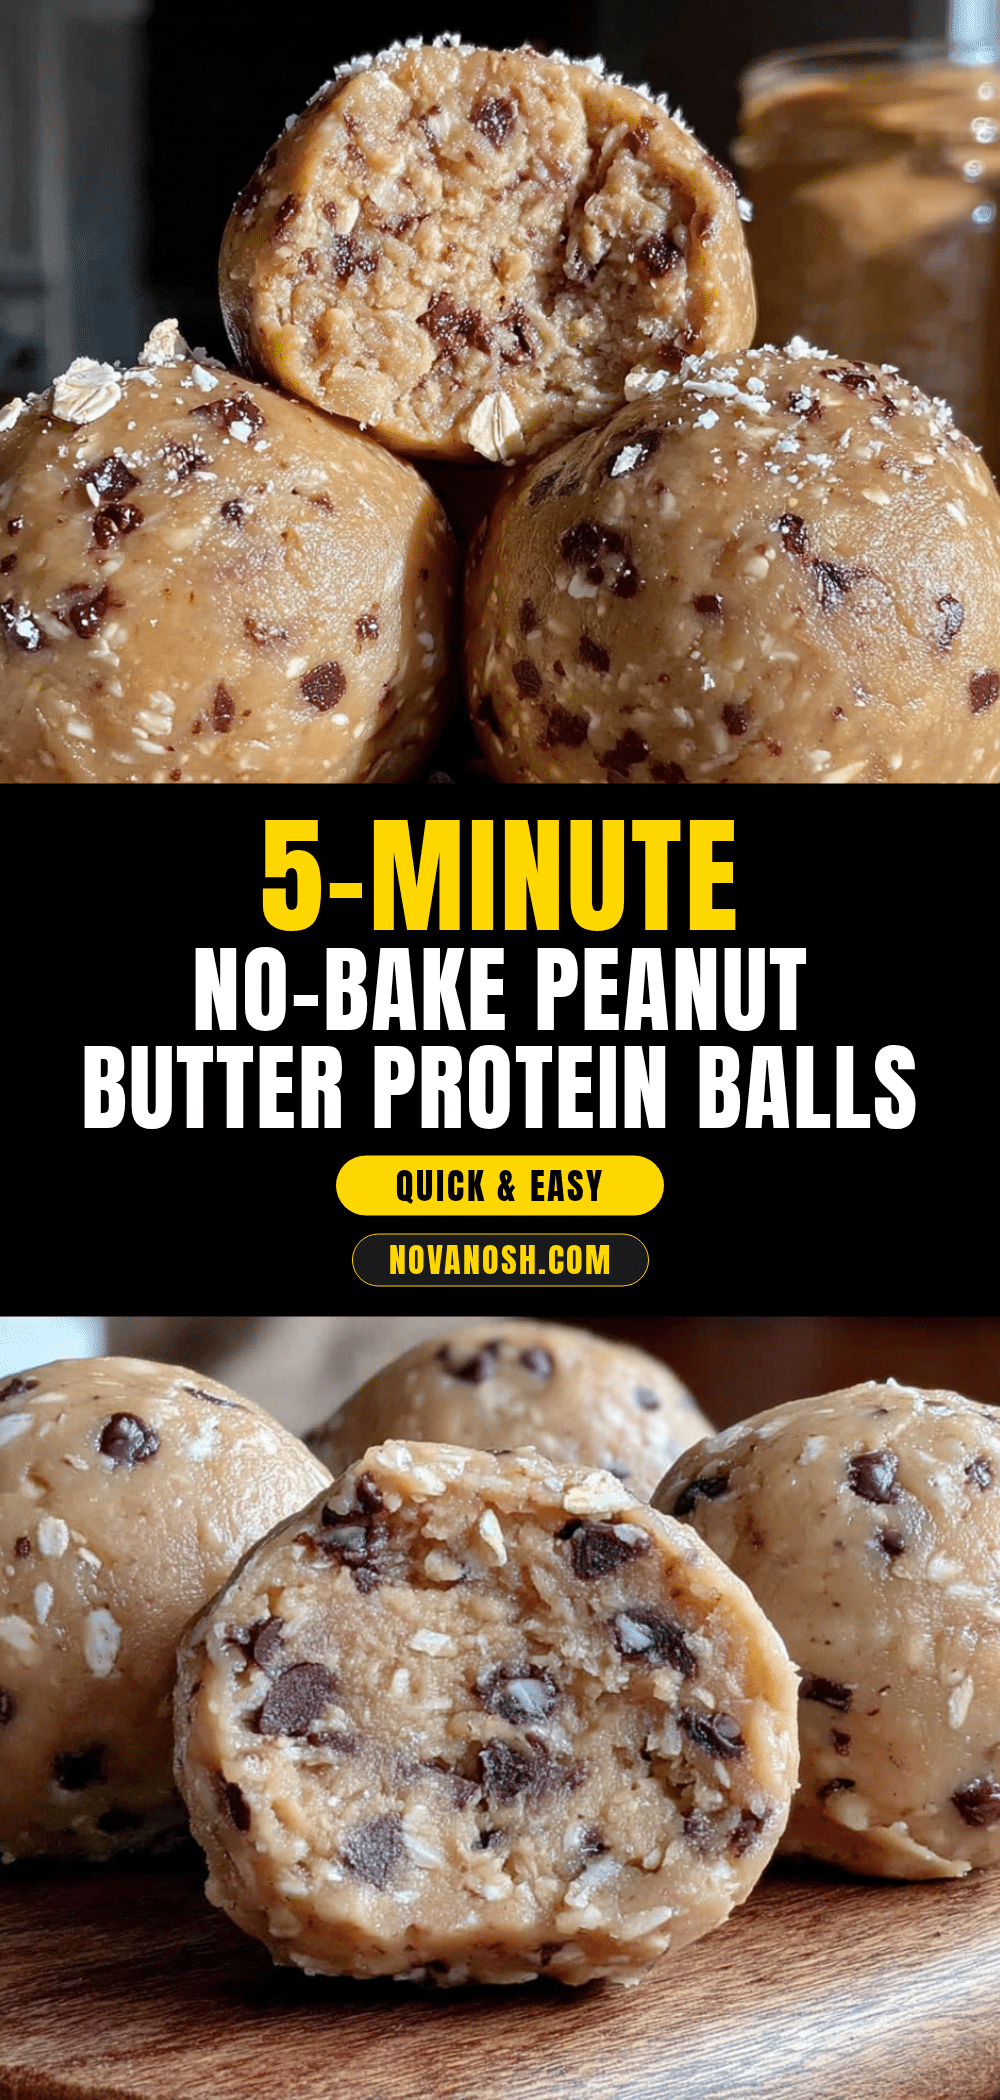
Easy 5-Minute Peanut Butter Protein Balls (No Bake)

These no-bake peanut butter protein balls come together in just 5 minutes with simple pantry ingredients. Perfect for a quick snack, meal prep, or a healthy treat that tastes like indulgence.
- Prep Time: 5 minutes
- Cook Time: 0 minutes
- Total Time: 25 minutes (includes 20 minutes chilling)
- Yield: 12-14 balls 1x
- Category: Snack
- Cuisine: American
Ingredients
- 1 cup old-fashioned rolled oats (use gluten-free certified if needed; quick oats work too, but the texture will be softer)
- 1/2 cup creamy peanut butter (natural preferred, but Skippy or Jif work too)
- 1/3 cup honey or maple syrup (honey gives richer flavor; maple syrup makes them softer)
- 1/4 cup protein powder (vanilla or unflavored; if omitted, add 1/4 cup extra oats)
- 1/4 cup dark chocolate chips (optional; mini chips distribute better; use Enjoy Life for dairy-free)
- 1 tablespoon chia seeds or flaxseed meal (adds fiber and helps bind)
- 1/2 teaspoon vanilla extract (pure, not imitation)
- Pinch of salt (omit if peanut butter is salted)
- Flaky sea salt for topping (optional but recommended)
Instructions
- Combine the dry ingredients. In a large mixing bowl, add rolled oats, protein powder, chia seeds (or flaxseed meal), and a pinch of salt if using. Stir to distribute evenly.
- Add the wet ingredients. Spoon in peanut butter, honey (or maple syrup), and vanilla extract. Spread them around for easier mixing. If peanut butter is cold, microwave for 10-15 seconds to soften.
- Mix until combined. Stir with a spatula, pressing the mixture against the sides of the bowl. It will look dry and crumbly at first; keep mixing until it forms a soft dough that holds together when pressed. If too dry, add a teaspoon of warm water or honey; if too wet, add a tablespoon of oats.
- Fold in the chocolate chips. Gently fold in the dark chocolate chips until evenly distributed. Do not overmix.
- Chill the mixture (optional but recommended). Refrigerate for 10-15 minutes to make rolling easier and less sticky.
- Roll into balls. Lightly wet your hands with water. Scoop about 1.5 tablespoons of mixture and roll into smooth balls. Place on a parchment-lined plate or baking sheet. Repeat until all mixture is used (yields 12-14 balls).
- Add the finishing touch. While balls are still slightly tacky, sprinkle a tiny pinch of flaky sea salt on top of each. Press gently to adhere.
- Set and serve. Refrigerate for at least 20 minutes to firm up. Store in an airtight container in the fridge for up to a week, or freeze for up to three months.
Notes
Wet hands are key to preventing sticky fingers. Chill the mixture for easier rolling. For a nut-free version, use sunflower seed butter or tahini. These balls get better after a day in the fridge as flavors meld.
Nutrition
- Serving Size: 1 ball
- Calories: 165
- Sugar: 9
- Sodium: 85
- Fat: 8
- Saturated Fat: 2
- Carbohydrates: 18
- Fiber: 3
- Protein: 8
Keywords: peanut butter protein balls, no bake protein balls, healthy snack, gluten free snack, meal prep snack, easy protein balls