Love this? Save it for later!
Share the inspiration with your friends
Introduction
My neighbor Sarah wasn’t trying to impress anyone that Tuesday morning. I’d stopped by to borrow a ladder—our gutters were clogged, and honestly, I was grumpy about it—and the smell hit me before I even got past her screen door. It wasn’t just pumpkin spice, you know? It was warmer than that. Richer. Like someone had bottled the exact moment autumn arrives and baked it into something edible.
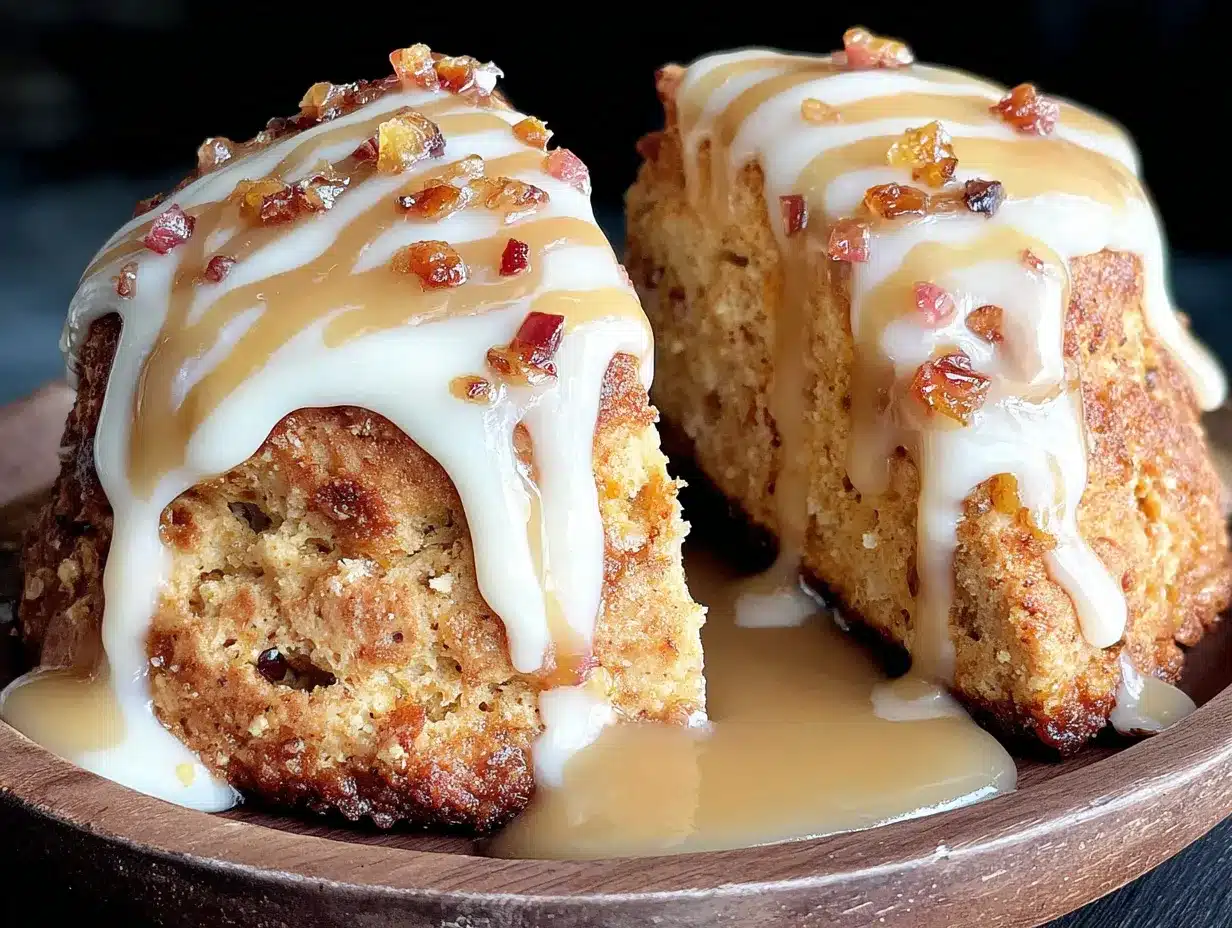
She was standing at her counter in sweatpants, flour dusted across her favorite old sweater, holding a whisk like it was no big deal. “Oh, those?” she said when I asked, waving her hand. “Just scones. I had a leftover can of pumpkin.” Just scones. I mean, I’ve had scones that taste like dry hockey pucks. These were something else entirely—tender, flaky, with this maple flavor that didn’t hit you over the head but lingered in the best way. And the glaze? She’d browned the butter first. Of course she had.
I stood there eating one (okay, two) while she told me she’d been making them every fall for years, never using a recipe, just eyeballing everything. That’s the thing about people who cook like that—they don’t realize how special what they’re doing actually is. I practically begged her to walk me through it while I scribbled notes on a scrap of envelope from my car. Maybe you’ve been there, watching someone make something incredible and thinking, I need to figure this out.
These perfect maple pumpkin scones with brown butter glaze are the result of that morning, plus about a dozen test batches in my own kitchen to get them just right. They’re the scones that made me understand why people get excited about fall baking. And now I get to share them with you.
Why You’ll Love This Recipe
Let me tell you why these scones have become my most-requested fall recipe. I’ve tested this roughly eight times—my family has been very patient—and each batch taught me something new. This version is the one that finally made my neighbor nod and say, “Yeah, that’s it.”
- Quick & Easy: From start to finish, you’re looking at about 35 minutes. No chilling the dough overnight, no complicated folding techniques. These come together in one bowl and are ready to eat before your coffee gets cold.
- Simple Ingredients: Canned pumpkin, real maple syrup, and pantry staples. No running to three different stores for obscure flours or extracts you’ll never use again.
- Perfect for Fall Mornings: These scream cozy weekend breakfasts, Thanksgiving brunch, or that moment when you just need the house to smell like autumn.
- Crowd-Pleaser: I’ve brought these to book club, to my kid’s soccer game, and to a work meeting. Every single time, someone asks for the recipe. Even people who claim they don’t like pumpkin desserts love these.
- Unbelievably Delicious: The brown butter glaze is what takes these over the top. It’s nutty, caramel-like, and pairs so perfectly with the maple-pumpkin base that you’ll want to put it on everything.
What makes these different from every other pumpkin scone recipe out there? It’s the technique. Blending the cold butter into the dry ingredients until it looks like coarse meal creates layers of flakiness that most pumpkin scones lack. And browning the butter for the glaze adds a depth of flavor you just can’t get any other way. This isn’t just another pumpkin scone—it’s the one that will ruin all other pumpkin scones for you.
Honestly, this is comfort food at its finest. The kind that makes you close your eyes after the first bite and forget about whatever was stressing you out. It’s warm, it’s spiced, and it’s exactly what you need when the leaves start turning.
What Ingredients You Will Need
This recipe uses simple, wholesome ingredients that come together to create something truly special. Most of these are probably already in your pantry or fridge, which makes these scones perfect for spontaneous baking.
For the Scones
- 2 cups all-purpose flour (I use King Arthur for consistent results, but any brand works)
- 1/3 cup packed light brown sugar (dark brown adds more molasses flavor if that’s your thing)
- 1 tablespoon baking powder (make sure it’s fresh—this is crucial for fluffiness)
- 1 teaspoon ground cinnamon
- 1/2 teaspoon ground ginger
- 1/2 teaspoon ground nutmeg
- 1/4 teaspoon ground cloves
- 1/2 teaspoon salt
- 6 tablespoons cold unsalted butter, cut into small cubes (the colder the better—pop it in the freezer for 10 minutes before cutting)
- 1/2 cup canned pumpkin puree (not pumpkin pie filling—make sure it’s 100% pumpkin)
- 1/4 cup real maple syrup (please don’t use pancake syrup here; the real stuff makes a huge difference)
- 1 large egg
- 1 teaspoon vanilla extract
- 2 tablespoons milk or heavy cream (heavy cream gives a richer texture)
For the Brown Butter Glaze
- 1/4 cup unsalted butter
- 1 cup powdered sugar, sifted
- 2 tablespoons real maple syrup
- 1-2 tablespoons milk or heavy cream (adjust for desired consistency)
- Pinch of salt
A note on pumpkin: I prefer Libby’s canned pumpkin for its consistent texture and deep flavor. If you want to use fresh pumpkin puree, make sure to strain it through cheesecloth overnight to remove excess moisture—otherwise your scones will turn out gummy.
For the maple syrup, look for Grade A Dark Amber if you can find it. It has a stronger maple flavor that really shines through in the glaze. I’ve tried this with Grade A Light Amber too, and it works, but the flavor is more subtle.
If you’re dairy-free, you can substitute the butter with a high-quality vegan butter (I like Miyoko’s) and use oat milk in the glaze. The texture will be slightly different but still delicious.
Equipment Needed
You don’t need a fancy kitchen to make these scones. Here’s what you’ll need:
- Large mixing bowl (any size works)
- Pastry cutter or two forks (for cutting butter into flour—you can also use your fingertips, but work quickly so the butter stays cold)
- Whisk (for mixing dry ingredients and glaze)
- Baking sheet (lined with parchment paper or a silicone baking mat)
- Parchment paper (makes cleanup so much easier)
- Small saucepan (for browning the butter—light-colored pan helps you see the color change)
- Cooling rack (optional but helpful for even cooling)
- Bench scraper or sharp knife (for cutting the scone dough)
I’ve made these scones using a $5 thrift store baking sheet and they turned out perfect. Don’t stress about having the latest kitchen gadgets. The most important tool is your hands—you’ll be using them to bring the dough together, and they work better than any mixer.
If you don’t have a pastry cutter, honestly, two forks work just fine. My grandmother used her hands exclusively. Just make sure your hands are cold—run them under cold water before handling the butter if your kitchen is warm.
Preparation Method
Alright, let’s make these scones. I’ve broken this down step by step so you can follow along without any confusion. Trust me, if I can do this while half-asleep on a Saturday morning, you can too.
- Preheat your oven to 400°F (200°C). Line a baking sheet with parchment paper and set it aside. Getting the oven hot ahead of time is key—you want that initial blast of heat to help the scones rise.
- Whisk together the dry ingredients. In a large bowl, combine the flour, brown sugar (make sure to break up any lumps), baking powder, cinnamon, ginger, nutmeg, cloves, and salt. Give it a good whisk so everything is evenly distributed. This takes about 30 seconds and makes a difference.
- Cut in the cold butter. Add the cold butter cubes to the flour mixture. Using a pastry cutter or two forks, cut the butter into the flour until the mixture resembles coarse meal with some pea-sized butter pieces remaining. Don’t overdo it—those little butter bits are what create flaky layers. If you’re using your hands, work quickly so the butter doesn’t warm up.
- Mix the wet ingredients. In a separate small bowl, whisk together the pumpkin puree, maple syrup, egg, vanilla extract, and milk until smooth. Make sure the egg is fully incorporated—I’ve learned this the hard way when I found a streak of cooked egg in my scone.
- Combine wet and dry ingredients. Pour the wet mixture into the dry mixture. Stir with a spatula or wooden spoon just until the dough comes together. It will look shaggy and a bit dry—that’s exactly what you want. Overmixing will make tough scones, so stop as soon as everything is moistened.
- Shape the dough. Turn the dough out onto a lightly floured surface. Gently bring it together with your hands, patting it into a circle about 3/4-inch thick. Don’t knead it—just coax it into shape. The dough should be soft but not sticky. If it’s too sticky, sprinkle a little more flour over the top.
- Cut the scones. Using a sharp knife or bench scraper, cut the circle into 8 wedges like you’re cutting a pizza. For cleaner edges, wipe the knife clean between cuts. I’ve used a pizza cutter in a pinch and it works great too.
- Transfer to baking sheet. Carefully place the scones on the prepared baking sheet, spacing them about 2 inches apart. They’ll spread a little, but not too much. If you want them to look really polished, brush the tops with a little extra milk or cream before baking.
- Bake for 14-16 minutes. The scones are done when they’re golden brown on the bottom and the edges look set. The tops should be lightly browned—not dark. A toothpick inserted in the center should come out clean or with just a few moist crumbs. My oven runs hot, so I check mine at the 12-minute mark.
- Cool completely before glazing. Transfer the scones to a cooling rack and let them cool for at least 20 minutes. I know it’s tempting to glaze them while they’re warm, but the glaze will just melt and slide right off. Patience, friend.
- Make the brown butter glaze. While the scones are cooling, melt the 1/4 cup butter in a small saucepan over medium heat. Stir constantly as it melts—it will foam up, then the foam will subside, and you’ll see golden brown specks forming at the bottom. This takes about 5-7 minutes. The moment it smells nutty and turns amber, remove it from the heat. Don’t walk away—brown butter goes from perfect to burnt very quickly.
- Finish the glaze. Let the brown butter cool for 2-3 minutes, then whisk in the sifted powdered sugar, maple syrup, and a pinch of salt. Add milk or cream 1 tablespoon at a time until the glaze reaches a pourable consistency. It should be thick but still flow off the whisk. Drizzle over the cooled scones and let the glaze set for about 10 minutes before serving.
A quick note on timing: If you’re making these for a specific occasion, you can prep the dry mix the night before and store it in an airtight container. Then just add the wet ingredients and bake in the morning. Fresh scones in 20 minutes? Yes, please.
Cooking Tips & Techniques
I’ve made these scones enough times to have a few disasters along the way. Let me save you from making the same mistakes.
Keep everything cold. This is the number one rule of scone-making. Cold butter creates steam pockets as it melts in the oven, giving you those flaky layers. If your kitchen is warm, pop your mixing bowl and flour in the fridge for 15 minutes before starting. I once made these on a hot August day (don’t ask—I was craving fall), and the butter melted before the scones even hit the oven. They turned out flat and greasy. Learn from my mistake.
Don’t overwork the dough. I cannot stress this enough. Scone dough should be handled as little as possible. Overmixing develops gluten, which makes scones tough and dense. When you add the wet ingredients, stir just until you can’t see dry flour anymore. When you shape the dough, pat it gently. Your scones will thank you.
Watch the brown butter like a hawk. The first time I made brown butter, I got distracted by my phone and ended up with black butter that smelled like burnt popcorn. Start with a light-colored pan so you can actually see the color change. Swirl the pan occasionally as it cooks. The moment you see golden brown specks and smell that nutty aroma, pull it off the heat immediately. Pour it into a heatproof bowl to stop the cooking process.
Use a kitchen scale if you have one. Measuring flour by volume can be inconsistent—a cup of flour can weigh anywhere from 120 to 150 grams depending on how you scoop it. For the most reliable results, weigh your flour: 240 grams for 2 cups. But honestly, if you don’t have a scale, just fluff your flour with a spoon, scoop it gently into the measuring cup, and level it off with a knife. Don’t pack it down.
Multitask wisely. While the scones are baking, clean up your workspace and get your glaze ingredients ready. That way, when the scones come out, you’re not scrambling to brown butter while they cool. Trust me, having everything prepped makes the process feel so much smoother.
Variations & Adaptations
One of my favorite things about this recipe is how adaptable it is. Here are some variations I’ve tried and loved:
Gluten-Free Version: Substitute the all-purpose flour with a 1:1 gluten-free baking flour blend (I like King Arthur Measure for Measure). Add 1 teaspoon of xanthan gum if your blend doesn’t already include it. The texture will be slightly more crumbly but still delicious. I brought these to a friend with celiac disease and she nearly cried—in a good way.
Vegan Version: Use cold vegan butter (make sure it’s the stick form, not spreadable) and substitute the egg with a flax egg (1 tablespoon ground flaxseed mixed with 3 tablespoons water, let sit for 5 minutes). Use oat milk or almond milk in both the scone dough and glaze. The scones won’t rise quite as much, but they’re still tender and flavorful.
Add-In Variations: Fold in 1/2 cup of toasted pecans or walnuts for crunch. Or add 1/2 cup of dried cranberries for a tart contrast to the sweet maple glaze. My personal favorite is adding 1/3 cup of mini chocolate chips—pumpkin and chocolate is an underrated combination, honestly.
Spice It Up: If you love a stronger spice profile, add 1/4 teaspoon of cardamom or allspice to the flour mixture. I did this on a whim one day and now I can’t go back. The cardamom adds this floral, slightly citrusy note that pairs beautifully with the pumpkin.
Maple Cream Cheese Glaze: For an extra decadent twist, beat 2 ounces of softened cream cheese with 2 tablespoons of maple syrup, then whisk in the brown butter and powdered sugar. It’s thicker, tangier, and absolutely incredible. I save this version for Thanksgiving morning when I’m feeling extra.
Serving & Storage Suggestions
These scones are best served slightly warm or at room temperature. If you’re serving them fresh from the oven, let them cool just enough so the glaze sets—about 10 minutes after glazing. The contrast between the warm, tender scone and the cool, creamy glaze is pure magic.
For a cozy fall breakfast, serve these alongside a hot cup of coffee with cinnamon stirred in, or a chai latte. They’re also wonderful with a mug of hot apple cider. I’ve been known to eat one with a scoop of vanilla ice cream for dessert—don’t judge until you try it.
If you’re hosting a brunch, arrange the scones on a wooden board with small bowls of extra maple syrup and apple butter for spreading. They pair beautifully with fresh fruit and scrambled eggs for a complete meal.
Storage: Store leftover scones in an airtight container at room temperature for up to 3 days. The glaze will soften slightly, but they’ll still be delicious. I like to place a paper towel in the bottom of the container to absorb any excess moisture.
Freezing: These freeze beautifully! You can freeze the unbaked scones on a baking sheet until solid, then transfer them to a freezer bag. Bake directly from frozen, adding 2-3 minutes to the baking time. Or freeze the baked, unglazed scones for up to 3 months. When you’re ready to eat them, thaw at room temperature, then pop them in a 300°F oven for 5 minutes to warm up. Make the fresh glaze right before serving.
One thing I’ve noticed: these scones actually taste even better the next day. The flavors meld together overnight, and the texture softens just slightly. If you can resist eating them all on day one, you’re in for a treat on day two.
Nutritional Information & Benefits
Here’s the estimated nutritional information for one scone (with glaze, based on 8 servings):
- Calories: 345
- Total Fat: 16g
- Saturated Fat: 10g
- Carbohydrates: 48g
- Fiber: 2g
- Sugar: 28g
- Protein: 5g
These numbers are estimates and will vary based on the specific brands and substitutions you use. If you’re watching your sugar intake, you can reduce the maple syrup in the glaze to 1 tablespoon—it will still be delicious, just less sweet.
On the health front, pumpkin is a nutritional powerhouse. It’s packed with vitamin A (great for your eyes and immune system), fiber (keeps you full), and antioxidants. Real maple syrup contains minerals like zinc and manganese. And hey, you’re getting some calcium and protein from the butter and milk. Look, these are still a treat, but they’re a treat that has some redeeming qualities.
If you’re looking for a lower-carb option, you could try using almond flour (about 1 1/2 cups plus 1/4 cup coconut flour as a substitute), but I’ll be honest—the texture won’t be the same. Sometimes it’s okay to just enjoy a scone for what it is.
Conclusion
These perfect maple pumpkin scones with brown butter glaze have become my fall baking signature for a reason. They’re the recipe I turn to when I want to feel like autumn has truly arrived, when I need to bring something to a gathering that will make people’s eyes light up, or when I just want my kitchen to smell incredible for an hour.
What I love most about this recipe is how forgiving it is. Even on days when I’m rushing and the dough feels a little too sticky or the glaze is a bit too thin, they always turn out wonderful. They remind me that baking doesn’t have to be perfect to be special—it just has to be made with care.
I hope you’ll try these and make them your own. Maybe you’ll add pecans because that’s how your family likes them, or you’ll double the cinnamon because you can’t get enough. That’s the beauty of a good recipe—it’s a starting point, not a rulebook.
When you make these (and I really hope you do), come back and let me know how they turned out. Did you try a variation? Did your kids devour them before the glaze even set? Did you finally understand what all the fuss about brown butter is? I’d love to hear your stories. Share them in the comments below, and don’t forget to pin this recipe for later—your future self will thank you when pumpkin season rolls around again.
Happy baking, friends. Here’s to warm scones, good coffee, and the coziest season of all.
Frequently Asked Questions
Can I use fresh pumpkin instead of canned?
Yes, but you’ll need to strain it first. Fresh pumpkin puree contains more water than canned, which can make your scones dense and gummy. Spread the puree on a paper towel-lined plate, cover with another paper towel, and let it sit for 15 minutes to absorb excess moisture. You could also strain it through cheesecloth overnight in the refrigerator.
Why did my scones turn out dry?
Dry scones usually come from one of two issues: too much flour or overbaking. Make sure you’re measuring your flour correctly (spoon and level, don’t scoop directly with the measuring cup). Also, check your oven temperature—an oven that runs hot can dry out scones quickly. Pull them out when they’re just set and lightly golden, even if they seem slightly underdone in the center.
Can I make the dough ahead of time?
Absolutely! You can prepare the scone dough, shape it into wedges, and refrigerate them on the baking sheet for up to 24 hours before baking. You can also freeze the unbaked wedges on a baking sheet, then transfer them to a freezer bag for up to 3 months. Bake from frozen, adding 2-3 minutes to the baking time. This is my go-to trick for having fresh scones on busy mornings.
My brown butter burned. What did I do wrong?
Brown butter can go from perfect to burnt in seconds. The most common mistake is walking away from the pan. Stay close and watch it carefully—stir constantly as the butter melts and foams. When the foam subsides and you see golden brown specks forming at the bottom, remove it from the heat immediately. Pour it into a cool bowl to stop the cooking process. If it smells nutty and looks amber, you’re good. If it smells bitter or looks dark brown, start over.
Can I skip the brown butter glaze?
You can, but I wouldn’t recommend it—the glaze is what makes these scones truly special. If you’re short on time, you can make a simple powdered sugar glaze with maple extract instead. Mix 1 cup powdered sugar with 2 tablespoons milk and 1/2 teaspoon maple extract. It won’t have the same depth of flavor, but it’s a decent substitute in a pinch.
Pin This Recipe!
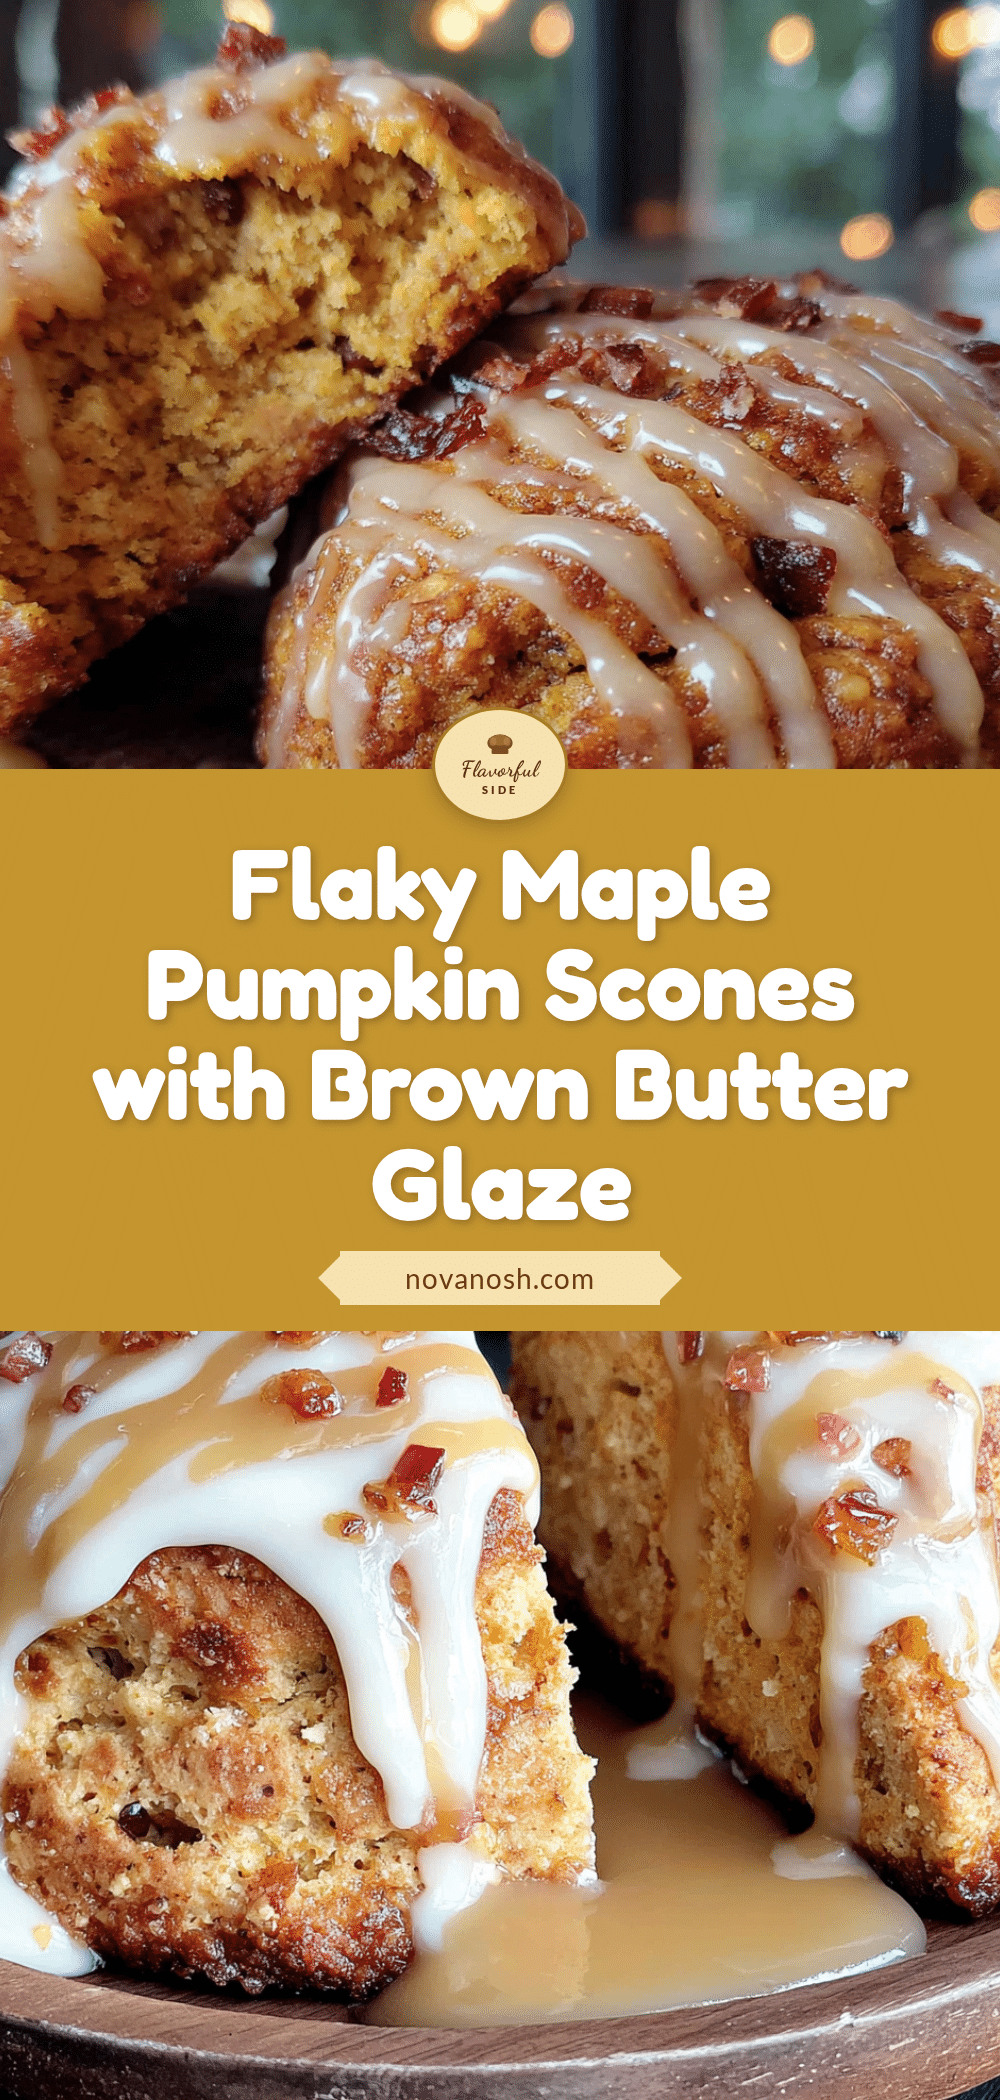
Perfect Maple Pumpkin Scones with Easy Brown Butter Glaze
Tender, flaky scones infused with maple and pumpkin, topped with a nutty brown butter glaze. Perfect for cozy fall mornings or holiday brunch.
- Prep Time: 15 minutes
- Cook Time: 16 minutes
- Total Time: 35 minutes
- Yield: 8 servings 1x
- Category: Breakfast
- Cuisine: American
Ingredients
- 2 cups all-purpose flour
- 1/3 cup packed light brown sugar
- 1 tablespoon baking powder
- 1 teaspoon ground cinnamon
- 1/2 teaspoon ground ginger
- 1/2 teaspoon ground nutmeg
- 1/4 teaspoon ground cloves
- 1/2 teaspoon salt
- 6 tablespoons cold unsalted butter, cut into small cubes
- 1/2 cup canned pumpkin puree
- 1/4 cup real maple syrup
- 1 large egg
- 1 teaspoon vanilla extract
- 2 tablespoons milk or heavy cream
- 1/4 cup unsalted butter (for glaze)
- 1 cup powdered sugar, sifted
- 2 tablespoons real maple syrup (for glaze)
- 1–2 tablespoons milk or heavy cream (for glaze)
- Pinch of salt (for glaze)
Instructions
- Preheat your oven to 400°F (200°C). Line a baking sheet with parchment paper and set it aside.
- In a large bowl, whisk together the flour, brown sugar, baking powder, cinnamon, ginger, nutmeg, cloves, and salt.
- Add the cold butter cubes to the flour mixture. Using a pastry cutter or two forks, cut the butter into the flour until the mixture resembles coarse meal with some pea-sized butter pieces remaining.
- In a separate small bowl, whisk together the pumpkin puree, maple syrup, egg, vanilla extract, and milk until smooth.
- Pour the wet mixture into the dry mixture. Stir with a spatula or wooden spoon just until the dough comes together. It will look shaggy and a bit dry.
- Turn the dough out onto a lightly floured surface. Gently bring it together with your hands, patting it into a circle about 3/4-inch thick.
- Using a sharp knife or bench scraper, cut the circle into 8 wedges like a pizza.
- Place the scones on the prepared baking sheet, spacing them about 2 inches apart. Optionally, brush the tops with extra milk or cream.
- Bake for 14-16 minutes, until golden brown on the bottom and edges set. Transfer to a cooling rack and cool completely (at least 20 minutes).
- While scones cool, make the glaze: melt 1/4 cup butter in a small saucepan over medium heat, stirring constantly. Cook until it foams, then subsides, and golden brown specks appear (about 5-7 minutes). Remove from heat immediately.
- Let the brown butter cool for 2-3 minutes, then whisk in sifted powdered sugar, maple syrup, and a pinch of salt. Add milk or cream 1 tablespoon at a time until pourable.
- Drizzle glaze over cooled scones and let set for about 10 minutes before serving.
Notes
Keep all ingredients cold for flaky scones. Do not overwork the dough. Watch brown butter carefully to avoid burning. Scones can be frozen unbaked or baked (unglazed).
Nutrition
- Serving Size: 1 scone
- Calories: 345
- Sugar: 28
- Sodium: 320
- Fat: 16
- Saturated Fat: 10
- Carbohydrates: 48
- Fiber: 2
- Protein: 5
Keywords: pumpkin scones, maple scones, brown butter glaze, fall baking, breakfast scones, pumpkin recipes