Love this? Save it for later!
Share the inspiration with your friends
There used to be a little bakery called The Black Cat on a side street in my old neighborhood that made the most incredible Halloween treats. Not the fancy, fondant-covered stuff you see on TV — I’m talking about the kind of desserts that made kids’ eyes go wide and adults secretly hope no one was watching them grab a second one. When they closed up shop three years ago, I genuinely mourned their graveyard dirt pudding cups. I mean, I actually stood outside the locked door reading their “Closed Forever” sign like it was a breakup text.
After about eight tries — and let me tell you, some of those early attempts were tragic — I finally cracked the code. The trick, honestly, was way simpler than I thought. It turns out you don’t need a pastry degree or any fancy equipment. You just need the right ratios and a little patience. And now, I’m sharing exactly how to make these Easy Graveyard Dirt Pudding Cups for a Spooky Halloween Party.
These little cups of chocolatey, creamy goodness are the kind of thing that makes people stop mid-conversation and point. “Wait, is that a graveyard? In a cup?” Yes. Yes, it is. And it’s delicious. The crushed cookies look just like fresh dirt, the pudding is rich without being too heavy, and those little tombstone cookies? Pure magic. Maybe you’ve been there — scrolling through Pinterest at 11 PM, wondering if you can pull off something impressive for the Halloween party without losing your mind. I’ve got you.
This recipe stuck with me because it’s the rare dessert that looks like you spent hours on it when really, it comes together in about 20 minutes. That’s the kind of kitchen magic I can get behind.
Why You’ll Love This Recipe
Let me tell you why these Easy Graveyard Dirt Pudding Cups for a Spooky Halloween Party are about to become your new favorite trick-or-treat.
- Quick & Easy: You can have these ready in under 20 minutes of active prep time. No baking, no fuss, no stress. Perfect for the night before the party or even the morning of.
- Simple Ingredients: Everything on the list is something you can find at any grocery store. No hunting down specialty baking supplies or weird extracts. You probably already have half of it in your pantry.
- Perfect for Halloween Parties: These little cups are the star of any spooky spread. Kids love them, adults sneak them, and they photograph beautifully for that Instagram post you know you’re going to make.
- Crowd-Pleaser: I’ve brought these to three different Halloween parties now, and every single time, people ask for the recipe before they even finish eating. They’re that good.
- Unbelievably Delicious: The contrast between the creamy chocolate pudding, the crunchy cookie “dirt,” and the slightly sweet whipped topping is just perfect. It’s comfort food in a cup, but make it spooky.
What makes this recipe different from all the others out there? It’s the texture. I spent a long time figuring out the right cookie-to-pudding ratio so you get that perfect bite every time. Not too crumbly, not too soggy — just right. Plus, I’ve tested this with both homemade and store-bought pudding, and I’ll tell you exactly which shortcut works best. This isn’t just another version of dirt cups. This is the one you’ll come back to year after year.
Honestly, this recipe is the kind that makes you close your eyes after the first bite. It’s nostalgic but fresh, simple but impressive, and it brings that little spark of joy that only a well-made Halloween treat can deliver.
What Ingredients You Will Need
This recipe uses simple, everyday ingredients to create something that looks and tastes like it took way more effort. Here’s everything you’ll need to make these Easy Graveyard Dirt Pudding Cups for a Spooky Halloween Party.
For the Pudding Base
- 2 boxes (3.9 oz each) instant chocolate pudding mix — I prefer Jell-O brand for the smoothest texture, but any brand works fine
- 3 cups cold whole milk — whole milk gives the richest, creamiest pudding. You can use 2% in a pinch, but don’t go lower or the pudding won’t set up properly
- 1 teaspoon vanilla extract — this is optional but it adds a lovely depth of flavor that makes the pudding taste homemade
For the “Dirt” Layer
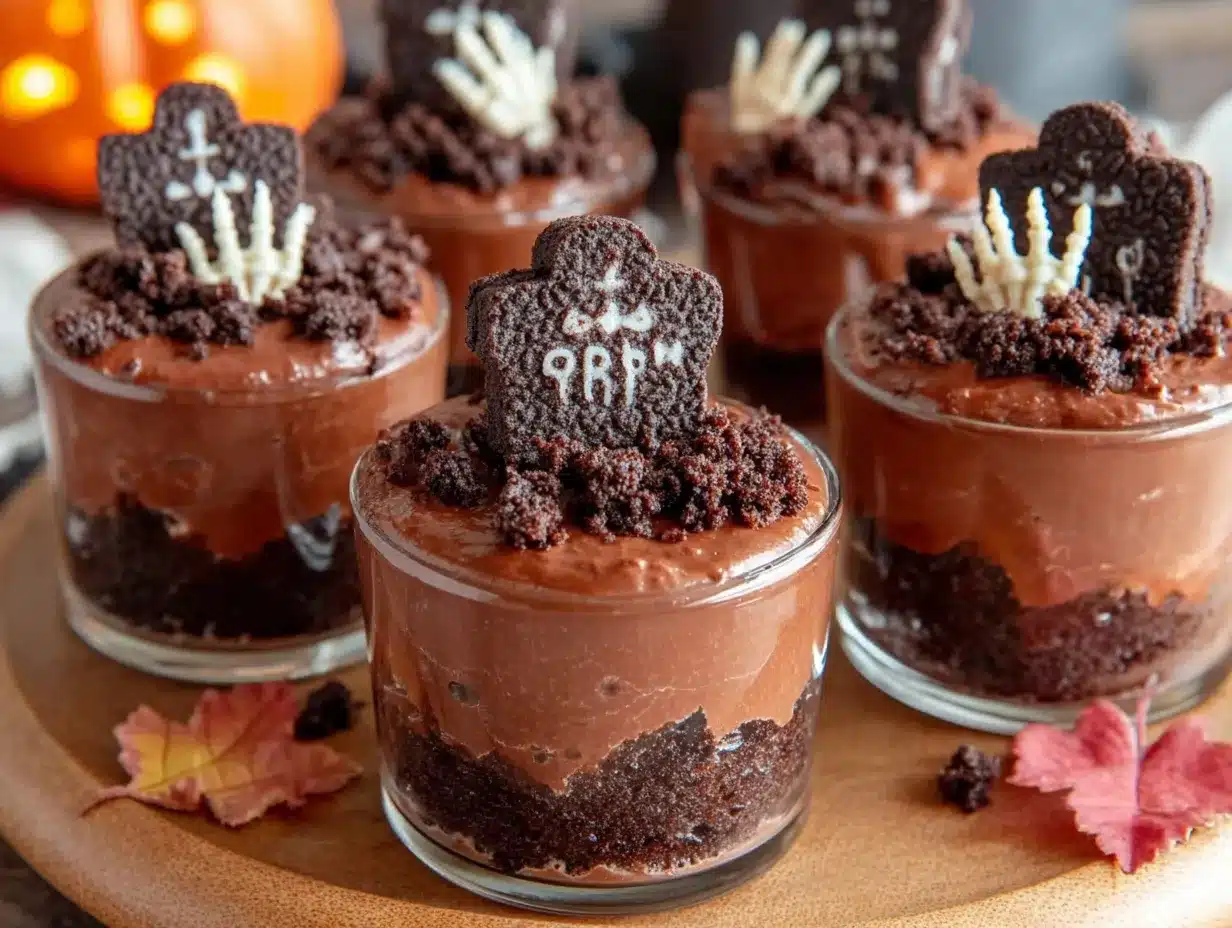
- 1 package (14.3 oz) chocolate sandwich cookies — Oreos are the gold standard here. You’ll need about 24 cookies total
- 4 tablespoons unsalted butter, melted — this helps the cookie crumbs stay slightly clumpy, just like real dirt
For the Graveyard Decorations
- 1 cup whipped topping — Cool Whip works great, or you can whip your own heavy cream with a little powdered sugar
- 8-10 chocolate wafer cookies or Milano cookies — these will become your tombstones. I like the rectangular shape of Milanos
- Black writing gel or black frosting — for writing “R.I.P.” on the tombstones
- 8-10 gummy worms — these are the creepy crawlies poking out of the dirt
- Green food coloring — a drop mixed into a tablespoon of coconut flakes makes cute “grass” (optional but adorable)
A quick note on ingredient selection: When you’re picking your chocolate sandwich cookies, look for the ones that aren’t too crumbly in the package. I’ve found that store-brand versions sometimes have more broken pieces, which makes it harder to get that nice, even crumb texture. Also, for the tombstones, if you can’t find Milano cookies, those rectangular shortbread cookies work perfectly too. Just make sure they’re sturdy enough to stand up in the pudding without falling over.
Substitution guidance: If you need this to be gluten-free, use gluten-free chocolate sandwich cookies and gluten-free wafer cookies. For a dairy-free version, swap the whole milk for oat milk or almond milk (though the pudding will be slightly less thick), use dairy-free butter, and grab a coconut-based whipped topping. I’ve tested the oat milk version and it works surprisingly well!
Equipment Needed
You don’t need a fancy kitchen to pull off these Easy Graveyard Dirt Pudding Cups for a Spooky Halloween Party. Here’s what you’ll need:
- 8-10 clear plastic or glass cups — I like using 8-ounce clear plastic cups so you can see all the layers. Solo cups work great for parties, or you can use small mason jars for a more rustic look
- Food processor or zip-top bag and rolling pin — for crushing the cookies into “dirt.” A food processor gives you the most consistent texture, but a zip-top bag and a rolling pin works just as well if you don’t mind a little arm workout
- Medium mixing bowl and whisk — for making the pudding. A hand mixer also works if you want to speed things up
- Small piping bag or zip-top bag — for writing on the tombstones. Snip off a tiny corner of the bag to pipe the writing
- Spatula — for scraping every last bit of pudding out of the bowl (trust me, you’ll want it all)
- Measuring cups and spoons — for accuracy, especially with the milk and vanilla
I remember the first time I made these, I didn’t have a food processor and spent 15 minutes crushing Oreos with a rolling pin while my cat watched me with what I swear was judgment. It worked perfectly fine, but my arms were tired. If you’re making these for a big party, definitely spring for the food processor method — it’s worth the cleanup.
Preparation Method
Alright, let’s get to the fun part. Here’s how to make these Easy Graveyard Dirt Pudding Cups for a Spooky Halloween Party, step by step.
- Make the chocolate pudding. In a medium bowl, whisk together the two boxes of instant chocolate pudding mix and 3 cups of cold whole milk. Whisk vigorously for about 2 minutes until the mixture starts to thicken. Add the vanilla extract and whisk once more. Let it sit for 5 minutes to fully set. You’ll know it’s ready when you can drag a spoon through it and the trail stays visible. (Pro tip: if your pudding isn’t thickening, your milk might not be cold enough. Pop it in the fridge for 10 minutes and try again.)
- Crush the cookies into “dirt.” While the pudding sets, place all 24 chocolate sandwich cookies (cream filling and all) into your food processor. Pulse about 10-12 times until you get a fine, sandy texture. You want some slightly larger pieces for that realistic dirt look. If you’re using the zip-top bag method, put the cookies in a gallon-sized bag, seal it, and go to town with a rolling pin. Pour the crushed cookies into a bowl and stir in the 4 tablespoons of melted butter until everything is evenly moistened. This gives your “dirt” that slightly clumpy, just-dug texture.
- Prepare the tombstones. Take your chocolate wafer cookies or Milano cookies and use the black writing gel to write “R.I.P.” on each one. You can also write silly things like “Here lies my diet” or “I ate too much candy.” Let the writing dry while you assemble the cups. (I learned the hard way that if you try to stick them in the pudding while the writing is still wet, it smears everywhere and looks like a horror movie — which, okay, is on theme, but not what we’re going for.)
- Layer the cups. Spoon about 2 tablespoons of the cookie “dirt” into the bottom of each cup. Press it down gently with the back of the spoon to create a solid base. Next, spoon or pipe about ¼ cup of the chocolate pudding on top of the dirt layer. Smooth it out evenly. Add another 2 tablespoons of cookie dirt on top of the pudding. You want the dirt to be the top layer so it looks like a little patch of freshly dug earth.
- Add the whipped topping. If you want an extra layer of creaminess, you can add a dollop of whipped topping between the pudding and the top dirt layer. Just spoon about 2 tablespoons on top of the pudding before adding the final dirt layer. This isn’t strictly necessary, but it adds a nice fluffy texture that contrasts with the crunchy dirt.
- Decorate the graveyard. Gently press one tombstone cookie into the top dirt layer of each cup, angled slightly so it looks like it’s leaning. Poke a gummy worm or two into the dirt so it looks like they’re crawling out of the ground. If you’re using the green coconut “grass,” sprinkle a little around the base of the tombstone. You can also add a few extra cookie crumbs on top to cover any exposed pudding.
- Chill until ready to serve. Place the assembled cups in the refrigerator for at least 30 minutes before serving. This allows the layers to settle and the flavors to meld together. They’re actually better after a few hours in the fridge, so feel free to make them a day ahead.
Sensory cue: When you’re layering the cups, you should see distinct, beautiful layers through the clear plastic — dark dirt, creamy chocolate pudding, more dirt, and then the spooky decorations on top. The smell is pure childhood nostalgia: chocolate, cookies, and a hint of vanilla. When you take that first bite, you’ll get the crunch of the cookie, the smoothness of the pudding, and the slight chewiness of the gummy worm all at once. It’s a textural party in your mouth.
Cooking Tips & Techniques
After making these Easy Graveyard Dirt Pudding Cups for a Spooky Halloween Party about a dozen times, I’ve picked up a few tricks that make the process smoother and the results better.
Don’t overmix the pudding. I know it’s tempting to keep whisking until it’s perfectly smooth, but overmixing can actually make the pudding grainy. Just whisk until it starts to thicken and then let it sit. The setting process does the rest of the work. I learned this the hard way when I made a batch that came out slightly lumpy because I couldn’t stop whisking. Patience, my friend.
Crush the cookies in batches. If you’re making a big batch for a party, don’t try to crush all the cookies at once in the food processor. Do it in two or three batches so you get an even texture. Overcrowding the processor means some cookies get pulverized while others stay in big chunks.
Use a piping bag for the pudding. This is a game-changer. Instead of spooning the pudding into the cups, transfer it to a piping bag or a zip-top bag with the corner snipped off. It makes layering so much cleaner and faster. Plus, you can control exactly how much goes into each cup, which means all your cups come out even.
Let the tombstones dry completely. I cannot stress this enough. If you write on the cookies and immediately stick them in the pudding, the writing will smear. Give them at least 10-15 minutes to dry. I usually write on them while the pudding is setting, so they’re ready to go when I start assembling.
Make extra “dirt.” You will always want more cookie crumbs than you think. Some will get eaten (don’t pretend you won’t snack on them), some will be too fine, and you’ll want extra for topping. I always crush one extra sleeve of cookies just to be safe.
Timing strategy: Here’s how I time this when I’m making it for a party. I make the pudding and crush the cookies the night before. Then the day of the party, I just layer and decorate. It takes about 15 minutes and I’m done. This way, I’m not scrambling the day of the event.
Variations & Adaptations
One of the best things about these Easy Graveyard Dirt Pudding Cups for a Spooky Halloween Party is how easy they are to customize. Here are some of my favorite variations.
Spooky Spiderweb Cups
Instead of tombstones, use the white writing gel to draw little spiderwebs on the sides of the cups. Drop a plastic spider ring on top of the dirt for an extra creepy touch. I did this for a Halloween movie night and the kids went absolutely nuts for the spiders.
Pumpkin Patch Cups
Swap the chocolate pudding for vanilla or butterscotch pudding. Use orange food coloring to tint the whipped topping a bright pumpkin orange. Top with a small candy pumpkin or a little green frosting “stem.” It’s a totally different look but just as easy.
Gluten-Free Version
Use gluten-free chocolate sandwich cookies (Kinnikinnick makes a great one) and gluten-free wafer cookies for the tombstones. The rest of the ingredients are naturally gluten-free. I made these for a friend with celiac disease and she said they were the best Halloween treat she’d had in years.
Vegan Version
Use dairy-free milk (oat milk works best), vegan butter, and a plant-based whipped topping. For the cookies, there are several vegan-friendly chocolate sandwich cookie brands available. The texture is slightly different — the pudding won’t be quite as thick — but the flavor is still amazing.
Individual Serving Jars
For a more elegant presentation, use small mason jars instead of plastic cups. They look adorable and make great party favors. Tie a little ribbon around the jar with a tag that says “Rest in Pieces” for an extra punny touch.
Serving & Storage Suggestions
These Easy Graveyard Dirt Pudding Cups for a Spooky Halloween Party are best served cold, straight from the fridge. The contrast between the chilled pudding and the crunchy cookie dirt is part of the magic. I like to set them out on a tray lined with black or orange fabric for that extra festive touch.
What to serve with them: These cups are pretty rich on their own, so I usually serve them as the dessert after something savory like chili or pizza. They also pair beautifully with a hot apple cider or a pumpkin spice latte for the adults. If you’re feeling extra, set out a bowl of extra gummy worms and cookie crumbs so people can add more toppings.
Storage instructions: These cups will keep in the refrigerator for up to 3 days. The cookie dirt will soften slightly over time, but honestly, I think they’re even better on day two when the flavors have had a chance to meld. Just make sure to keep them covered with plastic wrap or a lid so they don’t pick up any weird fridge smells.
Freezer instructions: You can freeze these cups for up to a month, though the texture of the pudding will change slightly. To freeze, assemble the cups without the tombstones and gummy worms. Wrap each cup tightly in plastic wrap and then foil. When you’re ready to serve, thaw them in the refrigerator overnight and add the decorations just before serving. The tombstones and gummy worms don’t freeze well, so always add those fresh.
Reheating: Honestly, you don’t want to reheat these. They’re meant to be served cold. If they’ve been in the fridge for a while and the pudding seems too firm, just let them sit at room temperature for 10 minutes before serving.
Nutritional Information & Benefits
Let’s be real — these Easy Graveyard Dirt Pudding Cups for a Spooky Halloween Party are a treat, not a health food. But here’s what you should know.
Estimated nutritional values per serving (1 cup):
- Calories: 380
- Total Fat: 18g
- Saturated Fat: 10g
- Cholesterol: 25mg
- Sodium: 480mg
- Total Carbohydrates: 52g
- Dietary Fiber: 2g
- Sugars: 38g
- Protein: 6g
Health highlights: The milk in the pudding provides a good amount of calcium and vitamin D, which is great for bone health. The cocoa in the chocolate pudding and cookies contains antioxidants called flavonoids, which have been linked to heart health. I mean, it’s not a superfood, but it’s not completely devoid of redeeming qualities either.
Dietary considerations: This recipe contains dairy, gluten, and soy (in the cookies). It can be adapted to be gluten-free, dairy-free, or vegan using the substitutions listed above. Always check your ingredient labels if you’re serving someone with allergies.
My personal perspective: Look, Halloween comes once a year. I’m a firm believer in enjoying treats in moderation and not stressing about every single calorie. These cups are about fun, nostalgia, and sharing something special with the people you love. So go ahead, enjoy one (or two). The world won’t end, and your soul will thank you.
Conclusion
These Easy Graveyard Dirt Pudding Cups for a Spooky Halloween Party are everything you want in a Halloween dessert: impressive, delicious, and shockingly simple to make. They look like you spent hours crafting each little graveyard scene, but the truth is, they come together in less time than it takes to watch a single episode of your favorite show.
I love this recipe because it brings people together. There’s something about seeing a little graveyard in a cup that makes adults act like kids again. I’ve watched grown men argue over who gets the last one. I’ve seen shy kids light up when they get to poke the gummy worms into the dirt. It’s pure joy in edible form.
I encourage you to make these your own. Maybe you add little candy pumpkins instead of tombstones. Maybe you use white chocolate pudding for a “snowy” graveyard effect. The beauty of this recipe is that it’s a canvas for your creativity. Don’t be afraid to experiment and have fun with it.
Now I want to hear from you! Have you made these before? Did you come up with a fun variation I haven’t tried? Drop a comment below and tell me all about it. And if you make these for your Halloween party, tag me in your photos — I love seeing your spooky creations. Happy Halloween, and happy eating!
Frequently Asked Questions
Can I make these graveyard dirt pudding cups ahead of time?
Absolutely! These are actually perfect for making ahead. You can assemble them up to 2 days in advance and keep them covered in the refrigerator. Just wait to add the tombstones and gummy worms until right before serving so they stay crisp and cute.
Can I use homemade chocolate pudding instead of instant?
Yes, you can! Homemade pudding will work beautifully, though it will be slightly less firm than the instant version. Just make sure to let it cool completely before layering it in the cups, otherwise the heat will melt your cookie dirt and create a soggy mess.
How do I keep the tombstones from falling over?
This is a common issue! The trick is to press the tombstone into the dirt layer at a slight angle, not straight up and down. The angled position gives it more stability. You can also press a little extra cookie dirt around the base to help hold it in place.
What can I use instead of Milano cookies for the tombstones?
Any rectangular cookie or cracker will work. Graham crackers cut into rectangles, shortbread cookies, or even those rectangular butter cookies all make great tombstones. Just make sure they’re sturdy enough to stand up in the pudding without crumbling.
Can I make these in a large dish instead of individual cups?
Definitely! If you want to make a big graveyard cake instead of individual cups, layer everything in a 9×13 inch baking dish. Use the same ratios but spread everything out in even layers. You can decorate the top with multiple tombstones and gummy worms for a larger, shareable version.
Pin This Recipe!
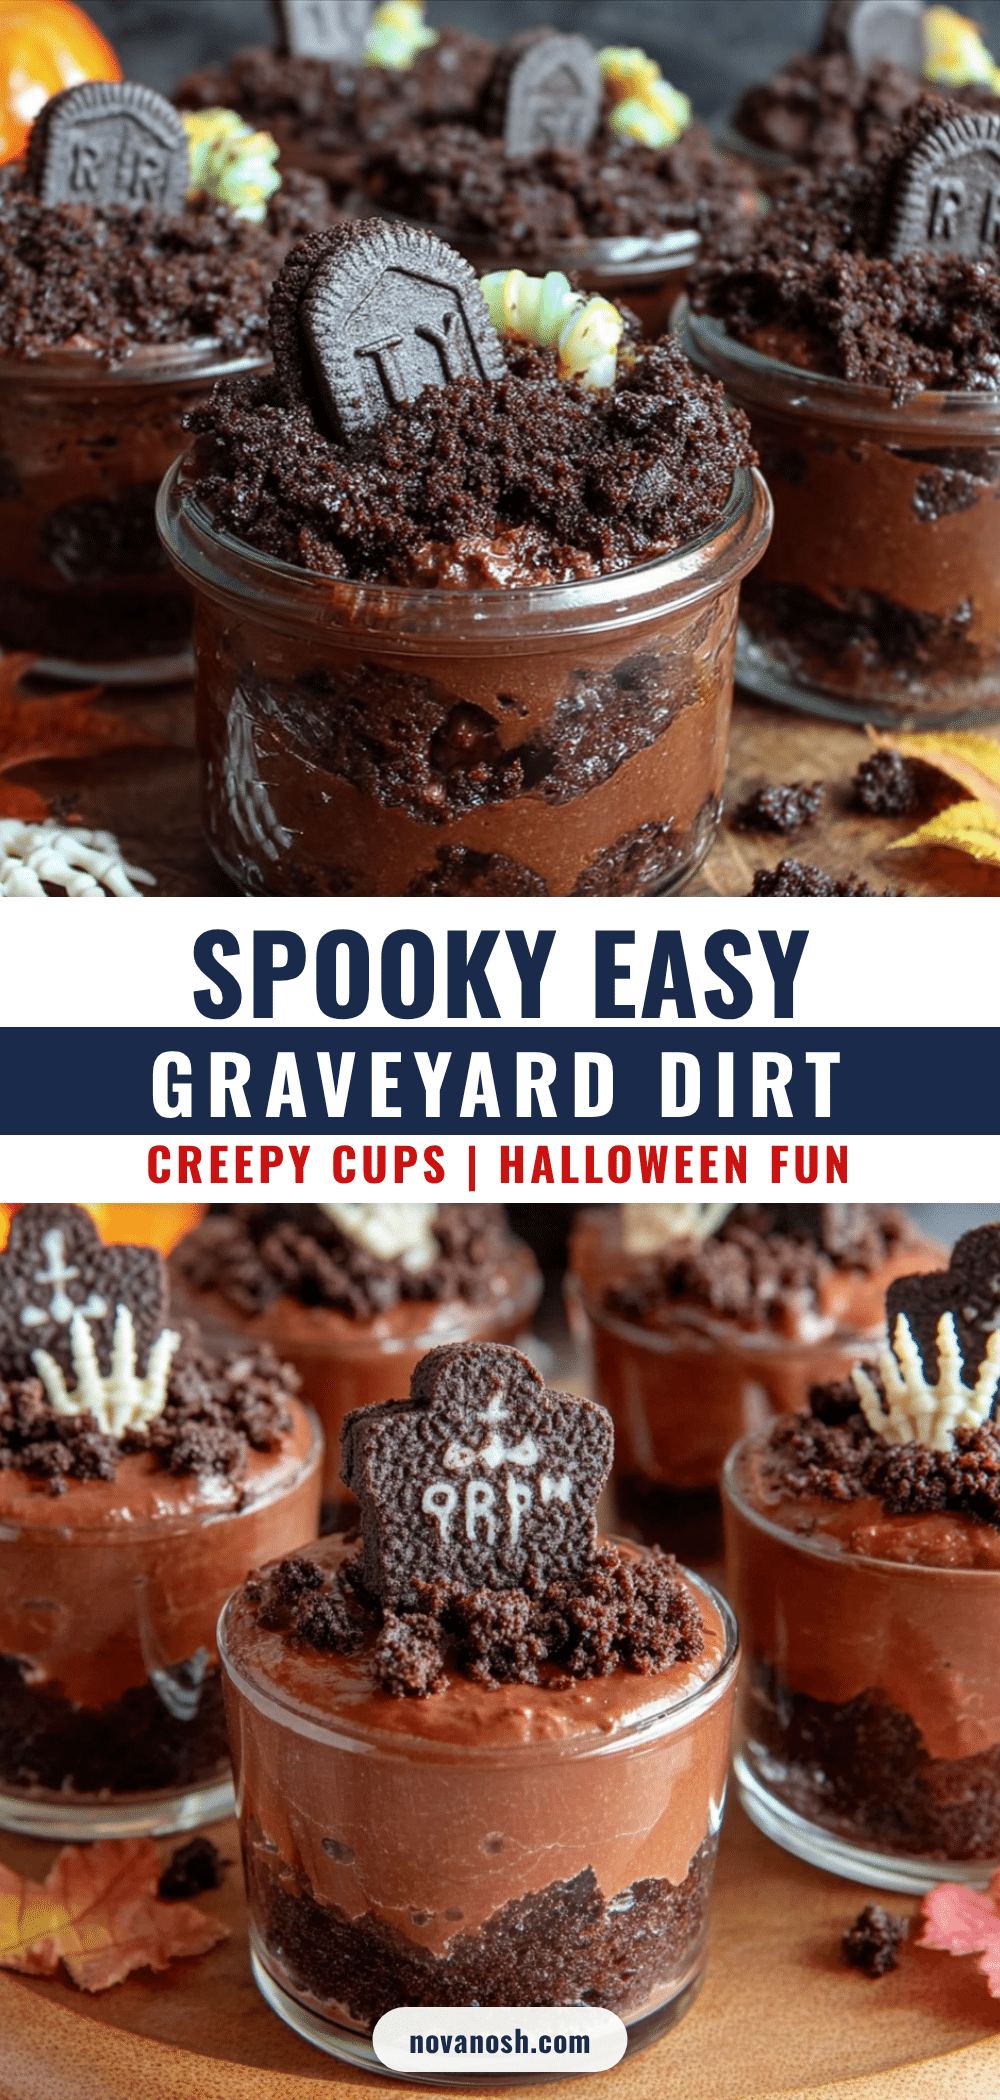
Easy Graveyard Dirt Pudding Cups: Perfect Spooky Halloween Treat
These Easy Graveyard Dirt Pudding Cups are a spooky, no-bake Halloween dessert that comes together in about 20 minutes. Layers of creamy chocolate pudding, crunchy cookie ‘dirt,’ and fun graveyard decorations make them a crowd-pleasing treat for parties.
- Prep Time: 20 minutes
- Cook Time: 0 minutes
- Total Time: 50 minutes
- Yield: 8-10 servings 1x
- Category: Dessert
- Cuisine: American
Ingredients
- 2 boxes (3.9 oz each) instant chocolate pudding mix
- 3 cups cold whole milk
- 1 teaspoon vanilla extract
- 1 package (14.3 oz) chocolate sandwich cookies (about 24 cookies)
- 4 tablespoons unsalted butter, melted
- 1 cup whipped topping
- 8–10 chocolate wafer cookies or Milano cookies
- Black writing gel or black frosting
- 8–10 gummy worms
- Green food coloring (optional)
- 1 tablespoon coconut flakes (optional)
Instructions
- Make the chocolate pudding: In a medium bowl, whisk together the two boxes of instant chocolate pudding mix and 3 cups of cold whole milk. Whisk vigorously for about 2 minutes until the mixture starts to thicken. Add the vanilla extract and whisk once more. Let it sit for 5 minutes to fully set.
- Crush the cookies into ‘dirt’: While the pudding sets, place all 24 chocolate sandwich cookies (cream filling and all) into your food processor. Pulse about 10-12 times until you get a fine, sandy texture. Pour the crushed cookies into a bowl and stir in the 4 tablespoons of melted butter until everything is evenly moistened.
- Prepare the tombstones: Take your chocolate wafer cookies or Milano cookies and use the black writing gel to write ‘R.I.P.’ on each one. Let the writing dry while you assemble the cups.
- Layer the cups: Spoon about 2 tablespoons of the cookie ‘dirt’ into the bottom of each cup. Press it down gently with the back of the spoon. Next, spoon or pipe about ¼ cup of the chocolate pudding on top of the dirt layer. Add another 2 tablespoons of cookie dirt on top of the pudding.
- Add the whipped topping (optional): If desired, add a dollop of whipped topping between the pudding and the top dirt layer.
- Decorate the graveyard: Gently press one tombstone cookie into the top dirt layer of each cup, angled slightly. Poke a gummy worm or two into the dirt. If using, sprinkle green coconut ‘grass’ around the base of the tombstone.
- Chill until ready to serve: Place the assembled cups in the refrigerator for at least 30 minutes before serving.
Notes
For best results, use whole milk for the pudding. Let the tombstones dry completely before inserting into the cups to prevent smearing. Make extra cookie ‘dirt’ for snacking and topping. These cups can be made up to 2 days ahead; add tombstones and gummy worms just before serving.
Nutrition
- Serving Size: 1 cup
- Calories: 380
- Sugar: 38
- Sodium: 480
- Fat: 18
- Saturated Fat: 10
- Carbohydrates: 52
- Fiber: 2
- Protein: 6
Keywords: Halloween dessert, dirt pudding cups, graveyard pudding, no-bake dessert, spooky treat, chocolate pudding, Oreo dirt


