Love this? Save it for later!
Share the inspiration with your friends
My neighbor Mark wasn’t trying to impress anyone. I’d stopped by to borrow a ladder—mine had mysteriously vanished after last year’s gutter cleaning—and the smell hit me before I even got to his front door. It was buttery, herbal, and so deeply savory that I honestly forgot why I was there for a second. Mark opened the door holding a cast iron skillet with these golden-brown pork chops resting in a pool of melted garlic butter, and he just shrugged when I asked what he was making. “Oh, just pork chops,” he said, like it was nothing.
Let me tell you, they were anything but nothing. I’ve made a lot of pork chops in my day—dry ones, tough ones, ones that tasted like the inside of a shoe. But these? These were juicy, tender, and had this gorgeous crust that gave way to the most flavorful meat. Mark’s secret, as it turns out, was a simple garlic herb butter that he’d whipped up while the chops were resting. He wasn’t following any fancy recipe. He was just cooking the way his grandmother taught him, which is probably why it tasted so good. I stood there in his kitchen, ladder completely forgotten, watching him slice into one of those chops. The juices ran out and pooled on the cutting board, and I swear I almost asked for a plate right then and there.
Maybe you’ve been there—standing in someone else’s kitchen, watching them cook something that looks way too good to be just “thrown together.” That’s exactly how this recipe feels. It’s the kind of dish that makes you look like a hero at dinner without all the stress. I’ve tweaked Mark’s method over the years, adding a few tricks I’ve picked up along the way, but the heart of it is still that same casual confidence. These baked pork chops with garlic herb butter have become my go-to for weeknights when I want something special but don’t want to spend hours in the kitchen. Honestly, I think about that afternoon every time I make them.
Why You’ll Love This Recipe
Let’s be real for a second—pork chops have a bad reputation. They’re known for being dry, tough, and honestly kind of boring. But these baked pork chops? They’re a total game-changer. I’ve tested this recipe more times than I care to admit, and every single time, the chops come out perfectly juicy with that gorgeous garlic herb butter melting over the top. It’s the kind of recipe that makes you wonder why you ever bothered with complicated techniques in the first place.
- Quick & Easy: From start to finish, these chops are ready in about 35 minutes. Perfect for those nights when you’re staring at the fridge wondering what to make.
- Simple Ingredients: You probably have most of these in your kitchen right now. Butter, garlic, herbs, salt, pepper—that’s really all it takes.
- Perfect for Weeknights: This isn’t a Sunday-only recipe. It’s fast enough for a Tuesday but fancy enough for company.
- Crowd-Pleaser: I’ve served these to picky kids, skeptical in-laws, and even a friend who swore she didn’t like pork. Guess what? She asked for the recipe.
- Unbelievably Delicious: The garlic herb butter does all the heavy lifting here. It keeps the meat moist while adding this incredible flavor that seeps into every bite.
What makes this recipe different from all the others out there? It’s the technique. Most baked pork chop recipes tell you to just throw them in the oven and hope for the best. But I’ve figured out that a quick sear on the stovetop before baking makes all the difference. That golden-brown crust locks in the juices and gives you that beautiful texture on the outside while keeping the inside tender and moist. Plus, the garlic herb butter isn’t just slapped on top—it’s actually used to baste the chops as they cook, infusing every layer with flavor.
This recipe is the kind that makes you close your eyes after the first bite. It’s comfort food at its finest—simple, satisfying, and so much better than anything you’d get at a restaurant. Whether you’re cooking for your family or just treating yourself to a nice dinner, these baked pork chops deliver every single time.
What Ingredients You Will Need
This recipe uses simple, wholesome ingredients to deliver bold flavor and satisfying texture without the fuss. Most of these are pantry staples, which means you can whip up these pork chops anytime the craving hits.
- Pork chops (4 pieces, about 1 inch thick): Look for bone-in chops if you can find them—they stay juicier during cooking. I prefer chops that are at least 1 inch thick because they don’t dry out as easily. If you only have thin chops, just reduce the cooking time by a few minutes.
- Unsalted butter (4 tablespoons, softened): Butter is the backbone of this recipe. I use unsalted so I can control the salt level myself. Let it sit out for about 20 minutes before you start so it’s easy to mix with the herbs.
- Garlic (4 cloves, minced): Fresh garlic is non-negotiable here. The jarred stuff just doesn’t have the same punch. I mince mine finely so it distributes evenly through the butter.
- Fresh parsley (2 tablespoons, chopped): Parsley adds freshness and color. Flat-leaf parsley works best, but curly parsley is fine too if that’s what you have.
- Fresh rosemary (1 tablespoon, chopped): Rosemary and pork are a match made in heaven. The woodsy flavor cuts through the richness of the butter beautifully.
- Fresh thyme (1 teaspoon, leaves stripped): Thyme is subtle but essential. It adds an earthy undertone that you’ll miss if it’s not there.
- Olive oil (2 tablespoons): You need this for searing the chops before they go in the oven. It has a higher smoke point than butter, so it won’t burn.
- Salt (1 teaspoon): I use kosher salt because it’s easier to control. If you’re using table salt, cut the amount in half.
- Black pepper (½ teaspoon, freshly ground): Freshly ground pepper makes a difference. The pre-ground stuff just doesn’t have the same aroma.
- Paprika (1 teaspoon): This is my secret ingredient. It adds a subtle smokiness and gives the chops a beautiful color. Smoked paprika works great here too.
- Garlic powder (½ teaspoon): Yes, I use both fresh garlic and garlic powder. The powder helps create that crust during searing while the fresh garlic goes into the butter.
One thing I’ve learned over the years—don’t skip the resting time for the butter. Letting the garlic and herbs sit in the softened butter for at least 10 minutes before you use it allows the flavors to meld together. Trust me on this one. I once rushed through it and the butter tasted like separate ingredients instead of one cohesive flavor. Learn from my mistakes, friends.
If you’re looking for substitutions, here are a few that work well:
- Use ghee instead of butter for a dairy-free option
- Swap rosemary with sage or oregano for a different herb profile
- Try bone-in pork loin chops if you want even more flavor
Equipment Needed
You don’t need a fancy kitchen to make these baked pork chops. Here’s what you’ll need:
- Cast iron skillet (10 or 12-inch): This is my go-to for searing and baking. It holds heat beautifully and gives you that perfect crust. If you don’t have one, any oven-safe skillet will work.
- Small bowl: For mixing the garlic herb butter. Nothing fancy here—a cereal bowl works perfectly.
- Meat thermometer: This is honestly the most important tool for perfect pork chops. Guessing doneness is how dry chops happen. I use a cheap instant-read one and it’s never let me down.
- Tongs: For flipping the chops during searing. Please don’t use a fork—piercing the meat lets all those precious juices escape.
- Cutting board: For letting the chops rest after cooking. A wooden one is nice, but plastic works just fine.
- Basting brush (optional): If you want to get fancy with the butter, a silicone basting brush helps spread it evenly.
I’ve made this recipe with a regular non-stick skillet too, and it works fine. Just make sure whatever pan you use can go in the oven. If your skillet handle is plastic or rubber, you can transfer the chops to a baking dish after searing. It’s an extra step, but it still works beautifully.
One tip about meat thermometers—don’t spend a fortune. My favorite one cost me twelve bucks at the grocery store and it’s been going strong for five years. Just make sure you clean it well between uses.
Preparation Method
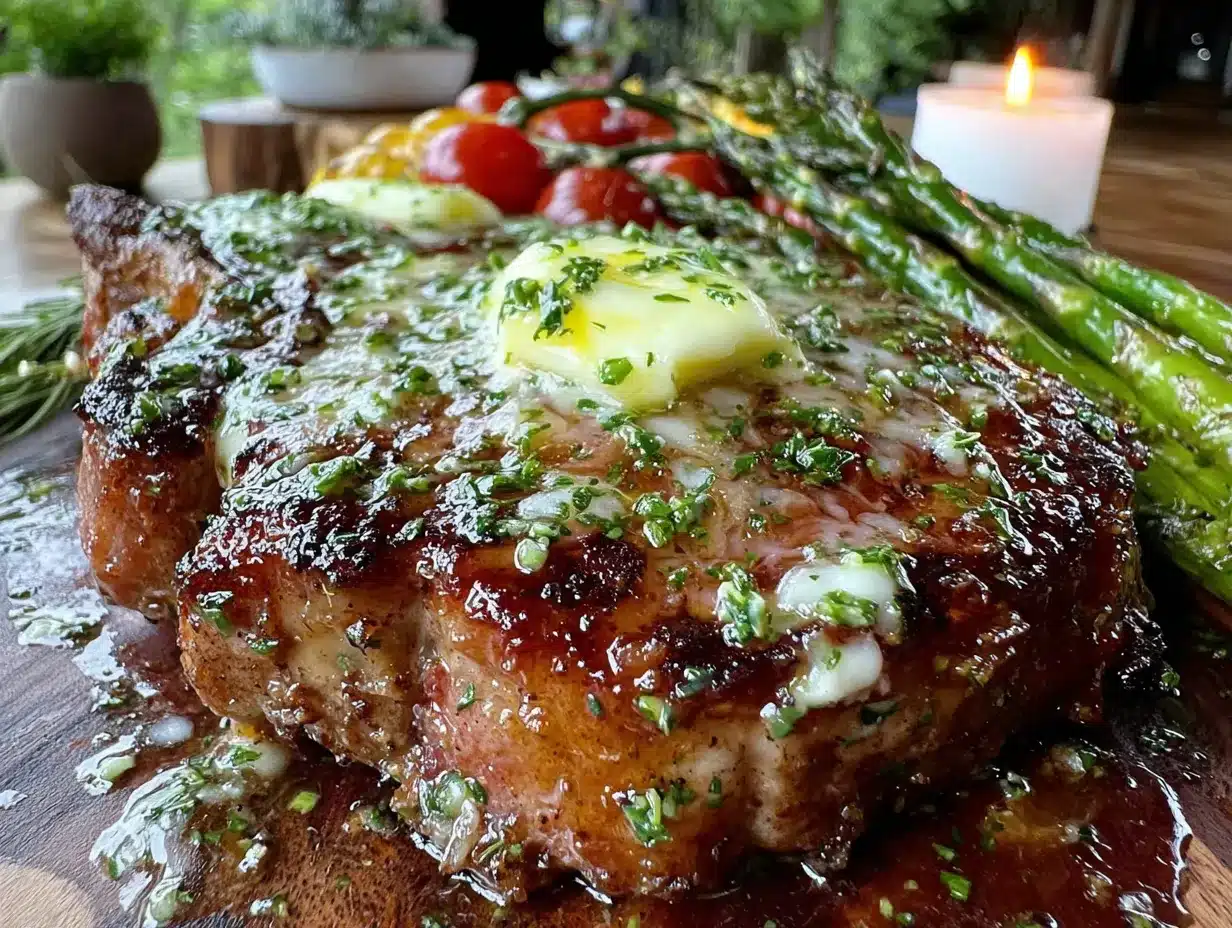
Alright, let’s get cooking. I’ve broken this down into clear steps so you don’t miss anything. Take your time with the first few steps—they make all the difference.
Step 1: Make the garlic herb butter.
In a small bowl, combine the softened butter, minced garlic, chopped parsley, rosemary, and thyme. Mix everything together with a fork until the herbs and garlic are evenly distributed. Add a pinch of salt and pepper. Set this aside at room temperature while you prepare the chops. The longer it sits, the more the flavors develop. I usually make this first thing so it has at least 15-20 minutes to meld.
Step 2: Prepare the pork chops.
Take your pork chops out of the fridge about 20 minutes before you start cooking. This is called tempering, and it helps the meat cook more evenly. Pat them dry with paper towels—this is crucial for getting a good sear. If the chops are wet, they’ll steam instead of brown. Season both sides generously with salt, pepper, paprika, and garlic powder. Don’t be shy with the seasoning. Most of it will stay on the surface and create that beautiful crust.
Step 3: Preheat your oven.
Set your oven to 400°F (200°C). Make sure the rack is in the middle position. You want the heat to circulate evenly around the chops.
Step 4: Sear the pork chops.
Place your cast iron skillet over medium-high heat and add the olive oil. Wait until the oil is shimmering—almost smoking—before adding the chops. Carefully place them in the skillet, making sure not to overcrowd. If your pan is too small, sear in batches. Cook for 3-4 minutes on the first side without moving them. You should see a deep golden-brown crust forming. Flip and cook for another 2-3 minutes on the second side. The smell at this point is absolutely incredible.
Step 5: Add the garlic herb butter.
Turn off the heat under your skillet. Spoon about half of the garlic herb butter over the tops of the pork chops. Let it melt and pool around them. If you have a basting brush, use it to spread the butter evenly. If not, just tilt the pan slightly and spoon the butter over the chops.
Step 6: Bake the pork chops.
Transfer the skillet to the preheated oven. Bake for 10-12 minutes, depending on the thickness of your chops. For 1-inch thick chops, 10 minutes is usually perfect. The internal temperature should reach 145°F (63°C) when measured at the thickest part. Don’t walk away—check them a minute or two early if you’re unsure. It’s better to undercook slightly than to overcook.
Step 7: Rest the chops.
Remove the skillet from the oven and transfer the pork chops to a cutting board. Spoon any remaining butter from the pan over the top. Let them rest for 5-7 minutes. I know it’s tempting to dig in right away, but this step is non-negotiable. Resting allows the juices to redistribute throughout the meat. If you cut into them too soon, all those delicious juices will end up on your cutting board instead of in your mouth.
Step 8: Serve and enjoy.
After resting, serve the chops with the remaining garlic herb butter spooned over the top. The butter will be perfectly melted and infused with all those pork juices. Pair with your favorite sides and enjoy every bite.
Cooking Tips & Techniques
I’ve made these baked pork chops more times than I can count, and I’ve learned a few things along the way. Here are my best tips for getting perfect results every time.
Don’t skip the sear. I know it’s tempting to just throw everything in the oven and call it a day, but that quick sear on the stovetop is what gives you that gorgeous golden crust. It also locks in the juices so the chops stay moist during baking. Trust me, those extra 5 minutes are worth it.
Watch the internal temperature. This is the single most important factor for juicy pork chops. The USDA says pork is safe at 145°F, and that’s exactly where you want to be. Anything over 150°F and you’re entering dry territory. I always pull my chops out at 140-142°F because they’ll continue cooking while resting. That carryover cooking usually brings them up to exactly 145°F.
Let the butter soften properly. I learned this one the hard way. Cold butter doesn’t mix well with herbs and garlic. You end up with clumps of garlic in some spots and plain butter in others. Let your butter sit out for at least 20 minutes before you start. If you’re in a hurry, you can microwave it for 5-10 seconds, but be careful not to melt it.
Use thick chops. Thin pork chops cook too quickly and don’t have enough time to develop that beautiful crust before they’re overdone. I always look for chops that are at least 1 inch thick. If you can only find thin ones, reduce the baking time to 5-7 minutes and watch them carefully.
Don’t overcrowd the pan. When you’re searing, each chop needs its own space. If they’re touching, they’ll steam instead of sear. Cook in batches if you need to. I know it’s an extra step, but the results are worth it.
One mistake I’ll never make again: I once tried to rush the process by using high heat the whole time. The outside burned before the inside was even warm. Medium-high heat for searing is plenty. Let the pan get hot, but don’t let it smoke.
Variations & Adaptations
One of the best things about this recipe is how easy it is to adapt. Here are some variations I’ve tried and loved.
Herb Swap: Not a fan of rosemary? Try using sage or oregano instead. Both work beautifully with pork. I’ve also used a mix of basil and oregano for a more Italian-inspired flavor. The key is to keep the total amount of herbs the same so the butter stays balanced.
Spicy Version: Add ½ teaspoon of red pepper flakes to the garlic herb butter for a little kick. The heat pairs surprisingly well with the richness of the pork. I made this version for a Super Bowl party once and it was gone in minutes.
Lemon Garlic Butter: Add the zest of one lemon to the butter mixture along with a teaspoon of fresh lemon juice. The acidity cuts through the richness and brightens up the whole dish. This is my go-to version in the spring.
Dairy-Free Option: Use vegan butter or ghee instead of regular butter. The flavor will be slightly different, but it still works beautifully. I’ve tested this with a few different brands and they all turned out great.
Air Fryer Adaptation: If you want to skip the oven, you can finish these chops in an air fryer. Sear them in a skillet first, then transfer to the air fryer basket. Cook at 375°F for 6-8 minutes. The results are surprisingly good—crispy on the outside and tender on the inside.
Grilled Version: During summer, I take this recipe to the grill. Sear the chops over high heat for 3-4 minutes per side, then move them to indirect heat and cook until they reach 145°F. Brush the garlic herb butter on during the last minute of cooking. The smoky flavor is incredible.
Serving & Storage Suggestions
These baked pork chops are versatile enough to pair with almost anything. Here’s how I like to serve and store them.
What to serve with them: I love pairing these chops with mashed potatoes or roasted vegetables. The garlic herb butter acts as a sauce, so you want something that can soak it up. Green beans, asparagus, or a simple side salad all work beautifully. If you’re feeling indulgent, serve them with creamy polenta or buttered egg noodles.
Serving temperature: These chops are best served hot, right after resting. The butter should still be warm and melty. If you’re serving a crowd, you can keep them warm in a low oven (200°F) for up to 30 minutes, but they’re best fresh.
Storage: Leftover pork chops can be stored in an airtight container in the refrigerator for up to 3 days. The garlic herb butter will solidify, but that’s fine—it will melt again when you reheat them.
Reheating: The best way to reheat these chops is in a skillet over medium-low heat. Add a splash of chicken broth or water to the pan to create steam, then cover and heat for 3-4 minutes per side. This keeps them from drying out. You can also microwave them, but they won’t be as juicy.
Freezing: These chops freeze surprisingly well. Wrap each one individually in plastic wrap, then place them in a freezer bag. They’ll keep for up to 3 months. Thaw in the refrigerator overnight before reheating. The texture won’t be quite as perfect as fresh, but they’re still delicious.
Flavor development: Honestly, the leftovers are sometimes even better the next day. The flavors have more time to meld together, and the garlic herb butter has fully permeated the meat. I’ve been known to make extra just for lunch the next day.
Nutritional Information & Benefits
Here’s a rough estimate of the nutritional content per serving (one pork chop with butter):
| Nutrient | Amount per Serving |
|---|---|
| Calories | 380 |
| Protein | 35g |
| Fat | 24g |
| Saturated Fat | 12g |
| Carbohydrates | 2g |
| Fiber | 0g |
| Sugar | 0g |
| Sodium | 650mg |
Pork is actually a great source of lean protein, especially if you choose loin chops. It’s packed with B vitamins, particularly B12, which is important for energy production and brain health. The garlic in this recipe has anti-inflammatory properties, and the herbs add antioxidants. Of course, the butter adds some saturated fat, but if you’re eating a balanced diet, these chops fit right in.
If you’re watching your sodium, you can reduce the salt or use a salt-free herb blend. The garlic herb butter is flavorful enough that you won’t miss it. For a lower-fat option, you can use less butter or substitute half with olive oil.
These chops are naturally gluten-free and low-carb, making them a great option for people following those diets. Just be mindful of what you serve them with—mashed potatoes add carbs, while roasted vegetables keep it low-carb.
Conclusion
These baked pork chops with garlic herb butter have become a staple in my kitchen for good reason. They’re simple enough for a busy weeknight but impressive enough for company. The combination of that perfectly seared crust and the melty, herby butter is honestly hard to beat.
I hope you give this recipe a try. Don’t be afraid to make it your own—swap the herbs, adjust the seasoning, or try one of the variations I mentioned. Cooking is supposed to be fun, and this recipe is forgiving enough that you can experiment without worrying about ruining dinner.
When you make them, I’d love to hear how they turned out. Drop a comment below and let me know if you tried any twists on the recipe. Did you use different herbs? Did you grill them instead of baking? Share your experience so we can all learn from each other. Happy cooking, friends!
Frequently Asked Questions
Can I use boneless pork chops for this recipe?
Absolutely. Boneless chops work just fine, but they tend to cook a little faster since there’s no bone to slow things down. Keep an eye on the internal temperature and start checking them around the 8-minute mark. Bone-in chops are slightly more forgiving because the bone helps conduct heat and keeps the meat moist.
How do I know when the pork chops are done without a thermometer?
I really recommend using a meat thermometer for the best results, but if you don’t have one, you can check by making a small cut near the bone. The meat should be white all the way through with just a hint of pink. The juices should run clear, not pink. But honestly, a thermometer is a game-changer for pork chops.
Can I prepare the garlic herb butter ahead of time?
Yes, and I actually recommend it. You can make the butter up to 3 days in advance and keep it in the refrigerator. Just let it come to room temperature before using so it spreads easily. You can also freeze it for up to 3 months—just wrap it tightly in plastic wrap and thaw in the refrigerator overnight.
What if my pork chops are thin (less than ½ inch)?
Thin chops cook very quickly and can dry out easily. I recommend reducing the baking time to 5-7 minutes and checking the temperature early. You might even skip the oven altogether and just cook them entirely on the stovetop. Sear for 2-3 minutes per side and they should be done.
Can I use dried herbs instead of fresh?
You can, but the flavor won’t be quite as bright. If you’re using dried herbs, use about one-third of the amount called for fresh. So instead of 1 tablespoon of fresh rosemary, use 1 teaspoon of dried. Let the butter sit for at least 30 minutes so the dried herbs have time to rehydrate and release their flavor.
Pin This Recipe!
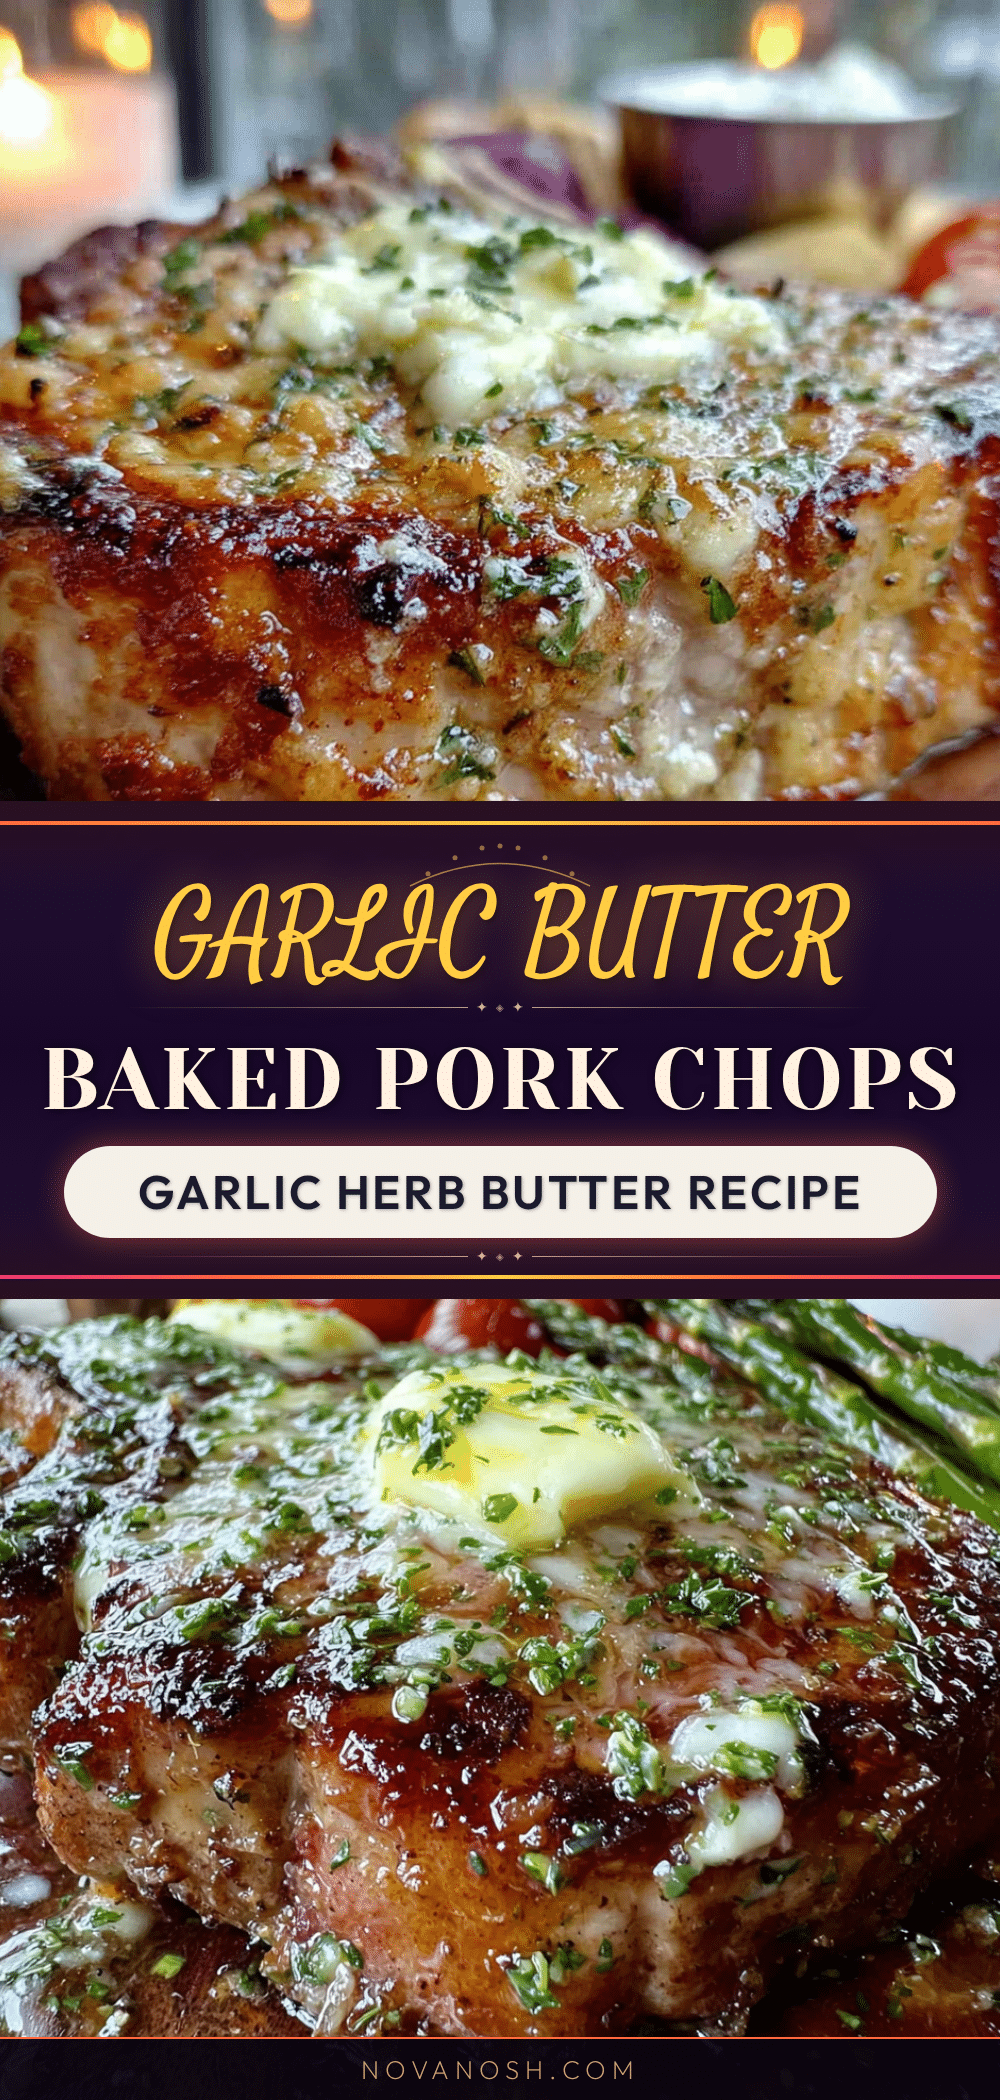
Juicy Baked Pork Chops with Garlic Herb Butter – Easy Recipe
These baked pork chops are perfectly juicy with a gorgeous garlic herb butter melting over the top. A quick sear on the stovetop before baking locks in the juices and creates a beautiful golden crust.
- Prep Time: 15 minutes
- Cook Time: 20 minutes
- Total Time: 35 minutes
- Yield: 4 servings 1x
- Category: Main Course
- Cuisine: American
Ingredients
- 4 bone-in pork chops, about 1 inch thick
- 4 tablespoons unsalted butter, softened
- 4 cloves garlic, minced
- 2 tablespoons fresh parsley, chopped
- 1 tablespoon fresh rosemary, chopped
- 1 teaspoon fresh thyme leaves
- 2 tablespoons olive oil
- 1 teaspoon kosher salt
- ½ teaspoon freshly ground black pepper
- 1 teaspoon paprika
- ½ teaspoon garlic powder
Instructions
- Make the garlic herb butter: In a small bowl, combine softened butter, minced garlic, chopped parsley, rosemary, and thyme. Mix with a fork until evenly distributed. Add a pinch of salt and pepper. Set aside at room temperature.
- Prepare the pork chops: Remove chops from fridge 20 minutes before cooking. Pat dry with paper towels. Season both sides generously with salt, pepper, paprika, and garlic powder.
- Preheat oven to 400°F (200°C) with rack in middle position.
- Sear the pork chops: Place a cast iron skillet over medium-high heat and add olive oil. When oil is shimmering, carefully add chops. Cook 3-4 minutes on first side without moving, then flip and cook 2-3 minutes on second side.
- Add garlic herb butter: Turn off heat. Spoon about half of the garlic herb butter over the tops of the chops. Let it melt and pool around them. Use a basting brush or tilt the pan to spread evenly.
- Bake: Transfer skillet to preheated oven. Bake 10-12 minutes for 1-inch thick chops, until internal temperature reaches 145°F (63°C) at the thickest part.
- Rest: Remove skillet from oven and transfer chops to a cutting board. Spoon any remaining butter from the pan over the top. Let rest 5-7 minutes.
- Serve: Serve chops with remaining garlic herb butter spooned over the top.
Notes
Don’t skip the sear—it locks in juices and creates a golden crust. Use a meat thermometer for best results; pull chops at 140-142°F as they will continue cooking while resting. Let butter soften properly for even mixing. Use thick chops (at least 1 inch) for best results. Do not overcrowd the pan when searing.
Nutrition
- Serving Size: 1 pork chop with but
- Calories: 380
- Sodium: 650
- Fat: 24
- Saturated Fat: 12
- Carbohydrates: 2
- Protein: 35
Keywords: baked pork chops, garlic herb butter, easy pork chop recipe, juicy pork chops, weeknight dinner


