Love this? Save it for later!
Share the inspiration with your friends
This was supposed to be a batch of monster-mouth apples. You know, the kind where you cut a wedge, slather on peanut butter, and line up mini marshmallows for teeth? I had the apples, I had the peanut butter, I had a bag of marshmallows that were definitely not for snacking. Then my four-year-old walked into the kitchen, took one look at the cutting board, and announced, “I don’t want that.” Just like that. No warning, no negotiation. I was already running late for a school Halloween party, and honestly? I was this close to just tossing a bag of chips into a bowl and calling it a day.
But then I spotted the veggie tray I’d prepped for the grown-up dinner later. Carrot sticks, cucumber rounds, bell pepper strips—all sitting there, looking a little sad and very orange-and-green. In a moment of pure, distracted desperation, I grabbed a ghost-shaped cookie cutter I’d bought on a whim, punched a face into a cucumber slice, and plopped it next to a pile of baby carrots. My son stopped mid-whine. “Whoa,” he said. “A ghost carrot.” It wasn’t a ghost carrot, obviously, but I wasn’t about to correct him. By the time I finished, I had a platter of veggie “monsters” and a kid who was actually excited about eating a pepper strip shaped like a bat. I mean, let’s be honest—I was more surprised than he was.
That accidental veggie tray became the hit of the party. Other parents kept asking how I got my kids to eat vegetables, and I kept shrugging, because the truth was I’d stumbled into it. But here’s the thing: it worked. The shapes, the dip, the whole silly Halloween vibe—it turned a boring snack into something they actually wanted to eat. And that’s why I keep making it. Not because I’m a Pinterest-perfect mom (I’m so not), but because it’s the one recipe that makes everyone happy without a single fight. Maybe you’ve been there, staring at a pile of vegetables and a kid who’d rather eat candy. Trust me, this tray changes the game.
Why You’ll Love This Recipe
Look, I’ve tested this tray more times than I can count. I’ve tried different dips, different veggie cuts, different cookie cutter shapes. I’ve even accidentally left the dip out overnight and had to start over (don’t ask). So when I say this version is the one, I mean it. It’s not just another veggie platter—it’s the one that actually gets eaten.
- Quick & Easy: You can throw this together in under 15 minutes. Seriously, it’s faster than baking a frozen pizza. Perfect for last-minute school parties or when the kids decide they’re “starving” five minutes before dinner.
- Simple Ingredients: Everything here is stuff you probably already have. Carrots, cucumbers, bell peppers, ranch seasoning, sour cream. No fancy grocery trips, no weird ingredients you’ll never use again.
- Perfect for Halloween Parties: Whether it’s a classroom celebration, a neighborhood get-together, or just a fun family dinner on October 31st, this tray fits right in. It’s festive without being fussy.
- Crowd-Pleaser: I’ve served this to kids aged 3 to 13, and they all go for it. Even the picky eaters. The shapes make it fun, and the dip makes it irresistible. Parents love it because it’s healthy, kids love it because it’s fun—everyone wins.
- Unbelievably Delicious: The ranch dip here isn’t your average packet mix. I add a little extra something (fresh dill and a squeeze of lemon) that makes it taste homemade. It’s creamy, tangy, and honestly, I’ve caught myself eating it with a spoon.
What makes this recipe different from every other veggie tray out there? It’s the combination of the cut-out shapes and the upgraded dip. The shapes make the vegetables feel like a treat, not a chore. And the dip? It’s so good that even the broccoli-haters come back for seconds. This isn’t just a snack—it’s the kind of thing that makes you feel like a kitchen genius without actually doing much work.
What Ingredients You Will Need
This recipe uses simple, everyday ingredients to create something that feels special. The magic is in the shapes and the dip, not in any hard-to-find items. Here’s what you’ll need:
For the Veggie Tray
- Carrots: 4-5 medium carrots, peeled and cut into sticks or rounds. (I like using rainbow carrots when I can find them—the purple ones look amazing on a Halloween tray.)
- Cucumbers: 1 large cucumber, sliced into rounds about 1/4-inch thick. (English cucumbers work best because they’re less watery and hold their shape better.)
- Bell Peppers: 2 bell peppers (one orange, one red), cut into strips. (The orange looks like pumpkin colors, and the red is perfect for “bloody” fingers.)
- Cherry Tomatoes: 1 cup cherry tomatoes. (These make great “eyeballs” or “pumpkin” shapes if you slice them right.)
- Broccoli Florets: 1 cup small broccoli florets. (They look like tiny trees—perfect for a spooky forest vibe.)
- Cauliflower: 1 cup small cauliflower florets. (These look like little brains. Gross? Maybe. But kids love it.)
- Snap Peas: 1 cup sugar snap peas. (They add a nice crunch and look like little green fingers.)
For the Ranch Dip
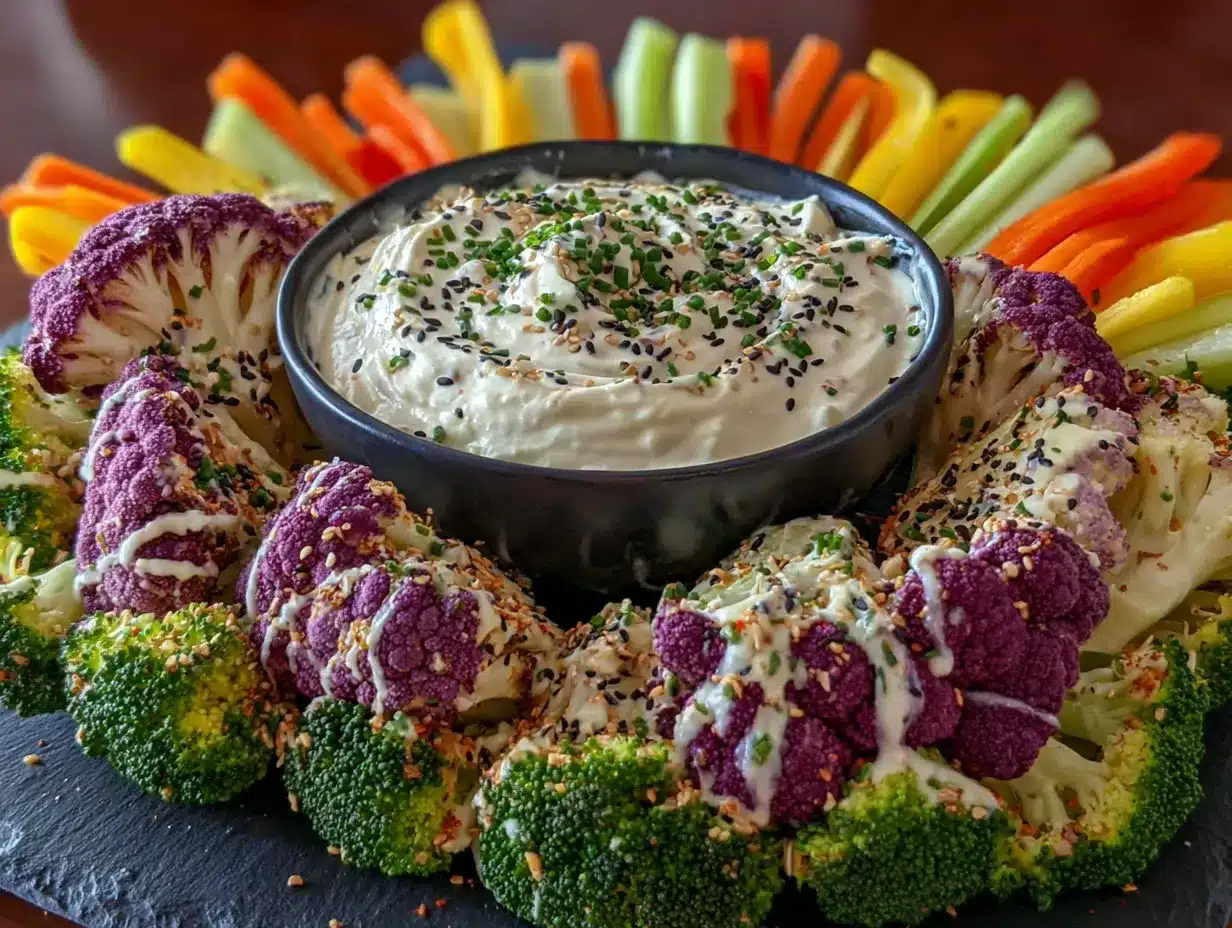
- Sour Cream: 1 cup full-fat sour cream. (Adds richness. I’ve tried low-fat, and it’s just not as good.)
- Mayonnaise: 1/2 cup mayonnaise. (I prefer Hellmann’s or Duke’s for the best flavor.)
- Buttermilk: 1/4 cup buttermilk. (This makes the dip extra tangy and creamy. If you don’t have buttermilk, add 1 tablespoon lemon juice to regular milk and let it sit for 5 minutes.)
- Ranch Seasoning Mix: 1 packet (about 1 ounce) of ranch seasoning mix. (I like Hidden Valley, but any brand works.)
- Fresh Dill: 1 tablespoon fresh dill, chopped. (This is my secret ingredient. It makes the dip taste garden-fresh.)
- Lemon Juice: 1 teaspoon fresh lemon juice. (Brightens up the flavors.)
- Garlic Powder: 1/2 teaspoon garlic powder. (Adds depth.)
- Salt and Pepper: To taste. (Go easy on the salt—the seasoning mix already has plenty.)
For the Halloween Shapes
- Mini Cookie Cutters: Ghost, bat, pumpkin, and cat shapes. (I got a set of 12 on Amazon for under $10. They’re totally worth it.)
- Black Olives: 1/2 cup sliced black olives. (These make great “eyes” for the veggie monsters.)
- Pretzel Sticks: A handful of pretzel sticks. (Use them for “spider legs” or “witch fingers.”)
Substitution Guidance: If you’re dairy-free, use a vegan sour cream and mayonnaise. The dip won’t be as thick, but it still tastes great. For a gluten-free option, make sure your ranch seasoning mix is certified gluten-free. You can also swap the buttermilk for unsweetened almond milk with a splash of vinegar.
Equipment Needed
You don’t need a fancy kitchen to make this tray. Here’s what I use:
- Cutting Board: A large one. Trust me, you’ll need the space for all those veggie shapes.
- Sharp Knife: A good chef’s knife makes cutting vegetables so much easier. I use my Wusthof, but any sharp knife works.
- Small Cookie Cutters: Mini Halloween shapes. I got mine at a craft store, but you can find them online too. They’re usually less than $10 for a set.
- Mixing Bowl: For the dip. A medium-sized bowl is perfect.
- Whisk: To mix the dip until smooth. A fork works too, but a whisk is faster.
- Serving Platter: A large, flat platter. I use a white one so the colors pop. A dark platter would look cool too—like a spooky night sky.
- Small Bowls: For the dip. I use a small pumpkin-shaped bowl for Halloween vibes.
Budget-Friendly Options: If you don’t have cookie cutters, just cut the vegetables into fun shapes with a knife. Stars, triangles, or even just zigzag cuts work great. And if you don’t have a fancy platter, a baking sheet lined with parchment paper works perfectly.
Preparation Method
Alright, let’s get to the fun part. Here’s how to make the best Halloween veggie tray, step by step.
- Make the Ranch Dip (5 minutes): In a medium bowl, whisk together the sour cream, mayonnaise, and buttermilk until smooth. Add the ranch seasoning mix, fresh dill, lemon juice, and garlic powder. Whisk again until everything is combined. Taste it—seriously, taste it. Add a pinch of salt and pepper if you think it needs it. Cover the bowl with plastic wrap and pop it in the fridge. The flavors get better as it sits, so making this first is a good idea.
- Prep the Vegetables (10 minutes): Wash all your vegetables thoroughly. Pat them dry with a clean towel—wet veggies won’t hold the dip as well. Peel the carrots and cut them into sticks about 3 inches long and 1/4-inch thick. Slice the cucumber into rounds. Cut the bell peppers into strips about 1/2-inch wide. Break the broccoli and cauliflower into small florets. Leave the cherry tomatoes whole—they’re perfect as is.
- Cut the Halloween Shapes (10 minutes): This is where the magic happens. Take your cucumber rounds and press a ghost-shaped cookie cutter into the center. Gently push the cucumber shape out. Do the same with the bell pepper strips—use a bat or pumpkin cutter. For the carrot sticks, you can cut them into small rounds and use a tiny cat face cutter. Don’t worry if some shapes break; just eat those ones yourself. (No judgment here.)
- Assemble the Tray (5 minutes): Grab your big platter. Place the small bowl of ranch dip in the center. Arrange the vegetables around it in a way that looks fun. I like to group similar colors together—orange carrots and peppers in one section, green cucumbers and broccoli in another. But you can also arrange them to look like a face or a spooky scene. One time I made the tray look like a jack-o-lantern face using carrot sticks for the mouth and olive slices for the eyes. My kids thought it was hilarious.
- Add the Spooky Details (5 minutes): This is the finishing touch. Take the black olive slices and place two on top of a cucumber ghost to make eyes. Stick pretzel sticks into the sides of a bell pepper strip to make spider legs. Arrange broccoli florets to look like a haunted forest. Honestly, you can get as creative as you want. The kids will love it no matter what.
- Chill Before Serving (optional but recommended): If you have time, put the assembled tray in the fridge for 15-20 minutes before serving. This helps the dip firm up and the veggies get extra cold and crunchy. Plus, it gives you a chance to clean up the kitchen before everyone sees the mess.
Troubleshooting Tip: If your cookie cutter isn’t cutting through the cucumber cleanly, the cucumber might be too thick. Try slicing it a little thinner—about 1/8-inch works best. And if the shapes are sticking to the cutter, dip the cutter in cold water before pressing down. Works like a charm.
Cooking Tips & Techniques
I’ve made this tray about a dozen times now, and I’ve learned a few things the hard way. Here are my best tips:
- Don’t Overcut the Shapes: I know it’s tempting to make every single vegetable into a ghost or bat, but trust me—it takes forever and the kids don’t care that much. Just do a few shapes and leave the rest as sticks and rounds. It still looks festive, and you’ll save yourself 20 minutes.
- Make the Dip a Day Ahead: This is my number one time-saver. The ranch dip actually tastes better after it sits overnight in the fridge. The flavors meld together, and it gets thicker and creamier. So if you’re hosting a party, make the dip the night before. You’ll thank me later.
- Keep the Veggies Dry: Wet vegetables make the dip watery and slide around on the platter. After washing, lay them out on a clean kitchen towel and pat them dry. For cucumbers, I even let them sit on paper towels for a few minutes to draw out excess moisture.
- Use a Variety of Textures: Kids get bored with too much of the same thing. Mix crunchy carrots with soft cucumber rounds and snappy snap peas. The variety keeps them interested and makes the tray feel more like a treat.
- Let the Kids Help: This is a great recipe for little hands. My son loves pressing the cookie cutters into the cucumber rounds. Does he make a mess? Yes. Does he eat half the vegetables before they make it onto the tray? Also yes. But he’s also way more likely to eat the finished tray because he helped make it. Totally worth the chaos.
- Don’t Stress About Perfection: I once dropped an entire batch of ghost cucumbers on the floor. I picked them up, rinsed them off, and put them on the tray anyway. Nobody noticed. The point is to have fun and get kids to eat vegetables, not to win a food styling award.
Variations & Adaptations
This recipe is super flexible. Here are some ways to change it up:
- Dairy-Free Version: Use vegan sour cream and mayonnaise for the dip. I’ve tried it with Kite Hill’s sour cream, and it works well. The dip is a little thinner, but still tasty. For the vegetables, everything is naturally dairy-free, so no changes needed there.
- Gluten-Free Version: Most ranch seasoning mixes are gluten-free, but double check the label. Skip the pretzel sticks or use gluten-free pretzels. Everything else is naturally gluten-free.
- Different Shapes for Different Holidays: This isn’t just a Halloween recipe! Use heart-shaped cutters for Valentine’s Day, star shapes for the Fourth of July, or flower shapes for spring. The dip stays the same, but the shapes change with the season.
- Add More Protein: If you want to make this a more filling snack, add some cheese cubes or hard-boiled egg halves. You can even add small meatballs shaped like eyeballs (use a slice of olive for the pupil). My kids went nuts for those.
- Spicy Ranch Dip: If you’re making this for adults (or adventurous kids), add a teaspoon of hot sauce or a pinch of cayenne pepper to the dip. It gives it a nice kick without being overwhelming.
- Roasted Veggie Version: For a warmer option, roast the vegetables at 400°F for 15-20 minutes before arranging them on the tray. The caramelized edges add a sweetness that kids love. Just skip the cookie cutters for this version—roasted shapes don’t hold up well.
Personal Variation I’ve Tried: Last year, I made a “spider web” dip by drizzling a little sriracha over the ranch dip and dragging a toothpick through it to create a web pattern. It looked amazing and tasted great. My nephew called it “fire dip” and ate half the bowl himself.
Serving & Storage Suggestions
This tray is best served cold, right out of the fridge. The vegetables are crunchiest when they’re chilled, and the dip is thickest when it’s cold. If you’re serving it at a party, keep the tray on ice or in a cooler if it’s going to sit out for more than an hour.
What to Serve With It: This veggie tray pairs perfectly with other Halloween snacks. Try it alongside my spooky Halloween popcorn mix for a sweet-and-salty combo. Or serve it with mini pumpkin pies for dessert. For drinks, apple cider or sparkling water with a splash of cranberry juice works great.
Storage Instructions: If you have leftovers (which is rare in my house, but it happens), store the vegetables and dip separately. Put the vegetables in an airtight container with a paper towel to absorb moisture. They’ll stay fresh for 2-3 days. The dip keeps in the fridge for up to a week. Just give it a good stir before serving again.
Reheating Tips: You don’t really reheat a veggie tray, but if the dip has been in the fridge for a few days and seems too thick, stir in a tablespoon of milk or buttermilk to loosen it up. For the vegetables, if they’ve gone a little limp, soak them in ice water for 10 minutes to crisp them back up.
Flavor Development: The dip actually gets better after a day or two in the fridge. The herbs and spices meld together, and the flavor becomes more rounded. So if you’re planning ahead, make the dip on Wednesday for a Friday party. Trust me on this one.
Nutritional Information & Benefits
Here’s the rough nutritional breakdown for one serving (about 1 cup of vegetables with 2 tablespoons of dip):
- Calories: 120
- Protein: 3g
- Fat: 8g
- Carbohydrates: 10g
- Fiber: 3g
- Sugar: 4g
- Sodium: 280mg
Health Benefits: This tray is packed with vitamins and nutrients. Carrots are loaded with vitamin A for eye health. Cucumbers are hydrating and low in calories. Bell peppers have more vitamin C than oranges. Broccoli is full of fiber and antioxidants. And the dip? Well, it’s not exactly health food, but the sour cream and buttermilk do provide calcium and probiotics.
Dietary Considerations: This recipe is naturally vegetarian. With the substitutions mentioned above, it can be made dairy-free and gluten-free. It’s also nut-free, which makes it safe for school parties. Just be aware of the sodium content if you’re watching your salt intake—the ranch seasoning mix is the main source.
Personal Wellness Perspective: I love this recipe because it helps me feel good about what my kids are eating. Halloween is all about candy and sugar, and this tray gives them something healthy to snack on without feeling like a punishment. Plus, the act of cutting vegetables into fun shapes makes me feel like a good mom, even when I’ve had a rough day. That counts for something, right?
Conclusion
So there you have it—the veggie tray that started as a complete disaster and ended up being my most-requested Halloween recipe. It’s proof that sometimes the best ideas come from the moments when everything goes wrong. I mean, if I hadn’t been too distracted to make the monster mouths, I never would have discovered that a ghost-shaped cucumber could make a four-year-old excited about vegetables.
This recipe is worth trying because it actually works. It’s fast, it’s easy, and it gets kids to eat vegetables without a fight. Plus, it’s fun to make. There’s something deeply satisfying about cutting a bell pepper into a bat shape and watching a kid’s face light up. It makes all the mess and chaos worth it.
I’d love to hear how yours turns out. Did your kids love it? Did you come up with a new shape I haven’t tried? Drop a comment below and let me know. And if you took photos, share them on social media and tag me—I love seeing your creations. Until next time, happy Halloween and happy snacking!
Frequently Asked Questions
Can I make this veggie tray ahead of time?
Yes! You can prep the vegetables and dip up to 2 days in advance. Store them separately in the fridge, and assemble the tray an hour or so before serving. The dip actually tastes better if it sits overnight.
What if I don’t have Halloween cookie cutters?
No problem! You can cut the vegetables into fun shapes with a knife—stars, triangles, or zigzag edges work great. Or just arrange them in a spooky pattern on the tray, like a spider web or a jack-o-lantern face.
How do I keep the vegetables from getting soggy?
Make sure the vegetables are completely dry before you cut them. After washing, lay them out on a clean kitchen towel and pat them dry. For cucumbers, let them sit on paper towels for a few minutes to draw out excess moisture.
Can I use a different dip?
Absolutely! This recipe works with any dip your kids love. Try hummus, guacamole, or even a simple yogurt dip. Just make sure the dip is thick enough to hold up to the vegetables.
How long will the veggie tray last at a party?
It’s best to keep the tray out for no more than 2 hours at room temperature. If it’s a warm day, keep it on ice or in a cooler. After that, any leftovers should be refrigerated immediately.
Pin This Recipe!
Halloween Veggie Tray: Easy, Kid-Approved Ranch Dip

A fun and festive Halloween veggie tray with spooky-shaped vegetables and a creamy, tangy ranch dip that even picky eaters will love. Quick to assemble and perfect for parties or family snacks.
- Prep Time: 15 minutes
- Cook Time: 0 minutes
- Total Time: 15 minutes
- Yield: 8 servings 1x
- Category: Appetizer
- Cuisine: American
Ingredients
- 4–5 medium carrots, peeled and cut into sticks or rounds
- 1 large cucumber, sliced into rounds about 1/4-inch thick
- 2 bell peppers (one orange, one red), cut into strips
- 1 cup cherry tomatoes
- 1 cup small broccoli florets
- 1 cup small cauliflower florets
- 1 cup sugar snap peas
- 1 cup full-fat sour cream
- 1/2 cup mayonnaise
- 1/4 cup buttermilk
- 1 packet (about 1 ounce) ranch seasoning mix
- 1 tablespoon fresh dill, chopped
- 1 teaspoon fresh lemon juice
- 1/2 teaspoon garlic powder
- Salt and pepper to taste
- Mini Halloween cookie cutters (ghost, bat, pumpkin, cat)
- 1/2 cup sliced black olives
- A handful of pretzel sticks
Instructions
- Make the Ranch Dip: In a medium bowl, whisk together the sour cream, mayonnaise, and buttermilk until smooth. Add the ranch seasoning mix, fresh dill, lemon juice, and garlic powder. Whisk again until combined. Taste and add salt and pepper if needed. Cover and refrigerate.
- Prep the Vegetables: Wash all vegetables thoroughly and pat dry. Peel carrots and cut into sticks about 3 inches long and 1/4-inch thick. Slice cucumber into rounds. Cut bell peppers into strips about 1/2-inch wide. Break broccoli and cauliflower into small florets. Leave cherry tomatoes whole.
- Cut the Halloween Shapes: Use cookie cutters to press shapes into cucumber rounds and bell pepper strips. For carrot sticks, cut into small rounds and use a tiny cutter if desired. Discard or eat any broken pieces.
- Assemble the Tray: Place the bowl of ranch dip in the center of a large platter. Arrange the vegetables around it, grouping similar colors together or creating a spooky scene.
- Add the Spooky Details: Place black olive slices on cucumber ghosts for eyes. Stick pretzel sticks into bell pepper strips for spider legs. Arrange broccoli florets to look like a haunted forest.
- Chill Before Serving: Refrigerate the assembled tray for 15-20 minutes before serving to firm up the dip and crisp the vegetables.
Notes
Make the dip a day ahead for best flavor. Keep vegetables dry to prevent soggy dip. Let kids help with cookie cutters for fun. If shapes stick, dip cutter in cold water. For dairy-free, use vegan sour cream and mayonnaise. For gluten-free, ensure ranch seasoning is certified gluten-free and skip pretzels or use gluten-free pretzels.
Nutrition
- Serving Size: 1 cup vegetables wit
- Calories: 120
- Sugar: 4
- Sodium: 280
- Fat: 8
- Saturated Fat: 3
- Carbohydrates: 10
- Fiber: 3
- Protein: 3
Keywords: Halloween, veggie tray, ranch dip, kid-friendly, party snack, healthy, spooky, vegetables