Love this? Save it for later!
Share the inspiration with your friends
My roommate Sarah asked why I couldn’t just dump everything in one pot and let it simmer for hours. I was about to launch into my carefully rehearsed speech about browning meat in batches and the importance of deglazing—the whole spiel I’d perfected from years of reading fancy cookbooks. Then I stopped. Honestly, I had no good answer. I mean, chili is basically a dump-and-simmer situation when you strip away all the chef-y posturing. So I tried it her way. The pot went on the stove at noon on a rainy Saturday, and by dinner time, that apartment smelled like something had died and gone to flavor heaven. I was so sure I’d end up with bland, watery meat soup. Let me tell you, eating my words never tasted so good.
That was three winters ago, and I haven’t browned meat separately for chili since. This Ultimate Classic Chili con Carne with Kidney Beans is the direct result of being wrong in the best possible way. It’s the kind of recipe that makes you question everything you thought you knew about cooking—in a good way. The beef stays tender, the beans soak up all that smoky, spicy goodness, and the whole thing comes together with way less mess and stress. Maybe you’ve been there, standing over a hot stove, convinced that more steps equal better food. I get it. I was that person.
What makes this chili different isn’t some secret technique or fancy ingredient. It’s the patience to let time do the work. That hour of simmering transforms canned tomatoes, ground beef, and humble kidney beans into something that tastes like it’s been cooking all day. The first time I made it, I stood there stirring every five minutes, certain I’d messed something up. But by the end, that deep, rich color and that smell—you know the one—told me everything I needed to know. This is the chili I keep coming back to, and I think you will too.
Why You’ll Love This Recipe
This isn’t just another chili recipe you’ll forget about by next Tuesday. It’s the one you’ll text your friends about. I’ve made this for Super Bowl parties, lazy Sunday dinners, and even a camping trip where we reheated it over a campfire. Every single time, someone asks for the recipe. And the best part? It’s embarrassingly simple.
- One-Pot Wonder : Everything cooks in a single pot. Less dishes, more time on the couch. That’s a win in my book.
- Pantry-Friendly Ingredients : Canned tomatoes, kidney beans, chili powder, and ground beef. You probably have most of this stuff already. No fancy grocery store trips required.
- Better the Next Day : This chili somehow tastes even better after sitting in the fridge overnight. The flavors meld together in a way that’s almost magical. Make it a day ahead if you can.
- Budget-Friendly Comfort : Ground beef and beans are cheap. This feeds a crowd without wrecking your grocery budget. My wallet thanks me every time.
- Customizable Heat : You control the spice level. Want it mild? Easy. Want it to clear your sinuses? Go for it. This recipe bends to your preferences.
I’ve tested this recipe at least a dozen times—probably more, honestly. I’ve tried it with different bean ratios, different chili powder brands, and even a version where I accidentally added too much cumin (it was still good, just very cumin-forward). Each time, I came back to this exact combination. It’s not just another version of chili. It’s the version. The one that feels like a hug in a bowl, but also makes you feel like you actually know what you’re doing in the kitchen.
There’s something about the way the kidney beans hold their shape while soaking up all that seasoned broth. And the beef? It stays tender and flavorful without turning into dry little crumbles. This is comfort food that doesn’t require a culinary degree. It just requires a pot and a little bit of patience.
What Ingredients You Will Need
This recipe relies on simple, honest ingredients to build deep, layered flavor. Nothing fancy here—just smart combinations and a little time. Most of these are probably sitting in your pantry right now, waiting for their moment to shine.
- 2 tablespoons olive oil (for sautéing the aromatics; use avocado oil if you prefer)
- 1 large yellow onion, diced (about 1.5 cups; this forms the flavor base)
- 1 green bell pepper, diced (adds sweetness and texture; red bell pepper works too)
- 4 cloves garlic, minced (fresh is non-negotiable here—skip the jarred stuff)
- 2 pounds ground beef (80/20 is ideal; leaner meat works but won’t be as flavorful)
- 2 tablespoons chili powder (I prefer McCormick for consistent heat; adjust to taste)
- 1 tablespoon ground cumin (this gives chili its signature warmth)
- 1 teaspoon smoked paprika (adds a subtle smokiness that makes all the difference)
- 1/2 teaspoon cayenne pepper (optional, for heat; skip if you’re serving sensitive palates)
- 1 teaspoon dried oregano (Mexican oregano if you can find it; regular works fine)
- 1 teaspoon salt (plus more to taste at the end)
- 1/2 teaspoon black pepper
- 1 can (14.5 ounces) fire-roasted diced tomatoes (undrained; Muir Glen is my go-to brand)
- 1 can (15 ounces) tomato sauce (smooth and rich; adds body to the broth)
- 2 cans (15 ounces each) kidney beans, drained and rinsed (dark red kidney beans are classic; light red work too)
- 1 cup beef broth (low-sodium preferred; chicken broth works in a pinch)
- 1 tablespoon Worcestershire sauce (adds umami depth; soy sauce works if you’re out)
- 1 bay leaf (remember to fish it out before serving)
Ingredient Notes & Substitutions:
- For a milder chili, reduce or omit the cayenne and use a mild chili powder blend. For more heat, add a diced jalapeño with the onions or stir in some chipotle powder at the end.
- Ground turkey or chicken works as a leaner substitute for beef, but add an extra tablespoon of oil to compensate for the lack of fat.
- If you’re watching your sodium, use no-salt-added tomatoes and broth, then adjust salt at the end.
- I’ve made this with pinto beans and black beans before—both work great, but kidney beans are the classic for a reason. They hold their shape and soak up flavor beautifully.
Equipment Needed
You don’t need a lot of fancy gear for this one. That’s part of the beauty. Here’s what you’ll need:
- Large Dutch oven or heavy-bottomed pot (5 to 6 quarts is ideal; a stockpot works in a pinch)
- Sharp chef’s knife (for dicing onions and peppers without crying—okay, maybe still a little)
- Cutting board
- Wooden spoon or silicone spatula (for stirring and scraping up any bits from the bottom)
- Measuring spoons
- Can opener
- Colander (for rinsing the kidney beans)
If you don’t have a Dutch oven, don’t sweat it. A large soup pot or even a slow cooker can work. For the slow cooker version, brown the beef and aromatics on the stovetop first, then transfer everything to the slow cooker and cook on low for 6 to 8 hours. Just know that the flavor won’t be quite as deep without that stovetop simmering time.
I use my Le Creuset Dutch oven for this recipe because it holds heat so evenly, but I’ve made it in a cheap stainless steel pot too. It turned out just fine. The pot doesn’t make the chili—the patience does.
Preparation Method
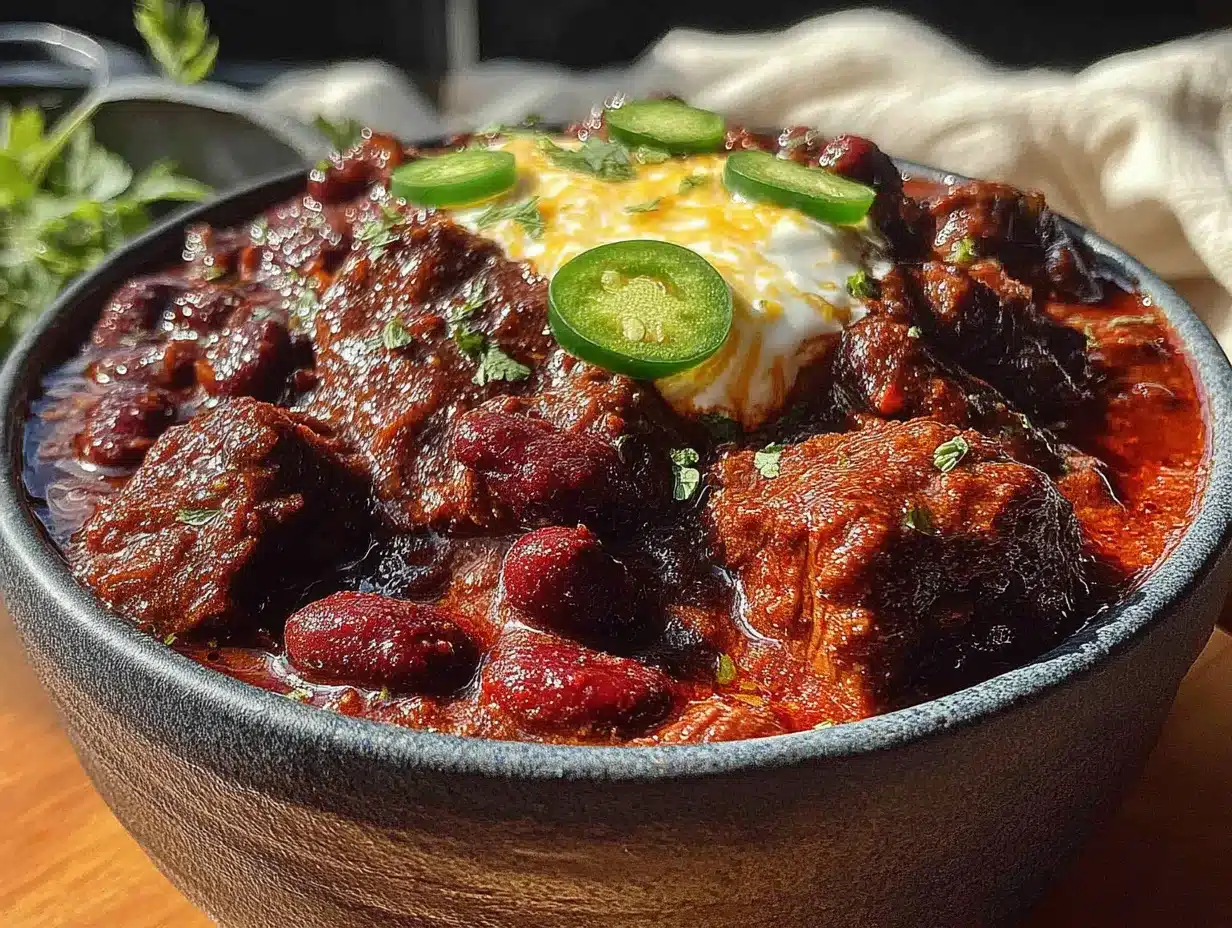
This method is about letting the ingredients do the talking. Trust the process, and don’t rush the simmer. That’s where the magic happens.
- Heat the olive oil in your large pot over medium heat. Once it shimmers (about 1 minute), add the diced onion and bell pepper. Cook, stirring occasionally, until the onion is translucent and the pepper softens—about 5 to 7 minutes. The kitchen should start smelling sweet and savory.
- Add the minced garlic and cook for 30 seconds, just until fragrant. Do not let it brown or burn. Burnt garlic tastes bitter and will ruin the whole pot. Trust me, I’ve done it. It’s not fun.
- Add the ground beef to the pot. Break it up with your wooden spoon into crumbles. Cook until no longer pink, about 6 to 8 minutes. Don’t drain the fat—that’s flavor. If you’re using lean beef and there’s no fat, add a splash of olive oil to keep things from drying out.
- Sprinkle the chili powder, cumin, smoked paprika, cayenne, oregano, salt, and pepper over the meat. Stir well to coat everything evenly. Cook for 1 minute, stirring constantly. This toasts the spices and wakes them up. You’ll smell it immediately—that warm, earthy aroma is exactly what you want.
- Pour in the fire-roasted diced tomatoes (with their juices) and the tomato sauce. Stir to combine, scraping the bottom of the pot to release any browned bits. Those bits are pure flavor gold.
- Add the drained and rinsed kidney beans, beef broth, Worcestershire sauce, and the bay leaf. Stir everything together until it’s well combined. The pot should look thick and hearty, not soupy. If it seems too thick, add a little more broth or water.
- Bring the chili to a gentle boil, then reduce the heat to low. Cover the pot with the lid slightly ajar (to let steam escape) and let it simmer for at least 45 minutes, stirring occasionally. For best results, simmer for 1 hour. The longer it simmers, the deeper the flavor becomes. The broth will reduce slightly, and the beans will get tender and flavorful.
- Taste and adjust seasoning after 45 minutes. Add more salt, chili powder, or cayenne if you want more heat. Remove the bay leaf and discard it. If the chili is too thick, stir in a little more broth or water until it reaches your desired consistency. If it’s too thin, let it simmer uncovered for another 10 to 15 minutes.
- Let the chili rest off the heat for 5 to 10 minutes before serving. This allows the flavors to settle and the texture to thicken slightly. Serve hot with your favorite toppings.
Visual Cue: At the end of cooking, the chili should look dark red and rich, with the beans and beef suspended in a thick, glossy sauce. The oil might separate slightly on top—that’s normal and actually a good sign that the flavors have concentrated.
Cooking Tips & Techniques
I’ve made this chili more times than I can count, and I’ve learned a few things along the way. Some from success, some from spectacular failure. Here’s what I wish someone had told me:
- Don’t skip the spice toasting step. That 1 minute where you cook the spices with the meat? That’s not just for show. Raw chili powder tastes flat and dusty. Toasted chili powder tastes warm and complex. It’s a small step that makes a huge difference.
- Let it simmer low and slow. I know you’re hungry. I know it smells amazing. But rushing the simmer is the number one mistake people make. The flavors need time to meld. Think of it like a friendship—it gets better with time.
- Taste as you go. I can’t stress this enough. Seasoning is personal. What’s perfectly salted to me might be bland to you. Taste at the 30-minute mark, then again at 45 minutes, and adjust. Your taste buds are the best tool you have.
- One time I forgot the cumin entirely. I was rushing, distracted by a phone call, and just skipped it. The chili was… fine. But it was missing that warm, earthy backbone that makes chili taste like chili. Don’t skip the cumin. It’s not optional.
- If your chili tastes bitter, add a pinch of sugar. Sometimes canned tomatoes can be a little acidic. A teaspoon of brown sugar or a splash of maple syrup balances it out beautifully. I’ve done this more times than I’ll admit.
- Let it rest before serving. This is a pro tip I picked up from a chef friend. Letting the chili sit off the heat for 5 to 10 minutes allows the flavors to settle and the texture to thicken. It’s like giving the chili a moment to breathe before the party starts.
Variations & Adaptations
This recipe is a starting point, not a rulebook. Feel free to make it your own. Here are some variations I’ve tried and loved:
- Vegetarian Chili : Swap the ground beef for 2 cans of black beans or pinto beans (drained and rinsed) and add an extra cup of diced mushrooms for texture. Use vegetable broth instead of beef broth. It’s still hearty and satisfying—I promise.
- Spicy Chipotle Chili : Add 1 to 2 chipotle peppers in adobo sauce (minced) along with the tomatoes. This adds a smoky, deep heat that’s absolutely addictive. I do this when I’m cooking just for myself and want something with a kick.
- Slow Cooker Version : Brown the beef and aromatics on the stovetop first (steps 1-4), then transfer everything to the slow cooker. Cook on low for 6 to 8 hours or on high for 3 to 4 hours. Add the beans in the last hour so they don’t get mushy.
- Beer-Infused Chili : Replace 1/2 cup of the beef broth with a dark beer (like a stout or porter). The beer adds a rich, malty depth that’s incredible. I’ve used Guinness and it worked beautifully. Just let the alcohol cook off for a few minutes before adding the rest of the liquid.
- White Chili Twist : Use ground chicken or turkey, swap kidney beans for cannellini beans, and use chicken broth. Replace chili powder with a blend of cumin, oregano, and white pepper. It’s a completely different dish but still comforting and delicious.
I once made a version with chorizo instead of ground beef—it was incredible but also way spicier than expected. My roommate couldn’t finish her bowl, but I polished off the leftovers for three days straight. Sometimes the best experiments are the ones that don’t quite work out for everyone else.
Serving & Storage Suggestions
This chili is a meal in itself, but the right toppings and sides can take it to another level. Here’s how I like to serve and store it:
- Serving Temperature: Serve hot, straight from the pot. Ladle into deep bowls and let everyone customize their own toppings. It’s more fun that way.
- Classic Toppings: Shredded cheddar cheese, sour cream (or Greek yogurt), diced red onion, fresh cilantro, and sliced jalapeños. A squeeze of lime juice right before eating brightens everything up.
- Side Dish Ideas: Cornbread is the classic pairing—sweet and crumbly, perfect for soaking up the chili. A simple side salad with a lime vinaigrette adds freshness. Tortilla chips for scooping are never a bad idea either.
- Storage: Let the chili cool completely before transferring to an airtight container. It will keep in the refrigerator for up to 5 days. The flavors actually get better after a day or two in the fridge—the beans soak up more of the broth, and everything melds together.
- Freezing: This chili freezes beautifully. Portion it into freezer-safe bags or containers, leaving some room for expansion. It will keep for up to 3 months. Thaw overnight in the refrigerator before reheating.
- Reheating: Reheat on the stovetop over medium-low heat, stirring occasionally. Add a splash of broth or water if it’s too thick. You can also microwave individual portions in 30-second bursts, stirring between each. The stovetop method gives better results, honestly.
- Flavor Development: I’ve noticed that day-old chili has a deeper, more rounded flavor. The spices mellow out and the beans become more tender. If you have the time, make this a day ahead. Your future self will thank you.
Nutritional Information & Benefits
This chili is hearty and satisfying, but it’s also packed with good stuff. Here’s a rough breakdown per serving (based on 8 servings):
- Calories: Approximately 380-420 per serving (depending on toppings)
- Protein: 28-32 grams (thanks to the beef and beans)
- Fiber: 10-12 grams (kidney beans are fiber superstars)
- Iron: 25% of the daily value (beef and beans are both excellent sources)
- Vitamin C: 15% of the daily value (from the bell pepper and tomatoes)
Health Highlights:
- Kidney beans are packed with soluble fiber, which helps lower cholesterol and keeps you feeling full longer. They’re also a great plant-based source of protein.
- Tomatoes are rich in lycopene, a powerful antioxidant that’s been linked to heart health. Cooking tomatoes actually increases the amount of lycopene your body can absorb.
- This recipe is naturally gluten-free (just double-check your Worcestershire sauce and broth labels). It’s also dairy-free if you skip the cheese and sour cream toppings.
- For a lower-carb option, serve the chili over cauliflower rice or a bed of greens instead of with cornbread or crackers.
I’m not a nutritionist, but I do know that a bowl of this chili makes me feel good—full, satisfied, and energized. It’s the kind of meal that nourishes you without feeling heavy. That’s a win in my book.
Conclusion
This Ultimate Classic Chili con Carne with Kidney Beans is more than just a recipe—it’s a reminder that sometimes the simplest approach is the best one. That rainy Saturday when my roommate suggested the one-pot method changed how I think about cooking. I stopped overcomplicating things and started trusting the ingredients. And honestly, that made everything taste better.
I hope you give this chili a try. Make it for a crowd, make it for yourself, or make it on a Sunday and enjoy it all week. Add your own twist—maybe some extra heat, a different bean, or a pile of your favorite toppings. That’s the beauty of a recipe like this. It’s a foundation, not a prison.
If you make it, come back and tell me how it went. Leave a comment below or tag me in your photos. I love seeing how people make recipes their own. And if you have a question, ask away. I’ve probably made every mistake you can think of, so I’m happy to help you avoid them.
Now go grab that pot and get cooking. Your taste buds are waiting.
Frequently Asked Questions
Can I use ground turkey instead of beef?
Absolutely. Ground turkey works great as a leaner option. Just add an extra tablespoon of olive oil to compensate for the lower fat content. The flavor will be slightly milder, so you might want to bump up the chili powder and cumin a bit.
How do I make this chili less spicy?
Easy. Skip the cayenne pepper entirely and use a mild chili powder blend instead of a hot one. You can also remove the seeds from any fresh peppers you add. The recipe is very forgiving, so adjust the heat to your comfort level.
Can I use dried kidney beans instead of canned?
Yes, but you’ll need to plan ahead. Soak 1 cup of dried kidney beans overnight, then drain and rinse them. Cook them separately in water until tender (about 1 to 1.5 hours) before adding them to the chili. Do not add raw dried beans directly to the chili—they need more time and liquid to cook properly.
Why is my chili watery?
This usually happens if you add too much broth or if the tomatoes are extra juicy. Fix it by simmering the chili uncovered for an extra 10 to 15 minutes to let the liquid evaporate. You can also mash some of the beans against the side of the pot to thicken the broth naturally.
Can I make this chili in an Instant Pot?
Yes! Use the sauté function to brown the beef and cook the aromatics, then add the remaining ingredients. Pressure cook on high for 15 minutes, then let the pressure release naturally for 10 minutes before quick releasing the rest. The flavor won’t be quite as deep as stovetop simmering, but it’s still delicious and much faster.
Pin This Recipe!

Best Classic Chili con Carne with Kidney Beans

This one-pot chili is the ultimate comfort food—tender ground beef, kidney beans, and a rich, smoky tomato broth come together with minimal effort and maximum flavor. It’s the recipe that proves simple is often best.
- Prep Time: 15 minutes
- Cook Time: 1 hour
- Total Time: 1 hour 15 minutes
- Yield: 8 servings 1x
- Category: Main Course
- Cuisine: American
Ingredients
- 2 tablespoons olive oil
- 1 large yellow onion, diced (about 1.5 cups)
- 1 green bell pepper, diced
- 4 cloves garlic, minced
- 2 pounds ground beef (80/20)
- 2 tablespoons chili powder
- 1 tablespoon ground cumin
- 1 teaspoon smoked paprika
- 1/2 teaspoon cayenne pepper (optional)
- 1 teaspoon dried oregano
- 1 teaspoon salt
- 1/2 teaspoon black pepper
- 1 can (14.5 ounces) fire-roasted diced tomatoes, undrained
- 1 can (15 ounces) tomato sauce
- 2 cans (15 ounces each) kidney beans, drained and rinsed
- 1 cup beef broth (low-sodium preferred)
- 1 tablespoon Worcestershire sauce
- 1 bay leaf
Instructions
- Heat the olive oil in a large pot over medium heat. Once it shimmers (about 1 minute), add the diced onion and bell pepper. Cook, stirring occasionally, until the onion is translucent and the pepper softens—about 5 to 7 minutes.
- Add the minced garlic and cook for 30 seconds, just until fragrant. Do not let it brown or burn.
- Add the ground beef to the pot. Break it up with a wooden spoon into crumbles. Cook until no longer pink, about 6 to 8 minutes. Do not drain the fat.
- Sprinkle the chili powder, cumin, smoked paprika, cayenne, oregano, salt, and pepper over the meat. Stir well to coat everything evenly. Cook for 1 minute, stirring constantly.
- Pour in the fire-roasted diced tomatoes (with their juices) and the tomato sauce. Stir to combine, scraping the bottom of the pot to release any browned bits.
- Add the drained and rinsed kidney beans, beef broth, Worcestershire sauce, and the bay leaf. Stir everything together until well combined.
- Bring the chili to a gentle boil, then reduce the heat to low. Cover the pot with the lid slightly ajar and let it simmer for at least 45 minutes, stirring occasionally. For best results, simmer for 1 hour.
- Taste and adjust seasoning after 45 minutes. Add more salt, chili powder, or cayenne if desired. Remove the bay leaf and discard it. If the chili is too thick, stir in a little more broth or water. If too thin, let it simmer uncovered for another 10 to 15 minutes.
- Let the chili rest off the heat for 5 to 10 minutes before serving. Serve hot with your favorite toppings.
Notes
For a milder chili, reduce or omit the cayenne and use a mild chili powder blend. For more heat, add a diced jalapeño with the onions or stir in some chipotle powder at the end. Ground turkey or chicken works as a leaner substitute for beef, but add an extra tablespoon of oil. If you’re watching your sodium, use no-salt-added tomatoes and broth. This chili tastes even better the next day—make it a day ahead if possible.
Nutrition
- Serving Size: 1 bowl (about 1.5 cu
- Calories: 400
- Sugar: 8
- Sodium: 800
- Fat: 18
- Saturated Fat: 6
- Carbohydrates: 30
- Fiber: 11
- Protein: 30
Keywords: chili con carne, classic chili, kidney beans, ground beef, one-pot chili, comfort food, easy chili recipe


