Love this? Save it for later!
Share the inspiration with your friends
The neighborhood potluck was in four hours and I’d completely forgotten. I mean, completely. I was standing in my kitchen at 2 PM on a Saturday, staring into my fridge like it held the answers to the universe. Everyone else would be bringing their signature dishes—you know the type. Maria’s famous lasagna that takes all day, Dave’s smoked brisket he starts marinating on Thursday, and then there was me. I had a pack of chicken thighs I’d bought on sale, some questionable Parmesan lurking in the cheese drawer, and honestly, not a lot of hope.
I remember muttering to myself, “Okay, think. You can do this.” The clock was ticking and I could already picture showing up empty-handed. That’s when I spotted the panko breadcrumbs shoved behind the oatmeal. I grabbed the chicken, the Parmesan, a few pantry staples, and just started winging it. No plan, no recipe pulled up on my phone—just pure kitchen panic. I breaded those thighs, threw them in a hot skillet, and prayed. The sizzle when they hit the pan was honestly the first good sign I’d had all day.
I walked into that potluck with a simple baking dish, feeling a little sheepish next to everyone else’s elaborate spreads. But you know what happened? That dish was gone in twenty minutes. People were coming up to me asking for the recipe, and I had to make something up on the spot because I’d literally invented it in a state of desperation. Maybe you’ve been there—that moment when you think you’ve ruined dinner (or in my case, a whole social event), and it turns out to be the best accident you’ve ever made. That’s this recipe. It’s the one I keep making on purpose now, even when nobody’s watching.
Why You’ll Love This Recipe
Let me tell you why these crispy Parmesan crusted chicken thighs have become my most-requested dish. I’ve tested this recipe at least a dozen times since that frantic potluck day, tweaking the ratios and the cooking method until it was absolutely foolproof. Here’s what makes it special:
- Quick & Easy: From fridge to table in under 35 minutes. Seriously, this is weeknight dinner gold.
- Simple Ingredients: You probably have most of this in your kitchen right now. No fancy grocery store runs required.
- Perfect for Any Occasion: Works for a casual Tuesday dinner, a game day snack, or when you need to impress someone without breaking a sweat.
- Crowd-Pleaser: I’ve served this to picky kids, foodie friends, and my dad who “doesn’t like chicken thighs.” They all went back for seconds.
- Unbelievably Delicious: The crust gets shatteringly crispy while the meat stays juicy and tender. It’s the texture contrast that gets everyone.
What makes this different from every other crispy chicken recipe out there? It’s the technique. Most recipes tell you to bake the chicken, but I use a hybrid method—searing first in a hot cast iron skillet to develop that golden crust, then finishing in the oven to ensure the inside stays perfectly cooked. The Parmesan gets mixed right into the breading, creating a cheesy, savory crust that browns beautifully without burning. And I add a tiny pinch of cayenne—not enough to make it spicy, but just enough to wake up all the other flavors. It’s a little trick I learned after my third batch came out tasting flat.
Honestly, this recipe is the kind that makes you close your eyes after the first bite. It’s comfort food that feels a little fancy but requires almost no effort. Perfect for nights when you want something satisfying without spending hours in the kitchen.
What Ingredients You Will Need
This recipe uses simple, wholesome ingredients to deliver that incredible crispy texture and savory flavor. Most of these are pantry staples, which is exactly what you want on a busy weeknight.
For the Chicken
- 4 bone-in, skin-on chicken thighs (about 1.5 lbs total) — the skin helps keep the meat moist while it cooks
- 1 teaspoon salt — I use kosher salt for better flavor distribution
- ½ teaspoon black pepper — freshly ground is best here
- ½ teaspoon garlic powder — adds savory depth without being overpowering
- ½ teaspoon onion powder — rounds out the seasoning nicely
For the Parmesan Crust
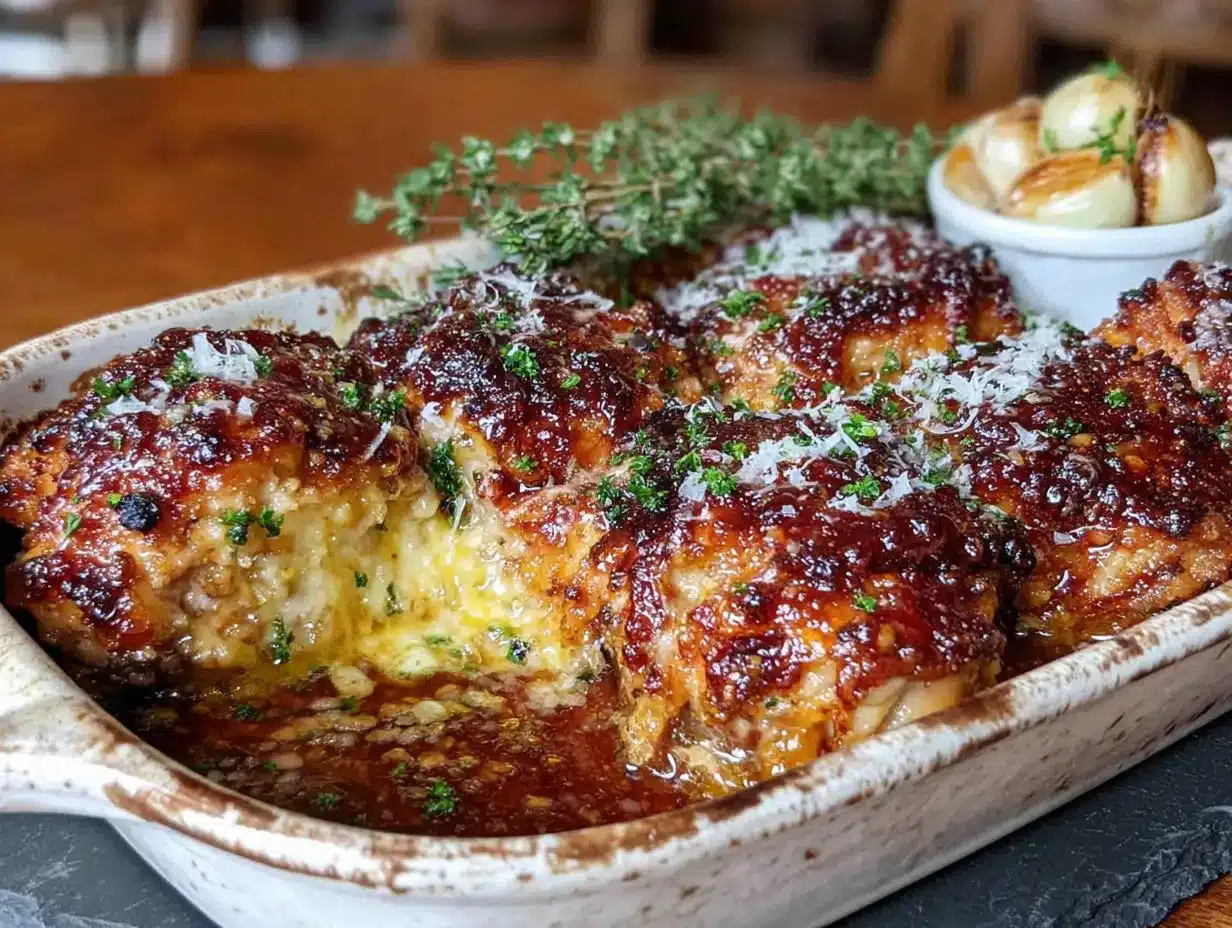
- ½ cup panko breadcrumbs — these give you that extra-crispy texture regular breadcrumbs just can’t match
- ¼ cup grated Parmesan cheese — use the good stuff from a block, not the green can. I recommend Parmigiano-Reggiano if you can find it
- ¼ cup all-purpose flour — helps the coating stick and adds to the crunch
- 1 large egg — the glue that holds everything together
- 1 tablespoon Dijon mustard — trust me on this, it adds a subtle tang that makes the Parmesan shine
- ¼ teaspoon cayenne pepper — optional but highly recommended, it doesn’t make it spicy, just more flavorful
- 2 tablespoons olive oil — for searing, use one with a higher smoke point
- 1 tablespoon unsalted butter — adds richness to the crust during searing
For the Parmesan, I’ve found that pre-shredded cheese doesn’t melt as smoothly because of the anti-caking agents. Take the extra minute to grate it yourself—it really does make a difference in how the crust forms. If you’re out of panko, you can use regular breadcrumbs, but the texture won’t be quite as crispy. And if you’re avoiding gluten, almond flour works surprisingly well as a substitute for the regular flour.
Equipment Needed
You don’t need a ton of fancy equipment for this recipe, which is part of why I love it. Here’s what you’ll want to have on hand:
- Cast iron skillet — this is my go-to for getting that perfect sear. If you don’t have one, any oven-safe skillet will work, but cast iron holds heat better for a more even crust.
- Mixing bowls — one shallow bowl for the flour mixture, one for the egg wash, and one for the panko-Parmesan coating
- Tongs — for flipping the chicken without messing up the crust
- Meat thermometer — honestly, this is non-negotiable if you want perfectly cooked chicken every time. I’ve ruined too many batches by guessing.
- Baking sheet — for transferring the chicken to the oven if your skillet isn’t large enough
- Wire rack — placing the cooked chicken on a rack instead of directly on a plate keeps the bottom crust crispy
If you don’t own a cast iron skillet, a stainless steel pan works great—just make sure it’s oven-safe up to 400°F. I picked up my cast iron skillet at a thrift store for eight dollars, so don’t feel like you need to spend a fortune. A good meat thermometer, though, is worth every penny. I use a simple digital one that cost about fifteen bucks, and it’s saved me from serving dry chicken more times than I can count.
Preparation Method
Alright, let’s get cooking. I’m going to walk you through every step so you get that perfect crispy crust every single time.
- Preheat your oven to 400°F. Position the rack in the middle. If you’re using a cast iron skillet, place it in the oven while it preheats—this helps the pan get screaming hot for the sear.
- Prep the chicken. Pat the chicken thighs dry with paper towels. This is crucial—wet skin won’t get crispy. Season both sides with salt, pepper, garlic powder, and onion powder. Let them sit at room temperature for about 10 minutes while you prepare the coating stations.
- Set up your breading station. In a shallow bowl, mix the flour with a pinch of salt and pepper. In a second bowl, whisk together the egg and Dijon mustard until smooth. In a third bowl, combine the panko breadcrumbs and grated Parmesan cheese. The order matters: flour first, then egg, then panko mixture. This three-step process is what creates that thick, crunchy crust.
- Coat the chicken. Take one chicken thigh and dredge it in the flour, shaking off any excess. Dip it into the egg mixture, letting the excess drip off. Finally, press it firmly into the panko-Parmesan mixture, making sure every surface is coated. Don’t be shy here—really press that coating on. Place the breaded thigh on a plate and repeat with the remaining chicken.
- Heat the skillet. Carefully remove the hot cast iron skillet from the oven (use oven mitts, please—I learned this the hard way). Place it on the stovetop over medium-high heat. Add the olive oil and butter, swirling until the butter is melted and sizzling.
- Sear the chicken. Carefully place the chicken thighs skin-side down in the hot skillet. You should hear a satisfying sizzle—if you don’t, the pan isn’t hot enough. Cook for 3-4 minutes without moving them. This is important: let them sit so the crust can develop. After 3-4 minutes, use tongs to flip them. The crust should be golden brown and gorgeous. Sear the other side for 2-3 minutes.
- Finish in the oven. If your skillet is oven-safe, transfer it directly to the preheated oven. If not, move the chicken to a baking sheet. Bake for 15-18 minutes, or until the internal temperature reaches 165°F when checked with a meat thermometer inserted into the thickest part of the thigh.
- Rest before serving. Let the chicken rest on a wire rack for 5 minutes. This keeps the crust crispy—if you put it directly on a plate, the steam will soften it. I know it’s tempting to dig in right away, but trust me on this one.
One thing I learned the hard way: don’t crowd the pan. If you’re making more than four thighs, work in batches. When the pan is too full, the temperature drops and the chicken steams instead of sears. You’ll end up with pale, soggy crusts and nobody wants that.
Cooking Tips & Techniques
After making this recipe more times than I can count, I’ve picked up a few tricks that make a real difference. Let me share what I’ve learned, including some of my more memorable failures.
The temperature trick. I used to just bake chicken thighs and wonder why they came out dry. The secret is starting with room-temperature chicken. If you put cold chicken straight from the fridge into a hot pan, the outside cooks too fast while the inside stays raw. Letting it sit out for 15-20 minutes before cooking makes a huge difference.
The crust that wouldn’t stick. My first few attempts at breaded chicken were a disaster—the coating just slid right off. The problem? I wasn’t pressing hard enough. When you coat the chicken in the panko mixture, really press it in with your fingers. You want the crumbs to embed themselves into the egg wash. And make sure your chicken is dry before you start breading. Wet chicken is the enemy of crispy crusts.
Don’t skip the resting step. I know, I mentioned this already, but it’s worth repeating. I once served these straight from the oven and the bottom crust was completely soggy within minutes. A wire rack is your best friend here. If you don’t have one, a cooling rack over a baking sheet works perfectly.
Multitasking like a pro. While the chicken is in the oven, I like to prep a simple side dish—maybe a quick salad or some roasted vegetables. The 15-18 minutes of baking time is perfect for throwing together a quick side. I’ll often toss some broccoli with olive oil and salt, and roast it on the other oven rack alongside the chicken.
My biggest failure. I once tried to double the recipe and cook all eight thighs in one batch. The pan was so crowded that the chicken basically steamed. The crust was pale and soft, and the cooking time took forever. Now I always cook in batches if I’m making a larger quantity. It takes a little longer, but the results are worth it.
Variations & Adaptations
One of the best things about this recipe is how adaptable it is. Here are some variations I’ve tried and loved:
Spicy Buffalo Version
Add 2 tablespoons of hot sauce to the egg mixture and increase the cayenne to ½ teaspoon. After baking, toss the cooked chicken in a mixture of melted butter and hot sauce. Serve with ranch or blue cheese dressing for dipping. I made this for a game day party and it disappeared faster than anything else on the table.
Herb and Garlic Version
Add 1 tablespoon of dried Italian seasoning and 2 minced garlic cloves to the panko mixture. This gives the crust a lovely herbaceous flavor that pairs beautifully with the Parmesan. I like to serve this version with a squeeze of fresh lemon juice right before serving—it brightens everything up.
Gluten-Free Adaptation
Substitute the all-purpose flour with almond flour or a gluten-free all-purpose blend. Use gluten-free panko breadcrumbs (they’re available at most grocery stores now). Everything else stays the same. I’ve tested this version for a friend with celiac disease and it came out just as crispy and delicious.
Lighter Version
Use boneless, skinless chicken thighs and reduce the oil to 1 tablespoon. The cooking time will be shorter—about 12-15 minutes in the oven. The crust won’t be quite as shatteringly crispy, but it’s still really good and significantly lower in calories.
Cheese Lover’s Version
Mix ¼ cup of shredded mozzarella into the panko-Parmesan mixture along with an extra tablespoon of Parmesan. The mozzarella melts and creates these little crispy cheese bits on the crust that are absolutely incredible.
Serving & Storage Suggestions
These crispy Parmesan crusted chicken thighs are best served fresh from the oven, but I’ve got plenty of tips for making the most of them.
Serving temperature and presentation. Serve the chicken hot, right after the 5-minute rest. I like to arrange them on a platter with a sprinkle of fresh parsley and a few lemon wedges on the side. The brightness of the lemon cuts through the richness of the Parmesan beautifully. For a complete meal, I pair these with a simple arugula salad dressed with lemon vinaigrette and some roasted baby potatoes.
Complementary dishes. These chicken thighs go with almost anything. Some of my favorite pairings include garlicky green beans, creamy mashed potatoes, roasted asparagus, or a simple tomato and cucumber salad. If you’re serving them for a crowd, a big batch of roasted vegetables and a crusty loaf of bread is all you need.
Storage instructions. Leftover chicken will keep in the refrigerator for up to 3 days in an airtight container. The crust will soften over time, but the flavor stays great. To reheat, place the chicken on a wire rack over a baking sheet and warm it in a 375°F oven for 8-10 minutes. This helps restore some of the crispiness. Avoid the microwave—it will make the crust soggy and the chicken rubbery.
Freezer tips. You can freeze the cooked chicken for up to 2 months. Let it cool completely, then wrap each piece individually in plastic wrap and place them in a freezer bag. To reheat, thaw overnight in the refrigerator and then warm in the oven as described above. I’ve also frozen the breaded but uncooked chicken with good results—just arrange the breaded thighs on a baking sheet, freeze until solid, then transfer to a freezer bag. Cook from frozen, adding about 5 minutes to the baking time.
How flavors develop. Honestly, these are best the day they’re made. The crust is at its peak crispiness right out of the oven. But the flavors do meld together nicely overnight, so leftovers are still delicious even if the texture isn’t quite the same.
Nutritional Information & Benefits
Here’s the estimated nutritional breakdown for one serving (one chicken thigh):
| Nutrient | Amount |
|---|---|
| Calories | 385 |
| Total Fat | 24g |
| Saturated Fat | 8g |
| Cholesterol | 155mg |
| Sodium | 620mg |
| Total Carbohydrates | 12g |
| Dietary Fiber | 1g |
| Sugars | 1g |
| Protein | 32g |
Chicken thighs are actually a great source of protein, iron, and B vitamins. The skin does add fat, but it also keeps the meat moist and flavorful without needing a lot of added oil. Parmesan cheese adds calcium and a good amount of protein too. If you’re watching your sodium, you can reduce the salt in the breading and use low-sodium Parmesan. This recipe is naturally gluten-free if you use the appropriate substitutions, and it’s also low-carb friendly if you skip the flour and use almond meal instead.
From a wellness perspective, I love that this recipe feels indulgent but is made with real, whole ingredients. There’s nothing processed or artificial here—just good food cooked well. It’s the kind of meal that leaves you feeling satisfied, not weighed down.
Conclusion
This crispy Parmesan crusted chicken thighs recipe started as a happy accident born from kitchen panic, and it’s become one of my most reliable go-to dishes. It’s proof that you don’t need complicated techniques or fancy ingredients to create something truly memorable. The combination of that golden, cheesy crust with the juicy, tender meat underneath is just unbeatable.
I hope you’ll give this recipe a try and make it your own. Maybe you’ll add extra herbs, dial up the spice, or find a new way to serve it that I haven’t thought of. That’s the beauty of cooking—it’s always evolving. I’d love to hear how yours turns out. Drop a comment below and let me know if you made any tweaks or if this became a new favorite in your kitchen. And if you’re looking for another easy weeknight dinner, you might enjoy my garlic butter chicken thighs or this sheet pan lemon herb chicken for those nights when you want dinner with minimal cleanup.
Until next time, happy cooking, and remember—sometimes the best recipes come from the moments when you least expect them.
Frequently Asked Questions
Can I use chicken breasts instead of thighs?
Yes, you can, but the cooking time will be different. Chicken breasts are leaner and can dry out more easily. I recommend using boneless, skinless chicken breasts and pounding them to an even thickness first. Reduce the baking time to 12-15 minutes and check for an internal temperature of 165°F.
Why did my crust fall off?
This usually happens for one of three reasons: the chicken wasn’t dry before breading, you didn’t press the coating on firmly enough, or the pan wasn’t hot enough when you started searing. Make sure to pat the chicken dry with paper towels and really press that panko mixture into the egg wash.
Can I make this recipe dairy-free?
Absolutely. Substitute the Parmesan cheese with a dairy-free alternative (look for one that melts well) and use a dairy-free butter substitute or just extra olive oil for searing. The texture will be slightly different, but it will still be delicious and crispy.
How do I know when the chicken is fully cooked?
The most reliable way is to use a meat thermometer. Insert it into the thickest part of the thigh, avoiding the bone. The chicken is done when it reaches 165°F. If you don’t have a thermometer, you can cut into the thickest part and check that the juices run clear and there’s no pink meat.
Can I prep these ahead of time for a party?
Yes! You can bread the chicken up to 24 hours in advance and keep it covered in the refrigerator. Let it sit at room temperature for 15 minutes before cooking. You can also sear the chicken ahead of time and finish it in the oven just before serving—just add a few extra minutes to the baking time since the chicken will be cold.
Pin This Recipe!
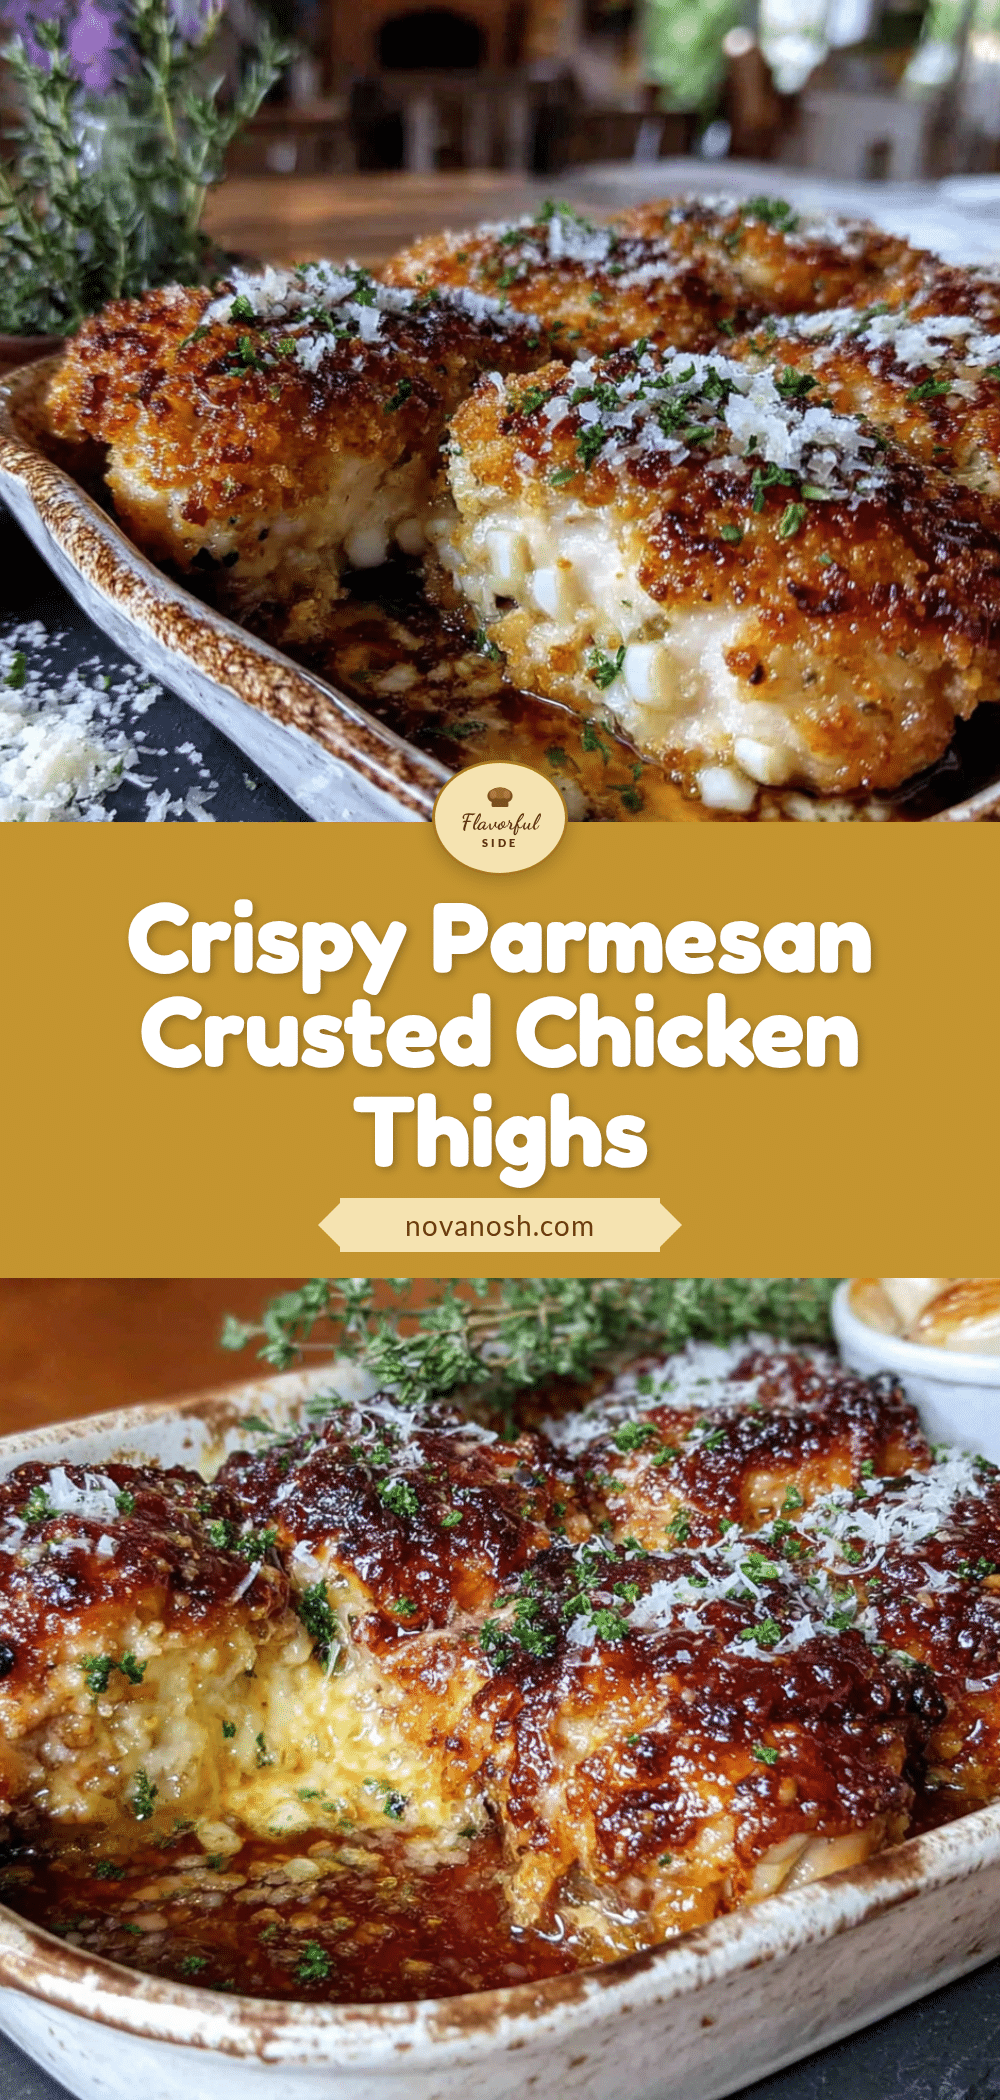
Best Crispy Parmesan Crusted Chicken Thighs Recipe

These crispy Parmesan crusted chicken thighs are a quick and easy weeknight dinner that turns out shatteringly crispy on the outside and juicy on the inside. Perfect for any occasion, this recipe uses simple ingredients and a hybrid sear-and-bake method for foolproof results.
- Prep Time: 15 minutes
- Cook Time: 25 minutes
- Total Time: 40 minutes
- Yield: 4 servings 1x
- Category: Main Course
- Cuisine: American
Ingredients
- 4 bone-in, skin-on chicken thighs (about 1.5 lbs total)
- 1 teaspoon kosher salt
- ½ teaspoon black pepper, freshly ground
- ½ teaspoon garlic powder
- ½ teaspoon onion powder
- ½ cup panko breadcrumbs
- ¼ cup grated Parmesan cheese (preferably Parmigiano-Reggiano)
- ¼ cup all-purpose flour
- 1 large egg
- 1 tablespoon Dijon mustard
- ¼ teaspoon cayenne pepper (optional)
- 2 tablespoons olive oil
- 1 tablespoon unsalted butter
Instructions
- Preheat your oven to 400°F. Position the rack in the middle. If using a cast iron skillet, place it in the oven while it preheats.
- Pat the chicken thighs dry with paper towels. Season both sides with salt, pepper, garlic powder, and onion powder. Let them sit at room temperature for about 10 minutes.
- Set up your breading station: In a shallow bowl, mix the flour with a pinch of salt and pepper. In a second bowl, whisk together the egg and Dijon mustard until smooth. In a third bowl, combine the panko breadcrumbs and grated Parmesan cheese.
- Coat the chicken: Dredge one thigh in the flour, shaking off excess. Dip into the egg mixture, letting excess drip off. Press firmly into the panko-Parmesan mixture, coating all surfaces. Place on a plate and repeat with remaining chicken.
- Carefully remove the hot cast iron skillet from the oven and place on stovetop over medium-high heat. Add olive oil and butter, swirling until melted and sizzling.
- Place chicken thighs skin-side down in the hot skillet. Cook for 3-4 minutes without moving, until golden brown. Flip and sear the other side for 2-3 minutes.
- Transfer the skillet (or move chicken to a baking sheet) to the preheated oven. Bake for 15-18 minutes, or until internal temperature reaches 165°F.
- Let the chicken rest on a wire rack for 5 minutes before serving.
Notes
For best results, use freshly grated Parmesan and pat chicken dry before breading. Do not crowd the pan; cook in batches if needed. Let chicken rest on a wire rack to keep crust crispy. For gluten-free, substitute flour with almond flour and use gluten-free panko.
Nutrition
- Serving Size: 1 chicken thigh
- Calories: 385
- Sugar: 1
- Sodium: 620
- Fat: 24
- Saturated Fat: 8
- Carbohydrates: 12
- Fiber: 1
- Protein: 32
Keywords: crispy chicken thighs, Parmesan crusted chicken, easy chicken recipe, weeknight dinner, baked chicken thighs


