Love this? Save it for later!
Share the inspiration with your friends
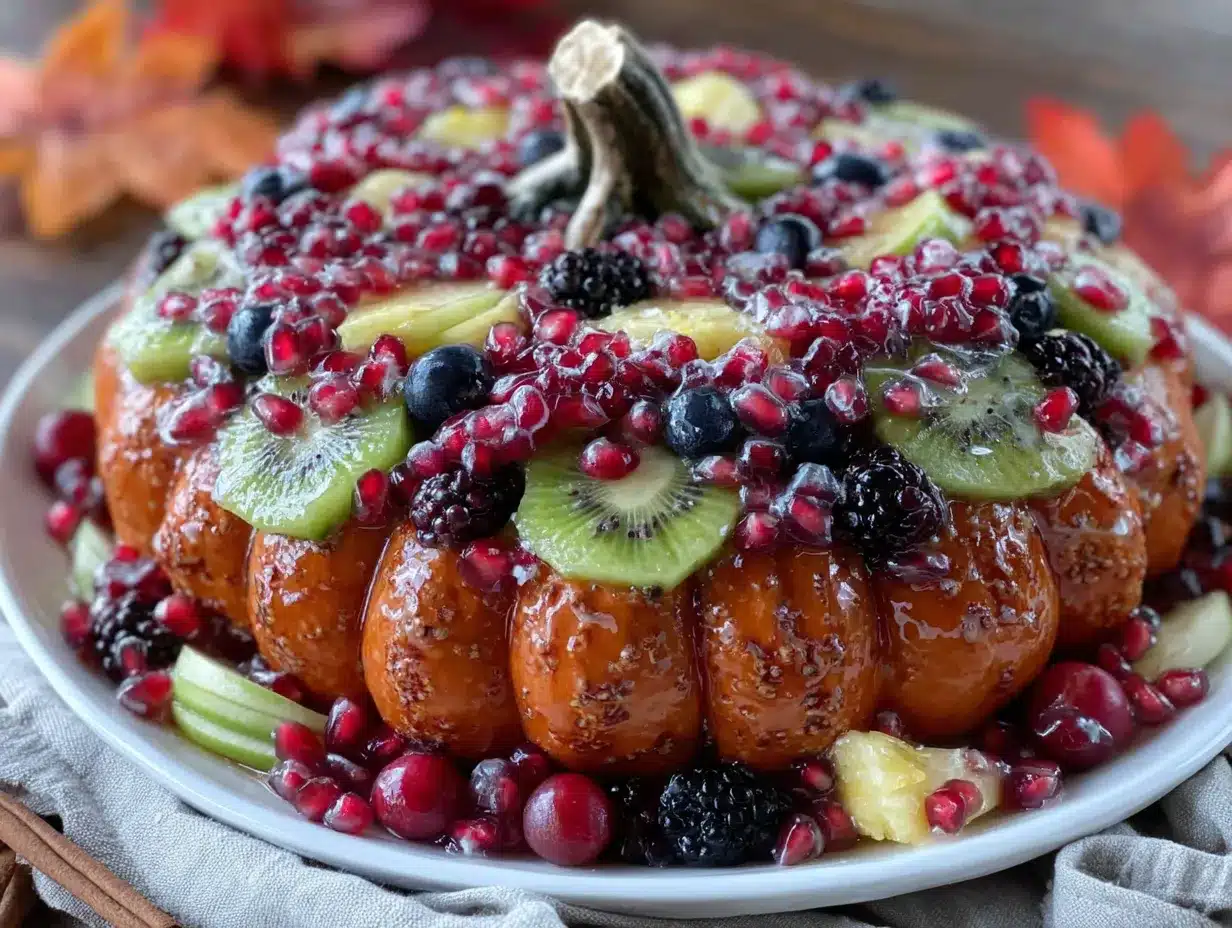
I was standing in line at the DMV—of all places—when the woman behind me started talking about fruit. Not complaining about the wait, not sighing dramatically like the rest of us. She was describing, in vivid detail, how she’d arranged sliced apples and grapes into the shape of a pumpkin for her daughter’s preschool class. She pulled out her phone to show me a photo, and I’m telling you, I forgot where I was for a solid minute. The platter was gorgeous—a perfect pumpkin silhouette made entirely of fruit, with a little pretzel stick stem and green grape vines curling around the edges. I asked her how she did it, and she shrugged like it was nothing. “You just trace a pumpkin shape in your head and start layering,” she said. “It’s easier than it looks.”
I scribbled her instructions on the back of an old receipt while the DMV number counter crawled along. Honestly, I was so distracted by the idea that I almost missed my turn. But that’s how the best recipes happen, right? When you least expect them. I went home that afternoon, grabbed every piece of fruit I had, and spent an hour arranging and rearranging until my pumpkin fruit tray looked half as good as hers. It wasn’t perfect—the grapes kept rolling off, and my “stem” was a little crooked—but you know what? Everyone who saw it loved it. That was three autumns ago, and I’ve been making this fall harvest pumpkin fruit tray platter every year since. It’s become my go-to for Halloween parties, Thanksgiving appetizers, and those cozy weekend gatherings where you want something beautiful that doesn’t require turning on the oven. Trust me, once you make this, you’ll understand why I still think about that DMV conversation every single time I slice an apple.
Why You’ll Love This Recipe
Let me tell you why this fall harvest pumpkin fruit tray platter has earned a permanent spot in my seasonal rotation. I’ve tested this with picky kids, health-conscious friends, and even my uncle who “doesn’t eat fruit” (he ate three servings). It delivers on every level.
- Stunning Presentation, Minimal Effort : This platter looks like you spent hours on it, but the actual hands-on time is about 20 minutes. The rest is just arranging, which honestly feels more like playing than cooking.
- Naturally Healthy : No added sugars, no processed ingredients—just fresh fruit arranged in the most festive way possible. It’s the kind of dish that makes everyone feel good about reaching for seconds.
- Perfect for Fall Gatherings : Whether it’s a Halloween party, Thanksgiving dinner, or a casual football watch party, this platter fits right in. It’s colorful, seasonal, and impossible to ignore on a buffet table.
- Customizable for Any Diet : Gluten-free, dairy-free, vegan, paleo—this platter checks every box. Nobody gets left out, and nobody feels like they’re missing dessert.
- Kid-Friendly Fun : My niece helped me arrange the grapes last year, and she was so proud of her “pumpkin” that she took a photo to show her teacher. It’s a great way to get little ones excited about eating fruit.
What makes this version different from other fruit platters you’ve seen? It’s all about the shape and the layering technique. Instead of just throwing fruit on a board, you’re building a recognizable pumpkin silhouette that immediately signals “fall.” The trick is using a variety of textures and colors—crunchy apples, juicy grapes, creamy banana slices—so every bite feels different. I’ve refined the arrangement over several seasons, and I can tell you exactly which fruits work best and which ones to avoid (looking at you, overly ripe peaches that turned into mush). This isn’t just another fruit tray—it’s your best version, built on trial and error and a little DMV magic.
What Ingredients You Will Need
This fall harvest pumpkin fruit tray platter uses simple, fresh ingredients that are easy to find at any grocery store or farmers market during autumn. The beauty of this recipe is that you can mix and match based on what looks best at the store, but here’s my tried-and-true combination for the perfect pumpkin shape.
For the Pumpkin Body
- Oranges or clementines (4-5 medium) — Peeled and segmented. The bright orange color is essential for the pumpkin look. I prefer clementines in the fall because they’re sweeter and easier to peel.
- Apple slices (2 large apples, any red variety) — Cut into thin wedges, about 1/4 inch thick. I recommend Honeycrisp or Fuji for sweetness and crunch. Toss them in a little lemon juice to prevent browning.
- Green grapes (2 cups) — Washed and dried. These create the darker “ribs” of the pumpkin and add nice contrast.
- Red grapes (1 cup) — Washed and dried. These blend beautifully with the apples and add another layer of color.
- Banana slices (2 bananas) — Cut into 1/2 inch rounds. Dip them in lemon juice or pineapple juice to keep them from turning brown too quickly.
- Mango chunks (1 ripe mango) — Peeled and cubed. The golden yellow adds warmth and variety. You can substitute with fresh pineapple if mango isn’t available.
- Kiwi slices (2 kiwis) — Peeled and cut into half moons. The green adds a pop of color that makes the platter feel more vibrant.
For the Stem and Vine
- Pretzel sticks (3-4) — These make the perfect pumpkin stem. They’re salty, crunchy, and contrast beautifully with the sweet fruit.
- Green apple slices (1/2 green apple) — Cut into thin strips to create curly vines around the stem. Granny Smith works best here.
- Fresh mint leaves (a small handful) — Optional, but they add a lovely pop of green and a fresh aroma that screams fall.
For the Base
- Large round platter or cutting board (12-14 inches) — A wooden board gives a rustic feel, but any large flat surface works. I’ve used a white ceramic platter and a bamboo cutting board, and both look fantastic.
- Leaf-shaped cookie cutters (optional) — For cutting apple or melon slices into decorative leaf shapes to scatter around the platter.
I recommend using organic fruit when possible, especially for apples and grapes, since you’re eating the skin. If you’re shopping at a farmers market, look for fruit that’s firm but gives slightly when pressed—that’s the sweet spot for ripeness. And here’s a tip I learned the hard way: avoid very juicy fruits like watermelon or overly ripe peaches. They release too much liquid and can make the platter soggy within an hour.
Equipment Needed
You don’t need fancy equipment for this fall harvest pumpkin fruit tray platter, which is part of why I love it. Here’s what you’ll need:
- Large round platter or wooden cutting board (12-14 inches) — A round surface helps create the pumpkin shape naturally. If you only have a rectangular board, that works too—just adjust the shape slightly.
- Sharp chef’s knife — For cutting apples, mangoes, and kiwis cleanly. A dull knife will crush the fruit and make everything look messy.
- Cutting board — For prepping the fruit. Use a separate board from your platter to keep things tidy.
- Small cookie cutters (leaf or pumpkin shapes, optional) — These are fun for cutting apple slices into decorative shapes, but definitely not required.
- Paper towels — For drying fruit thoroughly. Wet fruit makes the platter slippery and can cause the shape to collapse.
- Small bowl of lemon water — For dipping apple and banana slices to prevent browning. A little citrus goes a long way.
I bought my wooden board at a thrift store for three dollars, and it’s become my go-to for entertaining. You really don’t need to spend much. If you’re just starting out, a large dinner plate works in a pinch—just arrange the fruit in a smaller pumpkin shape. The most important thing is having enough surface area to spread everything out without overcrowding.
Preparation Method
Making this fall harvest pumpkin fruit tray platter is more about arranging than actual cooking, but there’s a method to getting that perfect pumpkin shape. Follow these steps, and you’ll have a showstopper in under 30 minutes.
- Prep your fruit first. Wash all grapes and let them dry completely on paper towels. Peel the oranges or clementines and separate into segments. Peel and slice the mango into small cubes. Peel and slice the kiwis into half-moon shapes. This makes the assembly process much smoother.
- Prevent browning on apples and bananas. Fill a small bowl with cold water and add the juice of half a lemon. Slice the apples into thin wedges (about 1/4 inch thick) and immediately drop them into the lemon water. Let them soak for 2-3 minutes, then drain and pat dry. Do the same with the banana slices. This keeps them looking fresh for hours.
- Visualize your pumpkin shape. Place your platter on a flat surface. Imagine a pumpkin silhouette taking up most of the space—wider at the bottom, slightly narrower at the top, with a little indent where the stem goes. This mental map will guide your arrangement.
- Start with the outline. Arrange orange segments along the outer edge of your imagined pumpkin shape. Place them with the curved side facing outward, creating a solid border. This defines the pumpkin’s shape and gives you a framework to work within. Take your time here—this step sets the foundation.
- Build the “ribs” of the pumpkin. Using green grapes, create vertical lines that run from the top of the pumpkin down to the bottom, like the natural ridges on a real pumpkin. Space them about 2 inches apart. These “ribs” give the platter its pumpkin-like structure and make the shape instantly recognizable.
- Fill in the sections. Working one section at a time, fill the spaces between the grape “ribs” with your remaining fruit. Alternate colors and textures for visual interest. I like to start with apple slices (arranged in a fan pattern), then add banana slices, mango cubes, and kiwi half-moons. Red grapes can fill any gaps. The key is to layer the fruit so the platter looks full and abundant—no empty spaces.
- Create the stem. At the top center of your pumpkin, arrange 3-4 pretzel sticks pointing upward at a slight angle. They should look like a natural pumpkin stem. Press them gently into the fruit so they stay in place.
- Add the vines and leaves. Cut thin strips from the green apple (about 1/4 inch wide and 3-4 inches long). Curl them around your finger to create spirals, then place them at the base of the pretzel stem. Scatter fresh mint leaves around the edges of the platter for a finished look. If you have leaf-shaped cookie cutters, cut a few apple slices into leaf shapes and tuck them around the stem.
- Fill the background. If you’re using a large platter, fill the empty space around the pumpkin with extra grapes, apple slices, or even small piles of nuts. This makes the platter look intentional and complete, not like you ran out of fruit.
- Serve immediately or refrigerate. This platter is best enjoyed within 2 hours of assembly. If you need to make it ahead, cover loosely with plastic wrap and refrigerate for up to 4 hours. Add the pretzel stem and mint leaves just before serving to keep them crisp.
One thing I learned the hard way: don’t overthink the symmetry. Pumpkins aren’t perfectly round, and your fruit platter shouldn’t be either. A slightly lopsided shape looks more natural and charming. If a grape rolls off, just tuck it back in. If your apple slices aren’t perfectly uniform, that’s fine—it adds character.
Cooking Tips & Techniques
After making this fall harvest pumpkin fruit tray platter more times than I can count, I’ve picked up a few tricks that make the process smoother and the results more impressive. Here’s what I wish someone had told me the first time.
Dry your fruit thoroughly. This is the number one mistake I see. Wet fruit creates condensation on the platter, which makes everything slide around and can cause the pumpkin shape to collapse. After washing grapes and berries, spread them on a clean kitchen towel and pat them dry. Let them sit for 5-10 minutes before you start arranging. Trust me on this—it makes a huge difference.
Use the “anchor” method for stability. Some fruits, like banana slices and mango cubes, tend to roll around. To keep them in place, start with a base layer of flatter fruits (apple slices work great) and nestle the rounder pieces into the gaps. The apples act like little anchors that hold everything in position.
Cut apples just before serving. Even with lemon water, apple slices will eventually start to brown. For the freshest look, cut your apples last, right before you start arranging. If you’re prepping ahead, keep the apple wedges in lemon water in the fridge, then drain and pat dry just before assembling.
Make extra “filler” fruit. I always prep about 20% more fruit than I think I’ll need. This gives you flexibility to adjust the shape as you go, and you can snack on the extras while you work. Plus, having backup fruit means you won’t panic if a piece falls apart or gets squished.
Embrace imperfection. My first pumpkin fruit tray looked like a sad, misshapen blob. But you know what? People still loved it because it was made with care and tasted delicious. Don’t stress about making it perfect. The more you make it, the better you’ll get at visualizing the shape and layering the fruit. Each time you make it, it will look a little more polished.
Variations & Adaptations
One of the best things about this fall harvest pumpkin fruit tray platter is how easy it is to adapt. Here are some variations I’ve tried and loved.
Dairy-Free Yogurt Dip : Serve the platter with a small bowl of dairy-free yogurt mixed with a drizzle of honey and a pinch of cinnamon. It adds a creamy element that pairs beautifully with the fruit. My sister-in-law, who’s vegan, always requests this version.
Halloween Spooky Twist : For a Halloween party, swap the pretzel stem for a black licorice stick and add some edible “eyes” (made from small round slices of banana with a dot of peanut butter) scattered around the platter. It’s silly but kids absolutely love it.
Low-Sugar Option : If you’re watching your sugar intake, focus on berries and green apples, which are lower in natural sugars than grapes and mangoes. You can also skip the banana slices entirely. The platter will still look beautiful and festive.
Fall Harvest Fruit Dip : Mix 8 ounces of cream cheese (softened) with 2 tablespoons of maple syrup and 1 teaspoon of pumpkin pie spice. Serve it in a small pumpkin-shaped bowl in the center of the platter. It’s indulgent, seasonal, and pairs perfectly with the fruit.
Nutty Crunch Addition : Scatter candied pecans or spiced walnuts around the edges of the platter for extra texture and a savory-sweet contrast. I did this for Thanksgiving last year, and my cousin said it was the best part of the entire appetizer spread.
Feel free to mix and match these ideas. The platter is forgiving and adaptable, which is exactly what you want in a last-minute party dish.
Serving & Storage Suggestions
This fall harvest pumpkin fruit tray platter is best served at room temperature, so take it out of the refrigerator about 20 minutes before you’re ready to present it. The fruit tastes sweeter and more flavorful when it’s not ice-cold.
For presentation, place the platter at eye level on your buffet table or serving counter. The pumpkin shape is most striking when viewed from above, so avoid tucking it into a corner. If you’re serving multiple dishes, let this platter be the centerpiece—it deserves the spotlight.
Complementary dishes include a warm cheese dip (like a baked brie with cranberries), a charcuterie board with cured meats and aged cheeses, or a bowl of roasted spiced nuts. For beverages, apple cider, mulled wine, or a crisp white wine like Sauvignon Blanc pair beautifully with the fruit.
Storage : Leftover fruit can be stored in an airtight container in the refrigerator for up to 2 days. However, the platter is best enjoyed fresh, as cut fruit will start to lose its texture and color after a few hours. If you have leftover assembled platter, pick off the pretzel sticks (they’ll get soggy) and store the fruit separately. The pretzels can be saved for snacking.
Reheating : There’s no reheating needed for this dish, but if you’re using the cream cheese dip, let it come to room temperature before serving for the best texture. The flavors actually develop and deepen after sitting for an hour or two, so don’t worry if you make the dip a little ahead of time.
One thing I’ve noticed: the fruit platter looks even more beautiful after about 30 minutes at room temperature because the colors seem to deepen and the fruit relaxes into the shape. Just don’t leave it out for more than 2 hours if you’re serving it at a party, especially if the room is warm.
Nutritional Information & Benefits
This fall harvest pumpkin fruit tray platter is packed with vitamins, fiber, and antioxidants. Here’s a rough estimate per serving (about 1 cup of mixed fruit, without dip):
- Calories : 120-150
- Carbohydrates : 30-35g
- Fiber : 4-5g
- Sugar : 20-25g (natural fruit sugars)
- Vitamin C : 60-80% of the daily recommended intake
- Potassium : 300-400mg
The combination of apples, oranges, grapes, and bananas provides a wide range of nutrients. Apples are rich in quercetin, an antioxidant that supports heart health. Oranges deliver a powerful dose of vitamin C, which boosts immune function—perfect for cold and flu season. Grapes contain resveratrol, which has anti-inflammatory properties. And bananas are loaded with potassium, which helps regulate blood pressure.
This platter is naturally gluten-free, dairy-free, vegan, and nut-free (unless you add nuts as a variation). It’s also low in fat and contains no added sugars, making it a smart choice for anyone watching their diet. I love serving this at parties because it gives guests a healthy option that doesn’t feel like a compromise.
Conclusion
This fall harvest pumpkin fruit tray platter has become one of my most-requested recipes, and I honestly think it’s because it captures everything I love about autumn—the colors, the flavors, the warmth of gathering with people you care about. It started with a random conversation at the DMV, and now it’s a tradition I look forward to every year.
I hope you’ll give it a try, even if you’re not a confident cook or arranger. The beauty of this recipe is that it’s forgiving. Your pumpkin doesn’t have to be perfect—it just has to be made with love. And trust me, when you set this platter on the table and watch everyone’s faces light up, you’ll be glad you took the time to create something so special.
I’d love to hear how your pumpkin fruit tray turns out! Share a photo in the comments below, or tag me on social media when you make it. Tell me about your own unexpected recipe discoveries—I’m always looking for inspiration from people who found magic in the most unlikely places. Happy fall, friends. Go make something beautiful.
Frequently Asked Questions
Can I make this fall harvest pumpkin fruit tray platter the night before?
You can prep the fruit the night before and store it in separate containers in the refrigerator. However, I recommend assembling the platter no more than 4 hours before serving to keep the fruit looking fresh and the shape intact. Add the pretzel stem and mint leaves right before serving.
What fruits should I avoid using?
Avoid very juicy fruits like watermelon, overly ripe peaches, or strawberries that have started to soften. They release too much liquid and can make the platter soggy. Also avoid fruits that brown very quickly, like pears or avocados, unless you’re serving immediately.
How do I keep apple slices from turning brown?
Soak apple slices in a bowl of cold water mixed with the juice of half a lemon for 2-3 minutes. Drain and pat dry thoroughly before arranging. You can also use pineapple juice or a commercial fruit preservative like Fruit-Fresh. This will keep them looking bright for several hours.
Can I use frozen fruit for this platter?
I don’t recommend frozen fruit because it releases excess moisture as it thaws, which will make the platter watery and cause the shape to collapse. Stick with fresh fruit for the best results. If fresh fruit isn’t available, choose firm fruits like apples, oranges, and firm bananas that hold their shape well.
What’s the best way to transport this platter to a party?
Assemble the platter on a large, flat board or platter that fits in your car. Cover it loosely with plastic wrap, being careful not to disturb the fruit arrangement. Place it on a flat surface in your car, like the floor of the passenger seat or the trunk. Drive carefully, and once you arrive, remove the plastic wrap and add any final touches like mint leaves or pretzel sticks.
Pin This Recipe!
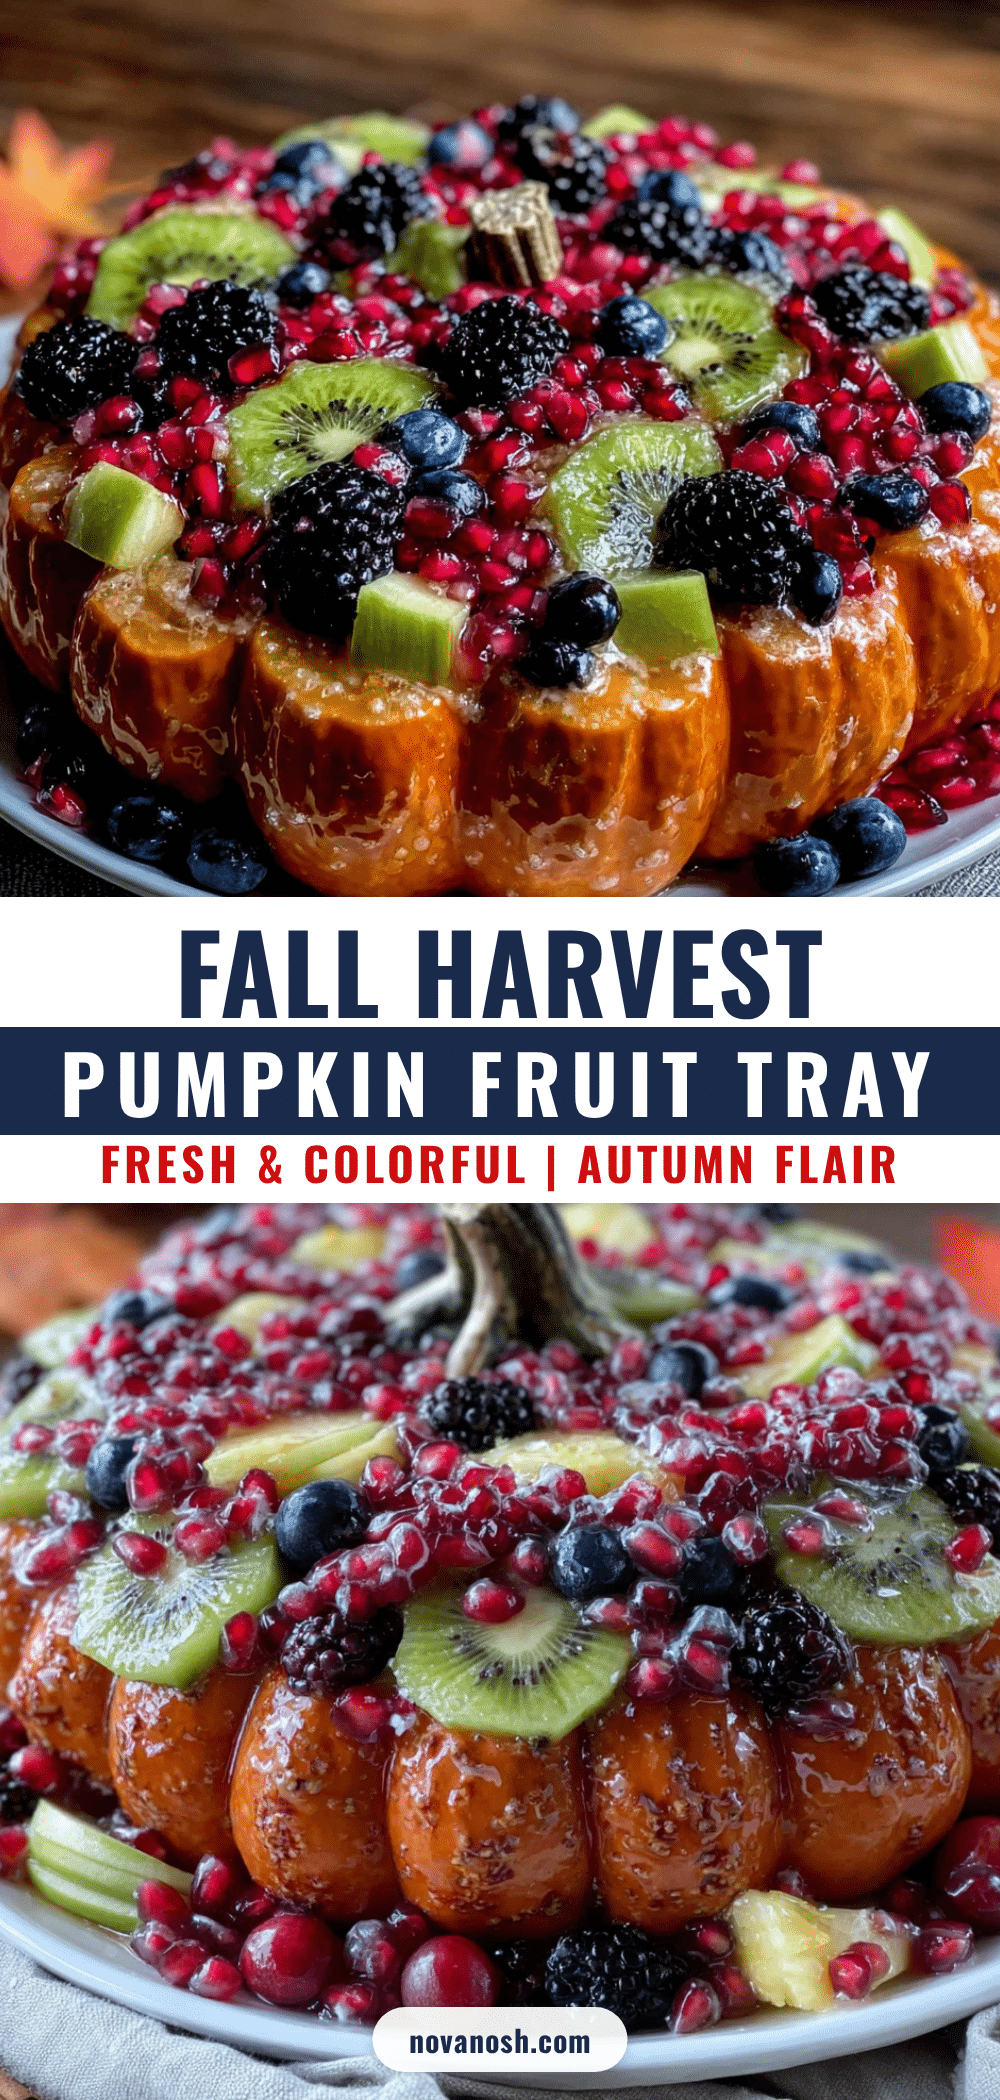
Best Fall Harvest Pumpkin Fruit Tray Platter
A stunning pumpkin-shaped fruit platter made with fresh apples, oranges, grapes, and more. Perfect for fall gatherings, this healthy and festive dish is easy to assemble and sure to impress.
- Prep Time: 20 minutes
- Cook Time: 0 minutes
- Total Time: 20 minutes
- Yield: 8 servings 1x
- Category: Appetizer
- Cuisine: American
Ingredients
- 4–5 medium oranges or clementines, peeled and segmented
- 2 large red apples (Honeycrisp or Fuji), sliced into thin wedges
- 2 cups green grapes, washed and dried
- 1 cup red grapes, washed and dried
- 2 bananas, sliced into 1/2 inch rounds
- 1 ripe mango, peeled and cubed
- 2 kiwis, peeled and sliced into half moons
- 3–4 pretzel sticks
- 1/2 green apple (Granny Smith), cut into thin strips
- Fresh mint leaves (optional)
- Juice of 1/2 lemon (for preventing browning)
Instructions
- Wash all grapes and let them dry completely on paper towels. Peel oranges or clementines and separate into segments. Peel and slice mango into small cubes. Peel and slice kiwis into half-moon shapes.
- Fill a small bowl with cold water and add the juice of half a lemon. Slice apples into thin wedges (about 1/4 inch thick) and immediately drop them into the lemon water. Let soak for 2-3 minutes, then drain and pat dry. Do the same with banana slices.
- Place your platter on a flat surface. Visualize a pumpkin silhouette taking up most of the space—wider at the bottom, slightly narrower at the top, with a small indent where the stem goes.
- Arrange orange segments along the outer edge of your imagined pumpkin shape, with the curved side facing outward, creating a solid border.
- Using green grapes, create vertical lines from the top of the pumpkin down to the bottom, spaced about 2 inches apart, to form the pumpkin’s ‘ribs’.
- Working one section at a time, fill the spaces between the grape ‘ribs’ with remaining fruit. Start with apple slices arranged in a fan pattern, then add banana slices, mango cubes, and kiwi half-moons. Use red grapes to fill any gaps. Layer the fruit so the platter looks full and abundant.
- At the top center of your pumpkin, arrange 3-4 pretzel sticks pointing upward at a slight angle to create the stem. Press them gently into the fruit.
- Cut thin strips from the green apple (about 1/4 inch wide and 3-4 inches long). Curl them around your finger to create spirals, then place them at the base of the pretzel stem. Scatter fresh mint leaves around the edges of the platter.
- If using a large platter, fill empty space around the pumpkin with extra grapes, apple slices, or small piles of nuts.
- Serve immediately or cover loosely with plastic wrap and refrigerate for up to 4 hours. Add pretzel stem and mint leaves just before serving.
Notes
Dry fruit thoroughly to prevent sliding. Use the ‘anchor’ method by starting with a base layer of flatter fruits like apple slices to hold rounder pieces in place. Cut apples just before serving for freshness. Prep about 20% more fruit than needed for flexibility. Embrace imperfection—a slightly lopsided shape looks more natural.
Nutrition
- Serving Size: 1 cup of mixed fruit
- Calories: 135
- Sugar: 23
- Sodium: 10
- Fat: 0.5
- Carbohydrates: 33
- Fiber: 5
- Protein: 1
Keywords: pumpkin fruit tray, fall harvest platter, fruit platter, Halloween appetizer, Thanksgiving fruit tray, healthy snack, fruit arrangement


