Love this? Save it for later!
Share the inspiration with your friends
My buddy Marcus watched me stress over my game day menu for the third year in a row and finally just shook his head. He didn’t say anything at first, just walked over to my fridge, pulled out a block of cheddar, and set it on the counter with this look that said “you’re overthinking this.” I was halfway through planning seven different appetizers, a dip, and some kind of main dish that nobody would actually eat because they’d be too busy yelling at the TV. Marcus had been hosting his own football parties for years, and his spread was always simple, satisfying, and somehow the thing everyone talked about the next day. He told me to stop trying to impress people with fancy stuff and just give them something they could pile onto a plate while standing up, holding a beer, and not missing a single play. That’s when he showed me the chili cheese fries bar concept, and honestly, I felt a little stupid for not thinking of it myself.
The first time I tried it, I made the mistake of using frozen fries that got soggy within five minutes. Marcus didn’t let me live that down. But once I figured out the right base—crispy, sturdy fries that can hold up to all that chili and cheese without turning into mush—it was a total game changer. I mean, you know that feeling when you finally crack a recipe and it just works? That’s what this was. The chili is hearty and beefy, the cheese sauce is silky and rich, and everyone gets to customize their own plate with whatever toppings they want. It turned my chaotic game day hosting into something almost effortless.
What I love most about this chili cheese fries bar is how it brings people together. There’s something about building your own plate of loaded fries that gets everyone talking, laughing, and inevitably reaching over to grab a jalapeño from someone else’s pile. It’s messy, it’s indulgent, and it’s exactly what football Sunday calls for. This recipe stayed with me because it taught me that the best hosting isn’t about showing off—it’s about creating a space where people feel comfortable and fed. And honestly, that’s the whole point, isn’t it?
Why You’ll Love This Recipe
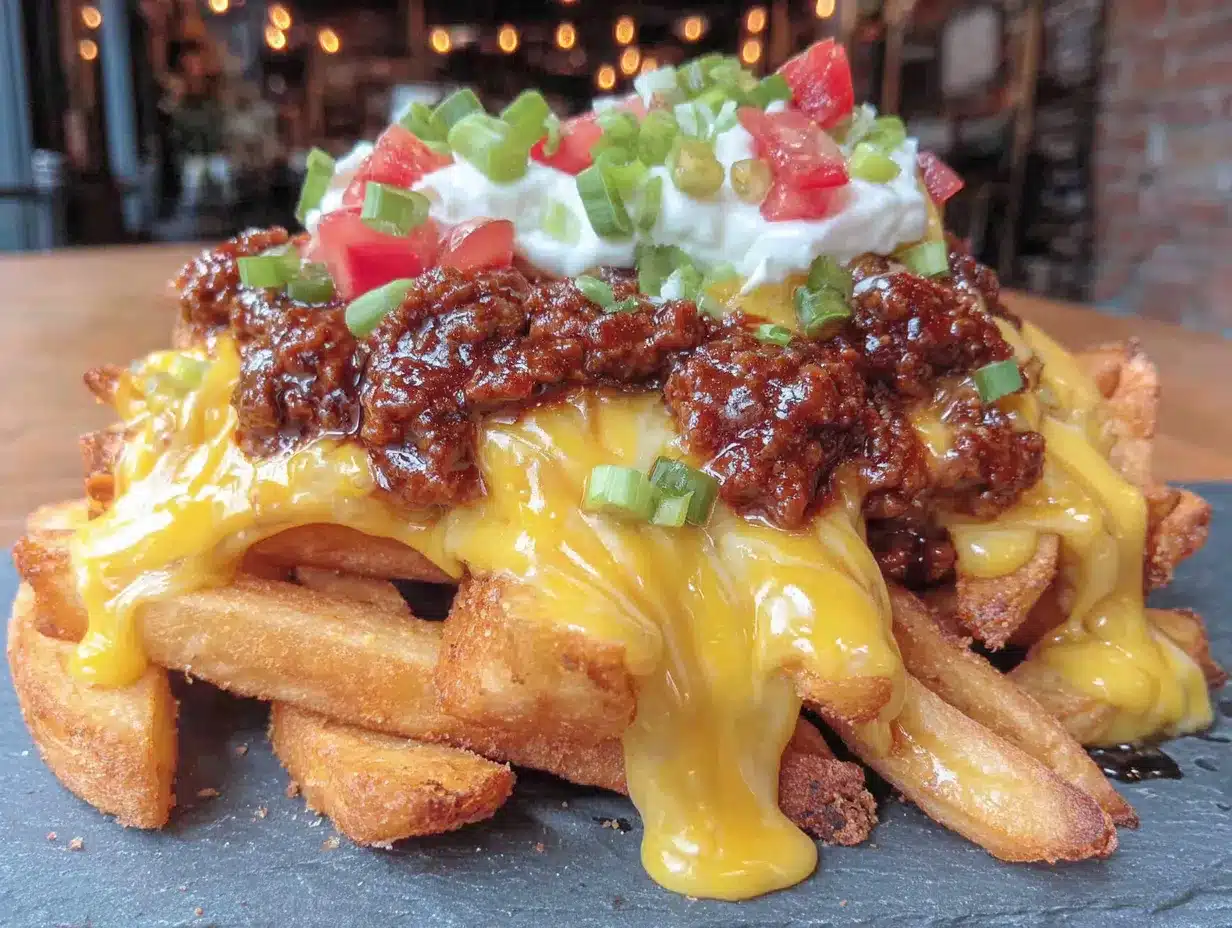
This isn’t just another chili cheese fries recipe that leaves you with a soggy mess and disappointed guests. I’ve tested this thing six different ways, tweaked the cheese sauce consistency, and figured out exactly how to keep those fries crispy even when they’re loaded with toppings. Here’s why this one’s different:
- Build-Your-Own Bar Concept – Everyone gets exactly what they want. Picky eaters can keep it simple, while adventurous folks can pile on everything. No more hearing “I don’t like beans” or “can I have extra cheese?” because it’s all right there.
- Crispy Fries That Stay Crispy – The secret is a double-bake method and the right potato cut. I learned this the hard way after three batches of sad, limp fries. These hold up for a solid 20 minutes under toppings.
- One-Pot Chili That’s Actually Quick – No all-day simmering required. This chili comes together in about 30 minutes and tastes like it’s been cooking for hours. Perfect for when you realize game day is tomorrow and you haven’t prepped anything.
- Real Cheese Sauce, Not That Jarred Stuff – We’re making a proper cheddar sauce from scratch. It takes five minutes and tastes light-years better than anything from a jar. Trust me on this one.
- Perfect for Crowds – This recipe scales up easily. Feeding eight people? Double it. Feeding twenty? Triple it. The components all hold well, so you can prep ahead and just assemble when guests arrive.
This is the kind of recipe that makes you close your eyes after the first bite. It’s comfort food at its finest—hearty, cheesy, a little spicy, and completely satisfying. Perfect for impressing your football crew without spending all day in the kitchen, or turning a regular Sunday into something worth gathering around.
What Ingredients You Will Need
This recipe uses simple, honest ingredients that come together to create something way bigger than the sum of their parts. Most of these are pantry staples, and the fresh stuff is easy to find at any grocery store.
For the Chili
- 1 pound ground beef (80/20 works best – the fat adds flavor and keeps the chili moist)
- 1 medium yellow onion, diced (about 1 cup)
- 3 cloves garlic, minced (fresh is non-negotiable here, don’t use the jarred stuff)
- 1 can (15 ounces) kidney beans, drained and rinsed (I prefer dark red kidney beans for texture)
- 1 can (15 ounces) diced tomatoes (fire-roasted if you can find them, they add a subtle smokiness)
- 2 tablespoons tomato paste (this is what gives the chili its deep color and richness)
- 1 cup beef broth (low-sodium so you can control the salt)
- 2 tablespoons chili powder (I use a blend from Penzeys, but any good quality chili powder works)
- 1 teaspoon ground cumin
- 1 teaspoon smoked paprika (regular works too, but smoked adds that backyard barbecue vibe)
- ½ teaspoon cayenne pepper (optional, for heat lovers)
- Salt and black pepper to taste
For the Cheese Sauce
- 2 tablespoons unsalted butter
- 2 tablespoons all-purpose flour
- 1 cup whole milk (warm – this prevents lumps)
- 2 cups sharp cheddar cheese, shredded (buy a block and shred it yourself, pre-shredded has anti-caking agents that mess with the texture)
- ½ teaspoon Dijon mustard (trust me, it enhances the cheese flavor without tasting like mustard)
- Pinch of cayenne (optional)
For the Fries Base
- 2 pounds frozen French fries (look for thick-cut or steak fries – shoestring fries get soggy too fast)
- 2 tablespoons olive oil (for tossing before the second bake)
- Salt for sprinkling
Topping Bar Suggestions
- Sour cream
- Fresh jalapeños, sliced
- Green onions, sliced
- Fresh tomatoes, diced
- Shredded lettuce
- Pickled jalapeños (for extra tang)
- Hot sauce (I always put out Cholula and Tabasco)
- Extra shredded cheddar
- Fresh cilantro, chopped (if you’re one of those people who loves it)
For the cheese sauce, I really recommend Tillamook sharp cheddar if you can find it. It melts beautifully and has that classic cheddar punch. And for the chili powder, don’t use the stuff that’s been sitting in your pantry for three years—it loses its kick. Fresh spices make a real difference here.
Equipment Needed
You don’t need a professional kitchen to pull this off. Here’s what you’ll actually use:
- Large skillet or Dutch oven – For the chili. I use my trusty 5-quart Dutch oven because it holds heat evenly and cleans up easily.
- Medium saucepan – For the cheese sauce. A heavy-bottomed one prevents scorching.
- Baking sheets – Two if you’re making a full batch. Rimmed sheets are best so nothing slides off.
- Whisk – For the cheese sauce. A silicone whisk won’t scratch your pan.
- Cheese grater – Please shred your own cheese. A box grater works perfectly.
- Cutting board and sharp knife – For all the veggie prep.
- Wooden spoon or spatula – For breaking up the ground beef.
- Serving bowls and platters – Set up your topping bar in small bowls so people can customize easily.
If you don’t have a Dutch oven, any large, deep skillet will work. Just keep an eye on the liquid level because a wider pan evaporates faster. And if you’re short on baking sheets, you can cook the fries in batches and keep them warm in a 200°F oven while you finish the rest.
Preparation Method
- Preheat your oven to 425°F. Spread the frozen fries in a single layer on two rimmed baking sheets. Don’t overcrowd them—they need space to get crispy. Bake according to package directions, usually about 20-25 minutes, flipping halfway through. You want them golden and crispy, not pale and sad.
- While the fries bake, start the chili. Heat a large skillet or Dutch oven over medium-high heat. Add the ground beef and cook, breaking it up with a wooden spoon, until browned all over, about 6-8 minutes. Don’t drain all the fat—leave about a tablespoon in the pan for flavor. If there’s more than that, tilt the pan and spoon out the excess.
- Add the diced onion to the beef and cook for 3-4 minutes until it softens and turns translucent. Stir in the minced garlic and cook for 30 seconds until fragrant. You’ll smell it when it’s ready—that warm, savory aroma that means good things are coming.
- Stir in the tomato paste and cook for 1-2 minutes, stirring constantly. This step is important because it caramelizes the paste and deepens the flavor. The color will turn a rich, dark red.
- Add the chili powder, cumin, smoked paprika, and cayenne if using. Stir everything together and let the spices toast for about 30 seconds. This wakes up their flavors and makes the chili taste like it’s been simmering all day.
- Pour in the diced tomatoes with their juices and the beef broth. Add the drained kidney beans. Stir everything together, scraping up any browned bits from the bottom of the pan. Bring the chili to a simmer, then reduce the heat to low. Let it bubble gently for 15-20 minutes, stirring occasionally. Taste and adjust salt and pepper. If it gets too thick, add a splash more broth.
- Make the cheese sauce while the chili simmers. In a medium saucepan, melt the butter over medium heat. Whisk in the flour and cook for 1-2 minutes, stirring constantly. This is called a roux, and it should look like pale golden paste. Don’t let it brown.
- Slowly pour in the warm milk while whisking continuously. Keep whisking until the mixture thickens and is smooth, about 2-3 minutes. It should coat the back of a spoon. Remove from heat.
- Add the shredded cheddar cheese a handful at a time, whisking until completely melted before adding more. Stir in the Dijon mustard and a pinch of cayenne. Taste and add salt if needed. Keep the sauce warm over low heat, stirring occasionally. If it gets too thick, whisk in a splash of warm milk.
- When the fries are done, remove them from the oven. Toss them with the olive oil and a sprinkle of salt, then return them to the oven for another 5-7 minutes. This extra step ensures they stay crispy even under all those toppings. Trust me, this is the trick I learned after too many soggy batches.
- Set up your topping bar. Arrange the chili, cheese sauce, and all your toppings in separate bowls. Let people build their own plates. I like to put the fries on a large platter and let everyone grab a handful for their own bowl or plate.
- To serve, pile hot fries into bowls, ladle chili over the top, drizzle with cheese sauce, and let everyone add their own toppings. Eat immediately while everything is hot and glorious.
One thing I learned the hard way—don’t pre-assemble the loaded fries for a crowd. They get soggy fast. Let everyone build their own plate so the fries stay crispy until the last bite.
Cooking Tips & Techniques
I’ve made this recipe more times than I can count, and I’ve definitely made my share of mistakes. Here’s what I’ve learned so you don’t have to repeat my errors.
The fry situation is critical. I tried using shoestring fries once because I thought they’d be fancier. Big mistake. They turned into mush under the chili within three minutes. Thick-cut steak fries or even frozen potato wedges are your best bet. They have enough structure to hold up to all that goodness. And that second bake with olive oil? Non-negotiable. It creates a crispy exterior that acts like a barrier against moisture.
Don’t rush the chili. I know game day is hectic, but letting that chili simmer for a full 20 minutes makes a real difference. The flavors meld together, the beans soften, and the whole thing becomes cohesive. If you’re in a hurry, you can make the chili a day ahead and reheat it. It actually tastes better the next day anyway.
Cheese sauce troubleshooting. If your cheese sauce turns grainy, you probably overheated it or added the cheese too quickly. Keep the heat on low and add cheese gradually. If it does seize up, try whisking in a tablespoon of warm milk or a squeeze of lemon juice to bring it back. Also, never use pre-shredded cheese for sauce—the anti-caking powder prevents smooth melting.
Timing is everything. Start the fries first since they take the longest. While they’re baking, make the chili. While the chili simmers, make the cheese sauce. By the time the fries come out for their second bake, everything else is ready. This way, you’re not scrambling when guests show up early (and they always do).
Keep the cheese sauce warm. I pour mine into a small slow cooker set to warm. It stays perfectly pourable for hours. If you don’t have a slow cooker, a thermos works surprisingly well too.
One more thing—don’t skip the Dijon mustard in the cheese sauce. I know it sounds weird, but it doesn’t taste like mustard. It just makes the cheese taste cheesier. It’s some kind of culinary magic, and I’m not questioning it.
Variations & Adaptations
This chili cheese fries bar is endlessly customizable. Here are some ways I’ve adapted it over the years:
Turkey or Vegetarian Chili
Swap the ground beef for ground turkey or a plant-based crumble. If using turkey, add a tablespoon of olive oil since it’s leaner. For vegetarian, use vegetable broth and add an extra can of beans—black beans work great here. I’ve made it with Beyond Meat crumbles and honestly, my meat-eating friends didn’t notice the difference.
Loaded Nacho Style
Replace the fries with sturdy tortilla chips for a nacho version. Everything else stays the same. This is great if you’re feeding a crowd that wants something lighter (relatively speaking). I’ve done this for Super Bowl parties and it disappears fast.
White Chicken Chili Version
For a twist, use shredded rotisserie chicken, white beans, and a creamy broth-based chili with green chiles. Top with pepper jack cheese sauce instead of cheddar. It’s a completely different vibe but just as addictive.
Spicy Southwestern Style
Add a can of drained corn and a diced chipotle pepper in adobo sauce to the chili. Top with pickled red onions and a squeeze of lime. The smokiness from the chipotle takes everything to another level.
Sweet Potato Fries Base
Use frozen sweet potato fries for a slightly healthier version. They’re naturally sweeter, which contrasts beautifully with the savory chili and sharp cheese sauce. Bake them a little longer than regular fries since sweet potatoes hold more moisture.
I’ve also tried adding crumbled bacon to the topping bar, and let me tell you, it’s a game changer. Everything is better with bacon, and chili cheese fries are no exception.
Serving & Storage Suggestions
This is best served immediately while everything is hot and the fries are still crispy. Set up your bar buffet-style with the fries on a large platter, chili in a slow cooker or heavy pot, and cheese sauce in a small slow cooker or warmed bowl. Arrange the toppings in small bowls around the main components.
For drinks, I love a cold IPA or a crisp lager with these. The beer cuts through the richness of the cheese and chili perfectly. If you’re not drinking, a tangy limeade or even a spicy Bloody Mary works great.
For sides, keep it simple. A crisp green salad with a vinaigrette helps balance out all the indulgence. Or set out some crunchy veggies like carrot sticks and celery with ranch dip—they’re great for munching while you wait for your fries to cool down.
Storage: Store leftover chili and cheese sauce separately in airtight containers in the refrigerator for up to 4 days. The fries don’t store well once they’re cooked—they’ll be sad and limp the next day. But if you have leftover chili, it’s fantastic over hot dogs, nachos, or even mac and cheese.
Reheating: Reheat the chili in a saucepan over medium-low heat, adding a splash of broth if it’s too thick. The cheese sauce can be reheated gently in a saucepan with a splash of milk, whisking until smooth. Don’t microwave it—it’ll separate and get grainy.
The chili actually gets better after a day in the fridge. The flavors meld and deepen. So if you’re planning ahead, make the chili on Saturday and just reheat it on game day. Your future self will thank you.
Nutritional Information & Benefits
Let’s be real—this is indulgent food. But knowing what’s in it helps you make informed choices. Per serving (about 1½ cups fries with chili and cheese sauce, without extra toppings):
- Calories: Approximately 620
- Protein: 28g
- Fat: 36g
- Carbohydrates: 48g
- Fiber: 8g
- Sugar: 6g
- Sodium: 980mg
The kidney beans add a solid dose of fiber and plant-based protein, which helps keep you full. The beef provides iron and B vitamins. And the cheese sauce—well, it’s calcium-rich, so there’s that. If you’re watching sodium, use low-sodium broth and go easy on the added salt.
For a lighter version, use baked sweet potato fries, lean ground turkey, and reduced-fat cheese in the sauce. You’ll cut the calories and fat significantly without sacrificing too much flavor. I’ve made it this way for friends who are watching their intake, and they still went back for seconds.
This recipe contains dairy, gluten (from the flour in the cheese sauce), and is not suitable for vegans as written. For a dairy-free version, use a plant-based butter, milk, and cheddar-style shreds. The texture won’t be exactly the same, but it’s still delicious.
Conclusion
This chili cheese fries bar has become my official game day tradition, and I don’t see that changing anytime soon. It’s the kind of recipe that makes hosting feel effortless—you set everything out, people serve themselves, and somehow you end up with the best party every single time. The combination of crispy fries, hearty chili, silky cheese sauce, and fresh toppings is just unbeatable.
I’d love to hear how yours turns out. Did you add any wild toppings? Did your guests fight over the last of the cheese sauce? Drop a comment below and let me know—I’m always looking for new ideas to try. And if you snap a photo of your loaded fries bar, tag me on social media. Nothing makes my day like seeing someone else fall in love with this recipe.
Now go make some chili cheese fries and enjoy the game. You’ve got this. And honestly, your guests are about to be very, very happy.
Frequently Asked Questions
Can I make the chili ahead of time?
Absolutely. In fact, I recommend it. The chili tastes even better the next day after the flavors have had time to meld. Make it up to 3 days ahead, store it in the fridge, and reheat gently on the stove or in a slow cooker on game day.
What’s the best type of fries to use?
Thick-cut steak fries or potato wedges are your best bet. They have enough structure to hold up under the chili and cheese sauce without turning into mush. Avoid shoestring or thin-cut fries—they’ll get soggy within minutes.
Can I freeze the chili?
Yes, the chili freezes beautifully. Let it cool completely, then transfer to freezer-safe containers or bags. It will keep for up to 3 months. Thaw overnight in the refrigerator and reheat on the stove. The cheese sauce doesn’t freeze well, so make that fresh.
How do I keep the cheese sauce from getting lumpy?
The key is to add the cheese gradually while whisking constantly, and keep the heat on low. Shred your own cheese from a block—pre-shredded cheese has anti-caking agents that can make the sauce grainy. If it does get lumpy, whisk in a splash of warm milk to smooth it out.
Can I make this in a slow cooker?
You can make the chili in a slow cooker—just brown the beef and onions first, then transfer everything to the slow cooker and cook on low for 4-6 hours. For the cheese sauce, I recommend making it on the stove and then keeping it warm in a small slow cooker set to warm. The fries should always be baked fresh for the best texture.
Pin This Recipe!
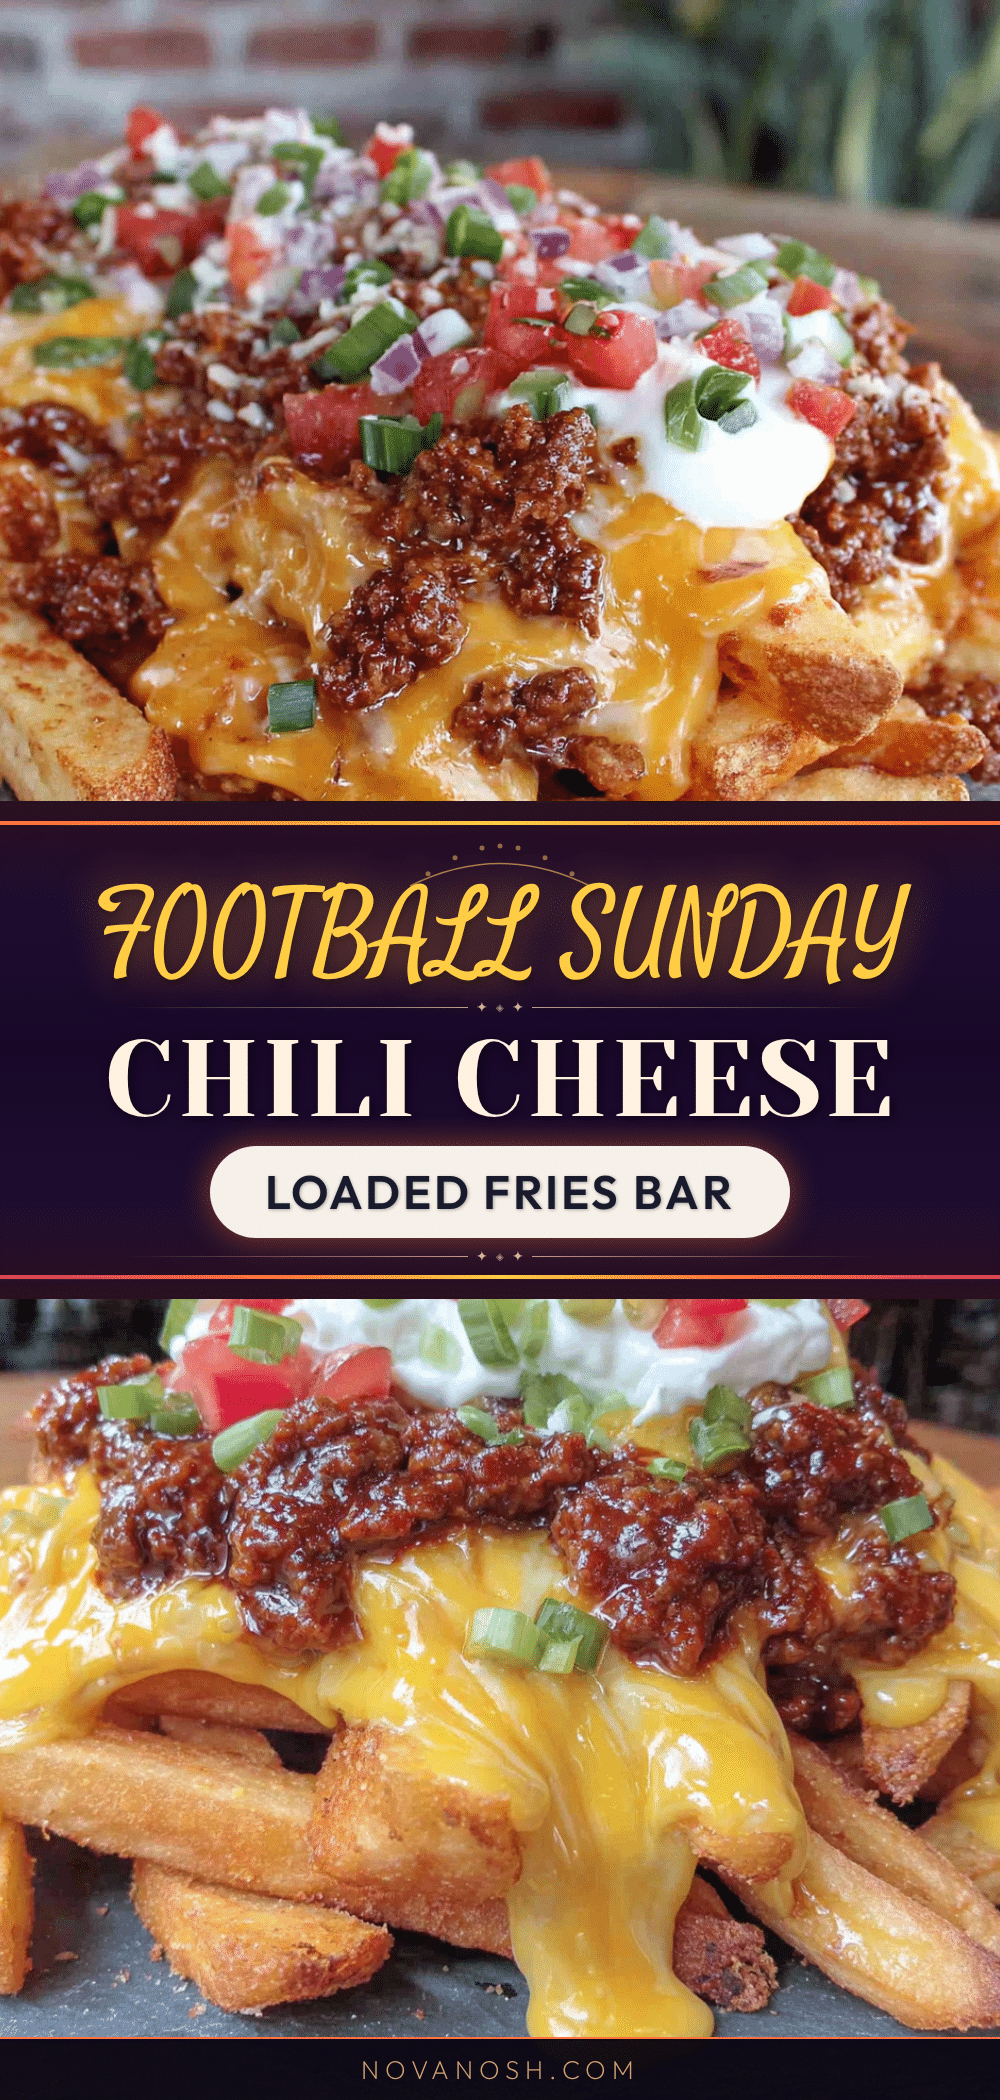
Best Football Sunday Chili Cheese Fries Bar (Easy Game Day Recipe)
A build-your-own chili cheese fries bar with crispy fries, hearty beef chili, and silky cheddar cheese sauce, perfect for game day gatherings.
- Prep Time: 15 minutes
- Cook Time: 30 minutes
- Total Time: 45 minutes
- Yield: 4 servings 1x
- Category: Main Course
- Cuisine: American
Ingredients
- 1 pound ground beef (80/20)
- 1 medium yellow onion, diced
- 3 cloves garlic, minced
- 1 can (15 ounces) kidney beans, drained and rinsed
- 1 can (15 ounces) diced tomatoes (fire-roasted preferred)
- 2 tablespoons tomato paste
- 1 cup beef broth (low-sodium)
- 2 tablespoons chili powder
- 1 teaspoon ground cumin
- 1 teaspoon smoked paprika
- ½ teaspoon cayenne pepper (optional)
- Salt and black pepper to taste
- 2 tablespoons unsalted butter
- 2 tablespoons all-purpose flour
- 1 cup whole milk, warm
- 2 cups sharp cheddar cheese, shredded
- ½ teaspoon Dijon mustard
- Pinch of cayenne (optional)
- 2 pounds frozen French fries (thick-cut or steak fries)
- 2 tablespoons olive oil
- Salt for sprinkling
- Sour cream (for topping bar)
- Fresh jalapeños, sliced (for topping bar)
- Green onions, sliced (for topping bar)
- Fresh tomatoes, diced (for topping bar)
- Shredded lettuce (for topping bar)
- Pickled jalapeños (for topping bar)
- Hot sauce (for topping bar)
- Extra shredded cheddar (for topping bar)
- Fresh cilantro, chopped (for topping bar)
Instructions
- Preheat oven to 425°F. Spread frozen fries in a single layer on two rimmed baking sheets. Bake according to package directions, about 20-25 minutes, flipping halfway through, until golden and crispy.
- While fries bake, heat a large skillet or Dutch oven over medium-high heat. Add ground beef and cook, breaking it up, until browned, about 6-8 minutes. Leave about 1 tablespoon of fat in the pan.
- Add diced onion to the beef and cook for 3-4 minutes until softened. Stir in minced garlic and cook for 30 seconds until fragrant.
- Stir in tomato paste and cook for 1-2 minutes, stirring constantly, until caramelized.
- Add chili powder, cumin, smoked paprika, and cayenne (if using). Stir and let spices toast for about 30 seconds.
- Pour in diced tomatoes with their juices and beef broth. Add drained kidney beans. Stir, scraping up browned bits. Bring to a simmer, then reduce heat to low. Let bubble gently for 15-20 minutes, stirring occasionally. Season with salt and pepper.
- While chili simmers, make cheese sauce. In a medium saucepan, melt butter over medium heat. Whisk in flour and cook for 1-2 minutes, stirring constantly, to make a roux.
- Slowly pour in warm milk while whisking continuously. Whisk until mixture thickens and is smooth, about 2-3 minutes. Remove from heat.
- Add shredded cheddar cheese a handful at a time, whisking until melted before adding more. Stir in Dijon mustard and a pinch of cayenne. Keep warm over low heat, stirring occasionally. Add a splash of warm milk if too thick.
- When fries are done, remove from oven. Toss with olive oil and a sprinkle of salt, then return to oven for another 5-7 minutes to ensure crispiness.
- Set up topping bar: arrange chili, cheese sauce, and all toppings in separate bowls. Let people build their own plates.
- To serve, pile hot fries into bowls, ladle chili over the top, drizzle with cheese sauce, and let everyone add their own toppings. Eat immediately.
Notes
Don’t pre-assemble loaded fries for a crowd; let everyone build their own to keep fries crispy. For best results, use thick-cut steak fries and shred your own cheddar cheese. The chili can be made a day ahead for deeper flavor.
Nutrition
- Serving Size: 1½ cups fries with c
- Calories: 620
- Sugar: 6
- Sodium: 980
- Fat: 36
- Saturated Fat: 14
- Carbohydrates: 48
- Fiber: 8
- Protein: 28
Keywords: chili cheese fries, game day recipe, football food, loaded fries, chili cheese fries bar, easy appetizer, crowd-pleaser


