Love this? Save it for later!
Share the inspiration with your friends
It was 11:17 PM on a random Thursday in October, and I had a very specific, slightly ridiculous craving. I wanted something that tasted like childhood Halloween parties but felt like a cozy hug. I didn’t have the fancy ingredients for a full-blown cake, but I had a half-empty bag of Oreos, some instant pudding mix, and a bag of gummy worms I’d bought on a whim. The idea that hit me was simple: what if I made dirt cups, but made them feel like a warm blanket on a chilly night?
Honestly, I was half-asleep standing in my kitchen, but something about the late hour made me throw out the rules. I wasn’t trying to impress anyone. I was just trying to satisfy that weird, specific need for something nostalgic and comforting. I mean, who hasn’t been there? You want a dessert that reminds you of being a kid, but you also want it to feel like a treat for your grown-up self. That’s exactly what these cozy Halloween dirt cups became.
I grabbed my favorite mixing bowls, the ones with the chips on the rims from too many moves, and just started going for it. The pudding came together in minutes, and the sound of crushing Oreos in a bag with a rolling pin was oddly satisfying. It was messy, it was impulsive, and it was exactly what I needed. That first bite, with the creamy pudding and the crunchy “dirt” and that little burst of sweetness from the gummy worm, made me close my eyes. It was pure comfort, and it’s why I keep making these every single Halloween season.
Why You’ll Love This Recipe
Let me tell you, I’ve tested this recipe more times than I can count, and my family has given it their official seal of approval. It’s one of those rare desserts that checks every single box. Here is why these cozy Halloween dirt cups are going to become your new favorite thing.
- Quick & Easy: You can have these ready in under 15 minutes of active prep time. No baking, no complicated steps, just pure, simple fun.
- Simple Ingredients: You probably already have most of these in your pantry. No fancy grocery trips or weird specialty items needed.
- Perfect for Halloween Parties: These are the life of the party. Kids go wild for them, and adults secretly love them just as much.
- Crowd-Pleaser: I’ve brought these to potlucks and Halloween gatherings, and they always disappear first. Everyone loves the playful presentation.
- Unbelievably Delicious: The creamy pudding, the crunchy Oreo “dirt,” and the chewy gummy worms create a texture and flavor combo that is next-level comfort food.
What makes this recipe different from the rest? It is the attention to texture. I use a specific ratio of crushed Oreos to pudding that gives you that perfect “dirt” consistency without being too dry or too soggy. It is comfort food reimagined—faster, easier, but with the same soul-soothing satisfaction that makes you feel like a kid again.
What Ingredients You Will Need
This recipe uses simple, everyday ingredients to deliver that big, comforting flavor. The beauty is that most of these are probably already in your kitchen, just waiting to be turned into something magical.
Here is what you will need for the pudding base:
- 1 package (3.9 oz) instant chocolate pudding mix (I recommend Jell-O brand for the smoothest texture)
- 2 cups cold whole milk (adds richness; you can use 2% or oat milk if needed)
- 1 teaspoon vanilla extract (optional, but it deepens the flavor)
For the “dirt” and assembly:
- 1 standard package (14.3 oz) Oreo cookies (about 36 cookies, regular or Double Stuf)
- 1 cup Cool Whip or homemade whipped cream (thawed if frozen)
- 1 cup gummy worms (plus extra for topping)
- 8 small clear cups or glasses (4 to 6 oz each)
Ingredient Selection Tips: For the best texture, use full-fat milk. It makes the pudding extra creamy. If you are using a dairy-free milk alternative, make sure it is unsweetened and unflavored so it doesn’t change the taste. For the Oreos, I have found that the regular ones crush more evenly than the Double Stuf, but both work great. Just make sure you remove the white cream filling if you want a darker “dirt” color, though I honestly leave it in for extra sweetness.
Substitution Guidance: Need a gluten-free option? Use gluten-free chocolate sandwich cookies. For a lower-sugar version, you can use sugar-free pudding mix and reduced-fat Oreos. If you don’t have Cool Whip, you can whip 1 cup of heavy cream with 2 tablespoons of powdered sugar until stiff peaks form.
Equipment Needed
You do not need any fancy equipment for this recipe, which is part of its charm. Here is what you will need to get started.
- Large mixing bowl for the pudding
- Medium mixing bowl or a large resealable bag for crushing Oreos
- Whisk for the pudding mix
- Rolling pin or a heavy-bottomed pan for crushing cookies (if using the bag method)
- Measuring cups and spoons
- Spatula for folding
- 8 small clear cups or glasses (plastic or glass, 4 to 6 oz each)
- Small spoon or piping bag for layering
If you don’t have a rolling pin, a wine bottle or even a sturdy coffee mug works perfectly. I have used a cast-iron skillet in a pinch, and it worked like a charm. For the cups, any small clear glass or even small mason jars will do. The clear cups are key for showing off those fun layers.
Preparation Method
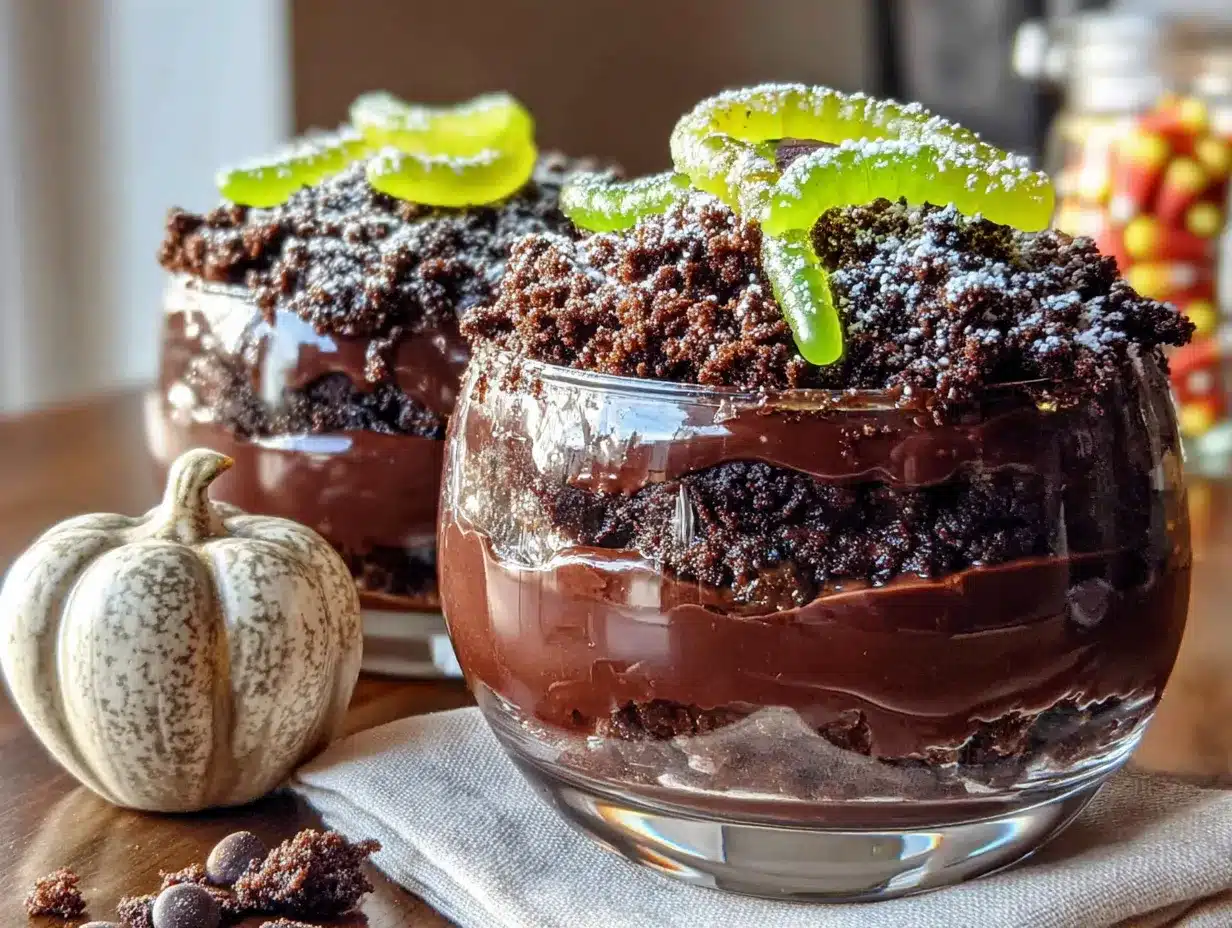
This is where the magic happens. Follow these steps, and you will have the most adorable and delicious Halloween treat in no time.
- Make the pudding base. In your large mixing bowl, whisk together the instant chocolate pudding mix and 2 cups of cold milk. Whisk vigorously for about 2 minutes until it starts to thicken. Let it sit for 5 minutes to set up completely. It should be thick and creamy, like a soft pudding.
- Crush the Oreos. While the pudding is setting, place the Oreo cookies (cream filling and all) into a large resealable bag. Seal it, making sure to push out the air. Use your rolling pin or a heavy pan to crush the cookies into fine crumbs. You want a mix of fine “dirt” and a few slightly larger pieces for texture. Alternatively, you can pulse them in a food processor in short bursts. Be careful not to overdo it; you want crumbs, not dust.
- Fold in the Cool Whip. Once the pudding has set, gently fold in the 1 cup of thawed Cool Whip using your spatula. Fold until it is fully incorporated and the mixture is light and fluffy. This step is what makes the filling extra creamy and dreamy.
- Start layering. Take your 8 small cups. Begin with a layer of crushed Oreos at the bottom of each cup. Use about 1 to 2 tablespoons per cup, pressing it down lightly with the back of a spoon. This creates the “dirt” base.
- Add the pudding mixture. Spoon or pipe the pudding mixture over the Oreo layer, filling the cup about halfway. Use the back of your spoon to spread it evenly. Gently tap the cup on the counter to remove any air pockets.
- Add the gummy worms. Take a few gummy worms and press them gently into the pudding layer, letting some stick out the side or poke up from the middle. This is the fun part—they look like worms crawling out of the dirt!
- Top with more “dirt.” Add another generous layer of crushed Oreos on top of the pudding, covering the gummy worms completely. Use about 2 tablespoons per cup. You want a nice, thick layer of “dirt.”
- Garnish and chill. Place a few more gummy worms on top of the Oreo layer, arranging them to look like they are crawling out. You can also add a small Halloween-themed sprinkle or a little plastic spider for extra fun. Refrigerate the cups for at least 30 minutes before serving. This helps the layers set and the flavors meld together.
Personal Tip: For the best presentation, use a piping bag or a zip-top bag with the corner snipped off to pipe the pudding mixture. It makes the layers much cleaner and more professional-looking.
Cooking Tips & Techniques
Over the years, I have learned a few tricks that make these dirt cups absolutely perfect every single time. Let me share them with you.
The Oreo Crumb Consistency: The biggest mistake people make is crushing the Oreos too fine. You want a mix of textures. A few larger pieces add a satisfying crunch, while the finer crumbs create that realistic “dirt” look. I like to crush them by hand in a bag so I have more control. I once used a food processor and ended up with Oreo dust. It still tasted great, but it didn’t have that same fun texture.
Preventing Soggy Dirt: Nobody wants soggy dirt. The key is to let the pudding set completely before layering. Also, make sure the Oreo layer on the bottom is thick enough to act as a barrier. If you are making these ahead of time, wait to add the top layer of Oreo crumbs until just before serving. This keeps the “dirt” on top perfectly crunchy.
Timing and Multitasking: This is a great recipe to multitask with. While the pudding is setting, you can crush the Oreos and get your cups ready. The whole active prep time is only about 15 minutes, but the chilling time is crucial. Do not skip the 30-minute chill. It makes a huge difference in the final texture.
Making it Extra Cozy: For a truly cozy feel, serve these in warm mugs instead of cold cups. I know it sounds weird, but the contrast between the warm mug and the cold, creamy pudding is incredible. Just make sure the mugs are room temperature, not hot, so the pudding doesn’t melt.
Variations & Adaptations
One of the best things about this recipe is how easy it is to adapt. Here are some of my favorite variations that I have tried over the years.
- Peanut Butter Dirt Cups: Add 2 tablespoons of creamy peanut butter to the pudding mixture before folding in the Cool Whip. It adds a rich, nutty flavor that pairs beautifully with the chocolate. My kids go absolutely crazy for this version.
- Pumpkin Spice Dirt Cups: For a fall twist, use vanilla or butterscotch pudding instead of chocolate. Add 1 teaspoon of pumpkin pie spice to the pudding mix. Top with crushed ginger snaps instead of Oreos. It tastes like autumn in a cup.
- Vegan and Dairy-Free Version: Use a dairy-free instant pudding mix (like Simply Delish) and your favorite plant-based milk. Use vegan chocolate sandwich cookies (like Newman’s Own) and a dairy-free whipped topping (like CocoWhip). It is just as delicious and creamy.
- Low-Carb/Keto Version: Use a sugar-free chocolate pudding mix and unsweetened almond milk. For the “dirt,” use crushed keto-friendly chocolate cookies or a mix of almond flour, cocoa powder, and a sugar-free sweetener. It satisfies that craving without the carbs.
- Spider Web Dirt Cups: For a spookier look, after the final layer of “dirt,” drizzle a little melted white chocolate in a spiral pattern to look like a spider web. Place a plastic spider on top. It is a showstopper for Halloween parties.
Serving & Storage Suggestions
These cozy Halloween dirt cups are best served cold, straight from the refrigerator. The contrast between the cold, creamy pudding and the crunchy Oreo crumbs is what makes them so addictive.
Serving Temperature and Presentation: I like to serve them in clear cups so you can see all the beautiful layers. For a party, arrange them on a platter with some extra gummy worms scattered around and a few fake spider webs for decoration. You can also top each cup with a small dollop of whipped cream and a sprinkle of orange and black sprinkles.
Complementary Dishes or Beverages: These pair wonderfully with a warm cup of hot apple cider or a cozy mug of hot chocolate. For a full Halloween spread, serve them alongside pumpkin-shaped sugar cookies or a slice of pumpkin bread. The rich chocolate flavor balances perfectly with the warm, spiced notes of fall drinks.
Storage Instructions: Store any leftover dirt cups in the refrigerator, tightly covered with plastic wrap or a lid. They will stay fresh for up to 3 days. The texture will change slightly as the Oreo crumbs absorb moisture from the pudding, but they will still taste delicious.
Reheating Methods: You do not need to reheat these. They are meant to be served cold. However, if you want a slightly different experience, you can let them sit at room temperature for 10 to 15 minutes before serving. This softens the pudding a bit and makes it even creamier.
How Flavors Develop: Honestly, these taste even better the next day. The flavors meld together beautifully, and the pudding gets even more luscious. Just make sure to add the top layer of Oreo crumbs fresh if you are making them a day ahead for a party.
Nutritional Information & Benefits
While these are definitely a treat, they do have some surprising benefits. Here is a rough estimate of the nutritional information for one serving (based on 8 servings).
| Nutrient | Amount Per Serving |
|---|---|
| Calories | 320 |
| Total Fat | 14g |
| Saturated Fat | 7g |
| Cholesterol | 15mg |
| Sodium | 380mg |
| Total Carbohydrates | 47g |
| Dietary Fiber | 2g |
| Sugars | 32g |
| Protein | 5g |
Health Benefits of Key Ingredients: The milk provides calcium and vitamin D for strong bones. The cocoa in the Oreos and pudding contains antioxidants called flavonoids, which are good for heart health. The gummy worms, while sugary, do provide a little bit of joy, which is important for mental wellness.
Dietary Considerations: This recipe is not gluten-free unless you use gluten-free cookies. It contains dairy, gluten, and soy. For a lower-sugar option, use sugar-free pudding and reduced-fat cookies. From my personal wellness perspective, I believe in balance. These are a fun, occasional treat that brings people together, and that has its own kind of nutritional value.
Conclusion
These cozy Halloween dirt cups are more than just a dessert. They are a little moment of childhood nostalgia wrapped up in a creamy, crunchy, and utterly delightful package. They are the kind of treat that makes you forget about your worries for a few minutes and just enjoy the simple pleasure of a good dessert.
I encourage you to make these your own. Customize them with your favorite cookies, your favorite pudding flavors, or your favorite gummy candies. That is the beauty of this recipe. It is a canvas for your own creativity. Honestly, I love this recipe because it reminds me of being a kid, but it also feels like a special treat for the grown-up I am now.
I would love to hear how yours turn out! Leave a comment below and tell me about your favorite variation or how you served them at your Halloween party. Share a photo on Pinterest and tag me so I can see your beautiful creations. Until next time, happy cooking, and may your kitchen always be filled with cozy treats and happy memories.
Frequently Asked Questions
Can I make these dirt cups ahead of time?
Yes, absolutely! You can make them up to 2 days in advance. Just wait to add the top layer of Oreo crumbs until right before you serve them to keep them crunchy. Store them covered in the refrigerator.
Can I use homemade pudding instead of instant?
You can, but it will change the texture. Instant pudding sets up much thicker, which is ideal for layering. If you use homemade, cook it a little longer so it is very thick, and let it cool completely before layering.
How do I keep the Oreo crumbs from getting soggy?
The key is to let the pudding set completely before layering and to use a thick enough layer of crumbs at the bottom. For the top layer, add it just before serving. This ensures that satisfying crunch.
Can I use other types of cookies?
Definitely! Chocolate wafer cookies, gluten-free chocolate cookies, or even crushed graham crackers work great. Each will give a slightly different flavor and texture. I have used chocolate chip cookies in a pinch, and it was delicious.
Are these safe for kids to make?
Yes, this is a perfect recipe for kids! They can help crush the Oreos (supervised), layer the cups, and add the gummy worms. It is a fun, no-bake activity that results in a tasty treat. Just be careful with the whisking if they are very young.
Pin This Recipe!
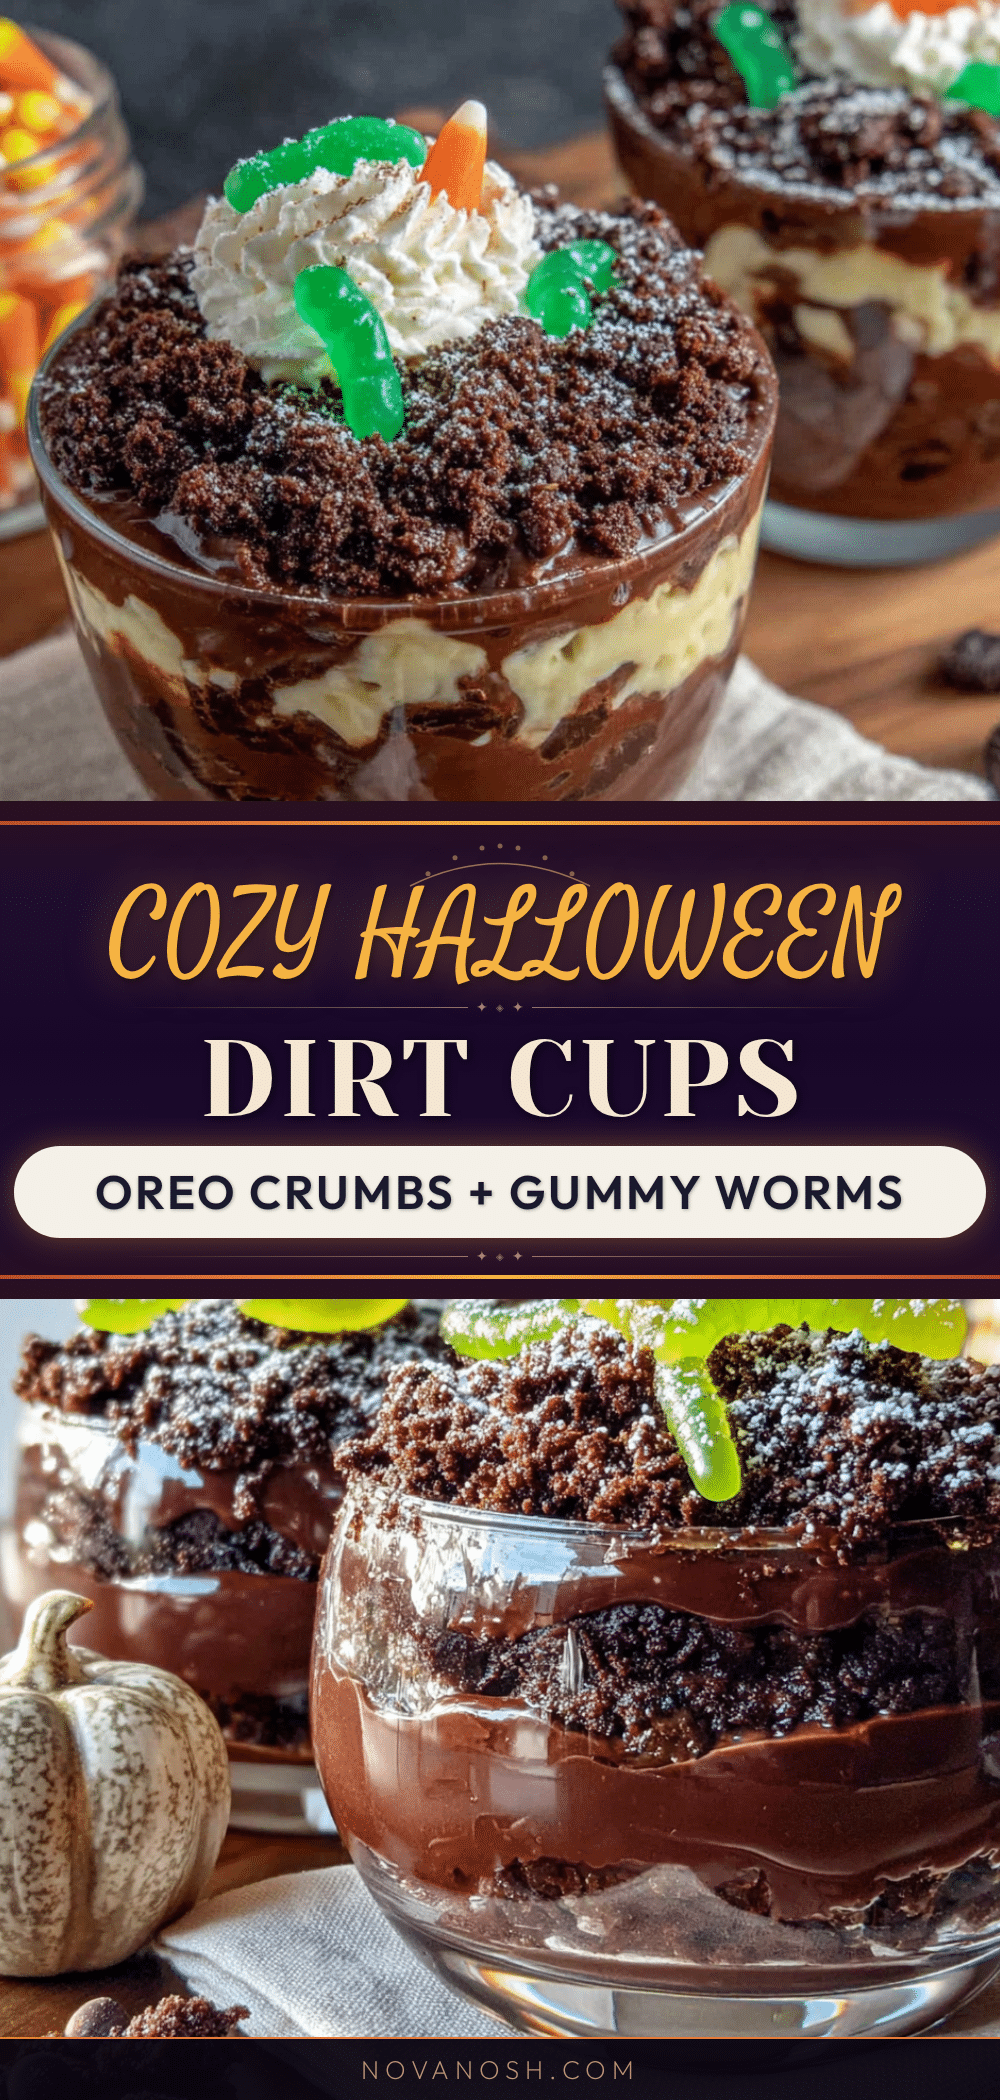
Cozy Halloween Dirt Cups: Easy Oreo & Gummy Worm Dessert
These no-bake dirt cups are a quick and easy Halloween treat made with creamy chocolate pudding, crushed Oreo ‘dirt,’ and gummy worms. Perfect for parties, they deliver nostalgic comfort in under 15 minutes of prep.
- Prep Time: 15 minutes
- Cook Time: 0 minutes
- Total Time: 45 minutes (includes 30 minutes chilling)
- Yield: 8 servings 1x
- Category: Dessert
- Cuisine: American
Ingredients
- 1 package (3.9 oz) instant chocolate pudding mix (Jell-O brand recommended)
- 2 cups cold whole milk (or 2% or oat milk)
- 1 teaspoon vanilla extract (optional)
- 1 standard package (14.3 oz) Oreo cookies (about 36 cookies, regular or Double Stuf)
- 1 cup Cool Whip or homemade whipped cream (thawed if frozen)
- 1 cup gummy worms (plus extra for topping)
- 8 small clear cups or glasses (4 to 6 oz each)
Instructions
- Make the pudding base: In a large mixing bowl, whisk together the instant chocolate pudding mix and 2 cups of cold milk. Whisk vigorously for about 2 minutes until it starts to thicken. Let it sit for 5 minutes to set up completely. It should be thick and creamy.
- Crush the Oreos: While the pudding is setting, place the Oreo cookies (cream filling and all) into a large resealable bag. Seal it, pushing out the air. Use a rolling pin or heavy pan to crush the cookies into fine crumbs with a few slightly larger pieces for texture. Alternatively, pulse in a food processor in short bursts.
- Fold in the Cool Whip: Once the pudding has set, gently fold in the 1 cup of thawed Cool Whip using a spatula until fully incorporated and the mixture is light and fluffy.
- Start layering: Take the 8 small cups. Begin with a layer of crushed Oreos at the bottom of each cup (about 1 to 2 tablespoons per cup), pressing it down lightly with the back of a spoon.
- Add the pudding mixture: Spoon or pipe the pudding mixture over the Oreo layer, filling the cup about halfway. Spread evenly and gently tap the cup on the counter to remove air pockets.
- Add the gummy worms: Press a few gummy worms gently into the pudding layer, letting some stick out the side or poke up from the middle.
- Top with more ‘dirt’: Add another generous layer of crushed Oreos on top of the pudding (about 2 tablespoons per cup), covering the gummy worms completely.
- Garnish and chill: Place a few more gummy worms on top of the Oreo layer, arranging them to look like they are crawling out. Refrigerate the cups for at least 30 minutes before serving.
Notes
For best presentation, use a piping bag or zip-top bag with corner snipped to pipe the pudding mixture. To keep top Oreo layer crunchy, add it just before serving if making ahead. For a cozy twist, serve in warm mugs (room temperature, not hot).
Nutrition
- Serving Size: 1 dirt cup
- Calories: 320
- Sugar: 32
- Sodium: 380
- Fat: 14
- Saturated Fat: 7
- Carbohydrates: 47
- Fiber: 2
- Protein: 5
Keywords: Halloween dirt cups, Oreo dirt cups, gummy worm dessert, no-bake Halloween treat, easy Halloween dessert, chocolate pudding cups, kid-friendly Halloween recipe


