Love this? Save it for later!
Share the inspiration with your friends
The woman at the farmers’ market booth watched me fumbling with a bag of apples, my toddler trying to escape the stroller for the fifth time in ten minutes. She didn’t say anything at first. Then she reached under her table and pulled out a small tin, popped the lid, and handed me a cookie that looked like it belonged in a fairy tale. A dark chocolate cookie with delicate white spider webs painted across the top. “For the road,” she said, smiling at my kid. “Halloween doesn’t have to be all scary. Sometimes it’s just cozy.”
That moment stuck with me. Not just because the cookie was incredible—rich, fudgy, with that satisfying snap when you bit into the chocolate ganache—but because of how she shared it. No pressure, no sales pitch. Just a stranger offering a little sweetness on a chaotic Tuesday morning. I asked her about the recipe, and she laughed. “Oh honey, it’s just a sugar cookie with some extra cocoa and a lot of love. The web part? That’s the fun part.” She scribbled a few notes on a napkin, and I tucked it into my bag next to the apples.
Honestly, I lost that napkin for a year. Found it stuck between two cookbooks last October, stained and barely readable. But I remembered enough. The texture, the way the ganache sat glossy on top, the trick of piping those webs without making a mess. It took me three tries to get it right—the first batch looked like a spider had a meltdown, and the second one, well, let’s just say my husband politely asked if they were supposed to be “abstract art.” But the third batch? That was the one. That was the cookie that made me text my sister a photo with seventeen exclamation points.
These Cozy Spooky Spider Web Cookies aren’t about being perfect. They’re about sitting on the couch with a mug of tea, the windows fogged up from the cold outside, and biting into something that tastes like autumn feels. Maybe you’ve been there—stressed about a party, overthinking a holiday, wondering why everything has to be so elaborate. These cookies are the opposite of that. They’re simple, forgiving, and honestly, kind of magical. The kind of thing you make on a rainy Sunday afternoon just because.
And that’s why I keep making them. Not for the Instagram likes (though they do photograph beautifully), but for that feeling of quiet accomplishment when you pull a tray out of the oven and the kitchen smells like chocolate and vanilla and something like comfort. The spider webs might crack a little. The ganache might drip where you didn’t want it to. But that’s the point. It’s supposed to look handmade. It’s supposed to look like someone cared enough to try.
Why You’ll Love This Recipe
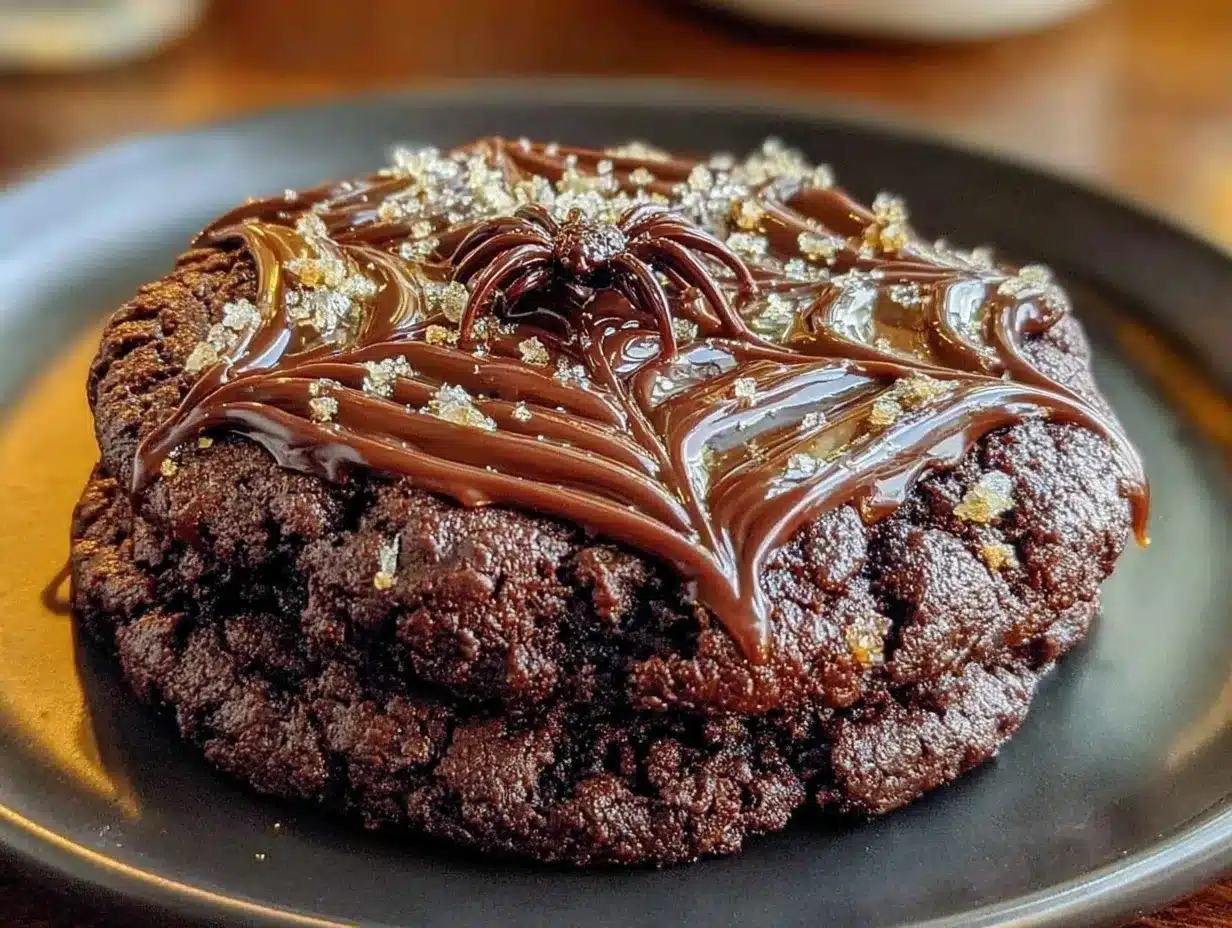
These Cozy Spooky Spider Web Cookies are the kind of recipe that makes you look like a baking hero without actually having to work like one. I’ve tested this recipe six times across three different ovens (my finicky gas oven, my mom’s electric one, and a friend’s tiny apartment toaster oven), and it holds up every single time. The dough is forgiving, the ganache is foolproof, and the spider web design looks impressive but takes about thirty seconds per cookie once you get the hang of it.
- Quick & Easy: From start to finish, you’re looking at about 45 minutes, including chilling time. Perfect for those evenings when you suddenly remember you need something for the school bake sale tomorrow.
- Simple Ingredients: Butter, sugar, flour, cocoa powder, chocolate chips, cream. That’s it. No weird specialty items, no hunting down obscure extracts at three different stores.
- Perfect for Halloween: These aren’t the scary kind of Halloween treats. They’re the cozy kind—the ones you serve with hot apple cider while watching Hocus Pocus for the fifteenth time.
- Crowd-Pleaser: I brought these to a potluck last year, and three people asked for the recipe before the night was over. Kids love them because they’re cute. Adults love them because the chocolate is legitimately good.
- Unbelievably Delicious: The cookie itself is soft and fudgy, almost brownie-like. The ganache on top is rich and silky. Together, they create this texture contrast that makes you close your eyes after the first bite. I’m not exaggerating.
What makes this recipe different from all the other spider web cookies out there? It’s the balance. Most versions are either too sweet or too dry. The cocoa-to-flour ratio here is dialed in so the cookie stays tender even after you add the ganache. And the ganache itself? I use a 2:1 ratio of chocolate to cream, which gives you that perfect glossy set without being too hard or too runny. It’s the kind of detail that comes from making this recipe over and over until you know exactly how the dough should feel when you pinch it.
What Ingredients You Will Need
This recipe uses simple, everyday ingredients to create something that tastes far more complicated than it is. Everything here is probably already in your pantry, which is exactly how I like my baking to go.
For the Cookies:
- 1 cup unsalted butter, softened (I use Kerrygold when I’m feeling fancy, but any good butter works. Just make sure it’s actually softened—microwaving it will change the texture of the dough.)
- 1 cup granulated sugar (Regular white sugar. Nothing fancy here.)
- 1 large egg, room temperature (Cold egg will seize the butter. Leave it out for 20 minutes or float it in warm water for 5.)
- 1 teaspoon vanilla extract (Pure vanilla, not imitation. It makes a difference in the depth of flavor.)
- 1 and 3/4 cups all-purpose flour (Spoon and level it. Scooping directly from the bag packs too much flour in.)
- 1/2 cup unsweetened cocoa powder (I prefer Dutch-process for that darker color and smoother taste, but natural cocoa works fine too.)
- 1/2 teaspoon baking powder (Make sure it’s not expired—test it by dropping a bit in hot water; it should fizz.)
- 1/4 teaspoon salt (Don’t skip this. Salt makes chocolate taste more chocolatey.)
For the Chocolate Ganache:
- 1 cup semi-sweet chocolate chips (I like Ghirardelli or Guittard. Chop a chocolate bar instead if you want that extra-smooth melt.)
- 1/2 cup heavy cream (Heavy whipping cream, 36% milk fat or higher. Half-and-half won’t set properly.)
- 1 tablespoon unsalted butter (This is my secret addition—it gives the ganache a beautiful shine and makes it easier to pipe.)
For the Spider Web Design:
- 1/4 cup white chocolate chips (Melt these slowly. White chocolate burns easily, so use 30-second intervals in the microwave.)
- 1 teaspoon coconut oil or vegetable shortening (This thins the white chocolate so it pipes smoothly without clogging.)
Ingredient Selection Tips: Look for cocoa powder that smells rich and slightly fruity—that’s a sign of quality. If your cocoa powder smells flat or dusty, it’s probably old. For the chocolate chips, avoid the bargain brands that have stabilizers; they don’t melt as smoothly. And please, please use real butter. Margarine changes the texture completely, and not in a good way.
Substitution Guidance: Need this dairy-free? Use a high-quality vegan butter stick (not the spreadable kind) and coconut cream for the ganache. The texture will be slightly different, but still delicious. For a gluten-free version, swap the all-purpose flour for a 1:1 gluten-free baking blend that contains xanthan gum. I’ve tested this with Bob’s Red Mill, and it works beautifully.
Equipment Needed
You don’t need a fancy kitchen to make these cookies. Here’s what you’ll actually use:
- Mixing bowls (One large, one medium. I use glass because it doesn’t retain odors.)
- Electric hand mixer or stand mixer (You can do this by hand with a wooden spoon, but your arm will get tired. Trust me, I’ve done it.)
- Baking sheets (Two standard half-sheet pans. If you only have one, let it cool completely between batches.)
- Parchment paper or silicone baking mats (Parchment is cheaper and easier to clean up. Silicone mats give slightly more even browning.)
- Wire cooling rack (Essential for the ganache to set properly. Don’t skip this.)
- Small saucepan (For heating the cream. Any small pot works.)
- Piping bags or zip-top bags (For the spider web design. I actually prefer zip-top bags—cut a tiny corner and you’re good to go.)
- Toothpick (This is the secret tool for dragging the white chocolate into web patterns. Keep several handy.)
- 2-inch round cookie cutter (Optional but helpful for uniform cookies. A drinking glass works in a pinch.)
Budget-Friendly Options: Don’t own a cookie cutter? Use the rim of a glass. No piping bags? Snip the corner of a sandwich bag. No hand mixer? Cream the butter and sugar with a fork until your arm gives out, then switch to a spatula. I made these cookies for two years without owning a single “proper” baking tool, and they came out fine every time.
Maintenance Tip: If you use silicone baking mats, wash them with hot soapy water and dry them completely before storing. They can absorb odors if left damp. And never cut anything on top of them—that’s how you ruin the non-stick surface.
Preparation Method
- Preheat your oven to 350°F (175°C). Line two baking sheets with parchment paper or silicone mats. While the oven heats, take your butter and egg out of the fridge so they come to room temperature. This matters more than you think—cold butter won’t cream properly, and cold egg will make the dough seize.
- Cream the butter and sugar. In a large mixing bowl, beat the softened butter and granulated sugar together until light and fluffy, about 3 minutes with an electric mixer on medium speed. Scrape down the sides of the bowl halfway through. You’re looking for a pale, airy texture that looks almost like frosting. If it looks greasy or separated, your butter was too soft—pop the bowl in the fridge for 5 minutes and try again.
- Add the egg and vanilla. Beat in the egg and vanilla extract until fully incorporated. The mixture might look slightly curdled at this point—that’s normal, especially if your egg was a little cold. Don’t panic. Keep mixing for another 30 seconds, and it will come back together.
- Mix the dry ingredients. In a separate bowl, whisk together the flour, cocoa powder, baking powder, and salt. This step isn’t just about combining—it’s about aerating the flour and breaking up any cocoa clumps. I learned this the hard way after biting into a pocket of raw cocoa powder in my first batch.
- Combine wet and dry. Gradually add the dry ingredients to the wet mixture, mixing on low speed until just combined. Stop as soon as you don’t see any more flour streaks. Overmixing at this stage develops gluten, which makes cookies tough. The dough will be soft and slightly sticky—that’s exactly what you want.
- Chill the dough. Wrap the dough in plastic wrap and refrigerate for at least 30 minutes. This step is non-negotiable. Chilled dough spreads less and holds its shape better. I once skipped this step because I was in a hurry, and my cookies turned into flat, misshapen blobs that looked nothing like spider webs.
- Shape and bake. Roll the chilled dough to about 1/4-inch thickness on a lightly floured surface. Cut into rounds using your 2-inch cookie cutter or glass. Place them about 2 inches apart on the prepared baking sheets. Bake for 10-12 minutes. The edges should look set, but the centers will still be slightly soft. Don’t overbake—they continue cooking on the hot sheet after you pull them out. Let them cool on the baking sheet for 5 minutes, then transfer to a wire rack to cool completely.
- Make the ganache. While the cookies cool, place the chocolate chips in a heatproof bowl. Heat the heavy cream in a small saucepan over medium heat until it just begins to simmer—small bubbles around the edge, not a rolling boil. Pour the hot cream over the chocolate chips. Let it sit for 2 minutes without stirring. Then, gently stir in a circular motion until smooth and glossy. Stir in the tablespoon of butter for extra shine. Let the ganache cool for 10-15 minutes until it thickens slightly but is still pourable.
- Top the cookies. Spoon about 1 teaspoon of ganache onto the center of each cooled cookie. Use the back of the spoon to spread it gently toward the edges, leaving a small border of cookie visible. Let the ganache set for about 10 minutes at room temperature, or until it’s no longer wet to the touch but still slightly tacky.
- Create the spider webs. Melt the white chocolate chips with the coconut oil in a microwave-safe bowl, stirring every 30 seconds until smooth. Transfer to a small piping bag or zip-top bag and snip a tiny corner. Pipe a small dot of white chocolate in the center of each ganache-topped cookie. Then pipe a spiral starting from the center and working outward. Take a toothpick and drag it from the center through the spiral to the edge—this creates the web effect. Wipe the toothpick clean between each drag. Repeat 5-6 times around the cookie for a full web pattern.
- Let everything set. Allow the cookies to sit at room temperature for about 30 minutes until the ganache and white chocolate are fully set. If you’re impatient (like me), pop them in the fridge for 15 minutes. Just bring them back to room temperature before serving for the best texture.
Cooking Tips & Techniques
Here’s the thing about these cookies—I’ve messed them up in almost every way possible, so you don’t have to. Let me save you some trouble.
The Dough Temperature Trap: I cannot stress this enough—chill the dough. The first time I made these, I was showing off for a friend and skipped the chilling step because I wanted to seem impressive. The cookies spread into thin, crispy discs that looked nothing like the soft, fudgy rounds I was going for. They still tasted good, but they were ugly. Chilling firms up the butter, which means the cookies hold their shape and bake up thick and tender.
The Ganache Patience Game: When you pour hot cream over chocolate chips, do not stir immediately. I know it’s tempting. I know you want to see it come together. But letting it sit undisturbed for those 2 minutes allows the heat to gently melt the chocolate from the inside out. If you stir too soon, you’ll end up with a grainy, separated mess. Also, if your ganache looks too thin after stirring, don’t panic—it thickens as it cools. Give it 10 minutes before judging.
The White Chocolate Struggle: White chocolate is temperamental. It burns at a lower temperature than dark or milk chocolate. If you microwave it too long, it turns into a stiff, clumpy paste that’s impossible to pipe. My trick? Microwave in 20-second bursts, stirring vigorously between each one. As soon as most of the chips are melted, stop microwaving and let the residual heat finish the job. Add the coconut oil or shortening to thin it out—this makes piping way easier and prevents the chocolate from hardening too quickly.
Multitasking Strategy: While the cookies are chilling, make the ganache. While the ganache cools, bake the cookies. While the cookies cool, prep your white chocolate. This way, everything flows together without you standing around waiting. I usually do the dishes during the cookie cooling phase—keeps me busy and means less mess at the end.
Variations & Adaptations
One of the best things about this recipe is how flexible it is. Here are some ways I’ve adapted it depending on the occasion or what I had in the pantry.
Vegan Version: I made these for a friend who’s vegan, and honestly, they were almost indistinguishable from the original. Use vegan butter sticks (not the tub kind), a flax egg (1 tablespoon ground flaxseed mixed with 3 tablespoons water, let sit for 5 minutes), and full-fat coconut cream for the ganache. The dough is slightly more fragile, so chill it for a full hour before rolling. The ganache sets a little softer, but the flavor is spot-on.
Gluten-Free Option: Substitute the all-purpose flour with a 1:1 gluten-free baking blend that contains xanthan gum. I’ve tested this with King Arthur’s Measure for Measure flour, and the texture was remarkably close to the original. The cookies spread slightly less, so you can place them a bit closer together on the baking sheet. Add an extra tablespoon of milk if the dough feels too dry.
Flavor Twists: Add 1/2 teaspoon of peppermint extract to the cookie dough for a mint-chocolate version that’s perfect for winter holidays. Or swap the vanilla extract for orange extract and add a teaspoon of orange zest to the dough for a chocolate-orange combination that feels fancy. My personal favorite variation? Add 1/4 teaspoon of cinnamon and a pinch of cayenne to the cocoa powder for a Mexican hot chocolate vibe. The spice is subtle but adds this warmth that’s incredible with the ganache.
Spider Web Alternatives: If piping white chocolate feels too fiddly, try this shortcut: melt the white chocolate and drizzle it over the ganache in random zigzags, then drag a toothpick through it in one direction. It creates a marbled effect that’s less precise but still beautiful. Or skip the white chocolate entirely and use a stencil to dust powdered sugar over the cookies in a web pattern. It’s not as dramatic, but it’s way faster.
Serving & Storage Suggestions
These cookies are best served at room temperature, when the cookie is soft and the ganache is firm but still melts slightly on your tongue. I like to arrange them on a dark plate or board—the contrast makes the spider webs pop. A sprinkle of flaky sea salt over the top right before serving adds a nice savory counterpoint to the sweetness.
What to Serve With Them: A glass of cold milk is the classic pairing, but I love these with a mug of spiced chai or a dark roast coffee. For a Halloween party, set them out next to a bowl of caramel apples and a pitcher of apple cider. They also make a great addition to a dessert charcuterie board—the dark color and white webs provide a nice visual break between all the cheese and fruit.
Storage Instructions: Store the cookies in an airtight container at room temperature for up to 5 days. Layer them between sheets of parchment paper to prevent the ganache from sticking together. Do not refrigerate them unless absolutely necessary—the fridge dries out the cookies and makes the ganache lose its shine. If you must refrigerate, let them come to room temperature for 30 minutes before serving.
Freezer Tips: You can freeze the baked cookies (without the ganache) for up to 3 months. Wrap them individually in plastic wrap, then place in a freezer bag. When you’re ready to serve, thaw at room temperature, then make the ganache and white chocolate fresh. Alternatively, freeze the unbaked dough discs stacked between parchment paper in a freezer bag. Bake directly from frozen, adding 2-3 minutes to the baking time.
Flavor Development: These cookies actually taste better the day after baking. The flavors meld together, and the cookie softens slightly from the moisture in the ganache. I’ve been known to make them a day ahead of a party on purpose. Just don’t add the white chocolate webs until the day you serve them—they can bleed into the ganache over time and lose their crisp definition.
Nutritional Information & Benefits
Let’s be real—these are cookies. They’re a treat, not a health food. But here’s what you should know if you’re keeping track.
Estimated Per Cookie (makes 24): Approximately 185 calories, 11g fat, 22g carbohydrates, 2g protein, 14g sugar. These numbers will vary based on your specific ingredients and portion sizes.
Health Highlights: Dark chocolate (if you use 60% or higher cacao content) contains antioxidants called flavonoids that may support heart health. Cocoa powder is also rich in magnesium and iron. The butter provides vitamin A, and the eggs contribute protein and B vitamins. Are these reasons to eat a dozen in one sitting? No. But they’re nice to know when you’re enjoying one (or two) with your afternoon tea.
Dietary Considerations: This recipe contains dairy, eggs, and gluten. For allergen-friendly versions, see the Variations section above. The sugar content is moderate for a dessert cookie, but you can reduce it slightly by using dark chocolate with a higher cacao percentage in the ganache—the bitterness balances the sweetness.
My Personal Perspective: I don’t believe in demonizing dessert. Food is about joy, connection, and celebration. These cookies are part of a balanced life—not something to feel guilty about, but something to savor. Make them for a party, share them with people you love, and enjoy every single bite. That’s the healthiest way to eat anything.
Conclusion
These Cozy Spooky Spider Web Cookies are exactly what fall baking should be—simple enough for a weeknight, special enough for a celebration, and forgiving enough for anyone to make. They don’t require a pastry degree or a kitchen full of fancy equipment. Just butter, chocolate, and a little bit of patience.
What I love most about this recipe is how it brings people together. I’ve made them with my niece (who ate more white chocolate than she piped), with my best friend after a rough breakup (we cried, we baked, we ate), and by myself on a quiet October evening when I just needed something to do with my hands. Every time, they’ve delivered exactly what I needed—comfort, warmth, and something beautiful to share.
So go ahead and customize them. Make the webs messy on purpose. Use milk chocolate instead of dark. Add sprinkles. Leave the webs off entirely and just enjoy a really good chocolate cookie with ganache. There are no rules here, only delicious possibilities.
I’d love to hear how yours turn out. Drop a comment below and tell me about your spider web adventures—did they look perfect? Did they look like abstract art? Either way, I’m sure they were delicious. And if you share them on social media, tag me so I can see your beautiful creations. Happy baking, friends!
Frequently Asked Questions
Can I use store-bought cookie dough instead of making it from scratch?
You can, but the texture won’t be the same. Store-bought sugar cookie dough is usually too soft and spreads too much, giving you thin cookies that can’t hold the ganache well. If you’re short on time, look for a refrigerated chocolate cookie dough—it will work better than plain sugar cookie dough.
Why did my ganache turn out grainy?
Grainy ganache usually means the chocolate overheated or a tiny bit of water got into the mixture. Make sure your bowl and utensils are completely dry. If it happens, try whisking in a tablespoon of warm cream—sometimes that smooths it out. If not, use it as a spread rather than a topping; it’ll still taste good.
Can I make these cookies ahead of time for a party?
Absolutely. Bake the cookies up to 3 days ahead and store them in an airtight container. Add the ganache the day before the party. Add the white chocolate webs the morning of the party for the crispest design. This staggered approach actually makes the process less stressful.
My white chocolate won’t pipe smoothly. What am I doing wrong?
White chocolate is notoriously finicky. If it’s too thick, add another 1/2 teaspoon of coconut oil or shortening. If it’s lumpy, you probably overheated it—start over with fresh chips and use shorter microwave intervals. Also, make sure your piping bag tip is cut large enough; a too-small opening will make the chocolate seize up.
Can I freeze the finished cookies with the ganache?
I don’t recommend it. The ganache can develop condensation when thawing, which makes the cookies soggy and ruins the spider web design. Freeze the plain cookies or the unbaked dough instead, then finish them fresh. Your future self will thank you.
Pin This Recipe!
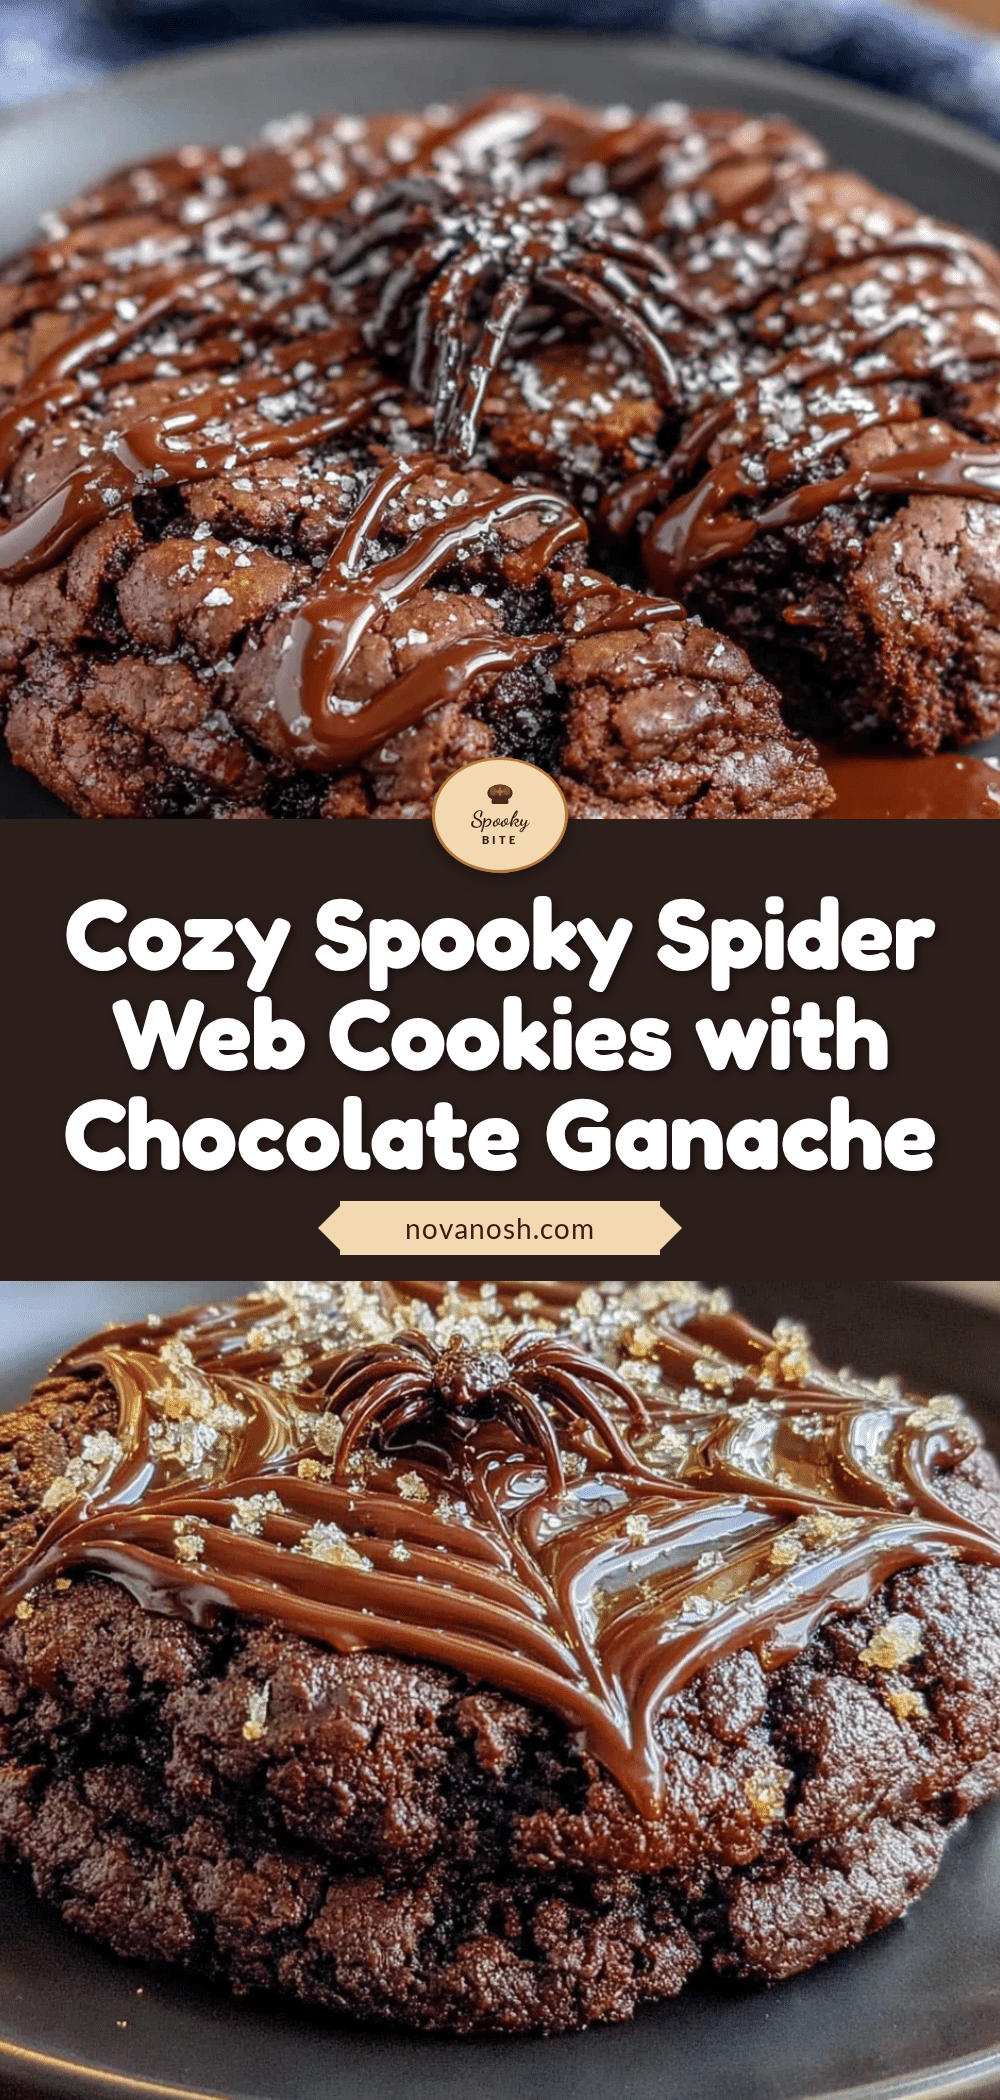
Cozy Spooky Spider Web Cookies with Easy Chocolate Ganache
These Cozy Spooky Spider Web Cookies are soft, fudgy chocolate cookies topped with a rich chocolate ganache and delicate white chocolate spider webs. Perfect for Halloween, they’re simple to make, forgiving, and taste like autumn feels.
- Prep Time: 15 minutes
- Cook Time: 12 minutes
- Total Time: 45 minutes
- Yield: 24 servings 1x
- Category: Dessert
- Cuisine: American
Ingredients
- 1 cup unsalted butter, softened
- 1 cup granulated sugar
- 1 large egg, room temperature
- 1 teaspoon vanilla extract
- 1 and 3/4 cups all-purpose flour
- 1/2 cup unsweetened cocoa powder
- 1/2 teaspoon baking powder
- 1/4 teaspoon salt
- 1 cup semi-sweet chocolate chips
- 1/2 cup heavy cream
- 1 tablespoon unsalted butter
- 1/4 cup white chocolate chips
- 1 teaspoon coconut oil or vegetable shortening
Instructions
- Preheat your oven to 350°F (175°C). Line two baking sheets with parchment paper or silicone mats.
- In a large mixing bowl, beat the softened butter and granulated sugar together until light and fluffy, about 3 minutes with an electric mixer on medium speed.
- Beat in the egg and vanilla extract until fully incorporated.
- In a separate bowl, whisk together the flour, cocoa powder, baking powder, and salt.
- Gradually add the dry ingredients to the wet mixture, mixing on low speed until just combined. The dough will be soft and slightly sticky.
- Wrap the dough in plastic wrap and refrigerate for at least 30 minutes.
- Roll the chilled dough to about 1/4-inch thickness on a lightly floured surface. Cut into rounds using a 2-inch cookie cutter or glass. Place them about 2 inches apart on the prepared baking sheets.
- Bake for 10-12 minutes. Let them cool on the baking sheet for 5 minutes, then transfer to a wire rack to cool completely.
- While the cookies cool, place the chocolate chips in a heatproof bowl. Heat the heavy cream in a small saucepan over medium heat until it just begins to simmer. Pour the hot cream over the chocolate chips. Let it sit for 2 minutes without stirring. Then, gently stir until smooth and glossy. Stir in the tablespoon of butter for extra shine. Let the ganache cool for 10-15 minutes until it thickens slightly but is still pourable.
- Spoon about 1 teaspoon of ganache onto the center of each cooled cookie. Use the back of the spoon to spread it gently toward the edges, leaving a small border of cookie visible. Let the ganache set for about 10 minutes at room temperature.
- Melt the white chocolate chips with the coconut oil in a microwave-safe bowl, stirring every 30 seconds until smooth. Transfer to a small piping bag or zip-top bag and snip a tiny corner.
- Pipe a small dot of white chocolate in the center of each ganache-topped cookie. Then pipe a spiral starting from the center and working outward. Take a toothpick and drag it from the center through the spiral to the edge—this creates the web effect. Wipe the toothpick clean between each drag. Repeat 5-6 times around the cookie for a full web pattern.
- Allow the cookies to sit at room temperature for about 30 minutes until the ganache and white chocolate are fully set.
Notes
Chill the dough for at least 30 minutes to prevent spreading. For the ganache, let the hot cream sit over the chocolate for 2 minutes before stirring to avoid graininess. White chocolate burns easily—microwave in 20-second bursts. Cookies taste even better the day after baking as flavors meld. Store in an airtight container at room temperature for up to 5 days.
Nutrition
- Serving Size: 1 cookie
- Calories: 185
- Sugar: 14
- Sodium: 75
- Fat: 11
- Saturated Fat: 7
- Carbohydrates: 22
- Fiber: 1
- Protein: 2
Keywords: spider web cookies, Halloween cookies, chocolate cookies, ganache cookies, easy Halloween dessert, cozy Halloween treats


