Love this? Save it for later!
Share the inspiration with your friends
This was supposed to be a buttermilk fried chicken situation. A proper, messy, oil-splattering Friday night project. I had the chicken soaking in buttermilk since breakfast, the flour mixture measured out, and a whole mental image of golden, craggy tenders that would make my niece, Lily, declare me the coolest aunt on the planet. Then, at 5 PM, I realized I was completely out of oil. Not a drop. The corner store was a twenty-minute round trip, and Lily was already hangry, clinging to my leg like a tiny, grumpy koala. I stood there, staring at my dusty air fryer, a gadget I mostly used for reheating pizza, and thought, “Well, this is either going to be a tragedy or a miracle.”
Honestly, I nearly gave up and ordered pizza. But the thought of those sad, soggy delivery tenders made me cringe. I grabbed the basket, tossed in a few coated strips, and crossed my fingers. The air fryer hummed away, and ten minutes later, I pulled out tenders that were… actually crispy? No, they were obscenely crispy. The coating had puffed up and turned a deep, even gold. I let one cool for a second, broke it in half, and heard that perfect shattering sound. Lily took one bite, stopped mid-chew, and just looked at me with these huge, serious eyes. “Auntie,” she whispered, “these are better than the restaurant ones.”
That moment, standing in my messy kitchen with a kid who normally picks at her food, was pure vindication. This recipe isn’t a compromise—it’s a straight-up upgrade. It delivers that crave-worthy crunch without the vat of hot oil, the splatter on your stovetop, or the lingering greasy smell in your house for two days. If you’ve ever had that moment of panic when a plan falls apart, you know exactly what I’m talking about. This is the happy accident that became a permanent fixture in our weekly rotation. And let me tell you, once you make these crispy air fryer chicken tenders, you might never go back to the deep fryer again.
Why You’ll Love This Recipe
I’ve tested this recipe more times than I care to count, tweaking the coating, the cooking time, and the temperature until it was absolutely foolproof. As someone who has burned, sogged, and under-seasoned more than my fair share of chicken, I can tell you with confidence—this version just works. It’s built on a few key tricks I’ve picked up from years of trial and error in my own kitchen.
- Quick & Easy: From fridge to plate in under 25 minutes. It’s faster than takeout, and you don’t even have to change out of your sweatpants.
- Simple Ingredients: No buttermilk, no complicated brines, no hard-to-find spices. You probably have everything you need in your pantry right now.
- Perfect for Picky Eaters: This is the kind of recipe that bridges the gap between what kids want and what parents feel good about serving. It’s a guaranteed crowd-pleaser.
- Unbelievably Crispy: The secret is in the double-coating technique. It creates a craggy, crunchy crust that stays crispy even after it cools down a bit.
- Less Mess, Less Stress: No splattering oil, no deep-fryer to clean, and no lingering kitchen smell. Just a basket to rinse and a happy family.
What makes this recipe different from the dozens of others out there? It’s the perfect balance of a light, airy crunch and juicy, tender meat. I’m not using any weird binders or complicated steps. It’s just a smart technique that maximizes the power of the air fryer. This isn’t just another version of air fryer chicken tenders—it’s the one that will make you close your eyes after the first bite. It’s comfort food reimagined: faster, cleaner, and totally soul-satisfying. Perfect for impressing your kids on a Tuesday night, or turning a simple lunch into something they’ll beg for again.
What Ingredients You Will Need
This recipe relies on a handful of simple, wholesome ingredients to build big flavor and that signature crunch. I’ve kept the list short because I know how annoying it is to hunt down obscure items for a simple weeknight dinner.
- Chicken Tenders (1 lb / 450g): Look for fresh, pre-trimmed chicken tenderloins. They’re naturally the perfect size and shape. If you only have chicken breasts, just slice them into 1-inch wide strips. Pat them super dry with paper towels before you start—this is the first step to a great crust.
- All-Purpose Flour (½ cup / 60g): This is the base of our dry coating. It helps the egg wash stick and creates a foundation for the crunch. I’ve tried gluten-free all-purpose blends here, and they work pretty well, too.
- Panko Breadcrumbs (1 cup / 80g): This is non-negotiable for maximum crispiness. Panko is flakier and airier than regular breadcrumbs, which means it gets way crunchier in the air fryer. I prefer the plain variety, but seasoned works in a pinch.
- Grated Parmesan Cheese (¼ cup / 25g): This is my secret weapon. The parmesan adds a savory, nutty flavor and helps the panko brown beautifully. Don’t use the powdery stuff from a can—get a block and grate it yourself for the best texture. It makes a huge difference.
- Eggs (2 large): They act as the glue between the flour and the panko. Make sure they’re at room temperature so they mix evenly.
- Paprika (1 teaspoon): For color and a mild, sweet smokiness. Smoked paprika works great here, too, if you want a deeper flavor.
- Garlic Powder (1 teaspoon): Don’t skip this. It adds that savory depth that makes these tenders so addictive.
- Salt & Black Pepper (1 teaspoon each): Season the flour mixture generously. Most of the flavor comes from this step, so don’t be shy.
- Avocado or Canola Oil Spray: A light spritz is crucial. It helps the coating crisp up and turn golden brown. Olive oil spray works, but avocado oil has a higher smoke point, which is better for the air fryer.
Equipment Needed
You don’t need a professional kitchen to nail this recipe. Just a few basic tools that you probably already own.
- Air Fryer: Any model will work. I use a 5.8-quart basket-style air fryer, but an oven-style one is fine too. Just keep an eye on the cooking time as models can vary.
- Shallow Bowls (3): For your flour mixture, egg wash, and panko coating. Pie plates or wide soup bowls work perfectly.
- Tongs: For handling the raw chicken without making a complete mess of your fingers.
- Wire Rack: This is optional, but I love placing the coated tenders on a wire rack set over a baking sheet while I finish coating the rest. It prevents the bottom from getting soggy.
- Instant-Read Thermometer: If you’re new to cooking chicken, this is a game-changer. It takes the guesswork out of knowing when it’s done.
Preparation Method
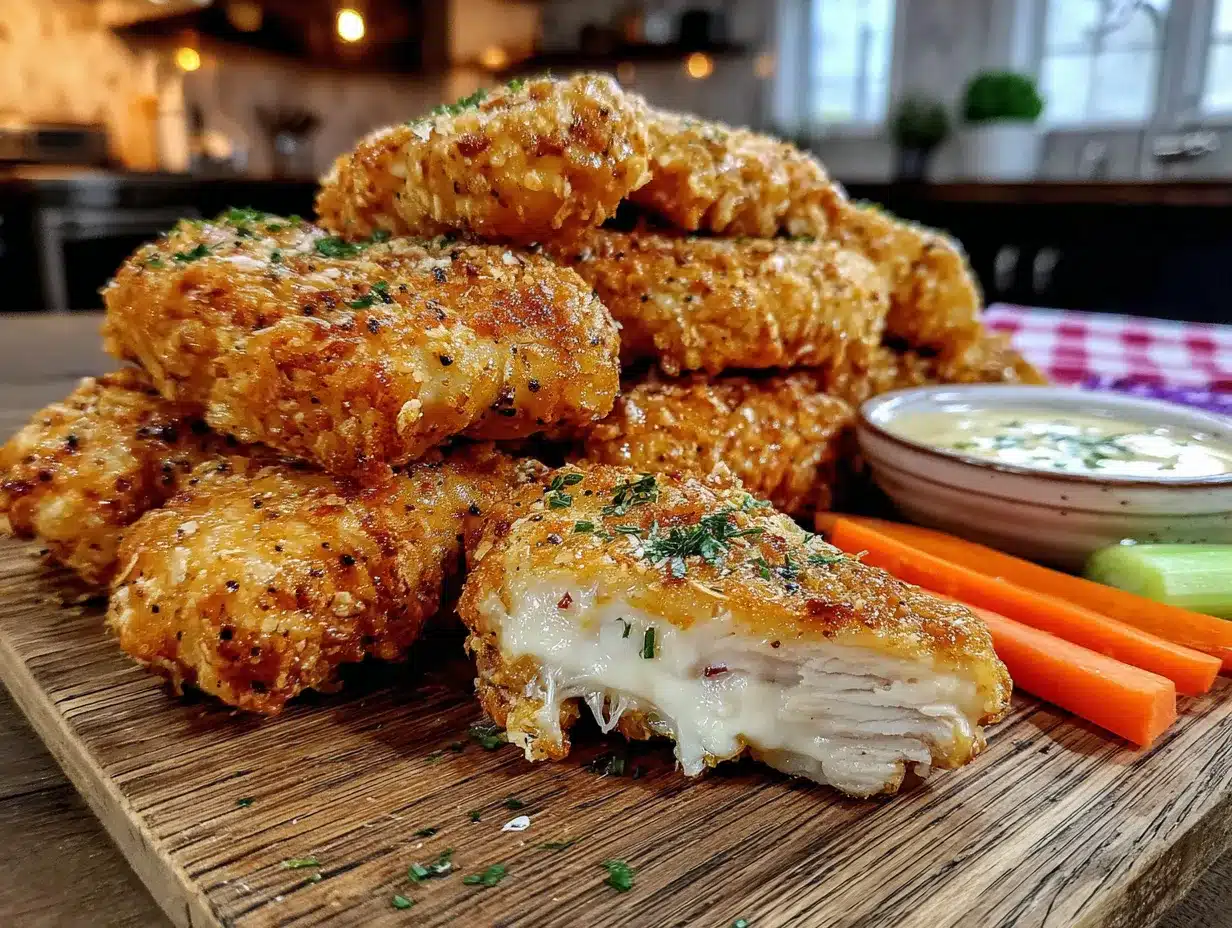
Alright, let’s get cooking. This process moves quickly, so it helps to have everything set up before you start. I call it my “assembly line” method.
- Prep the Chicken (5 minutes): Pat the chicken tenders completely dry with paper towels. This is so important—any extra moisture will create steam and ruin your crispiness. Season them lightly with a pinch of salt and pepper.
- Set Up Your Breading Station (5 minutes): Grab three shallow bowls. In the first bowl, whisk together the flour, paprika, garlic powder, ½ teaspoon of salt, and ½ teaspoon of pepper. In the second bowl, beat the two eggs with a tablespoon of water until they’re uniform. In the third bowl, combine the panko breadcrumbs and the grated parmesan cheese. Mix it with your fingers to break up any clumps.
- Coat the Chicken (10 minutes): Working one piece at a time, dredge a tender in the flour mixture. Shake off the excess—you want a thin, even layer. Then, dip it into the egg wash, letting any extra drip off. Finally, press it firmly into the panko-parmesan mixture. Flip it and press again to make sure it’s completely covered. I like to really press the panko in so it sticks well. Place the coated tender on your wire rack and repeat with the rest.
- Preheat the Air Fryer (3 minutes): Set your air fryer to 400°F (200°C) and let it preheat for about 3 minutes. A hot start is key for that immediate sizzle that creates a crispy crust.
- Cook in Batches (10-12 minutes per batch): Lightly spray the air fryer basket with oil. Place the tenders in a single layer, making sure they aren’t touching. You want good air circulation. Give them a light spritz with your oil spray. Cook for 6 minutes, then flip each tender with tongs and give them another light spray. Cook for another 4-6 minutes, until they are golden brown and the internal temperature reaches 165°F (74°C) on an instant-read thermometer.
- Rest and Serve (2 minutes): Let the tenders rest on a clean wire rack for 2 minutes. This helps the juices redistribute and keeps the coating from getting steamy on a plate. Serve immediately with your favorite dipping sauces.
Troubleshooting Tip: If your tenders aren’t browning evenly, your air fryer might have hot spots. Just rotate the basket or flip the tenders halfway through. If the coating looks dry, you didn’t use enough oil spray—a light mist is essential for that golden color.
Cooking Tips & Techniques
Over the years, I’ve made every mistake in the book with air fryer chicken. Here are the lessons I’ve learned so you don’t have to repeat them.
Don’t Overcrowd the Basket. This is the number one mistake people make. If you cram the tenders in, they’ll steam instead of fry. You’ll end up with a soggy, pale mess. Cook in batches if you have to. It adds a few minutes to the total time, but the result is infinitely better. Trust me, I learned this the hard way when I tried to feed a crowd of hungry teenagers.
Let the Coating Rest. After you bread the chicken, let it sit on the wire rack for about 5 minutes before air frying. This gives the coating time to adhere to the chicken, so it doesn’t slide off in the air fryer. It’s a small step that makes a huge difference in the final texture.
Spray, Don’t Drizzle. Use an aerosol oil spray, not a pump bottle. The aerosol creates a fine, even mist that coats the tenders perfectly without making them greasy. A pump bottle tends to shoot out in heavy streams, which can wash off your precious panko coating.
Flip with Confidence. When you flip the tenders halfway through, use a thin, sturdy spatula or tongs. The coating is delicate at this stage. Be gentle but quick to avoid losing the crispy bits. I once dropped a tender and watched my perfect coating shatter on the bottom of the basket. Sad day.
Know Your Air Fryer. Every air fryer runs a little differently. A 400°F setting on my machine might run hot or cool compared to yours. The first time you make these, check the tenders at the 8-minute mark. If they look pale, give them an extra minute or two. Once you know your machine’s personality, you’ll nail the timing every single time.
Variations & Adaptations
One of the best things about this recipe is how easily it adapts to different tastes and dietary needs. Don’t be afraid to play around.
- Spicy Honey Sriracha: Add ½ teaspoon of cayenne pepper and 1 teaspoon of chili powder to the flour mixture. After cooking, toss the hot tenders in a mixture of 2 tablespoons of honey and 1 tablespoon of sriracha. It’s sweet, sticky, and has a fantastic kick. My brother-in-law, a self-proclaimed spice wimp, actually loved this version.
- Gluten-Free Option: Swap the all-purpose flour for a 1:1 gluten-free baking flour, and use gluten-free panko breadcrumbs. The texture will be slightly different, but it’s still incredibly crispy. I’ve tested this with the King Arthur brand, and it works beautifully.
- Parmesan-Herb Crust: Add 1 tablespoon of dried Italian seasoning and 1 teaspoon of dried parsley to the panko mixture. This gives the tenders a beautiful, aromatic crust that tastes amazing with a simple marinara dipping sauce.
- Lighter “Baked” Feel: If you want a less crunchy, more oven-baked texture, skip the panko and just use the flour and egg wash. The result is a tender, juicy strip with a thin, golden skin. It’s a great option for younger toddlers who might find the panko texture too much.
Serving & Storage Suggestions
These tenders are best served hot and fresh, right out of the air fryer. The contrast between the warm, juicy chicken and the shatteringly crisp coating is pure magic.
For serving, I love to pile them on a large platter with a few dipping stations. Classic ketchup is a must for the kids, but homemade honey mustard or a creamy ranch dressing takes it to another level. They’re fantastic alongside a simple side salad, some sweet potato fries, or even just a pile of crunchy pickles. The tenders are also amazing sliced up on top of a big Caesar salad for a quick, satisfying lunch.
If you have leftovers (which is rare in my house), let them cool completely before storing. Place them in an airtight container lined with a paper towel to absorb any excess moisture. They’ll keep in the fridge for up to 3 days. To reheat, do not use the microwave—it will turn them into rubber. Instead, pop them back in the air fryer at 350°F (175°C) for 3-4 minutes, or until they’re hot and crispy again. The texture won’t be quite as perfect as day one, but it’s still pretty darn good.
These also freeze beautifully. After they’ve cooled completely, arrange them in a single layer on a baking sheet and freeze for 2 hours. Then, transfer the frozen tenders to a freezer-safe bag. They’ll keep for up to 2 months. Reheat from frozen in the air fryer at 375°F (190°C) for 8-10 minutes. It’s the ultimate emergency dinner hack.
Nutritional Information & Benefits
Compared to deep-fried chicken tenders, this air fryer version is a much lighter option. By using a tiny amount of oil spray instead of a vat of oil, you’re saving a significant amount of fat and calories. Plus, you get the benefit of knowing exactly what’s in your food—no weird preservatives or mystery ingredients.
| Nutrient | Per Serving (approx. 3-4 tenders) |
|---|---|
| Calories | 320-380 kcal |
| Protein | 35-40 g |
| Fat | 10-14 g |
| Carbohydrates | 20-25 g |
| Fiber | 1-2 g |
Chicken is a fantastic source of lean protein, which is essential for muscle growth and repair. The parmesan adds a bit of calcium, and the paprika provides a small dose of antioxidants. This recipe is naturally nut-free and can easily be made gluten-free. It’s a meal that feels indulgent but fits comfortably into a balanced diet. I love that I can serve this to my family without any guilt, knowing they’re getting a solid dose of protein in a form they actually get excited about.
Frequently Asked Questions
Can I use frozen chicken tenders?
I don’t recommend it for this recipe. Frozen chicken releases a lot of water as it thaws, which will make the coating soggy. If you’re in a pinch, thaw them completely in the fridge overnight and pat them extremely dry before breading.
Why are my chicken tenders not crispy?
This usually happens for one of three reasons: the basket was overcrowded, you didn’t pat the chicken dry enough, or you forgot to spray them with oil. Make sure you follow the steps for a single layer and a good spritz of oil spray.
Can I make these ahead of time for a party?
Absolutely! You can bread the tenders up to 4 hours in advance and keep them on a wire rack in the fridge. Let them sit at room temperature for 10 minutes before air frying. You can also fully cook them, then reheat in the air fryer just before serving.
My coating fell off in the air fryer. What happened?
This usually means the chicken wasn’t dry enough before you started, or you didn’t press the panko on firmly enough. Also, make sure you’re not handling them too roughly when you flip them halfway through.
What dipping sauces go best with these?
Honestly, the options are endless! Classic ketchup, honey mustard, ranch dressing, BBQ sauce, and buffalo sauce are all fantastic. For a fun twist, try a creamy sriracha mayo or a sweet chili sauce.
Conclusion
These crispy air fryer chicken tenders are more than just a recipe—they’re a solution. They solve the problem of what to make for dinner when you’re short on time, energy, and patience. They solve the dilemma of wanting something crunchy and satisfying without the mess and guilt of deep frying. And most importantly, they solve the puzzle of feeding picky eaters a meal they’ll actually clean their plates for.
I love this recipe because it’s a reminder that sometimes the best things in life come from a happy accident. A missing bottle of oil led me to discover a technique that’s become a staple in my kitchen. I hope it becomes a staple in yours, too. Don’t be afraid to tweak the seasonings or try one of the variations—make it your own. That’s the beauty of cooking.
If you make these tenders, I’d love to hear about it! Leave a comment below and tell me how they turned out, or share a photo on Pinterest. Tag me so I can see your crispy creations. Happy cooking, friend—you’ve got this!
Pin This Recipe!
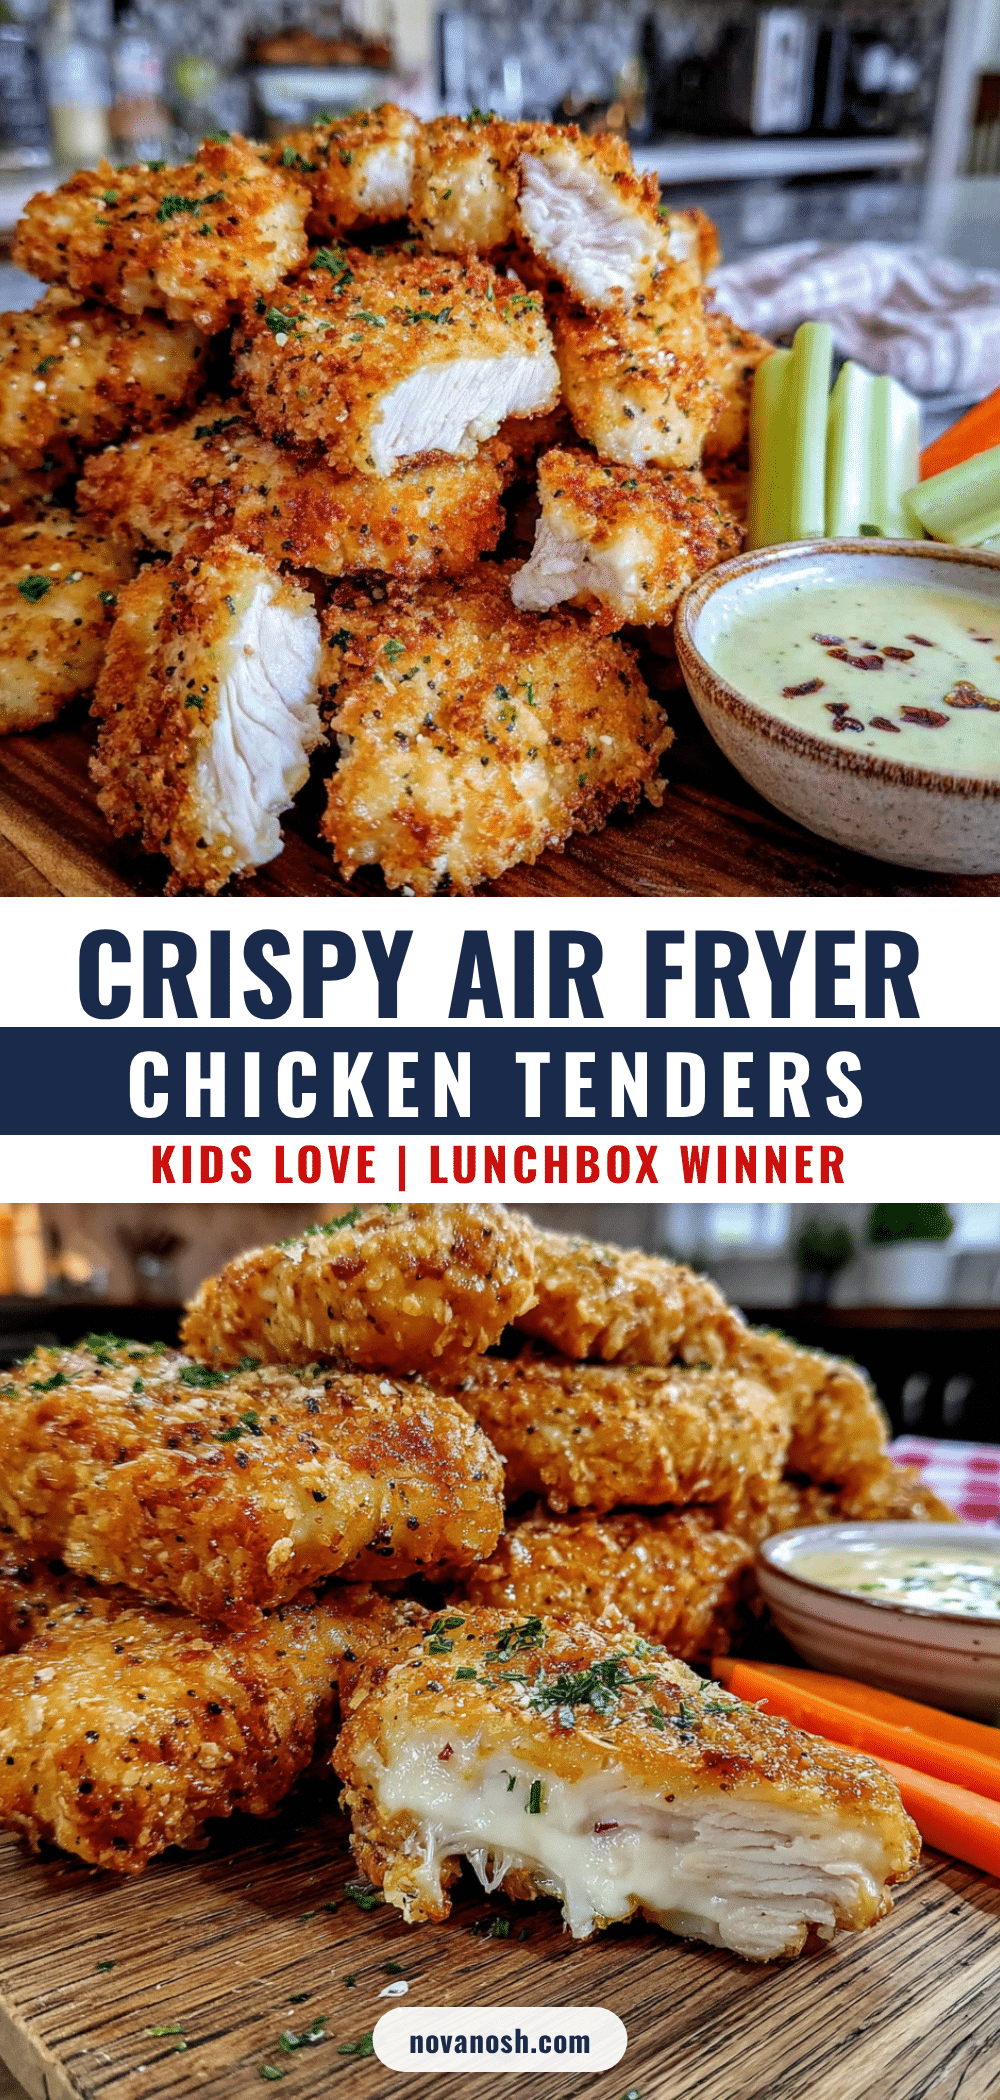
Crispy Air Fryer Chicken Tenders: Easy Recipe Kids Love

These crispy air fryer chicken tenders are a quick and easy weeknight dinner that kids and adults love. They deliver a shatteringly crunchy crust with juicy, tender meat, all without the mess of deep frying.
- Prep Time: 15 minutes
- Cook Time: 12 minutes
- Total Time: 27 minutes
- Yield: 4 servings 1x
- Category: Main Course
- Cuisine: American
Ingredients
- 1 lb (450g) chicken tenders
- ½ cup (60g) all-purpose flour
- 1 cup (80g) panko breadcrumbs
- ¼ cup (25g) grated Parmesan cheese
- 2 large eggs
- 1 teaspoon paprika
- 1 teaspoon garlic powder
- 1 teaspoon salt
- 1 teaspoon black pepper
- Avocado or canola oil spray
Instructions
- Pat the chicken tenders completely dry with paper towels. Season lightly with a pinch of salt and pepper.
- Set up a breading station with three shallow bowls. In the first bowl, whisk together flour, paprika, garlic powder, ½ teaspoon salt, and ½ teaspoon pepper. In the second bowl, beat the eggs with 1 tablespoon of water. In the third bowl, combine panko breadcrumbs and grated Parmesan cheese.
- Working one piece at a time, dredge a tender in the flour mixture, shaking off excess. Dip into the egg wash, letting extra drip off. Press firmly into the panko-Parmesan mixture, coating all sides. Place on a wire rack. Repeat with remaining tenders.
- Preheat the air fryer to 400°F (200°C) for 3 minutes.
- Lightly spray the air fryer basket with oil. Place tenders in a single layer without touching. Spray the tops lightly with oil. Cook for 6 minutes, flip, spray again, and cook for another 4-6 minutes until golden brown and internal temperature reaches 165°F (74°C).
- Let tenders rest on a clean wire rack for 2 minutes before serving.
Notes
For best results, do not overcrowd the basket. Let the coating rest for 5 minutes before air frying. Use an aerosol oil spray for even coating. If tenders aren’t browning evenly, rotate the basket or flip halfway through.
Nutrition
- Serving Size: 3-4 tenders
- Calories: 320380
- Sugar: 12
- Sodium: 600800
- Fat: 1014
- Saturated Fat: 35
- Carbohydrates: 2025
- Fiber: 12
- Protein: 3540
Keywords: air fryer chicken tenders, crispy chicken tenders, easy chicken tenders, kid-friendly chicken tenders, healthy chicken tenders


