Love this? Save it for later!
Share the inspiration with your friends
I was standing in line at the hardware store—of all places—when the woman in front of me turned around and started talking about Halloween cupcakes. She was holding a single lightbulb and a bag of mulch, and she had this look in her eye like she was about to share a secret. “You know,” she said, “the trick isn’t the black color. It’s keeping them moist.” I blinked. I hadn’t asked for cupcake advice. But there I was, on a random Tuesday in October, listening to a complete stranger describe how she’d spent three years perfecting a black velvet cupcake recipe that her grandson called “the only good thing about wearing a costume.”
She told me she’d tried everything—activated charcoal, black cocoa powder, even food coloring that stained her countertops for weeks. She’d failed spectacularly more times than she cared to admit. Dry cupcakes. Gray cupcakes. Cupcakes that tasted like dirt. But she kept at it because, honestly, her grandson was a tough critic. And when she finally got it right, she brought a batch to the hardware store and made the cashier cry. Not sad tears—happy tears. The kind you cry when something tastes exactly like the memory you wanted it to be.
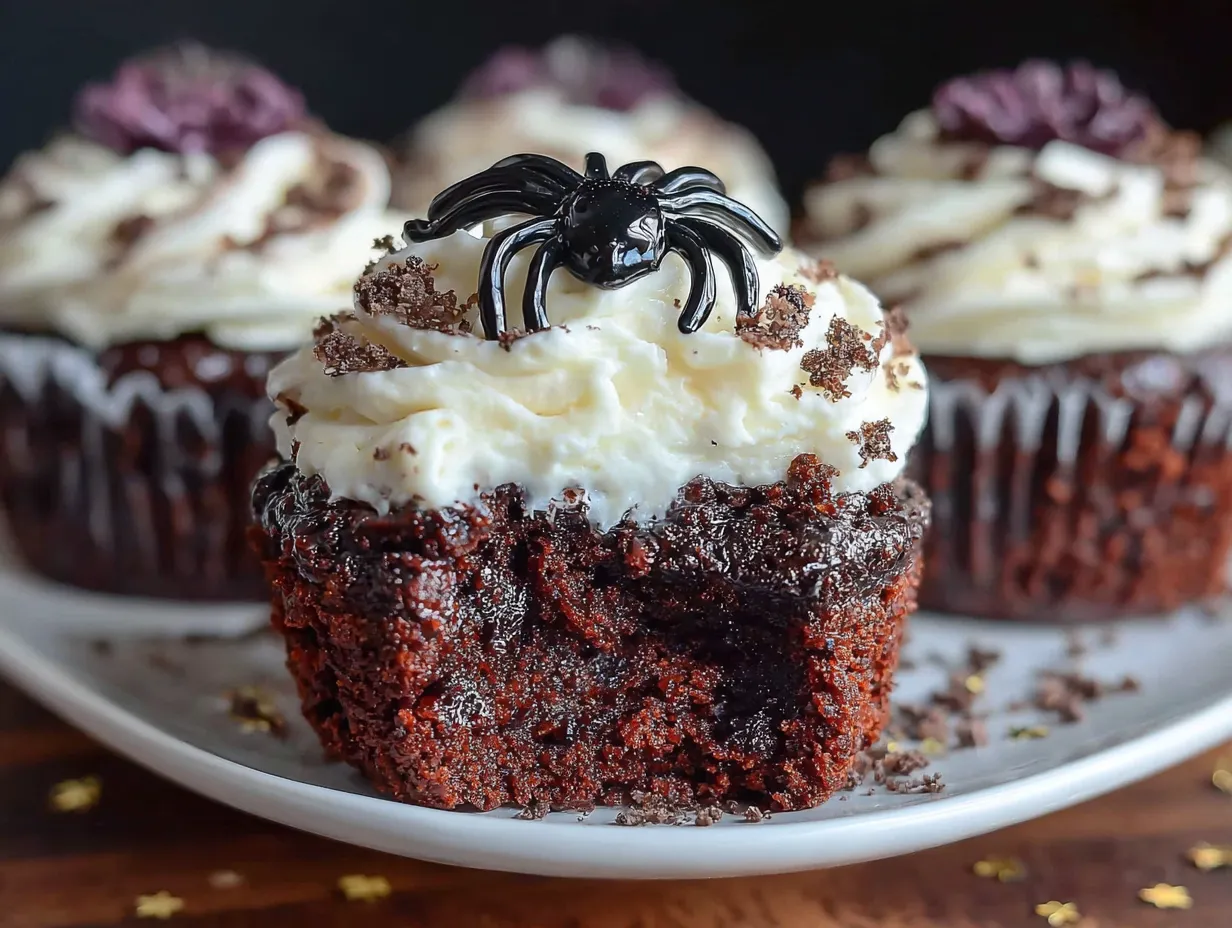
I scribbled her notes on the back of a receipt. I mean, you can’t let that kind of wisdom walk away, right? I’ve tweaked her method over the years—added a little more vinegar for tenderness, swapped in Dutch-process cocoa for that deep, dark color—but the heart of it is still hers. These spooky black velvet Halloween cupcakes with cream cheese frosting are the ones I make every year now. They’re the ones my friends text me about in September, asking, “Is it too early?” And honestly? It’s never too early for a cupcake that looks like it came straight out of a haunted bakery. You know the feeling when you bite into something and it’s exactly what you hoped for? That’s this recipe.
Why You’ll Love This Recipe
These aren’t just any Halloween cupcakes. They’re the result of real trial and error—my own and a stranger’s—and they deliver every single time. Here’s why this recipe stands out from the crowd:
- Quick & Easy: From start to finish, these come together in about 45 minutes. The batter takes 10 minutes flat. Perfect for last-minute Halloween parties or a Tuesday night baking session when the spooky mood strikes.
- Simple Ingredients: No trips to specialty baking stores. You probably have everything in your pantry right now—flour, sugar, cocoa powder, buttermilk, vinegar. The only “special” ingredient is black food coloring, and you can find that at any grocery store.
- Perfect for Halloween: Whether you’re hosting a costume party, sending treats to school, or just want something fun for a cozy October evening, these cupcakes fit the bill. They look dramatic and spooky but taste like comfort.
- Crowd-Pleaser: I’ve brought these to potlucks, office parties, and neighborhood gatherings. Kids love the color. Adults love the flavor. Everyone asks for the recipe—and I always share it.
- Unbelievably Delicious: Here’s the thing about black velvet—it’s not just red velvet dyed black. The cocoa powder is more pronounced, the crumb is tighter, and the tang from the buttermilk cuts through the sweetness perfectly. Paired with cream cheese frosting? It’s next-level.
What makes this recipe different from every other black cupcake out there is the balance. I’ve tested versions that were too dry, too sweet, too artificial-tasting. This one hits all the right notes. The vinegar and buttermilk react with the baking soda to create a tender crumb that stays moist for days. The black cocoa powder gives it that deep, dark color without tasting burnt. And the cream cheese frosting is whipped just enough to be light and fluffy but sturdy enough to pipe into dramatic swirls.
This is the kind of recipe that makes you close your eyes after the first bite. It’s Halloween fun without sacrificing quality. It’s comfort food with a spooky twist—same soul-soothing satisfaction, just dressed up in its goth best. Perfect for impressing guests without spending hours in the kitchen, or turning a simple October evening into something memorable.
What Ingredients You Will Need
This recipe uses simple, pantry-friendly ingredients to deliver bold flavor and that signature dark color. Nothing fancy here—just smart combinations that work together beautifully.
For the Cupcakes
- All-purpose flour, 2 cups (250g) — provides structure without making the cupcakes dense. I prefer Gold Medal or King Arthur for consistent results.
- Granulated sugar, 1 ½ cups (300g) — sweetens the batter and helps with browning. Don’t reduce it; sugar also adds moisture.
- Unsweetened cocoa powder, ½ cup (45g) — use Dutch-process for the deepest color and richest flavor. Regular cocoa works too, but the color won’t be as dramatic.
- Baking soda, 1 teaspoon — reacts with the vinegar and buttermilk for lift and tenderness.
- Salt, ½ teaspoon — balances sweetness and enhances the chocolate flavor.
- Vegetable oil, ½ cup (120ml) — keeps the cupcakes moist for days. Canola or avocado oil work too.
- Buttermilk, 1 cup (240ml), room temperature — adds tang and activates the baking soda. No buttermilk? Add 1 tablespoon of lemon juice or vinegar to regular milk and let it sit for 5 minutes.
- Large eggs, 2, room temperature — bind the batter and add richness.
- White vinegar, 1 teaspoon — sounds weird, but it reacts with the baking soda for a lighter crumb. You won’t taste it, I promise.
- Vanilla extract, 2 teaspoons — rounds out the flavor.
- Black gel food coloring, 2-3 tablespoons — this is key. Liquid food coloring won’t give you true black. I use Americolor Super Black. Start with 2 tablespoons and add more if needed.
For the Cream Cheese Frosting
- Cream cheese, 8 oz (226g), softened — use full-fat blocks, not spreadable cream cheese. The spreadable kind has too much water and will make your frosting runny.
- Unsalted butter, ½ cup (113g), softened — adds stability and richness.
- Powdered sugar, 4 cups (480g), sifted — sifting prevents lumps. Trust me on this one.
- Vanilla extract, 2 teaspoons — enhances the creamy flavor.
- Pinch of salt — balances sweetness.
For Decoration (Optional)
- Black sanding sugar or black sprinkles — for that extra spooky sparkle.
- Candy eyeballs — because everything is better with eyes.
- Orange or purple sprinkles — for a pop of Halloween color.
I always recommend using room temperature ingredients for the batter. Cold eggs and buttermilk can make the batter seize up, and you’ll end up with dense cupcakes. Set everything out on the counter about 30 minutes before you start. And if you’re using a new brand of black food coloring, test it in a small amount of batter first—some brands are weaker than others, and you don’t want gray cupcakes on Halloween.
Equipment Needed
- 12-cup muffin tin — standard size. Non-stick is fine, but I always use paper liners anyway.
- Paper cupcake liners — Halloween-themed ones make everything more fun. I like the ones with bats or skeletons.
- Two large mixing bowls — one for dry ingredients, one for wet.
- Whisk — for mixing dry ingredients.
- Hand mixer or stand mixer — for the frosting. You can do it by hand with a whisk, but your arm will hate you.
- Rubber spatula — for scraping down the bowl and folding ingredients.
- Cooling rack — letting cupcakes cool completely is non-negotiable. Hot cupcakes + cream cheese frosting = melted disaster.
- Piping bag and star tip — I use a Wilton 1M tip for those dramatic swirls. A zip-top bag with the corner snipped off works in a pinch.
- Measuring cups and spoons — for accuracy.
- Small offset spatula — helpful for smoothing frosting if you’re not piping.
If you don’t have a piping bag, don’t stress. You can spread the frosting with a knife and it’ll still taste amazing. I’ve done it many times when I couldn’t find my piping tips. And if you’re baking with kids, let them use a butter knife to swirl the frosting on—it looks rustic and charming.
Preparation Method
- Preheat your oven to 350°F (175°C). Line your muffin tin with paper liners. This recipe makes exactly 12 cupcakes—no more, no less. I’ve tested it twice to be sure.
- In a large bowl, whisk together the dry ingredients: 2 cups all-purpose flour, 1 ½ cups sugar, ½ cup cocoa powder, 1 teaspoon baking soda, and ½ teaspoon salt. Whisk until everything is evenly distributed. No need to sift—just make sure there are no lumps of cocoa.
- In a separate bowl, combine the wet ingredients: ½ cup vegetable oil, 1 cup buttermilk (room temperature), 2 eggs (room temperature), 1 teaspoon white vinegar, and 2 teaspoons vanilla extract. Whisk until smooth and well combined.
- Add the black gel food coloring to the wet ingredients. Start with 2 tablespoons. Whisk it in—the mixture will look dark gray at this point. Don’t worry, it gets darker after baking. If you want an even deeper black, add another tablespoon. I usually do 2 ½ tablespoons for that “midnight sky” look.
- Pour the wet ingredients into the dry ingredients. Gently fold together with a rubber spatula until just combined. Do not overmix. A few small lumps are fine. Overmixing develops gluten and makes the cupcakes tough. You want tender, not tough.
- Divide the batter evenly among the 12 liners. I use a ⅓ cup measuring cup or an ice cream scoop for even portions. Each liner should be about ⅔ full. The batter is thin—that’s normal. It’s supposed to be.
- Bake for 18-22 minutes. At 18 minutes, insert a toothpick into the center of a cupcake. If it comes out clean or with a few moist crumbs, they’re done. If it’s wet batter, give them 2 more minutes and check again. My oven runs hot, so I start checking at 17 minutes. Know your oven.
- Cool in the pan for 5 minutes, then transfer to a wire rack to cool completely. This step is crucial. If you leave them in the pan too long, the bottoms get soggy. And if you frost them while they’re warm, the cream cheese frosting will slide right off. I speak from experience—it’s a sad, melty mess.
- While the cupcakes cool, make the frosting. In a large bowl with a hand mixer or stand mixer fitted with the paddle attachment, beat 8 oz softened cream cheese and ½ cup softened butter together until smooth and creamy—about 2 minutes. Scrape down the sides.
- Add 4 cups sifted powdered sugar, one cup at a time, beating on low speed after each addition. Once all the sugar is in, add 2 teaspoons vanilla extract and a pinch of salt. Increase speed to medium-high and beat for 2-3 minutes until light and fluffy. Don’t overbeat, or the frosting can become too soft.
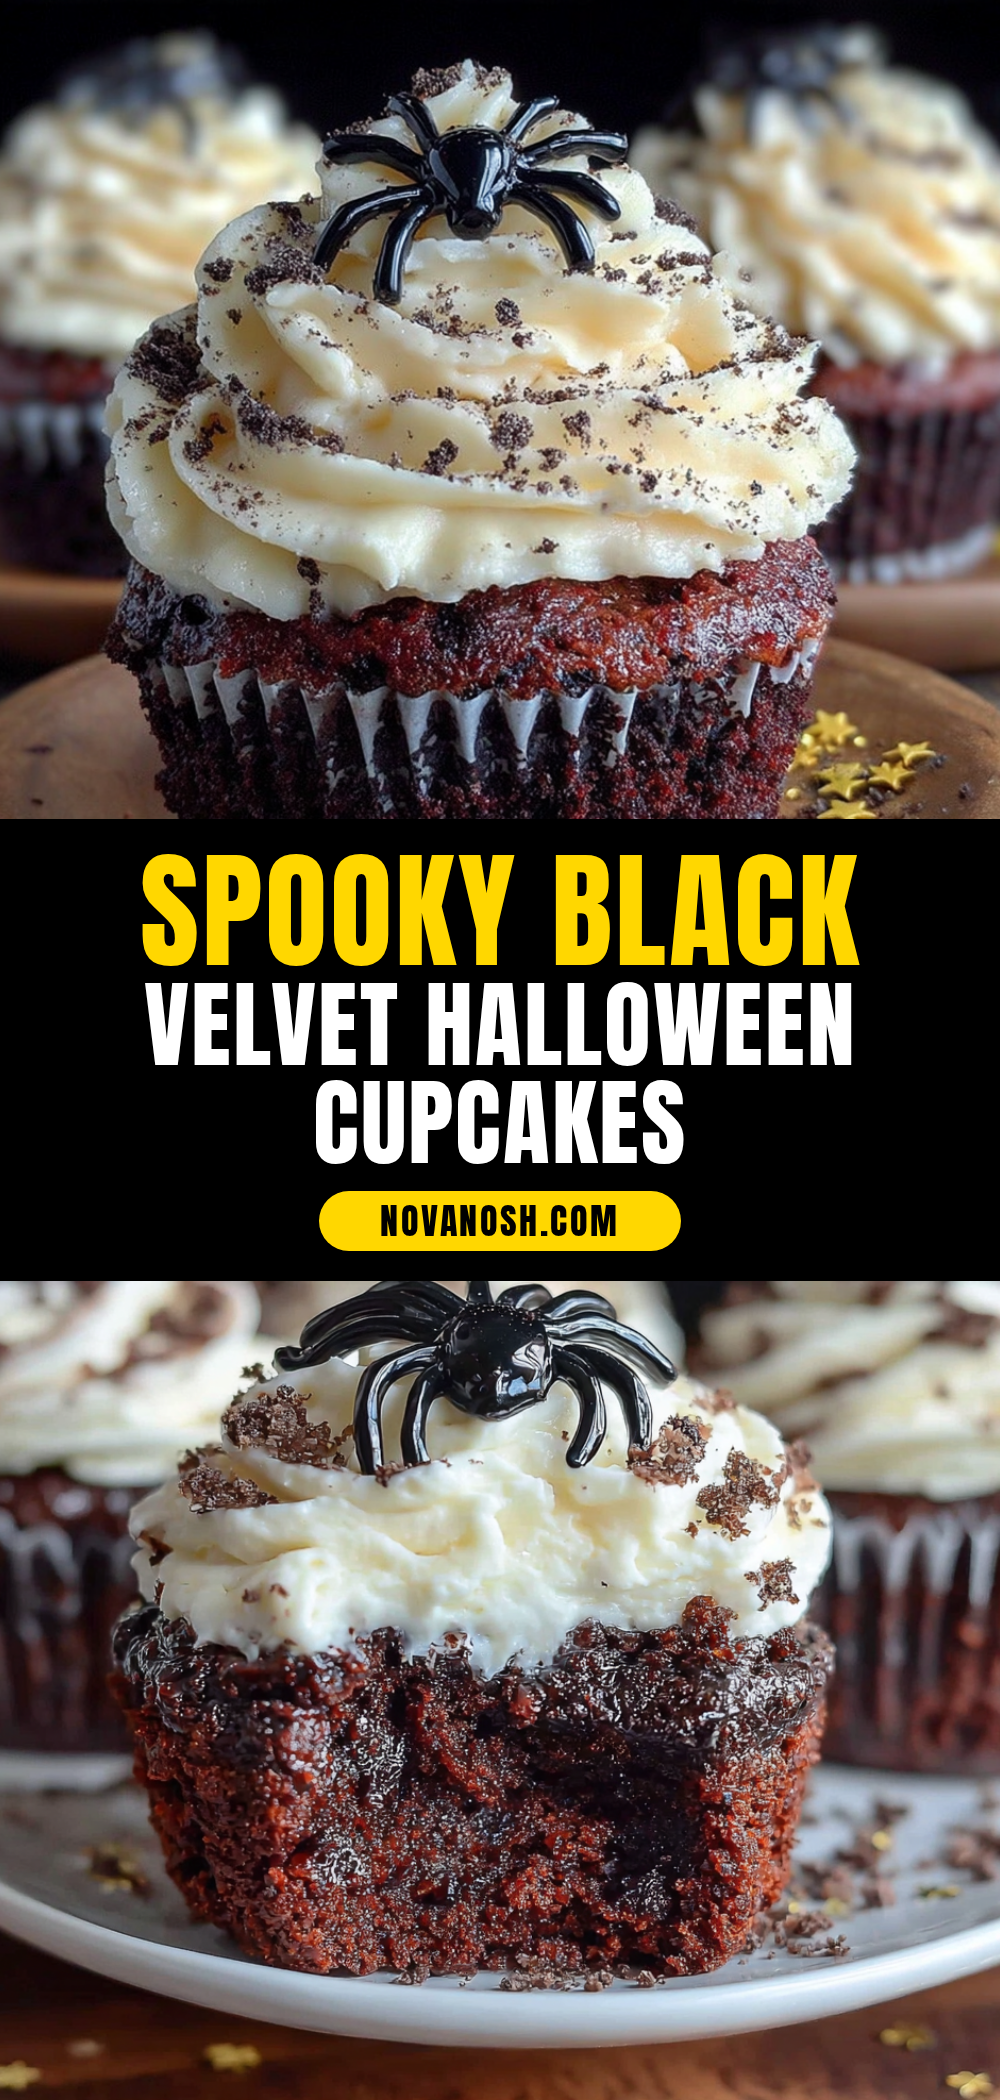
- Once cupcakes are completely cool, pipe or spread the frosting. I like a generous swirl that starts at the outside edge and works inward. Top with black sanding sugar, candy eyeballs, or orange sprinkles. Get creative—these are Halloween cupcakes, after all.
Cooking Tips & Techniques
Let me save you from the mistakes I’ve already made. First, don’t skip the vinegar. I know it sounds crazy, but the vinegar reacts with the baking soda to create carbon dioxide bubbles, which give you a lighter, fluffier cupcake. Without it, you’ll get dense, flat tops. I learned this the hard way when I ran out of vinegar and thought, “Eh, it’s just a teaspoon.” It was not just a teaspoon.
Room temperature ingredients matter. Cold buttermilk can make the butter in the batter seize up (even though we’re using oil here, the principle applies). Cold eggs don’t incorporate as smoothly. Set everything out 30 minutes before you start. Your future self will thank you.
Black food coloring is not all created equal. I’ve tried at least six brands. Americolor Super Black is my go-to. Wilton Color Right in black is also good. Avoid the liquid food coloring you find in the baking aisle—it’s too weak and will turn your batter gray. You’d need half a bottle to get anywhere close to black, and that much liquid will mess with the batter consistency. Gel or paste is the way to go.
Don’t overmix the batter. Seriously. Mix until you can’t see streaks of flour anymore, then stop. A few lumps are fine. Overmixing develops gluten, and gluten makes cupcakes tough and rubbery. You want them tender and soft.
Let the cupcakes cool completely. I know it’s tempting to rush this step, especially when your kitchen smells amazing. But warm cupcakes + cream cheese frosting = a puddle of sadness. If you’re in a hurry, pop them in the fridge for 15 minutes after they’ve cooled on the rack for 10. That usually speeds things up.
For the frosting, don’t overbeat it. Cream cheese frosting can go from perfect to soupy in about 30 seconds if you keep mixing. Beat it just until it’s light and fluffy, then stop. If it gets too soft, pop it in the fridge for 10 minutes before piping.
Variations & Adaptations
Gluten-Free Version: Swap the all-purpose flour with a 1:1 gluten-free baking flour blend. I’ve used Bob’s Red Mill and King Arthur with great results. Add an extra tablespoon of buttermilk since gluten-free flours tend to absorb more liquid.
Dairy-Free Version: Use a plant-based buttermilk (mix 1 cup unsweetened almond or oat milk with 1 tablespoon lemon juice) and dairy-free cream cheese. Kite Hill makes a good cream cheese alternative. Use vegan butter or coconut oil in the frosting—just know the texture will be slightly different.
Extra Spooky Version: Add ½ teaspoon of activated charcoal powder to the dry ingredients for an even deeper black color. Be careful though—a little goes a long way, and too much can make the cupcakes taste earthy. Start with ¼ teaspoon and add more if needed.
Blood Drip Version: After frosting, drizzle with red raspberry syrup or strawberry puree to look like blood drips. It’s dramatic and delicious. Just make sure the syrup is thick enough that it doesn’t soak into the frosting.
Mini Cupcake Version: Use a mini muffin tin and bake for 10-12 minutes instead of 18-22. This recipe makes about 36 mini cupcakes. Perfect for parties where people want to try multiple treats.
Chocolate Ganache Topping: Swap the cream cheese frosting for a dark chocolate ganache. Heat ½ cup heavy cream and pour over 4 oz chopped dark chocolate. Stir until smooth, let cool slightly, then dip the tops of the cupcakes. It gives them a glossy, almost sinister look.
I once made a batch with orange cream cheese frosting by adding a few drops of orange food coloring and a teaspoon of orange extract. They looked like little jack-o’-lanterns and tasted like fall. Sometimes the best variations come from whatever you have in the pantry.
Serving & Storage Suggestions
These cupcakes are best served at room temperature. The cream cheese frosting softens slightly, the cake is tender, and every bite is perfect. If you’ve refrigerated them, let them sit on the counter for 20-30 minutes before serving.
For a Halloween party, arrange them on a black cake stand or a wooden board. Sprinkle some orange and purple candy corn around the base for a festive look. I like to add a few fake spider webs or plastic spiders for extra drama—the kids love it, and honestly, the adults do too.
These pair beautifully with a glass of cold milk, a hot cup of coffee, or a warm apple cider. If you’re serving them at a party, set out some creepy crawly caramel apples alongside for a full Halloween dessert spread. The contrast between the rich chocolate cupcakes and the tart, sticky apples is fantastic.
Storage: Store unfrosted cupcakes in an airtight container at room temperature for up to 3 days. Frosted cupcakes should be refrigerated in an airtight container for up to 5 days. The cream cheese frosting needs to stay cold, but the cake itself is fine at room temperature for a few hours.
Freezing: You can freeze unfrosted cupcakes for up to 3 months. Wrap each one tightly in plastic wrap, then place in a freezer bag. Thaw at room temperature, then frost. Frosted cupcakes can also be frozen, but the texture of the cream cheese frosting might change slightly. I prefer to freeze without frosting and make fresh frosting when I’m ready to serve.
Reheating: If you want that just-baked warmth, microwave an unfrosted cupcake for 10-15 seconds. Don’t do this with frosted cupcakes unless you want a puddle. The flavors actually deepen after a day—the black cocoa becomes more pronounced, and the tang from the buttermilk mellows. They’re good on day one, but honestly, day two is even better.
Nutritional Information & Benefits
Here’s the nutritional breakdown for one cupcake with frosting (based on 12 servings):
| Nutrient | Amount Per Serving |
|---|---|
| Calories | 385 |
| Total Fat | 18g |
| Saturated Fat | 8g |
| Cholesterol | 55mg |
| Sodium | 280mg |
| Total Carbohydrates | 54g |
| Dietary Fiber | 2g |
| Sugars | 40g |
| Protein | 5g |
These are treats, not health food—let’s be real. But the cocoa powder does contain antioxidants called flavonoids, which can support heart health. The cream cheese adds a small amount of calcium and protein. And the buttermilk provides probiotics and calcium too. So there are tiny silver linings, but honestly, eat these because they make you happy. That’s their real benefit.
If you’re watching your sugar intake, you can reduce the sugar in the frosting by using a sugar-free powdered sugar alternative, but the texture will be slightly different. For a lower-fat option, swap half the oil in the batter with unsweetened applesauce. The cupcakes will be a little denser but still delicious.
These cupcakes contain dairy, eggs, and gluten. They are not suitable for vegans or those with celiac disease unless you use the substitutions listed in the variations section. Always check your food coloring for any hidden allergens—most are safe, but it’s worth reading the label.
Conclusion
These spooky black velvet Halloween cupcakes with cream cheese frosting are everything you want in a Halloween treat—dramatic, delicious, and surprisingly easy to make. They came to me from an unexpected source, and now they’re a tradition I look forward to every October. There’s something special about pulling a tray of pitch-black cupcakes out of the oven and watching people’s faces light up. They’re fun. They’re comforting. And they taste like the best kind of autumn memory.
I hope you make these your own. Add extra sprinkles. Use purple frosting. Top them with candy spiders or edible glitter. The recipe is a starting point, but your creativity is what makes it yours. And if you forget the vinegar or overmix the batter or accidentally use liquid food coloring and end up with gray cupcakes? That’s okay. You’ll know for next time. That’s how we all learn.
I’d love to hear how yours turn out! Leave a comment below and tell me about your Halloween baking adventures. Did you add a special touch? Did your kids help? Did you make them for a party? Share your photos and stories—I read every single one. And if you’re looking for more spooky treats, check out our haunted forest mud pie for another showstopper. Happy Halloween, and happy baking!
Frequently Asked Questions
Can I make these cupcakes ahead of time?
Absolutely. Bake the cupcakes up to 3 days in advance and store them unfrosted in an airtight container at room temperature. Make the frosting the day you plan to serve them for the best texture. You can also freeze unfrosted cupcakes for up to 3 months.
Why did my cupcakes turn out gray instead of black?
This usually happens when you use liquid food coloring instead of gel. Liquid coloring is too weak to achieve true black. You’d need so much that it would affect the batter consistency. Switch to a gel or paste food coloring like Americolor Super Black or Wilton Color Right.
Can I use regular cocoa powder instead of Dutch-process?
Yes, you can. The cupcakes will still taste great, but the color won’t be as deep and dark. Dutch-process cocoa is treated with alkali, which neutralizes its acidity and gives it a darker color. Regular cocoa is more acidic and lighter in color. If you use regular cocoa, the cupcakes might look more dark brown than black.
My cream cheese frosting is too runny. What went wrong?
Most likely, your cream cheese was too soft or you used spreadable cream cheese instead of block cream cheese. Spreadable cream cheese has added water and stabilizers that make it thinner. Also, make sure your butter and cream cheese are just softened, not melted. If your frosting gets too runny, pop it in the fridge for 15-20 minutes to firm up before piping.
Can I make these cupcakes without an electric mixer?
Yes, for the cupcakes you only need a whisk and a spatula—no mixer required. For the frosting, you can beat it by hand with a whisk, but it will take some elbow grease. Make sure your cream cheese and butter are very soft, and sift your powdered sugar to make mixing easier. It’s totally doable, just give yourself an extra 5-10 minutes.
Pin This Recipe!
Easy Black Velvet Halloween Cupcakes with Cream Cheese Frosting
These spooky black velvet Halloween cupcakes with cream cheese frosting are dramatic, delicious, and surprisingly easy to make. They deliver a tender, moist crumb with deep cocoa flavor, perfect for Halloween parties or a cozy October evening.
- Prep Time: 10 minutes
- Cook Time: 20 minutes
- Total Time: 45 minutes
- Yield: 12 servings 1x
- Category: Dessert
- Cuisine: American
Ingredients
- 2 cups (250g) all-purpose flour
- 1 ½ cups (300g) granulated sugar
- ½ cup (45g) unsweetened Dutch-process cocoa powder
- 1 teaspoon baking soda
- ½ teaspoon salt
- ½ cup (120ml) vegetable oil
- 1 cup (240ml) buttermilk, room temperature
- 2 large eggs, room temperature
- 1 teaspoon white vinegar
- 2 teaspoons vanilla extract
- 2–3 tablespoons black gel food coloring
- 8 oz (226g) cream cheese, softened
- ½ cup (113g) unsalted butter, softened
- 4 cups (480g) powdered sugar, sifted
- 2 teaspoons vanilla extract (for frosting)
- Pinch of salt (for frosting)
- Black sanding sugar or black sprinkles (optional)
- Candy eyeballs (optional)
- Orange or purple sprinkles (optional)
Instructions
- Preheat your oven to 350°F (175°C). Line a 12-cup muffin tin with paper liners.
- In a large bowl, whisk together 2 cups all-purpose flour, 1 ½ cups sugar, ½ cup cocoa powder, 1 teaspoon baking soda, and ½ teaspoon salt until evenly distributed.
- In a separate bowl, whisk together ½ cup vegetable oil, 1 cup buttermilk, 2 eggs, 1 teaspoon white vinegar, and 2 teaspoons vanilla extract until smooth.
- Add 2-3 tablespoons black gel food coloring to the wet ingredients and whisk until combined. The mixture will look dark gray.
- Pour the wet ingredients into the dry ingredients and fold gently with a rubber spatula until just combined. Do not overmix; a few small lumps are fine.
- Divide the batter evenly among the 12 liners, filling each about ⅔ full.
- Bake for 18-22 minutes, or until a toothpick inserted into the center comes out clean or with a few moist crumbs.
- Cool in the pan for 5 minutes, then transfer to a wire rack to cool completely.
- While the cupcakes cool, make the frosting: In a large bowl, beat 8 oz softened cream cheese and ½ cup softened butter together until smooth and creamy, about 2 minutes.
- Add 4 cups sifted powdered sugar, one cup at a time, beating on low speed after each addition. Add 2 teaspoons vanilla extract and a pinch of salt. Increase speed to medium-high and beat for 2-3 minutes until light and fluffy.
- Once cupcakes are completely cool, pipe or spread the frosting. Decorate with black sanding sugar, candy eyeballs, or orange/purple sprinkles as desired.
Notes
Use room temperature ingredients for best results. Don’t skip the vinegar—it reacts with baking soda for a lighter crumb. Use gel food coloring, not liquid, for true black color. Let cupcakes cool completely before frosting to avoid melting. For gluten-free, use a 1:1 gluten-free flour blend. For dairy-free, use plant-based buttermilk and dairy-free cream cheese.
Nutrition
- Serving Size: 1 cupcake with frost
- Calories: 385
- Sugar: 40
- Sodium: 280
- Fat: 18
- Saturated Fat: 8
- Carbohydrates: 54
- Fiber: 2
- Protein: 5
Keywords: Halloween cupcakes, black velvet cupcakes, cream cheese frosting, spooky cupcakes, easy Halloween dessert