Love this? Save it for later!
Share the inspiration with your friends
This was supposed to be a regular Tuesday night dinner. I had grabbed a bag of frozen meatballs, some dinner rolls, and a jar of marinara—the kind of no-effort meal you throw together when the week has already won. But my four-year-old walked into the kitchen wearing a cape made from a dish towel, and suddenly, plain meatball sliders felt like a missed opportunity.
I mean, how often does a kitchen accident actually turn into something you keep making on purpose? I was already committed to the meatballs, but I had this block of mozzarella staring at me from the fridge. On a whim—honestly, more out of desperation than creativity—I sliced it into thin strips and laid them across the tops of the meatballs like bandages. I stuck two tiny black sesame seeds on for eyes. My kid gasped like I had just performed actual magic.
That first batch was messy. The cheese slid off. The eyes sank into the sauce. But when I pulled them out of the oven, they looked ridiculous and wonderful—like tiny mummies that had escaped from a cartoon tomb. Maybe you’ve been there, standing over a baking sheet, realizing you accidentally created something way more fun than what you planned. These mini mummy meatball sliders became our official Halloween dinner that night, and honestly, they’ve never left the rotation since.
They’re the kind of recipe that makes you feel like a hero without actually working for it. And let me tell you, that’s my favorite kind of recipe.
Why You’ll Love This Recipe
Let’s be real for a second—Halloween dinner can be a stressful mess. You’re trying to get costumes on, answer the door for trick-or-treaters, and somehow feed actual humans before the sugar rush begins. These easy mini mummy meatball sliders solve all of that without breaking a sweat.
- Quick & Easy : Comes together in under 30 minutes, which is basically a miracle on Halloween night. You can prep the meatballs while the kids are still arguing about their costumes.
- Simple Ingredients : No fancy grocery trips needed. Frozen meatballs, dinner rolls, mozzarella, and marinara—you probably have most of this already.
- Perfect for Halloween Parties : They look spooky and cute without requiring any artistic talent. I promise you don’t need to be a food stylist to make these work.
- Crowd-Pleaser : Kids love the mummy look, and adults love that they actually taste like real food—not just themed novelty snacks.
- Unbelievably Delicious : The combination of saucy meatballs, melted cheese, and soft buttery rolls is next-level comfort food. You’ll make these even when it’s not Halloween.
What makes this recipe different from other Halloween snacks is the texture. The cheese gets slightly crispy around the edges while staying gooey on top, and the meatballs soak up just enough sauce without getting soggy. I tested this with different cheeses—shredded, sliced, even string cheese—and the thin mozzarella strips give you that perfect mummy wrap look every single time.
This recipe isn’t just good—it’s the kind that makes you close your eyes after the first bite. It’s comfort food reimagined for the spookiest night of the year, and it turns a chaotic evening into something genuinely fun.
What Ingredients You Will Need
This recipe uses simple, mostly pantry-staple ingredients to deliver big flavor and maximum Halloween fun without the fuss. Here’s what you’ll need to grab:
For the Meatball Base
- Frozen fully cooked meatballs (24-30 mini meatballs or 12-15 regular-sized)—I prefer the homestyle or Italian-style variety for best flavor. The brand I use most often is Rosina or Aidells when I want something a little more premium.
- 1 jar (24 oz) marinara sauce—Rao’s is my go-to for that rich, slightly sweet tomato flavor, but any good-quality jarred sauce works. Look for one with minimal added sugar.
- 12 slider buns or dinner rolls—Sweet Hawaiian rolls are my secret weapon here. The slight sweetness balances the savory meatballs and tangy sauce perfectly. King’s Hawaiian is the classic choice.
- 2 tablespoons unsalted butter, melted—for brushing the tops of the rolls to get that golden, slightly crispy finish. Use dairy-free butter if needed.
- 1 teaspoon garlic powder—mixed into the melted butter for extra flavor. Fresh garlic works too, but it can burn under the broiler.
- ½ teaspoon dried oregano—optional, but adds a nice Italian-herb touch to the butter brush.
For the Mummy Wraps
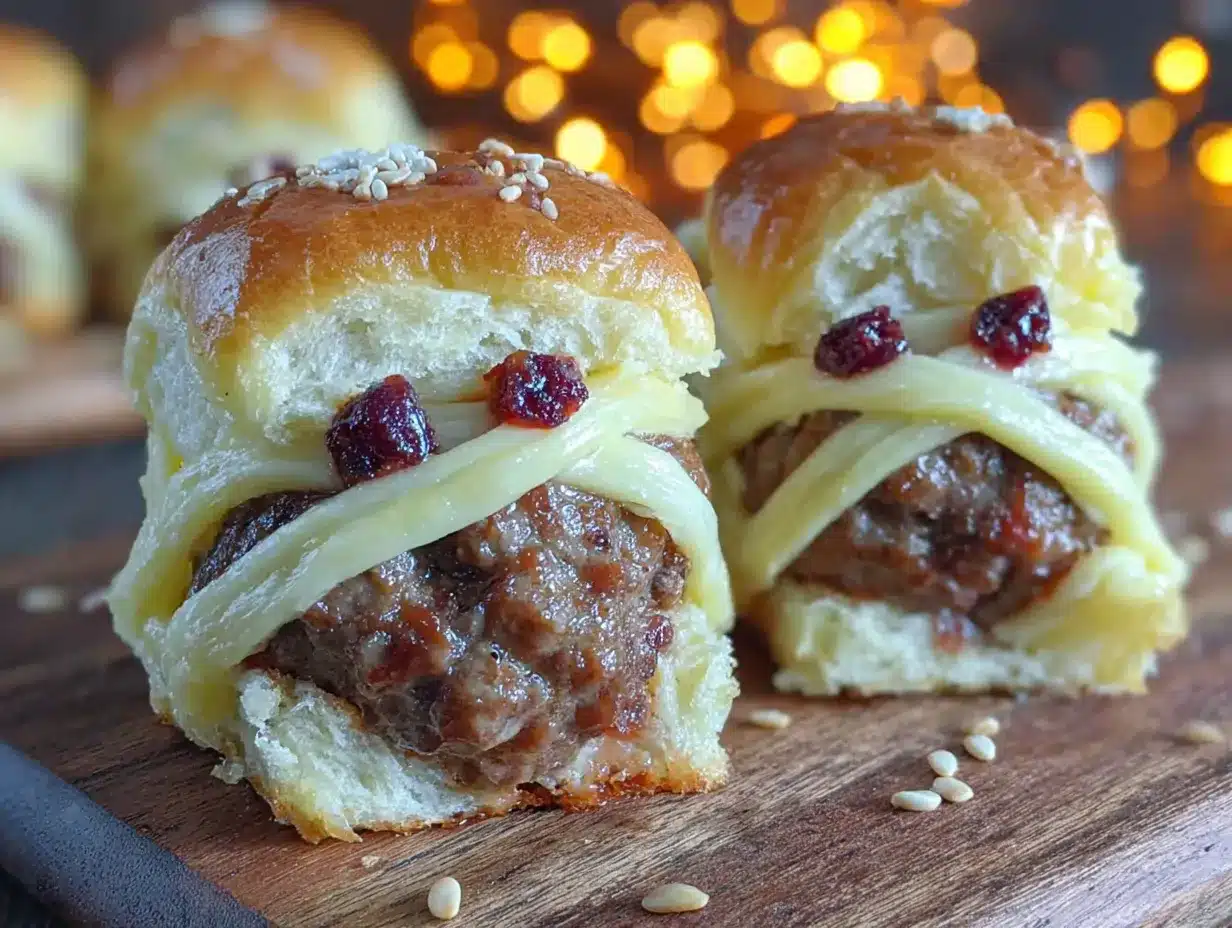
- 8 oz fresh mozzarella cheese—block-style, not the wet fresh mozzarella balls in water. You want the firmer block that slices cleanly into thin strips. I’ve tested this with part-skim and whole milk mozzarella, and whole milk gives you that perfect stretchy melt.
- Black sesame seeds or poppy seeds—for the mummy eyes. Black sesame seeds look more dramatic against the white cheese, but poppy seeds work in a pinch. You could also use tiny dots of black olive or nori cut into small circles.
Optional Add-Ons
- 1 teaspoon red pepper flakes—if you want a little heat in the sauce. My husband adds these to his portion.
- Fresh basil leaves—for garnish and a pop of green color against the white cheese mummies.
- Garlic aioli or spicy mayo—for dipping. Honestly, these are good enough on their own, but a little extra sauce never hurts.
If you’re feeding a crowd, double everything. These disappear fast, and I’ve learned the hard way that making just one batch leaves people fighting over the last slider.
Equipment Needed
You don’t need any fancy kitchen gadgets for these mummy sliders. Here’s what you’ll actually use:
- Baking sheet or casserole dish (9×13 works perfectly)—anything with a rim so the sauce doesn’t drip everywhere. I use a half-sheet pan for easier access to each slider.
- Small saucepan—for warming the marinara sauce and meatballs together. You can also do this in the microwave, but the stovetop gives you more control over the temperature.
- Cheese grater or sharp knife—for slicing the mozzarella into thin strips. I actually prefer a good chef’s knife for this because I can control the thickness better. The strips should be about ¼ inch thick and 2-3 inches long.
- Pastry brush—for brushing the melted butter onto the rolls. A silicone brush works great and is easy to clean. If you don’t have one, just use the back of a spoon.
- Small bowl—for mixing the melted butter with garlic powder and oregano.
- Toothpicks—optional, but helpful if you want to secure the cheese wraps before baking. I don’t always use them, but they can prevent cheese-slide disasters.
That’s it. No stand mixer, no food processor, no special Halloween-themed cookie cutters. I’ve made these in a tiny apartment kitchen and in a fully stocked test kitchen, and they turn out the same either way.
Preparation Method
Follow these steps, and you’ll have the cutest Halloween dinner on your table in under 30 minutes. I’ve included all the little details I wish someone had told me the first time I made these.
- Preheat your oven to 375°F (190°C). While it’s heating up, take the frozen meatballs out of the freezer and let them sit at room temperature for about 5 minutes. This helps them heat through more evenly later.
- Warm the meatballs and sauce. In a small saucepan over medium heat, combine the frozen meatballs and the entire jar of marinara sauce. Stir gently until the meatballs are coated. Bring to a simmer, then reduce the heat to low and let it cook for 8-10 minutes, stirring occasionally. The meatballs should be heated through and the sauce should be slightly thickened. If you’re in a rush, you can microwave the meatballs and sauce in a large bowl for 3-4 minutes, but the stovetop gives you better flavor.
- Prepare the mozzarella strips. While the meatballs are heating, slice your mozzarella block into thin strips. Aim for about ¼ inch thick and 2-3 inches long. You want them thin enough to look like bandages but thick enough that they don’t disappear completely when melted. I usually get about 2-3 strips per slider, depending on how “wrapped” I want the mummy to look. Don’t stress about making them perfect—mummies are supposed to look a little messy.
- Assemble the sliders. Place the bottom halves of the slider buns on your baking sheet, cut side up. Using a slotted spoon (to drain excess sauce), place one meatball on each bun bottom. Spoon a little extra sauce over each meatball—about a tablespoon—but don’t drown it. Now comes the fun part: lay the mozzarella strips across the meatballs in a crisscross pattern, leaving a small gap in the center for the eyes. Press the cheese gently against the meatball so it stays in place. Place the top buns on, but don’t press down too hard—you want the cheese to stay visible.
- Brush with garlic butter. In a small bowl, mix the melted butter with garlic powder and oregano. Brush this mixture over the tops of the slider buns. Don’t skip this step—it’s what gives the rolls that gorgeous golden color and that irresistible garlicky aroma. If you have any leftover butter, brush it around the edges of the baking sheet to prevent sticking.
- Bake for 10-12 minutes. Place the baking sheet in the preheated oven and bake until the cheese is melted and bubbly and the bun tops are golden brown. Keep an eye on them after the 8-minute mark—ovens vary, and you don’t want the cheese to slide off completely. The cheese should be soft and gooey but still holding its shape.
- Add the eyes. Remove the sliders from the oven and let them cool for 2-3 minutes. While they’re still warm, press two black sesame seeds into the exposed cheese in the center of each meatball. If the cheese has melted over the gap, use a toothpick to gently create a small opening. Work quickly while the cheese is still soft enough to hold the seeds.
- Serve immediately. These sliders are best eaten warm, when the cheese is still stretchy and the buns are soft. Transfer them to a serving platter and watch them disappear.
Cooking Tips & Techniques
I’ve made these mummy sliders probably a dozen times now, and I’ve learned a few things the hard way. Here are the tips that actually matter:
The cheese strip thickness is everything. Too thin, and they melt into a puddle before you even see them. Too thick, and they don’t wrap nicely around the meatball. I’ve found that slicing the mozzarella block into ¼-inch strips gives you the perfect balance. If you’re using pre-sliced mozzarella from the deli, that’s usually the right thickness—just cut the slices into strips yourself.
Don’t over-sauce the meatballs. I know it’s tempting to load up on marinara, but too much sauce makes the buns soggy and causes the cheese to slide off. Use a slotted spoon to transfer the meatballs, and only add about a tablespoon of extra sauce on top. The meatballs will release a little moisture as they bake anyway.
Let the sliders rest before adding the eyes. This was my biggest rookie mistake. I used to try to stick the sesame seeds in right out of the oven, and they’d either burn my fingers or sink into the molten cheese. Let the sliders sit for 2-3 minutes—the cheese will still be soft enough to hold the seeds, but you won’t burn yourself.
If the cheese slides off during baking, don’t panic. It happens. Just use a spatula to gently nudge it back into place while the sliders are still warm. Or you can embrace the chaos—my kids actually prefer the sliders where the cheese has gone rogue because they look “more like real monsters.”
Make-ahead tip: You can assemble the sliders up to the butter-brushing step and refrigerate them for up to 4 hours. Just add 2-3 minutes to the baking time if they’re going in cold. This is a lifesaver if you’re hosting a Halloween party and want to minimize last-minute stress.
Variations & Adaptations
One of the best things about this recipe is how flexible it is. Here are some variations I’ve tried and loved:
Vegetarian Mummy Sliders: Swap the meatballs for plant-based meatballs or even large portobello mushroom caps cut into chunks. I’ve used the Impossible brand meatballs, and they work beautifully—just make sure to brown them in a pan first for extra flavor. The cheese and sauce do most of the heavy lifting anyway.
Spicy Mummy Sliders: Add 1 teaspoon of red pepper flakes to the marinara sauce while it’s heating, or use a spicy arrabbiata sauce instead of regular marinara. For an extra kick, mix a little sriracha into the melted butter before brushing the buns. My husband insists this is the only way to make them.
Gluten-Free Option: Use gluten-free slider buns or even large gluten-free dinner rolls. I’ve tested this with Schar brand gluten-free rolls, and they hold up well. Just keep an eye on the baking time—gluten-free buns can dry out faster, so check them at the 8-minute mark.
Different Cheese Wraps: If you don’t have mozzarella, provolone works surprisingly well. It has a slightly sharper flavor and melts just as nicely. You can also use white cheddar for a bolder taste, though the melt won’t be as stretchy. For a dairy-free version, try Violife or Daiya mozzarella shreds pressed into strips—they won’t look as authentic, but they still taste great.
Air Fryer Method: Assemble the sliders as directed, then place them in the air fryer basket in a single layer. Cook at 350°F for 5-7 minutes, until the cheese is melted and the buns are golden. This is faster and gives you a slightly crispier bun. Just don’t overcrowd the basket—work in batches if needed.
Halloween-Themed Variations: Swap the sesame seed eyes for tiny candy eyeballs (the kind you find at baking supply stores) for an even cuter look. You can also use string cheese pulled into thin strips instead of sliced mozzarella—it gives a more “bandage” texture. My kids went absolutely wild for the candy eyeball version.
Serving & Storage Suggestions
These sliders are best served warm, straight from the oven, when the cheese is still stretchy and the buns are soft. I like to arrange them on a large wooden board or a Halloween-themed platter, with the mummy eyes facing outward so everyone can see them. A small bowl of extra marinara on the side for dipping never hurts.
What to serve with them: These sliders are pretty filling on their own, but if you’re feeding a crowd, they pair beautifully with a simple green salad dressed with balsamic vinaigrette. The acidity of the dressing cuts through the richness of the cheese and meatballs. For a full Halloween spread, add a bowl of roasted pumpkin seeds, some veggie sticks with ranch dip, and maybe a batch of spider web deviled eggs. I’ve also served these alongside a big bowl of tomato soup for a cozy, low-effort dinner.
Storage: If you have leftovers (unlikely, but possible), store them in an airtight container in the refrigerator for up to 3 days. The buns will soften slightly from the sauce, but they’re still delicious. To reheat, pop them in a 350°F oven for 5-7 minutes, or microwave them for 30-45 seconds. The oven method gives you a crisper bun, while the microwave is faster but softer.
Freezing: You can freeze the assembled but unbaked sliders for up to 2 months. Assemble them on a baking sheet, freeze until solid, then transfer to a freezer bag. When you’re ready to bake, add 5-7 minutes to the baking time and don’t thaw them first. I’ve done this for Halloween parties, and it’s a game-changer.
Flavor development: Honestly, these sliders are best the day they’re made. The buns stay soft, the cheese is perfectly melted, and the meatballs are at their juiciest. Leftovers are still good, but they lose that fresh-from-the-oven magic. If you’re making them for a party, try to time the baking so they come out right before serving.
Nutritional Information & Benefits
Let’s be honest—these are indulgent Halloween treats, not health food. But here’s a rough breakdown per slider (based on one slider with a standard meatball and one tablespoon of sauce):
- Calories: Approximately 280-320 calories per slider
- Protein: 14-16 grams (thanks to the meatballs and cheese)
- Carbohydrates: 22-26 grams (mostly from the bun)
- Fat: 14-18 grams (from the meatballs, cheese, and butter)
- Fiber: 1-2 grams (from the marinara sauce)
- Sodium: 600-800 mg (varies by meatball brand and sauce)
The mozzarella cheese provides a decent amount of calcium and protein, and the marinara sauce offers a small dose of lycopene (an antioxidant) from the tomatoes. If you use lean turkey meatballs instead of beef or pork, you can reduce the fat content by about 30%. I’ve also made these with chicken meatballs, and they’re lighter but still satisfying.
For anyone watching their carb intake, you can serve the meatballs and sauce in lettuce wraps instead of buns—just skip the butter brush and serve the cheese-wrapped meatballs on a bed of romaine. It’s not quite as fun, but it works.
Potential allergens: dairy (cheese, butter), gluten (buns), and sesame (seeds). Use the substitutions mentioned in the variations section to accommodate dietary needs.
Conclusion
These easy mini mummy meatball sliders are proof that Halloween dinner doesn’t have to be complicated to be memorable. They came from a moment of kitchen chaos—a distracted mom, a bag of frozen meatballs, and a kid in a dish towel cape—and turned into something our family looks forward to every October.
What I love most about this recipe is how forgiving it is. The cheese might slide, the eyes might sink, and the buns might get a little squished—but they’ll still taste amazing, and the kids will still think you’re a wizard. That’s the magic of Halloween, honestly. It’s not about perfection. It’s about making something fun out of whatever you have on hand.
I’d love to hear how your mummy sliders turn out! Did you use candy eyeballs instead of sesame seeds? Did your kids help wrap the cheese? Drop a comment below and share your version—I’m always looking for new ideas to try. And if you make these for a Halloween party, tag me in your photos. There’s nothing better than seeing a tray of silly, delicious mummies making people smile.
Happy Halloween, and happy cooking!
Frequently Asked Questions
Can I use homemade meatballs instead of frozen?
Absolutely! Homemade meatballs work great in this recipe. Just make sure they’re fully cooked before assembling the sliders. I recommend baking them at 375°F for 15-18 minutes before adding them to the sauce. This extra step ensures they hold their shape and don’t fall apart when you wrap them in cheese.
How do I prevent the cheese from sliding off during baking?
This is the most common issue, and I’ve found two solutions that work. First, don’t over-sauce the meatballs—too much liquid makes the cheese slip. Second, press the cheese strips gently into the meatball so they stick. If you’re still having trouble, use a toothpick to secure the cheese to the bun until it melts enough to hold itself in place. Remove the toothpicks before serving.
Can I make these ahead of time for a party?
Yes! You can assemble the sliders up to 4 hours in advance and keep them covered in the refrigerator. Wait to brush the butter on until right before baking, or the buns will get soggy. When you’re ready to serve, add 2-3 minutes to the baking time since they’re starting from cold. I’ve done this for multiple Halloween parties, and it saves so much stress.
What can I use instead of black sesame seeds for the eyes?
There are so many options! Poppy seeds work well and are easier to find. You can also use tiny dots of black olive, small pieces of nori (seaweed), or even miniature candy eyeballs from the baking aisle. My kids prefer the candy eyeballs because they look cuter, but the sesame seeds give a more authentic mummy look. Just make sure whatever you use is small enough to stay in place.
Are these sliders kid-friendly for non-Halloween occasions?
Honestly, yes. My kids ask for these year-round now. You can skip the mummy eyes and just call them “cheesy meatball sliders” if you want—they taste just as good without the Halloween theming. The cheese wraps add a fun texture, and the garlic butter buns are a hit with everyone. I’ve served them at birthday parties and backyard barbecues, and they always disappear fast.
Pin This Recipe!
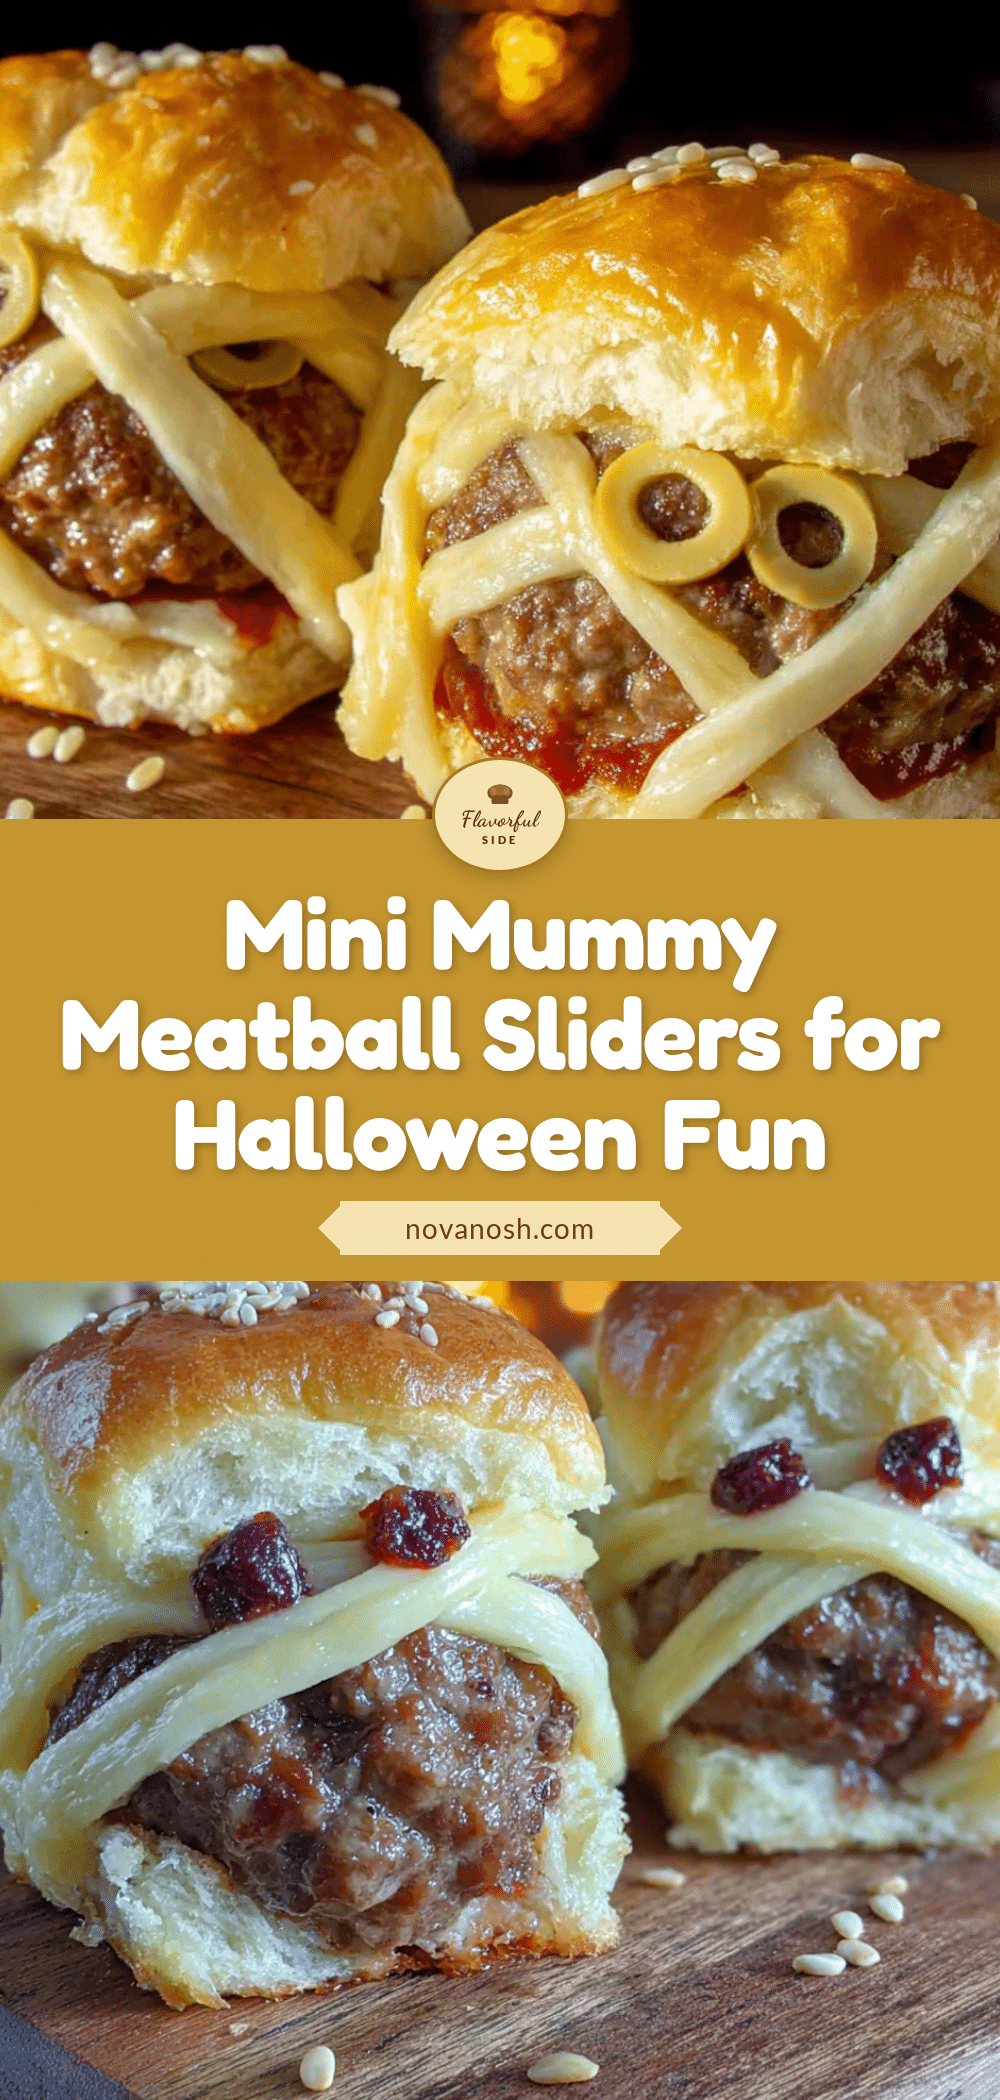
Easy Mini Mummy Meatball Sliders for Halloween

These easy mini mummy meatball sliders are the perfect Halloween dinner—quick, fun, and delicious. Made with frozen meatballs, marinara, mozzarella wraps, and garlic butter buns, they come together in under 30 minutes and are a guaranteed crowd-pleaser.
- Prep Time: 10 minutes
- Cook Time: 12 minutes
- Total Time: 22 minutes
- Yield: 12 sliders 1x
- Category: Main Course
- Cuisine: American
Ingredients
- 24–30 mini frozen fully cooked meatballs (or 12–15 regular-sized)
- 1 jar (24 oz) marinara sauce
- 12 slider buns or dinner rolls (e.g., King’s Hawaiian)
- 2 tablespoons unsalted butter, melted
- 1 teaspoon garlic powder
- ½ teaspoon dried oregano (optional)
- 8 oz fresh mozzarella cheese (block-style)
- Black sesame seeds or poppy seeds (for eyes)
- 1 teaspoon red pepper flakes (optional)
- Fresh basil leaves (optional, for garnish)
- Garlic aioli or spicy mayo (optional, for dipping)
Instructions
- Preheat your oven to 375°F (190°C). Let frozen meatballs sit at room temperature for about 5 minutes.
- In a small saucepan over medium heat, combine frozen meatballs and marinara sauce. Stir gently, bring to a simmer, then reduce heat to low and cook for 8-10 minutes, stirring occasionally, until meatballs are heated through and sauce thickens slightly.
- While meatballs heat, slice mozzarella block into thin strips about ¼ inch thick and 2-3 inches long.
- Place bottom halves of slider buns on a baking sheet, cut side up. Using a slotted spoon, place one meatball on each bun bottom. Spoon about 1 tablespoon of extra sauce over each meatball. Lay mozzarella strips across meatballs in a crisscross pattern, leaving a small gap in the center for eyes. Press cheese gently against meatball. Place top buns on without pressing down hard.
- In a small bowl, mix melted butter with garlic powder and oregano. Brush mixture over tops of slider buns.
- Bake for 10-12 minutes, until cheese is melted and bubbly and bun tops are golden brown.
- Remove from oven and let cool for 2-3 minutes. While still warm, press two black sesame seeds into the exposed cheese in the center of each meatball for eyes.
- Serve immediately.
Notes
For best results, don’t over-sauce the meatballs to prevent soggy buns and cheese slippage. Let sliders rest 2-3 minutes before adding eyes. You can assemble up to 4 hours ahead and refrigerate; add 2-3 minutes to baking time if starting cold. For a vegetarian version, use plant-based meatballs or portobello mushroom chunks.
Nutrition
- Serving Size: 1 slider
- Calories: 300
- Sugar: 6
- Sodium: 700
- Fat: 16
- Saturated Fat: 7
- Carbohydrates: 24
- Fiber: 1.5
- Protein: 15
Keywords: Halloween, meatball sliders, mummy, easy dinner, party food, kid-friendly, 30-minute meal


