Love this? Save it for later!
Share the inspiration with your friends
I was supposed to be making granola bars. That was the plan. I had the oats measured, the honey warming on the stove, and I was feeling pretty good about myself—like a real organized person who meal-preps on a Sunday afternoon. But then my phone rang, I got distracted talking to my sister about her dog’s weird new habit of eating socks, and I completely forgot about the honey. It boiled over, made a sticky mess on the stovetop, and by the time I hung up, I had zero desire to deal with that cleanup. So I just stood there, staring at my bowl of dry oats, feeling defeated. Honestly, I almost just threw it all in the trash and ordered takeout.
But then I spotted the jar of peanut butter in the pantry. And a container of protein powder I had bought on a whim. A little voice in my head said, “Just mush it all together and see what happens.” So I did. I mean, what did I have to lose? I grabbed a spoon, scooped out a big dollop of peanut butter, tossed in some protein powder, a handful of chocolate chips, and started mixing. The mixture was thick and sticky, and it smelled like a Reese’s cup. I rolled it into little balls, popped one in my mouth, and let me tell you—I actually laughed out loud. It was better than the granola bars would have been. Way better.
That was two years ago, and I have not stopped making these easy no-bake peanut butter protein energy balls since. They have saved me on frantic mornings when I am running late, on afternoons when the 3 PM slump hits hard, and on evenings when I need something sweet but don’t want to ruin my dinner. If you have ever stood in your kitchen hangry and overwhelmed, wondering what to eat that is quick and actually good for you—this recipe is for you. It is the happy accident that became a staple, and I am pretty sure it will become one for you too.
Why You’ll Love This Recipe
Let me be honest with you—I have tested a lot of energy ball recipes over the years. Some were too dry, some fell apart, and some just tasted like sawdust. These easy no-bake peanut butter protein energy balls are different. They are the ones I keep coming back to, and here is why.
- Ready in 5 Minutes : No oven, no stovetop, no complicated steps. Just mix, roll, and eat. This is the kind of recipe you can make while your coffee is brewing.
- Simple Ingredients : You probably have most of these in your pantry right now. No weird health food store items, no expensive superfood powders—just real, recognizable ingredients.
- Perfect for Busy Days : These are my go-to for hectic mornings, post-workout refueling, and afternoon slumps. They travel well, too. I have taken them on road trips, hiking trails, and even to the airport.
- Crowd-Pleaser : I have served these to kids, picky eaters, gym enthusiasts, and grandmas. Everyone loves them. They taste like dessert but fuel your body like a real snack.
- Unbelievably Delicious : The texture is soft and chewy, not dry or crumbly. The peanut butter and chocolate combo is next-level comfort food, but with protein and fiber to keep you full.
What makes this recipe different from all the others? It is the texture. I spent months tweaking the ratios to get that perfect balance—not too sticky, not too dry, just soft enough to roll but firm enough to hold their shape. Plus, I use a trick of warming the peanut butter slightly so it mixes in evenly. Trust me, these are not just another version. This is the best version.
These energy balls are the kind of snack that makes you close your eyes after the first bite. They are comfort food reimagined—healthier, faster, but with the same soul-soothing satisfaction. Perfect for impressing yourself on a busy Tuesday, or turning a simple snack into something you actually look forward to.
What Ingredients You Will Need
This recipe uses simple, wholesome ingredients to deliver bold flavor and satisfying texture without the fuss. Most of these are pantry staples, which means you can whip up a batch anytime the craving strikes.
For the Energy Balls
- 1 cup rolled oats (use certified gluten-free oats if needed) — These provide the base and chewy texture. I prefer old-fashioned rolled oats over quick oats because they hold up better and give a nicer bite.
- ½ cup natural peanut butter (creamy or crunchy, your choice) — This is the glue that holds everything together. I recommend using a brand like Justin’s or Smucker’s Natural for the best flavor without added sugar or hydrogenated oils. If your peanut butter is very dry, you may need to add a teaspoon of honey or oil.
- ¼ cup honey or maple syrup — For sweetness and binding. Maple syrup gives a slightly different flavor, but both work beautifully. If you are vegan, stick with maple syrup.
- ¼ cup vanilla protein powder (whey or plant-based) — This boosts the protein content and adds a subtle vanilla flavor. I have used Orgain and Vega protein powders with great results. If your protein powder is very sweet, you can reduce the honey slightly.
- ¼ cup dark chocolate chips (or mini chocolate chips) — Because everything is better with chocolate. I like using dark chocolate chips with at least 60% cacao for a richer taste and less sugar. Mini chips distribute more evenly.
- 2 tablespoons ground flaxseed or chia seeds (optional but recommended) — These add extra fiber, omega-3s, and help bind the mixture. I almost always add them because you cannot even taste them.
- Pinch of sea salt — This enhances the peanut butter flavor and balances the sweetness. Do not skip it—it makes a surprising difference.
Ingredient Selection Tips
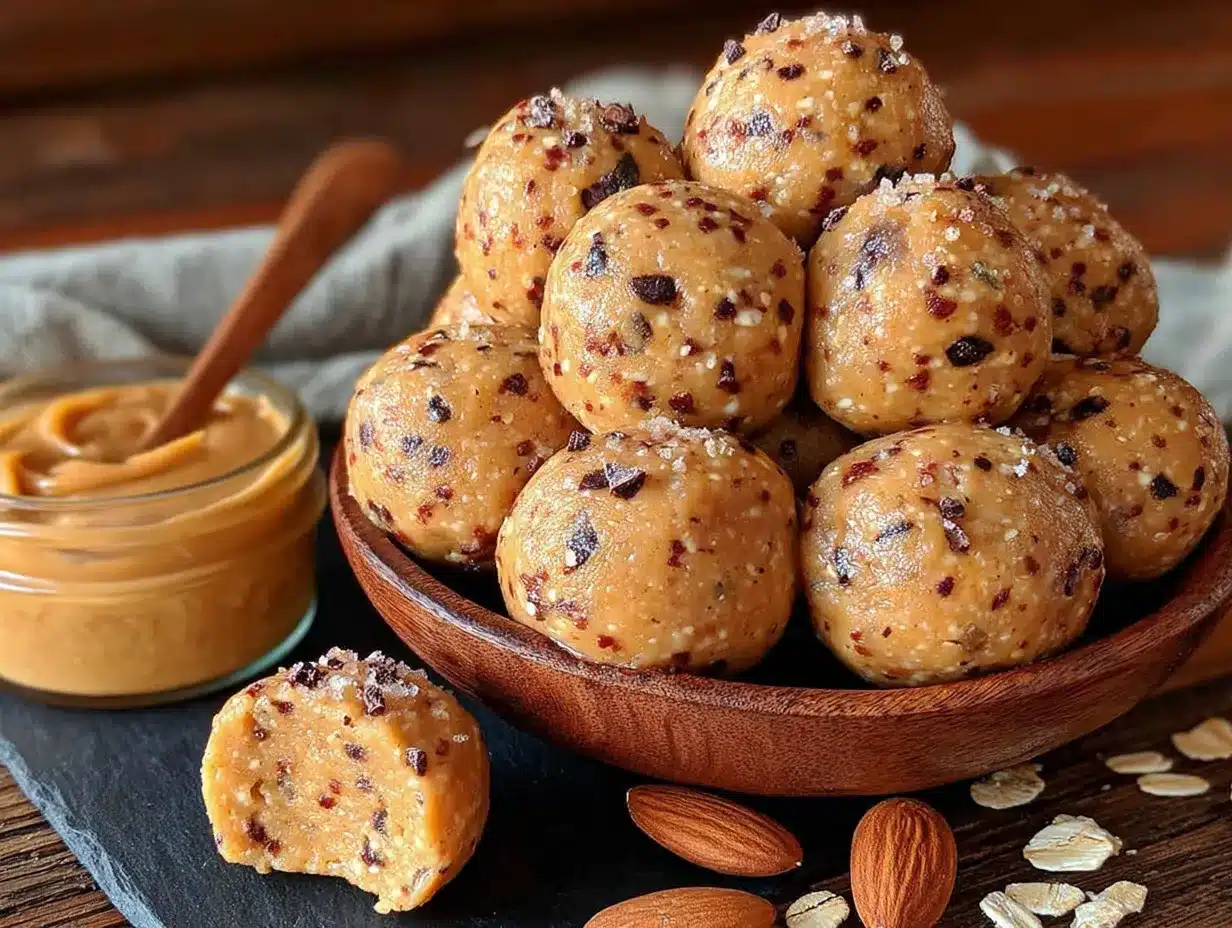
For the best texture, use natural peanut butter that is well-stirred and not too oily. If you use a brand that separates, make sure to mix it thoroughly before measuring. If your peanut butter is too stiff, microwave it for about 10 seconds to make it easier to combine.
For the oats, I recommend Bob’s Red Mill or Quaker old-fashioned rolled oats. Quick oats will work in a pinch, but the texture will be softer and less chewy.
If you are avoiding added sugars, you can substitute the honey with a sugar-free maple syrup alternative, but note that the texture may be slightly different. You might need to add an extra tablespoon of peanut butter to compensate.
Equipment Needed
- Large mixing bowl — Any medium-to-large bowl will work. I use a glass or stainless steel bowl because they are easy to clean and do not absorb odors.
- Measuring cups and spoons — For accurate measurements. Baking is a science, even for no-bake recipes.
- Rubber spatula or wooden spoon — For mixing. A rubber spatula is my favorite because it scrapes the sides cleanly.
- Small cookie scoop or tablespoon — For portioning the mixture into uniform balls. A #60 cookie scoop (about 1 tablespoon) works perfectly. If you do not have one, just use a regular tablespoon.
- Parchment paper or wax paper — For lining a baking sheet or plate so the balls do not stick while they chill.
- Baking sheet or large plate — To hold the balls while they set in the fridge.
- Air-tight container — For storage. A glass or BPA-free plastic container with a tight-fitting lid works best.
I have made these with just a bowl and a spoon many times, so do not stress if you are missing fancy equipment. That said, a cookie scoop makes the process much faster and gives you perfectly round balls every time. I bought mine for five dollars at a kitchen supply store, and it was worth every penny.
Preparation Method
- Warm the peanut butter slightly. This is a small step that makes a big difference. Place ½ cup of peanut butter in a microwave-safe bowl and microwave for 10 to 15 seconds, just until it is soft and stirrable. If you do not have a microwave, you can set the jar in a bowl of warm water for a few minutes. Warm peanut butter mixes much more evenly and prevents dry pockets in your energy balls.
- Combine the dry ingredients. In a large mixing bowl, add 1 cup of rolled oats, ¼ cup of protein powder, 2 tablespoons of ground flaxseed (if using), and a pinch of sea salt. Stir them together with your spatula or spoon until everything is evenly distributed. This ensures the protein powder does not clump up later.
- Add the wet ingredients. Pour the warmed peanut butter and ¼ cup of honey or maple syrup into the bowl with the dry ingredients. Stir everything together vigorously. At first, it will look like a crumbly mess—do not panic. Keep mixing, scraping the bottom and sides of the bowl. After about 30 seconds of stirring, the mixture will come together into a thick, cohesive dough. It should feel slightly sticky but not wet. If it seems too dry, add a teaspoon of honey or a splash of milk (dairy or plant-based). If it seems too sticky, add a tablespoon of oats.
- Fold in the chocolate chips. Sprinkle ¼ cup of chocolate chips over the dough and fold them in gently. Make sure they are evenly distributed so every ball gets a little chocolate in every bite. If you want, you can reserve a few chips to press into the tops of the balls for a prettier look.
- Chill the mixture (optional but recommended). If the dough feels too soft to roll, pop the bowl in the refrigerator for 10 to 15 minutes. This firms up the peanut butter and makes the balls easier to shape. I usually skip this step if I am in a hurry, but it helps if your kitchen is warm or your peanut butter was very soft.
- Roll into balls. Using a small cookie scoop or a tablespoon, scoop out portions of the dough. Roll each portion between your palms to form a smooth ball. You should get about 12 to 14 balls, depending on size. Place each ball on a parchment-lined baking sheet or plate as you go. If the dough sticks to your hands, lightly wet your palms with a little water or rub a drop of oil on them.
- Chill to set. Transfer the baking sheet to the refrigerator and let the energy balls chill for at least 30 minutes. This step is important—it allows them to firm up and hold their shape. If you are impatient like me, you can eat one right away, but they will be softer and a bit messier.
- Store properly. Once the balls are firm, transfer them to an air-tight container. Keep them in the refrigerator for up to one week, or freeze them for up to three months. I like to keep a small container in the fridge for easy grabbing and freeze the rest for later.
Cooking Tips & Techniques
I have made these easy no-bake peanut butter protein energy balls more times than I can count, and I have learned a few things along the way. Here are my best tips for perfect results every time.
Use room temperature ingredients. Cold peanut butter is hard to mix and creates uneven texture. Let it sit on the counter for 15 minutes before starting, or give it a quick warm-up in the microwave. This one change made my energy balls much more consistent.
Taste before you roll. Before shaping all the balls, taste a small amount of the dough. This is your chance to adjust. Need more sweetness? Add a drizzle of honey. Want more salt? Sprinkle in a pinch. Prefer extra chocolate? Toss in a few more chips. Once the balls are rolled, it is harder to fix.
Do not overmix. Stir just until everything is combined. Overmixing can make the oats break down too much and turn the texture mushy. You want some texture in the final balls.
Wet hands are your friend. If the dough sticks to your palms while rolling, simply wet your hands with a little water. This creates a barrier and makes the process much less frustrating. I learned this trick after a particularly sticky batch that left me covered in peanut butter.
Chill thoroughly. I know it is tempting to skip the chilling step, but it really makes a difference. The balls need that time to firm up so they hold their shape when you grab them. If you eat them too soon, they will be soft and may fall apart.
One mistake I made early on was using old oats. They were stale and gave the energy balls a weird, cardboard-like flavor. Always check the freshness of your oats—they should smell toasty and nutty, not musty. Trust me on this one.
Variations & Adaptations
One of the best things about this recipe is how easy it is to customize. Here are some of my favorite variations.
Chocolate Peanut Butter Version
Replace 2 tablespoons of the oats with unsweetened cocoa powder. This gives the balls a richer, more decadent chocolate flavor while keeping them healthy. It tastes like a fudgy brownie in snack form.
Vegan & Dairy-Free
Use maple syrup instead of honey, and choose a plant-based protein powder. Also, make sure your chocolate chips are dairy-free—brands like Enjoy Life and Hu Kitchen make excellent options. Everything else is already plant-based.
Nut-Free Alternative
Swap the peanut butter for sunflower seed butter or tahini. Sunflower seed butter works beautifully and gives a similar creamy texture. Note that the color will turn slightly greenish when mixed with the oats—this is a natural reaction and totally safe.
Add-In Ideas
Get creative with mix-ins! Try shredded coconut, chopped dried fruit like apricots or cranberries, hemp seeds for extra protein, or a teaspoon of cinnamon for warmth. I once added a tablespoon of instant coffee granules for a mocha twist, and it was amazing.
Lower Sugar Option
Reduce the honey or maple syrup to 3 tablespoons and add an extra tablespoon of peanut butter. You can also use unsweetened protein powder and sugar-free chocolate chips. The balls will be less sweet but still deliciously satisfying.
Serving & Storage Suggestions
These easy no-bake peanut butter protein energy balls are incredibly versatile when it comes to serving and storing.
Serving Temperature: I prefer them straight from the fridge—they are firm, cool, and perfectly chewy. They are also great at room temperature if you are packing them for a snack on the go. Just keep in mind that they soften as they warm up, so they may be a bit messier in warm weather.
Presentation Ideas: For a pretty presentation, press a few extra chocolate chips or a sprinkle of sea salt into the top of each ball before chilling. Arrange them on a wooden board or a small platter for parties. They also look lovely stacked in a mason jar tied with a ribbon—perfect for gift giving.
Complementary Pairings: Serve these alongside a cup of coffee for an afternoon pick-me-up, or with a glass of cold milk for a satisfying snack. They also pair beautifully with fresh fruit like apple slices or strawberries for a balanced mini-meal.
Storage Instructions: Store the energy balls in an air-tight container in the refrigerator for up to one week. They actually get better after a day or two as the flavors meld together. For longer storage, place them in a freezer-safe bag or container and freeze for up to three months. To thaw, simply transfer them to the fridge overnight or let them sit at room temperature for 10 minutes.
Pro Tip: I like to keep a small container in the fridge for immediate snacking and freeze the rest in a labeled bag. That way, I always have a healthy snack ready when I need it. Just grab and go!
Nutritional Information & Benefits
Here is an approximate nutritional breakdown for one energy ball (based on a recipe yielding 12 balls):
| Nutrient | Amount per Ball |
|---|---|
| Calories | 175 |
| Protein | 8g |
| Carbohydrates | 20g |
| Fiber | 3g |
| Sugar | 10g |
| Fat | 9g |
| Saturated Fat | 2g |
| Sodium | 85mg |
Note: Values are estimates and will vary based on specific brands and substitutions.
These energy balls pack a surprising nutritional punch. The rolled oats provide complex carbohydrates for sustained energy, while the peanut butter and protein powder deliver a solid dose of protein to keep you full and support muscle recovery. The flaxseed adds omega-3 fatty acids and extra fiber, which is great for digestion. Dark chocolate chips offer antioxidants and a little mood boost—because let us be honest, we all need that.
This recipe is naturally gluten-free if you use certified gluten-free oats, and it can easily be made vegan by swapping the honey for maple syrup. It is also free of refined sugars if you use a natural sweetener. The only potential allergen to note is peanuts, but as mentioned, you can easily substitute sunflower seed butter.
I love that these energy balls feel like a treat but actually nourish my body. They are proof that healthy eating does not have to be boring or complicated.
Conclusion
These easy no-bake peanut butter protein energy balls are the snack you did not know you needed. They are quick, simple, and made with ingredients you already have. Whether you are a busy parent, a student cramming for exams, or just someone who loves a good homemade snack, this recipe is for you.
I love that this recipe is forgiving—you can tweak it, swap ingredients, and make it your own. That is the beauty of no-bake energy balls. They are a canvas for your creativity. So go ahead, add some coconut, toss in dried cherries, or sprinkle in some cinnamon. Make them yours.
I would love to hear how yours turn out! Leave a comment below and let me know what variations you tried. Did you add something unexpected? Did your kids gobble them up? Share your stories—I read every single one. And if you loved this recipe, please share it with a friend who needs a quick, healthy snack in their life.
Happy rolling, friend. You have got this.
Frequently Asked Questions
Can I use quick oats instead of rolled oats?
Yes, you can use quick oats, but the texture will be softer and less chewy. Rolled oats give a better structure and a more satisfying bite. If you only have quick oats, reduce the honey slightly as they absorb moisture differently.
How long do these energy balls last?
Stored in an air-tight container in the refrigerator, they stay fresh for up to one week. In the freezer, they last for up to three months. I usually make a double batch and freeze half for later.
Can I make these without protein powder?
Absolutely! Simply replace the protein powder with an equal amount of rolled oats or almond flour. The texture will be slightly different, but they will still be delicious and satisfying.
Why are my energy balls too dry or too sticky?
If they are too dry, add a teaspoon of honey or a splash of milk until the dough comes together. If they are too sticky, add a tablespoon of oats or a teaspoon of peanut butter. The humidity and brand of ingredients can affect the consistency, so adjust as needed.
Can I use almond butter instead of peanut butter?
Yes, almond butter works wonderfully. It has a slightly milder flavor, so you may want to add an extra pinch of salt to balance the taste. The texture will be similar, though almond butter can be a bit oilier, so you might need an extra tablespoon of oats.
Pin This Recipe!

Easy No-Bake Peanut Butter Protein Energy Balls: Best 5-Minute Snack

These easy no-bake peanut butter protein energy balls are the perfect 5-minute snack for busy days. Made with simple pantry ingredients, they are soft, chewy, and taste like dessert while fueling your body with protein and fiber.
- Prep Time: 5 minutes
- Cook Time: 0 minutes
- Total Time: 35 minutes (includes 30 minutes chilling)
- Yield: 12-14 servings 1x
- Category: Snack
- Cuisine: American
Ingredients
- 1 cup rolled oats (use certified gluten-free oats if needed)
- ½ cup natural peanut butter (creamy or crunchy)
- ¼ cup honey or maple syrup
- ¼ cup vanilla protein powder (whey or plant-based)
- ¼ cup dark chocolate chips (or mini chocolate chips)
- 2 tablespoons ground flaxseed or chia seeds (optional but recommended)
- Pinch of sea salt
Instructions
- Warm the peanut butter slightly. Place ½ cup of peanut butter in a microwave-safe bowl and microwave for 10 to 15 seconds, just until it is soft and stirrable. If you do not have a microwave, set the jar in a bowl of warm water for a few minutes.
- Combine the dry ingredients. In a large mixing bowl, add 1 cup of rolled oats, ¼ cup of protein powder, 2 tablespoons of ground flaxseed (if using), and a pinch of sea salt. Stir together until evenly distributed.
- Add the wet ingredients. Pour the warmed peanut butter and ¼ cup of honey or maple syrup into the bowl with the dry ingredients. Stir vigorously until the mixture comes together into a thick, cohesive dough. If too dry, add a teaspoon of honey or a splash of milk. If too sticky, add a tablespoon of oats.
- Fold in the chocolate chips. Sprinkle ¼ cup of chocolate chips over the dough and fold them in gently until evenly distributed.
- Chill the mixture (optional but recommended). If the dough feels too soft to roll, refrigerate for 10 to 15 minutes to firm up.
- Roll into balls. Using a small cookie scoop or tablespoon, scoop out portions of dough and roll between your palms to form smooth balls. You should get about 12 to 14 balls. Place on a parchment-lined baking sheet or plate.
- Chill to set. Refrigerate the energy balls for at least 30 minutes to firm up and hold their shape.
- Store properly. Transfer to an air-tight container. Refrigerate for up to one week or freeze for up to three months.
Notes
For best texture, use natural peanut butter that is well-stirred and not too oily. Warm peanut butter slightly for easier mixing. If dough is too sticky, wet hands with water while rolling. Chilling is essential for firmness. Store in refrigerator for up to 1 week or freeze for up to 3 months.
Nutrition
- Serving Size: 1 energy ball
- Calories: 175
- Sugar: 10
- Sodium: 85
- Fat: 9
- Saturated Fat: 2
- Carbohydrates: 20
- Fiber: 3
- Protein: 8
Keywords: no-bake energy balls, peanut butter protein balls, healthy snack, 5-minute snack, gluten-free snack, vegan option, meal prep snack


