Love this? Save it for later!
Share the inspiration with your friends
I wasn’t expecting cooking advice from a plumber, but there I was, standing in my kitchen with a dripping sink, listening to Gary explain exactly how to make the perfect one-pan chicken and rice. He was supposed to be fixing the garbage disposal, but instead, he spent twenty minutes telling me about his “famous Tuesday night chicken.” Honestly, I was skeptical. A plumber giving me dinner advice while elbow-deep in my sink? But Gary had this way of describing food that made you hungry. He talked about the way the rice soaked up the chicken juices, the crispy bits that formed on the bottom of the pan, and how his wife always ate two servings. By the time he tightened the last pipe, I had the whole recipe scribbled on a napkin. I made it that very night, and let me tell you—Gary was right.
This Easy One-Pan Chicken Thigh and Rice Skillet has become my go-to for those nights when I need dinner on the table without a ton of fuss. It is the kind of meal that feels like a hug in a bowl, but it comes together with almost no effort. The chicken thighs get beautifully golden and crispy on the skin, while the rice cooks in all those savory drippings, soaking up every bit of flavor from the garlic, herbs, and broth. It is a complete meal in one pan—protein, carbs, and all the comfort you need. Maybe you have been there, staring at a raw chicken and wondering how to turn it into something memorable without dirtying every dish in your kitchen. This recipe is the answer. I keep coming back to it because it works every single time, and it makes me feel like I actually know what I am doing in the kitchen.
Why You’ll Love This Recipe
I have tested this recipe more times than I can count, tweaking the liquid ratio, adjusting the heat, and figuring out the exact timing to get that perfect rice texture. After all those trials, I can confidently say this is the best version. It is the kind of recipe that makes you look like a hero with minimal effort.
- Quick & Easy: This whole dish comes together in about 40 minutes, and most of that time is hands-off. You just sear the chicken, add the rice and liquid, and let the oven do the work. Perfect for a busy weeknight when you are short on time.
- Simple Ingredients: You likely have most of these ingredients in your pantry right now. Chicken thighs, rice, onions, garlic, and broth—nothing fancy, just real, wholesome food that delivers big flavor.
- Perfect for Busy Weeknights: This is the meal you make when you want something hearty and satisfying but do not feel like spending an hour at the stove. It is also great for meal prep since the leftovers reheat beautifully.
- Crowd-Pleaser: I have served this to picky eaters, to friends who claim they do not like chicken thighs, and to my own family on repeat. Every single time, the pan comes back empty. The rice is the star—fluffy, flavorful, and impossible to resist.
- Unbelievably Delicious: The magic here is in the one-pan cooking. The chicken releases its fat as it sears, which then flavors the rice as it cooks. The result is a dish where every grain of rice tastes like it has been simmering in chicken goodness. It is comfort food at its finest, without the heavy feeling afterward.
What makes this recipe different from the rest is the technique. Instead of just dumping everything in a pan and hoping for the best, we take a few extra minutes to sear the chicken first. That step is non-negotiable—it builds a foundation of flavor that makes the whole dish sing. Plus, using chicken thighs instead of breasts means the meat stays juicy and tender, even if you get distracted and leave it in the oven a few minutes too long. This is not just another chicken and rice recipe. It is your new best friend on a busy night.
What Ingredients You Will Need
This recipe keeps things simple, relying on a handful of pantry staples to create something truly satisfying. The ingredients work together to build layers of flavor without requiring a trip to a specialty grocery store.
- Bone-in, skin-on chicken thighs (4-6 thighs, about 2 pounds): I prefer bone-in thighs because they stay juicier during cooking and the skin gets wonderfully crispy. If you only have boneless, skinless thighs, they will work, but reduce the cooking time by about 10 minutes.
- Salt and black pepper: For seasoning the chicken. Be generous here—the salt helps crisp the skin and seasons the meat all the way through.
- Olive oil (2 tablespoons): For searing the chicken. You can also use avocado oil or another high-heat oil.
- Yellow onion (1 medium, diced): Adds sweetness and depth to the rice as it cooks. I like yellow onion here, but a white or sweet onion will also work.
- Garlic cloves (4 cloves, minced): Fresh garlic is key. I have used the jarred stuff in a pinch, but the flavor is not the same. Take the extra minute to mince fresh cloves.
- Long-grain white rice (1½ cups): Basmati or jasmine rice works beautifully here. Avoid short-grain rice, which can turn gummy. I have tested this with brown rice, and it needs more liquid and a longer cooking time—about 45 minutes covered.
- Chicken broth (2½ cups): Use low-sodium broth so you can control the salt level. If you only have regular broth, reduce the added salt in the recipe. I like Swanson or Kitchen Basics for consistent flavor.
- Dried thyme (1 teaspoon): Adds an earthy, slightly floral note that pairs perfectly with chicken. You can substitute dried oregano or rosemary.
- Paprika (1 teaspoon): I use sweet paprika for color and a mild, peppery sweetness. Smoked paprika will add a deeper, smokier flavor if that is your preference.
- Bay leaf (1): Adds a subtle herbal background note. Do not skip it—it makes a difference even if you cannot pinpoint the flavor.
- Fresh parsley (for garnish, optional): A sprinkle of fresh parsley adds a pop of color and freshness at the end.
Ingredient Tip: For the best texture, look for chicken thighs that are similar in size so they cook evenly. If your thighs are on the smaller side, check for doneness a few minutes early. I recommend using a meat thermometer to ensure the internal temperature reaches 165°F.
Equipment Needed
You do not need a lot of fancy equipment for this recipe, which is part of its charm. Here is what you will need:
- Large oven-safe skillet (12-inch): This is the star of the show. A cast-iron skillet works perfectly because it holds heat well and gives the chicken a beautiful sear. A stainless steel or oven-safe nonstick skillet will also work. If your skillet does not have an oven-safe handle, wrap the handle in a double layer of aluminum foil before placing it in the oven.
- Tongs: For flipping the chicken and stirring the rice. I prefer metal tongs with silicone tips so they do not scratch the pan.
- Cutting board and chef’s knife: For dicing the onion and mincing the garlic. A sharp knife makes this step quick and easy.
- Measuring cups and spoons: For accurate measurements. I have learned the hard way that eyeballing the rice and liquid ratio can lead to mushy or undercooked rice.
- Meat thermometer (optional but recommended): Takes the guesswork out of checking doneness. I use a simple instant-read thermometer, and it has saved many a dinner.
Budget-Friendly Tip: If you do not own an oven-safe skillet, you can sear the chicken in a regular skillet and then transfer everything to a baking dish before adding the rice and liquid. Just make sure the baking dish is large enough to hold everything in a single layer.
Preparation Method
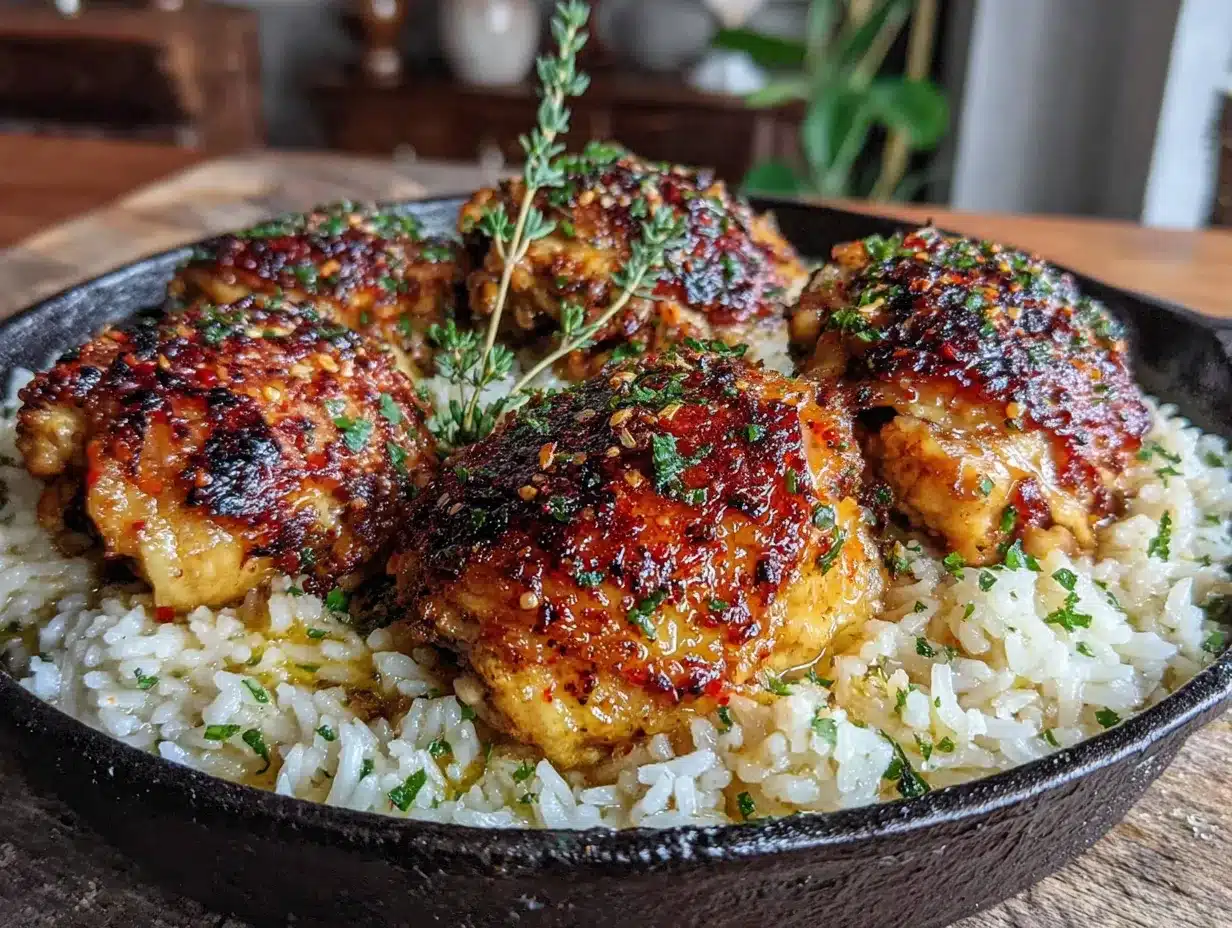
Let me walk you through this step by step. I have made this recipe enough times to know exactly where things can go wrong, so I will share those little tricks along the way.
- Preheat your oven to 375°F (190°C). While the oven heats, pat the chicken thighs dry with paper towels. This is important—dry skin means crispy skin. Season both sides generously with salt and pepper. Do not be shy here; the salt helps the skin render and crisp up.
- Heat the olive oil in your large oven-safe skillet over medium-high heat. Once the oil is shimmering (you will see it ripple slightly), place the chicken thighs skin-side down in the pan. Do not crowd them—they need space to brown. If your pan is small, work in batches. Let them cook undisturbed for 5-6 minutes. You will know they are ready to flip when the skin is deep golden brown and releases easily from the pan. Flip and cook for another 3-4 minutes on the other side. Transfer the chicken to a plate and set aside.
- Reduce the heat to medium. There should be about 2 tablespoons of rendered chicken fat left in the pan. If there is more, pour some off. If there is less, add a splash of olive oil. Add the diced onion and cook, stirring occasionally, for 3-4 minutes until softened and translucent. The onion will start to pick up the browned bits from the bottom of the pan, which is exactly what you want.
- Add the minced garlic and cook for 30 seconds, stirring constantly. Garlic burns quickly, so keep it moving. You will smell it become fragrant almost immediately.
- Add the rice, dried thyme, and paprika to the pan. Stir everything together for about 1 minute, letting the rice toast slightly in the fat. This step adds a nutty flavor to the rice and helps it stay separate after cooking.
- Pour in the chicken broth and add the bay leaf. Stir to combine, scraping up any remaining browned bits from the bottom of the pan. Bring the liquid to a gentle simmer. Taste the broth and adjust seasoning if needed—it should be well-seasoned since the rice will absorb it.
- Nestle the chicken thighs back into the pan, skin-side up, positioning them evenly over the rice. The rice should be mostly submerged in the liquid. If it looks dry, add a splash more broth.
- Transfer the skillet to the preheated oven and bake, uncovered, for 25-30 minutes. The rice should be tender and the liquid fully absorbed. The chicken skin should be crispy and the internal temperature of the thighs should reach 165°F. If the rice is still a bit firm after 30 minutes, cover the pan with foil and bake for another 5-10 minutes.
- Remove the skillet from the oven and let it rest for 5 minutes before serving. This resting time allows the rice to finish absorbing any remaining moisture and makes it easier to serve without it turning mushy. Remove the bay leaf and discard it.
- Fluff the rice with a fork and garnish with fresh parsley if desired. Serve the chicken thighs on top of the rice with any pan juices spooned over.
Pro Tip: If your rice is perfectly cooked but the chicken skin is not as crispy as you would like, pop the skillet under the broiler for 1-2 minutes after baking. Watch it closely so the skin does not burn.
Cooking Tips & Techniques
I have made this recipe more times than I care to count, and I have learned a few things the hard way. Let me save you some trouble.
Do not skip the searing step. I know it adds a few extra minutes, but that golden-brown skin is where all the flavor lives. If you rush this step, you will end up with pale, rubbery skin and rice that lacks depth. Give the chicken time to develop a deep crust.
Watch your liquid ratio. I once used too much broth because I got distracted, and the rice turned into porridge. The ratio of 1½ cups rice to 2½ cups liquid is tested and true. If you are using a different type of rice, adjust accordingly. Brown rice needs more liquid and a longer cook time, while parboiled rice needs slightly less.
Let the pan do the work. When you add the broth, make sure to scrape up all those browned bits from the bottom of the pan. That is pure flavor—the French call it “fond.” If you leave it stuck to the pan, you are missing out on the best part.
Check for doneness early. Ovens vary, and the size of your chicken thighs matters. Start checking the rice at the 25-minute mark. If the rice is still crunchy and the liquid is gone, add a few tablespoons of hot broth and continue baking covered.
Rest the pan before serving. This is the step I used to skip, and my rice was always a bit wet. Letting the pan sit for 5 minutes off the heat allows the rice to steam and firm up. It makes a noticeable difference in texture.
Variations & Adaptations
One of the things I love about this recipe is how flexible it is. Here are a few ways to change it up depending on what you have in your fridge or what you are craving.
Mediterranean Twist: Add a teaspoon of dried oregano along with the thyme, and stir in a handful of halved Kalamata olives and some chopped sun-dried tomatoes before baking. Top with crumbled feta cheese when serving. The briny olives and tangy feta take this in a completely different direction.
Spicy Version: If you like heat, add a diced jalapeño along with the onion and stir in ½ teaspoon of cayenne pepper or red pepper flakes with the paprika. You can also use andouille sausage instead of chicken for a Cajun-inspired meal. I tried this once on a whim, and it was fantastic.
Vegetable-Packed: Sauté a diced bell pepper and a chopped carrot along with the onion. You can also stir in a cup of frozen peas or green beans during the last 10 minutes of baking. This makes the dish more substantial and adds a pop of color.
Herb and Lemon: Add the zest of one lemon and a tablespoon of fresh lemon juice along with the broth. Stir in a handful of fresh dill or parsley before serving. The brightness of the lemon cuts through the richness of the chicken beautifully.
Dairy-Free: This recipe is naturally dairy-free as written. Just make sure your chicken broth does not contain any dairy ingredients.
Serving & Storage Suggestions
This dish is best served warm, straight from the skillet. The contrast between the crispy chicken skin and the tender, flavorful rice is hard to beat. I like to serve it with a simple green salad dressed with lemon vinaigrette to balance the richness. Steamed green beans or roasted broccoli also pair beautifully.
For a heartier meal, serve the chicken and rice with a side of crusty bread to soak up any remaining pan juices. A glass of crisp white wine, like a Sauvignon Blanc or a dry Riesling, complements the savory flavors without overwhelming them.
Storage: Leftovers keep well in an airtight container in the refrigerator for up to 4 days. The rice will absorb more liquid as it sits, so it might be a bit softer the next day, but the flavor only gets better. To reheat, place a portion in a skillet with a splash of broth or water, cover, and warm over medium-low heat until heated through. You can also microwave it, but the skin will lose its crispness.
Freezing: This recipe freezes surprisingly well. Let the dish cool completely, then transfer it to a freezer-safe container. It will keep for up to 3 months. To serve, thaw overnight in the refrigerator and reheat in a covered skillet over medium-low heat, adding a splash of broth if needed to loosen the rice.
Flavor Development: Honestly, the leftovers might be even better than the fresh version. The flavors meld together overnight, and the rice becomes almost creamy. I have been known to make a double batch just so I can have leftovers for lunch the next day.
Nutritional Information & Benefits
This dish is a balanced meal in one pan, providing protein, carbohydrates, and healthy fats. Here is an approximate breakdown per serving (based on 4 servings):
- Calories: 520
- Protein: 32g
- Carbohydrates: 48g
- Fat: 22g
- Fiber: 1g
- Sodium: 680mg
Health Benefits: Chicken thighs are a good source of protein, iron, and B vitamins, which support energy metabolism. The skin does add fat, but much of it renders out during cooking. If you are watching your fat intake, you can remove the skin before eating. The rice provides energy in the form of complex carbohydrates, and the onion and garlic offer antioxidants that support immune health.
Dietary Considerations: This recipe is naturally gluten-free (make sure your broth is certified gluten-free) and dairy-free. It is also nut-free and egg-free, making it suitable for many common dietary restrictions. For a lower-carb option, you can substitute cauliflower rice, but the cooking time and liquid ratio will need significant adjustment.
Personal Wellness Note: I love that this recipe feels indulgent but is made with whole, unprocessed ingredients. It is the kind of meal that satisfies without leaving you feeling heavy. For me, that is the sweet spot—food that tastes like comfort but is made from real, nourishing ingredients.
FAQs
Can I use boneless, skinless chicken thighs?
Yes, you can. Boneless, skinless thighs will cook faster, so reduce the baking time by about 10 minutes. They will not have the crispy skin, but the meat will still be tender and juicy. Check the internal temperature to ensure it reaches 165°F.
Why is my rice mushy or undercooked?
Mushy rice usually means too much liquid or overcooking. Stick to the 1½ cups rice to 2½ cups broth ratio. Undercooked rice means the liquid evaporated too quickly. If your oven runs hot, check the dish at the 25-minute mark and add a splash of broth if the rice is still hard.
Can I make this in a slow cooker or Instant Pot?
I have not tested this in a slow cooker, but for an Instant Pot, sear the chicken using the sauté function, then remove it. Sauté the onion and garlic, add the rice and broth, and place the chicken on top. Pressure cook on high for 10 minutes, then let the pressure release naturally for 5 minutes before quick releasing. The texture will be different, but it works in a pinch.
Can I use brown rice instead of white rice?
Yes, but you will need to adjust the liquid and cooking time. Use 2¾ cups of broth for 1½ cups of brown rice, and bake for 45-50 minutes covered with foil. Check for doneness and add more liquid if needed. The texture will be chewier than white rice.
How do I get the chicken skin extra crispy?
Pat the chicken thighs very dry before seasoning. Do not move them while searing—let them form a crust. After baking, if the skin is not as crispy as you would like, place the skillet under the broiler for 1-2 minutes. Keep a close eye on it to prevent burning.
Conclusion
This Easy One-Pan Chicken Thigh and Rice Skillet is the kind of recipe that makes you feel like you have it all together, even on the busiest nights. It is simple enough for a Tuesday, but impressive enough to serve to company. The chicken is juicy, the rice is flavorful, and the whole thing comes together in one pan with minimal cleanup. Honestly, what more could you ask for?
I love this recipe because it reminds me that good food does not have to be complicated. Sometimes the best meals come from a few humble ingredients, cooked with a little patience and a lot of love. Whether you are cooking for your family, meal prepping for the week, or just craving something warm and comforting, this dish delivers every single time.
I would love to hear how this turns out for you. Did you add your own twist? Did the rice come out perfect? Let me know in the comments below, and do not forget to share this recipe with someone who needs a little comfort in their life. Happy cooking!
Pin This Recipe!
Easy One-Pan Chicken Thigh and Rice Skillet Recipe

This Easy One-Pan Chicken Thigh and Rice Skillet is a comforting, flavorful meal that comes together in about 40 minutes with minimal cleanup. Juicy, crispy-skinned chicken thighs are baked on top of perfectly seasoned rice that absorbs all the savory drippings.
- Prep Time: 10 minutes
- Cook Time: 30 minutes
- Total Time: 40 minutes
- Yield: 4 servings 1x
- Category: Main Course
- Cuisine: American
Ingredients
- 4–6 bone-in, skin-on chicken thighs (about 2 pounds)
- Salt and black pepper, to taste
- 2 tablespoons olive oil
- 1 medium yellow onion, diced
- 4 cloves garlic, minced
- 1½ cups long-grain white rice (such as basmati or jasmine)
- 2½ cups low-sodium chicken broth
- 1 teaspoon dried thyme
- 1 teaspoon paprika (sweet or smoked)
- 1 bay leaf
- Fresh parsley, for garnish (optional)
Instructions
- Preheat your oven to 375°F (190°C). Pat the chicken thighs dry with paper towels and season both sides generously with salt and pepper.
- Heat the olive oil in a large oven-safe skillet (12-inch) over medium-high heat. Once the oil is shimmering, place the chicken thighs skin-side down in the pan. Cook undisturbed for 5-6 minutes until the skin is deep golden brown. Flip and cook for another 3-4 minutes. Transfer the chicken to a plate and set aside.
- Reduce the heat to medium. If needed, pour off excess fat, leaving about 2 tablespoons in the pan. Add the diced onion and cook, stirring occasionally, for 3-4 minutes until softened and translucent.
- Add the minced garlic and cook for 30 seconds, stirring constantly.
- Add the rice, dried thyme, and paprika to the pan. Stir for about 1 minute to toast the rice slightly.
- Pour in the chicken broth and add the bay leaf. Stir to combine, scraping up any browned bits from the bottom of the pan. Bring to a gentle simmer. Taste and adjust seasoning if needed.
- Nestle the chicken thighs back into the pan, skin-side up, positioning them evenly over the rice.
- Transfer the skillet to the preheated oven and bake, uncovered, for 25-30 minutes, until the rice is tender and the liquid is absorbed. The chicken should reach an internal temperature of 165°F. If the rice is still firm, cover with foil and bake for another 5-10 minutes.
- Remove the skillet from the oven and let it rest for 5 minutes. Remove and discard the bay leaf.
- Fluff the rice with a fork and garnish with fresh parsley if desired. Serve the chicken thighs on top of the rice with any pan juices spooned over.
Notes
For extra crispy skin, pat the chicken very dry before searing. If the skin isn’t crispy enough after baking, place the skillet under the broiler for 1-2 minutes. Let the pan rest for 5 minutes before serving to allow the rice to firm up. Leftovers keep in the refrigerator for up to 4 days and freeze well for up to 3 months.
Nutrition
- Serving Size: 1 serving (about 1 c
- Calories: 520
- Sugar: 2
- Sodium: 680
- Fat: 22
- Saturated Fat: 6
- Carbohydrates: 48
- Fiber: 1
- Protein: 32
Keywords: one-pan chicken, chicken thigh and rice, easy skillet dinner, weeknight dinner, one-pot meal, chicken and rice


