Love this? Save it for later!
Share the inspiration with your friends
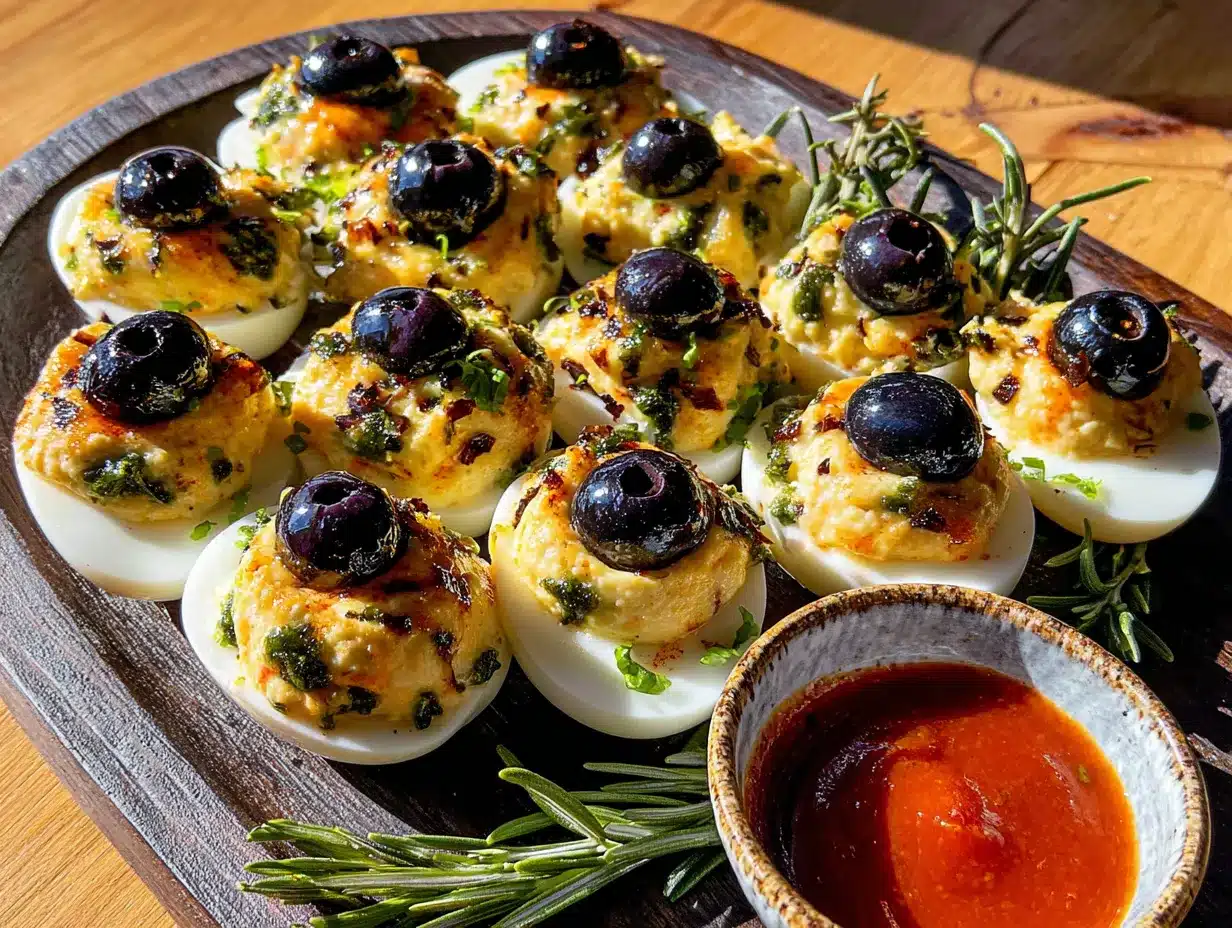
My neighbor, Sarah, wasn’t trying to impress anyone. I’d stopped by to borrow a ladder and the sight of these things sitting on her kitchen counter hit me before I even got through the back door. Honestly, I just stood there, ladder completely forgotten, staring at a platter of what looked like a dozen severed monster eyeballs. She was simultaneously wrestling with a toddler and a clogged coffee maker, totally nonchalant about the fact that she had created the most perfectly grotesque, hilarious, and delicious appetizer I had ever seen. “Oh, those,” she said, waving a hand. “Just deviled eggs for the kid’s school party.”
The casualness of it all was the whole point. She wasn’t showing off. She was just making deviled eggs, and maybe you’ve been there, but she had added one simple, genius twist that turned a classic potluck staple into the star of Halloween. I mean, I’ve spent hours on elaborate spooky desserts, only for them to get a polite nod. But these monster eyeballs? They caused a scene. People couldn’t stop laughing, taking pictures, and, you know, eating them. The combination of the creamy, tangy yolk filling and that one surprising, savory “pupil” in the middle was just brilliant. I practically begged for the recipe, and she scribbled it on a napkin while her kid tried to feed the dog a crayon. That napkin is now a prized possession, and this is why I keep making these Spooky Monster Eyeball Deviled Eggs every single Halloween. They are the perfect blend of creepy and delicious, and they are so much easier to make than they look.
Why You’ll Love This Recipe
These aren’t just your average deviled eggs with a bit of food coloring. This recipe has been tested through multiple Halloween parties and family gatherings, and it always delivers on both shock value and flavor. The secret is in the savory, briny surprise that forms the “pupil” of the eye, which perfectly complements the creamy yolk filling.
- Quick & Easy: These come together in under 30 minutes (not including egg boiling time), making them perfect for last-minute Halloween party prep or a fun afternoon activity with kids.
- Simple Ingredients: No fancy grocery trips or specialty stores needed. You likely already have everything in your kitchen except for the key “eyeball” ingredient, which is a common pantry staple.
- Perfect for Halloween: These are the ultimate spooky appetizer for Halloween parties, potlucks, school events, or even a fun movie night snack. They are guaranteed to be the most talked-about item on the table.
- Crowd-Pleaser: Even people who claim they don’t like deviled eggs will be won over by the fun presentation. Kids and adults alike get a kick out of them, and they disappear faster than any candy bowl.
- Unbelievably Delicious: The texture is perfectly creamy, and the flavor profile is the ultimate comfort food. The “eyeball” adds a burst of briny, savory goodness that makes this version next-level.
This isn’t just another deviled egg recipe. It’s your new secret weapon for Halloween. The special technique of creating a realistic-looking “bloodshot” effect with a simple sauce and a perfectly placed “pupil” makes all the difference. It’s the kind of appetizer that makes you close your eyes after the first bite—not because it’s spooky, but because it’s so good. It’s comfort food reimagined for a holiday, with the same soul-soothing satisfaction but a whole lot of creepy fun.
What Ingredients You Will Need
This recipe uses simple, classic deviled egg ingredients, plus a few key additions to transform them into spooky monster eyeballs. The magic is all in the presentation, so each component plays a crucial role in achieving that realistic, gory look.
For the Hard-Boiled Eggs
- 12 large eggs (look for eggs that are a week or two old for easier peeling)
- Water (enough to cover the eggs by an inch in a large pot)
- 1 tablespoon white vinegar (helps prevent the whites from leaking if an egg cracks during boiling)
For the Yolk Filling
- 6 tablespoons mayonnaise (I recommend Duke’s or Hellmann’s for a rich, tangy flavor)
- 2 teaspoons yellow mustard (adds a classic tang and a bit of color)
- 1 teaspoon white vinegar (or pickle juice for extra zest)
- 1/4 teaspoon salt (or to taste)
- 1/4 teaspoon black pepper (freshly ground is best)
- A few drops of red food coloring (gel or liquid, for the “bloodshot” effect)
- A few drops of blue or green food coloring (gel or liquid, for the “iris” effect)
For the Monster Eyeball Topping
- 24 pimento-stuffed green olives (this is the key ingredient! The olive forms the eye, and the pimento is the pupil. I recommend getting the large, firm ones for the best visual effect.)
- 2 tablespoons paprika (optional, for a dusty, “creepy” finish)
- 1 tablespoon sriracha or hot sauce (optional, for the “bloodshot” veins to give it a gory look. Mix with a little mayonnaise to create a thin, red sauce.)
Ingredient Selection Tips: For the best texture, use eggs that are not super fresh. Fresh eggs are harder to peel. The pimento-stuffed olives are non-negotiable for the “eyeball” look. Make sure to pat them dry with a paper towel before placing them on the filling so they don’t slide around. If you want to make this dairy-free, use a vegan mayonnaise and ensure your hot sauce is dairy-free.
Equipment Needed
You don’t need any fancy gadgets for this recipe, just a few basic kitchen tools that you probably already have. Having the right tools, however, can make the process much smoother and more enjoyable.
- Large pot: For boiling the eggs.
- Slotted spoon: For carefully lowering eggs into boiling water and removing them.
- Bowl of ice water: For shocking the eggs after boiling to stop the cooking process and make peeling easier.
- Sharp knife and cutting board: For halving the eggs and slicing the olives.
- Small mixing bowl: For combining the yolk filling.
- Fork or potato masher: For mashing the cooked yolks.
- Piping bag or small zip-top bag: For neatly filling the egg whites. A zip-top bag with a corner snipped off works perfectly and is easier to clean.
- Small spoon or piping tip: For creating the “bloodshot” veins on the filling.
- Serving platter: A large, flat platter works best for displaying your monster eyeballs.
Budget-Friendly Options: If you don’t have a piping bag, a simple zip-top bag is your best friend. You can also use a small spoon to carefully scoop the filling into the egg whites, though it won’t look as neat. For the “bloodshot” veins, a toothpick or the tip of a butter knife works just as well as a piping tip.
Preparation Method
Let’s get spooky! Follow these steps carefully, and you’ll have a platter of terrifyingly delicious monster eyeballs in no time. Take your time with the presentation details—it’s what makes this recipe so special.
- Perfectly Boil the Eggs (10-12 minutes): Place the eggs in a single layer in your large pot. Cover them with cold water by about an inch. Add the tablespoon of white vinegar. Bring the water to a full, rolling boil over high heat. Once boiling, cover the pot, turn off the heat, and let the eggs sit for exactly 10-12 minutes. For a firmer, more vibrant yolk (which is easier to work with), go for the full 12 minutes.
- Shock and Peel the Eggs (5 minutes): While the eggs are resting, prepare a large bowl of ice water. Using a slotted spoon, carefully transfer the eggs to the ice water bath. Let them sit for at least 5 minutes to cool completely. This stops the cooking process and makes the eggs much easier to peel. Gently tap the eggs on a hard surface to crack the shell all over, then peel under cold running water. The water helps separate the shell from the egg white.
- Halve and Prep the Whites (5 minutes): Using a sharp knife, carefully slice each egg in half lengthwise. Gently pop out the cooked yolks into your small mixing bowl. Arrange the hollowed-out egg white halves on your serving platter. If they wobble, you can trim a tiny, thin slice off the bottom of each white to create a flat, stable base.
- Make the “Bloodshot” Filling (10 minutes): To the bowl with the yolks, add the mayonnaise, yellow mustard, white vinegar, salt, and pepper. Use a fork to mash and mix everything together until it is completely smooth and creamy. There should be no lumps. Now, separate about 2 tablespoons of this mixture into a small bowl. To this small portion, add a few drops of red food coloring and mix well to create a bright red “blood” paste. Set this aside. To the remaining, larger portion of the filling, add a few drops of blue or green food coloring and mix until you have a pale, eerie “iris” color. Don’t overdo it—you want it to look slightly unnatural, like a monster’s eye.
- Pipe the “Iris” Filling (5 minutes): Spoon the green or blue “iris” filling into your piping bag or a zip-top bag. Snip off a small corner (about 1/4 inch). Carefully pipe a generous mound of the filling into each egg white half. You want it to be slightly domed, like a real eyeball.
- Create the “Pupil” and “Bloodshot” Veins (10 minutes): Take your pimento-stuffed olives and pat them dry. Gently press one olive, pimento-side facing out, into the center of each deviled egg’s “iris” filling. The pimento becomes the pupil. Now, take your small spoon or a toothpick and dip it into the red “blood” paste you made earlier. Carefully draw thin, jagged lines from the olive outwards across the filling, creating the look of “bloodshot” veins. Don’t make them perfect—the more irregular and messy, the more realistic and spooky they will look!
- Optional “Creepy” Finish: For an extra touch of Halloween horror, you can lightly dust the whites of the eggs with a little paprika. It gives them a dusty, ancient, and slightly decayed appearance. If you want a gory, wet look, you can use the tip of your finger to smear a tiny bit of the red “blood” paste on the edge of the egg white.
- Chill Before Serving (30 minutes minimum): Once all the eyeballs are assembled, cover the platter loosely with plastic wrap and refrigerate for at least 30 minutes. This allows the flavors to meld and the filling to firm up, making them easier to serve and eat.
Sensory Cues: Your filling should be so smooth it looks like frosting. When you pipe it, it should hold its shape without being too stiff. The “bloodshot” lines should look like thin, jagged cracks. The final platter should look like a collection of gory, hilarious monster eyes staring back at you.
Cooking Tips & Techniques
Here are some hard-learned lessons from my many batches of monster eyeballs. Trust me, a few small tweaks can make the difference between a good batch and a legendary one.
- The Egg Peeling Struggle is Real: I can’t stress this enough—use older eggs! Eggs that are a week or two old have a higher pH level, which makes the membrane separate from the shell more easily. If you only have fresh eggs, try steaming them instead of boiling. It often works better for fresh eggs. Also, peeling them under cold running water is a game-changer.
- Don’t Overcook the Yolks: Overcooked yolks get a greenish-gray ring around them and become crumbly and dry. This ruins the smooth texture of your filling. The 12-minute “off-heat” method is the most reliable way to get perfectly cooked, bright yellow yolks.
- Keep the “Blood” Paste Thick: The red “blood” paste needs to be thick, like a paste, not a liquid. If it’s too runny, it will just bleed into the “iris” filling and ruin the effect. If your paste is too thin, add a little more of the reserved yolk mixture to thicken it up.
- Chill the Piping Bag: If your kitchen is warm, the filling in your piping bag can get a bit soft. If you are making a large batch, pop the filled piping bag into the fridge for 10 minutes before you start piping. This will give you much cleaner, more defined mounds.
- Presentation is Everything: The beauty of this recipe is in the details. Take a moment to place each olive perfectly in the center. Make sure the pimento is facing directly out. The “bloodshot” veins should look angry and irregular. A well-arranged platter is half the fun.
Variations & Adaptations
This recipe is incredibly versatile. Once you have the basic technique down, you can really let your creativity run wild. Here are a few of my favorite ways to mix it up.
- Vegan “Eyeball” Version: For a plant-based option, use a vegan egg substitute like silken tofu or chickpea flour to create the “egg whites.” For the filling, use a vegan mayonnaise and a pinch of kala namak (black salt) to get that classic “eggy” flavor. The olive and pimento “pupil” works perfectly as is.
- Spicy Zombie Eyeballs: Add 1/2 teaspoon of cayenne pepper or a tablespoon of sriracha to your yolk filling for a spicy kick. You can also use pickled jalapeño slices instead of the pimento in the olive for a fiery “pupil.” This is my personal favorite variation!
- Alien Eyeballs: Swap the green or blue food coloring for a neon pink or purple. You can also use a different type of olive, like a kalamata olive, for a darker, more otherworldly “pupil.” The flavor will be a bit different, but just as delicious.
- Smoked Paprika Dusting: Instead of regular paprika, use smoked paprika for a deeper, more complex flavor. It gives the eggs a slightly smoky, “roasted” taste that pairs beautifully with the creamy filling and briny olive.
- Add a “Gore” Factor: For an extra gory look, you can make a simple “blood” sauce by mixing a little ketchup with a few drops of red food coloring and a tiny bit of water. Drizzle this over the finished platter or around the base of the eyeballs for a truly horrifying presentation.
Serving & Storage Suggestions
These monster eyeballs are best served cold, straight from the fridge. The firm, chilled filling is part of the experience. They are the perfect make-ahead appetizer for any Halloween gathering.
- Serving Temperature: Serve them directly from the refrigerator. They are most stable and flavorful when cold.
- Presentation: Arrange them on a large, dark-colored platter (black is perfect) to make the colors pop. You can scatter some plastic spider rings or fake eyeballs around the platter for an extra spooky touch. A bed of shredded lettuce or kale can also add a nice “creepy” green base.
- Complementary Dishes: These eyeballs are fantastic alongside other finger foods like Spooky Halloween Meatball Mummies, a bowl of Creamy Halloween Dip with pretzel “bones,” or a platter of Witch’s Brew Punch.
- Storage Instructions: Store any leftover deviled eggs in an airtight container in the refrigerator. They will keep well for up to 2 days. The texture of the filling may change slightly over time, but they will still be delicious.
- Reheating: Do not reheat these! They are meant to be served cold. If you have leftover filling or whites, you can store them separately and assemble them fresh the next day.
Nutritional Information & Benefits
While these are a treat, they do have some redeeming qualities! Eggs are a fantastic source of high-quality protein and essential nutrients.
- Estimated Values (per deviled egg half): Calories: ~60, Fat: 5g, Protein: 3g, Carbs: 1g.
- Key Ingredient Benefits: Eggs are a great source of choline (important for brain health) and Vitamin D. They also contain lutein and zeaxanthin, which are good for your eyes (ironic, right?).
- Dietary Considerations: This recipe is naturally low-carb, gluten-free, and keto-friendly. For a lower-fat option, you can use a light mayonnaise.
- Potential Allergens: This recipe contains eggs, which is a common allergen. The olives may contain trace amounts of other allergens depending on the processing facility.
- Personal Wellness Perspective: I love that this recipe lets you enjoy a classic party food with a fun, creative twist. It proves that you can have delicious, satisfying food that also makes you laugh. It’s a perfect example of how a little bit of creativity can turn a simple snack into a memorable experience.
Conclusion
Honestly, these Spooky Monster Eyeball Deviled Eggs are more than just a recipe—they are a Halloween tradition waiting to happen. They are so easy to make, yet they have that “wow” factor that makes people think you spent hours in the kitchen. The combination of the creamy, tangy filling and that surprising, briny pop from the olive is just perfect. I love that I can make them the night before a party and just pull them out of the fridge, feeling completely prepared and ready to impress.
I encourage you to take this recipe and make it your own. Add a bit more hot sauce, use different colored olives, or get creative with your “bloodshot” veins. The best part about cooking is making a recipe fit your own personality. So go ahead, get a little spooky in the kitchen, and make a batch of these for your next Halloween gathering. I promise you, they will be the life of the party.
Have you tried this recipe? I’d love to see your monster creations! Leave a comment below and tell me how they turned out, or share a photo on social media. Don’t forget to tag me so I can see your spooky masterpieces! Happy Halloween, and happy cooking!
Frequently Asked Questions
Can I make these monster eyeball deviled eggs a day ahead of time?
Absolutely! In fact, they are perfect for making ahead. Assemble the eggs completely up to 24 hours in advance. Store them covered in the refrigerator. The flavors will meld together beautifully, and they will be perfectly chilled and ready to serve.
My eggs are hard to peel. What am I doing wrong?
This is the most common problem! The key is to use eggs that are not super fresh. Eggs that are a week or two old peel much more easily. Also, shocking them in an ice water bath immediately after boiling is crucial. Peeling them under cold running water helps, too.
Can I use a different type of olive for the “pupil”?
Yes, you can! While pimento-stuffed green olives are the classic choice for the “eyeball” look, you can experiment. Kalamata olives will give you a dark, alien-like pupil. You could even use a caper or a slice of pickled pepper for a different texture and flavor.
How do I get the “bloodshot” veins to look realistic?
The trick is to use a thick, paste-like red mixture, not a liquid. A thin liquid will just bleed into the filling. Use a small, pointed tool like a toothpick or the tip of a butter knife to draw jagged, irregular lines from the center olive outwards. Don’t make them perfect—the messier, the better!
Can I freeze these deviled eggs?
I do not recommend freezing these. The texture of the mayonnaise-based filling will become watery and grainy upon thawing, and the egg whites will become rubbery. They are best made fresh and stored in the refrigerator for up to 2 days.
Pin This Recipe!
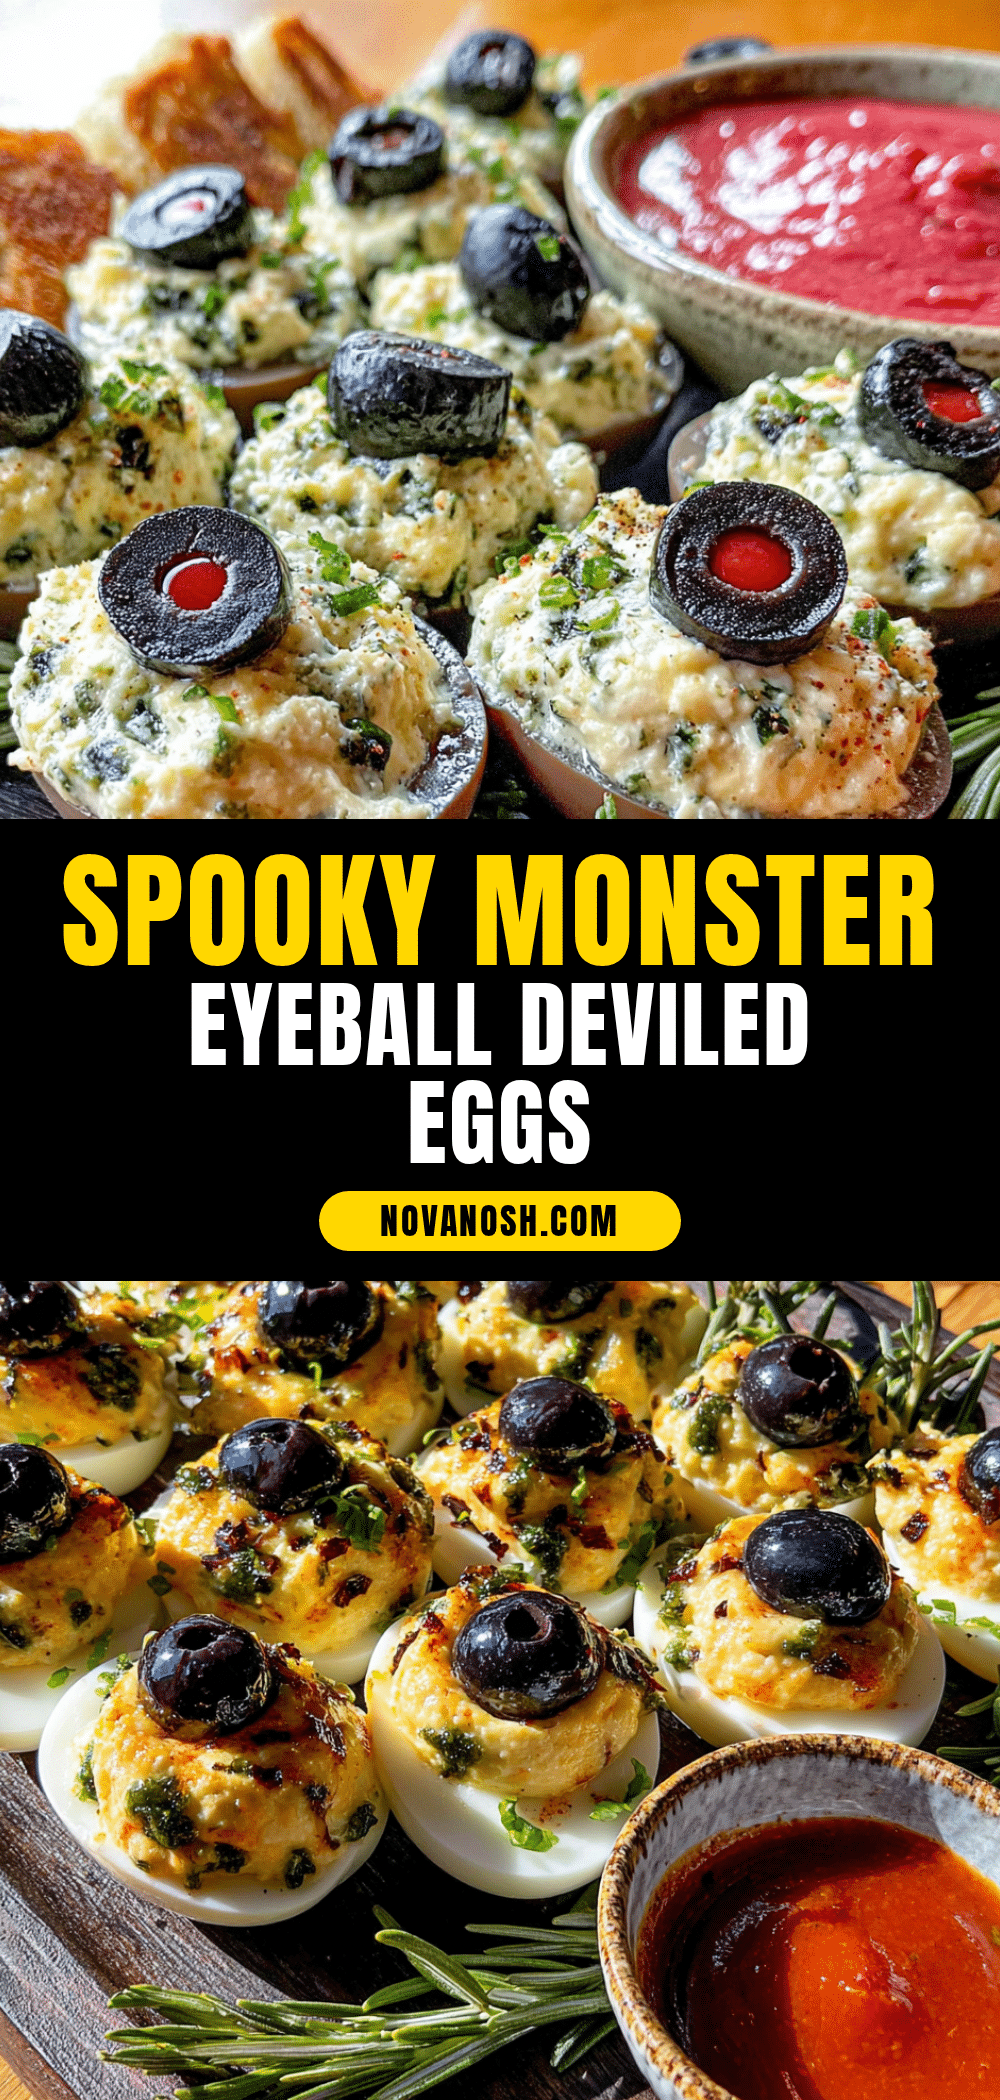
Easy Spooky Monster Eyeball Deviled Eggs for Halloween
These Spooky Monster Eyeball Deviled Eggs are the perfect blend of creepy and delicious for Halloween. With a creamy, tangy filling and a briny olive ‘pupil,’ they are easy to make and guaranteed to be the star of any party.
- Prep Time: 15 minutes
- Cook Time: 12 minutes
- Total Time: 27 minutes (plus 30 minutes chilling)
- Yield: 24 deviled egg halves (12 servings of 2 halves each) 1x
- Category: Appetizer
- Cuisine: American
Ingredients
- 12 large eggs (a week or two old for easier peeling)
- Water (enough to cover eggs by an inch)
- 1 tablespoon white vinegar (for boiling eggs)
- 6 tablespoons mayonnaise (Duke’s or Hellmann’s recommended)
- 2 teaspoons yellow mustard
- 1 teaspoon white vinegar (or pickle juice)
- 1/4 teaspoon salt
- 1/4 teaspoon black pepper (freshly ground)
- A few drops red food coloring (gel or liquid)
- A few drops blue or green food coloring (gel or liquid)
- 24 pimento-stuffed green olives (large, firm ones)
- 2 tablespoons paprika (optional, for dusty finish)
- 1 tablespoon sriracha or hot sauce (optional, for bloodshot veins, mixed with a little mayonnaise)
Instructions
- Perfectly Boil the Eggs (10-12 minutes): Place eggs in a single layer in a large pot. Cover with cold water by an inch. Add 1 tablespoon white vinegar. Bring to a full rolling boil over high heat. Once boiling, cover the pot, turn off the heat, and let eggs sit for exactly 10-12 minutes.
- Shock and Peel the Eggs (5 minutes): While eggs rest, prepare a large bowl of ice water. Using a slotted spoon, transfer eggs to the ice water bath. Let sit for at least 5 minutes to cool completely. Gently tap eggs to crack shells all over, then peel under cold running water.
- Halve and Prep the Whites (5 minutes): Carefully slice each egg in half lengthwise. Pop out cooked yolks into a small mixing bowl. Arrange hollowed-out egg white halves on a serving platter. Trim a tiny slice off the bottom of each white if they wobble.
- Make the ‘Bloodshot’ Filling (10 minutes): To the bowl with yolks, add mayonnaise, yellow mustard, white vinegar, salt, and pepper. Mash and mix until completely smooth and creamy. Separate about 2 tablespoons of this mixture into a small bowl. Add a few drops of red food coloring to this small portion and mix well to create a bright red ‘blood’ paste. To the remaining larger portion, add a few drops of blue or green food coloring and mix until you have a pale, eerie ‘iris’ color.
- Pipe the ‘Iris’ Filling (5 minutes): Spoon the green or blue ‘iris’ filling into a piping bag or zip-top bag. Snip off a small corner (about 1/4 inch). Carefully pipe a generous mound of filling into each egg white half, slightly domed like a real eyeball.
- Create the ‘Pupil’ and ‘Bloodshot’ Veins (10 minutes): Pat pimento-stuffed olives dry. Gently press one olive, pimento-side facing out, into the center of each deviled egg’s ‘iris’ filling. Using a small spoon or toothpick dipped in the red ‘blood’ paste, carefully draw thin, jagged lines from the olive outwards across the filling to create ‘bloodshot’ veins.
- Optional ‘Creepy’ Finish: Lightly dust the whites of the eggs with paprika for a dusty appearance. For a gory look, smear a tiny bit of red ‘blood’ paste on the edge of the egg white.
- Chill Before Serving (30 minutes minimum): Cover the platter loosely with plastic wrap and refrigerate for at least 30 minutes to allow flavors to meld and filling to firm up.
Notes
Use older eggs (a week or two old) for easier peeling. The pimento-stuffed olives are key for the eyeball look; pat them dry to prevent sliding. For the bloodshot veins, keep the red paste thick to avoid bleeding into the filling. These are best served cold and can be made up to 24 hours in advance.
Nutrition
- Serving Size: 2 deviled egg halves
- Calories: 120
- Sugar: 1
- Sodium: 300
- Fat: 10
- Saturated Fat: 2
- Carbohydrates: 2
- Protein: 6
Keywords: Halloween deviled eggs, monster eyeball deviled eggs, spooky appetizer, Halloween party food, deviled eggs recipe, easy Halloween recipe


