Love this? Save it for later!
Share the inspiration with your friends
My neighbor Mark asked why I couldn’t just dump a can of green enchilada sauce into my regular chicken chili. I started to explain why that wouldn’t work—the acidity, the texture clash, the flavor imbalance. Then I stopped. Honestly, I had no good reason except that I’d never seen it done before. So I shrugged and said, “Let’s find out.”
That was a Tuesday night in November, the kind of damp, gray evening where you just want something warm and forgiving in a bowl. Mark was over helping me fix a wobbly table leg (I’m not handy, let me tell you), and I was making my standard white chicken chili—the one I’d been making for years. He kept eyeing the can of green enchilada sauce on my counter, the one I’d bought for a different recipe and never used. “Just try it,” he said. “What’s the worst that happens? We order pizza.”
So I poured it in. And I stood there, stirring, fully prepared to be disappointed. The kitchen smelled incredible—like toasty cumin and tangy tomatillos and something warm that felt like a hug. I ladled us each a bowl, and that first bite? I mean, I actually laughed. It was exactly what I’d been trying to get right for years: creamy but not heavy, tangy but not sharp, with that slow heat that builds in the back of your throat. Mark didn’t say a word. He just kept eating.
Maybe you’ve been there—stuck in your cooking ways, convinced your method is the only method. I was so sure I knew better. But sometimes the best ideas come from someone who doesn’t overthink things. This cozy white chicken chili with green enchilada sauce is now the only version I make. It’s the one I bring to sick friends and potlucks and nights when I just need something to go right.
Why You’ll Love This Recipe
Let me tell you why this one’s different. I’ve tested this cozy white chicken chili with green enchilada sauce at least a dozen times—tweaking the amount of sauce, testing different beans, arguing with myself about the spice level. And every single time, it delivered. Here’s what makes it special:
- Quick & Easy: From fridge to table in about 40 minutes. That’s faster than delivery, and trust me, it tastes a whole lot better.
- Simple Ingredients: No hunting down fancy specialty items. Canned beans, rotisserie chicken, a jar of enchilada sauce—you probably have most of this already.
- Perfect for Cozy Nights: Cold weather, bad day, or just one of those evenings where you need something warm—this chili delivers every time.
- Crowd-Pleaser: I’ve served this to picky kids, spice-wary adults, and chili purists. Empty bowls all around.
- Unbelievably Delicious: The green enchilada sauce adds this tangy, slightly smoky depth that regular white chili just doesn’t have. It’s a game-changer.
What makes this recipe stand out from every other white chicken chili out there is that can of green enchilada sauce. It’s not just a shortcut—it’s a secret weapon. The tomatillos and green chiles add brightness and a gentle heat that melds perfectly with the creamy broth. Plus, I’ve perfected the balance so it’s not too thin or too thick, not too spicy or too bland. It’s just right.
This is the kind of recipe that makes you close your eyes after the first bite. It’s comfort food reimagined—faster, easier, but with the same soul-soothing satisfaction. Perfect for impressing guests without stress, or turning a simple Tuesday into something memorable.
What Ingredients You Will Need
This recipe uses simple, wholesome ingredients to deliver bold flavor and satisfying texture without the fuss. Most of these are pantry staples or easy to find at any grocery store.
- Cooked chicken, shredded – about 3 cups. Rotisserie chicken is my go-to here. It saves time and adds great flavor. You can also use leftover grilled chicken or poached chicken breasts.
- Green enchilada sauce – one 28-ounce can. I prefer Las Palmas or Hatch brand for the best flavor. Look for mild if you’re sensitive to heat, or medium if you want a little kick.
- Chicken broth – 2 cups. Low-sodium is best so you can control the salt. I use Swanson or Kitchen Basics.
- White beans – two 15-ounce cans, drained and rinsed. Great Northern or cannellini beans work perfectly. They hold their shape and add creaminess.
- Yellow onion – 1 medium, diced. About 1 cup. Sweet or yellow onion gives the best base flavor.
- Garlic – 4 cloves, minced. Fresh garlic makes a difference here. Don’t use the jarred stuff if you can help it.
- Ground cumin – 2 teaspoons. This is the backbone spice. I use McCormick or Simply Organic.
- Dried oregano – 1 teaspoon. Mexican oregano if you have it, but regular works fine too.
- Chili powder – 1 teaspoon. Adds warmth without overpowering.
- Salt and black pepper – to taste. Start with 1 teaspoon salt and ½ teaspoon pepper, then adjust.
- Heavy cream – ½ cup. This adds that luxurious texture. You can substitute with half-and-half or full-fat coconut milk for a dairy-free option.
- Monterey Jack cheese – 1 cup, shredded. Stirred in at the end for creaminess. Pepper Jack works great if you want more heat.
- Fresh cilantro – ¼ cup, chopped, plus more for garnish. Don’t skip this—it brightens everything up.
- Lime juice – from 1 lime, about 2 tablespoons. Adds that final pop of acidity.
- Optional toppings: sliced avocado, sour cream, crushed tortilla chips, extra cheese, pickled jalapeños.
For substitutions: use canned chickpeas instead of white beans for a different texture. Swap the heavy cream with plain Greek yogurt stirred in at the end (just don’t boil it or it will curdle). If you’re gluten-free, double-check your enchilada sauce label—most are gluten-free, but some brands add flour.
Equipment Needed
You don’t need a fancy kitchen for this one. Here’s what you’ll need:
- Large Dutch oven or heavy-bottomed pot – 5 to 6 quarts. I use my Lodge enameled Dutch oven, but any large pot works. The key is even heat distribution.
- Wooden spoon or silicone spatula – for stirring. I prefer wood because it doesn’t scratch the pot.
- Chef’s knife and cutting board – for dicing the onion and mincing garlic. Nothing fancy needed.
- Measuring cups and spoons – for accuracy. I use stainless steel ones that last forever.
- Can opener – obviously. But if you have a good one, it makes the job easier.
- Ladle – for serving. A deep one works best.
- Citrus juicer or reamer – optional, but squeezing limes by hand can get messy. I use a simple wooden reamer I’ve had for years.
If you don’t have a Dutch oven, a large soup pot or even a deep skillet will work. Just watch the heat—thinner pots can scorch the bottom if you’re not careful. My first attempt at this recipe was in a cheap nonstick pot, and I had to scrape burnt bits off the bottom. Lesson learned. Invest in something heavy-bottomed if you make soup often.
Preparation Method
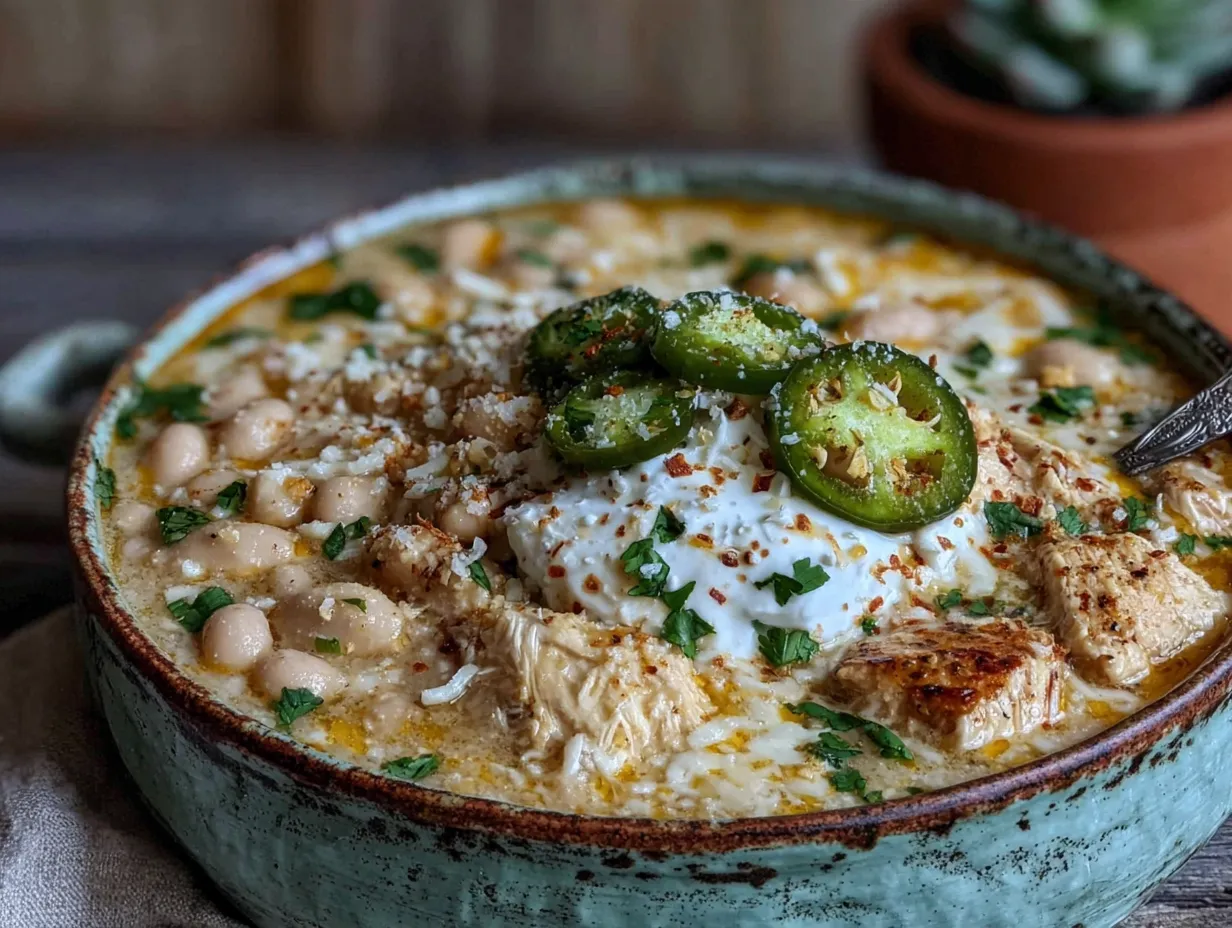
Let’s get cooking. This cozy white chicken chili with green enchilada sauce comes together in layers, and each step builds flavor.
- Prep your ingredients first. Dice the onion, mince the garlic, drain and rinse the beans, shred the chicken, and juice the lime. Having everything ready makes the process smooth. Trust me, you don’t want to be chopping onions while the pot is hot.
- Sauté the aromatics. Heat 1 tablespoon of olive oil or butter in your Dutch oven over medium heat. Add the diced onion and cook for 4-5 minutes until softened and translucent. Stir occasionally—you want them to sweat, not brown. Add the minced garlic and cook for 30 seconds until fragrant. Your kitchen should smell amazing at this point.
- Bloom the spices. Add the cumin, oregano, and chili powder to the pot. Stir constantly for about 30-45 seconds. This step wakes up the spices and deepens their flavor. Be careful not to burn them—if the pan is too hot, they’ll turn bitter.
- Add the liquids. Pour in the green enchilada sauce and chicken broth. Stir to combine, scraping up any browned bits from the bottom of the pot. Bring the mixture to a gentle simmer—you should see small bubbles, not a rolling boil.
- Add the beans and chicken. Stir in the drained white beans and shredded chicken. Let everything simmer together for 10-12 minutes. This allows the flavors to meld and the chicken to absorb all that tangy, spicy goodness.
- Stir in the cream and cheese. Reduce the heat to low. Pour in the heavy cream and stir. Add the shredded Monterey Jack cheese a handful at a time, stirring until each addition melts completely. The chili should look thick, creamy, and luscious.
- Finish with cilantro and lime. Turn off the heat. Stir in the chopped cilantro and fresh lime juice. Taste and adjust seasoning—you might want more salt, more lime, or a pinch more cumin.
- Let it rest. Let the chili sit for 5 minutes before serving. This allows the flavors to settle and the texture to thicken slightly. I know it’s hard to wait, but it’s worth it.
- Serve and garnish. Ladle into bowls and top with your favorite garnishes. I go for sliced avocado, a dollop of sour cream, crushed tortilla chips, and a few extra cilantro leaves. A squeeze of lime over the top never hurts.
A few notes: If the chili seems too thick, add a splash of chicken broth or water. If it’s too thin, let it simmer uncovered for a few more minutes. The chili will also thicken as it cools. Also, don’t skip the lime juice—it brightens everything and balances the richness of the cream and cheese.
Cooking Tips & Techniques
After making this cozy white chicken chili with green enchilada sauce more times than I can count, I’ve learned a few things the hard way. Here are my best tips:
Don’t boil after adding dairy. This is the number one mistake I made early on. Once you stir in the cream and cheese, keep the heat low. Boiling will cause the dairy to separate and turn grainy. You want a gentle warmth, not a vigorous bubble.
Toast your spices. That 30-second bloom step makes a huge difference. Cumin and oregano release their essential oils when heated, making them more aromatic and flavorful. I once skipped this step because I was in a hurry, and the chili tasted flat. Never again.
Use room temperature cream. Cold heavy cream can seize up when added to hot liquid. Let it sit on the counter for 10-15 minutes before stirring it in. Same goes for the cheese—shred it fresh and let it come to room temperature for smoother melting.
Shred your own cheese. Pre-shredded cheese has anti-caking agents that prevent it from melting smoothly. I know it’s convenient, but for this recipe, freshly shredded Monterey Jack makes a noticeable difference in texture. It’s worth the extra 2 minutes.
Layer your salt. Don’t add all the salt at once. The enchilada sauce and broth both contain salt, so season gradually. Taste after adding the cream and cheese, then adjust. You can always add more, but you can’t take it out.
Make it ahead for better flavor. Like most soups and chilis, this one tastes even better the next day. The flavors meld and deepen overnight. Make it a day ahead, refrigerate, and reheat gently. Just add a splash of broth when reheating, as it thickens considerably.
Variations & Adaptations
This recipe is forgiving and flexible. Here are some ways to make it your own:
Spicy Version: Use medium or hot green enchilada sauce, add a diced jalapeño with the onions, and swap Monterey Jack for Pepper Jack. Top with pickled jalapeños for extra heat. My brother-in-law requests this version every time he visits.
Creamy Vegan Option: Substitute the chicken with canned jackfruit (drained, shredded, and sautéed) or extra white beans. Use full-fat coconut milk instead of heavy cream, and use a vegan shredded cheese or nutritional yeast for that cheesy flavor. Vegetable broth works instead of chicken broth.
Slow Cooker Method: Sauté the onions and garlic on the stovetop first, then transfer everything except the cream, cheese, cilantro, and lime to the slow cooker. Cook on low for 4-6 hours or high for 2-3 hours. Stir in the dairy and finishings just before serving. This is my go-to for busy days.
Smoky Twist: Add ½ teaspoon of smoked paprika along with the cumin. Stir in a can of fire-roasted green chiles for extra depth. Top with crispy bacon bits. My neighbor Mark (who started all this) loves this version.
Thicker Chili: Mash half of the white beans before adding them to the pot. This releases their starch and naturally thickens the broth without adding flour or cornstarch. I do this when I want a heartier, stew-like consistency.
Lower-Carb Adaptation: Skip the beans entirely and double the chicken. Add diced zucchini or cauliflower florets for bulk. Use full-fat coconut milk for creaminess. It’s still delicious and satisfying.
Serving & Storage Suggestions
This cozy white chicken chili with green enchilada sauce is best served hot, straight from the pot, with a generous pile of toppings. I like to set up a little topping bar so everyone can customize their bowl. Here’s how I serve it:
Serving Temperature: Hot, but not boiling. Let it cool for 5 minutes after cooking so the flavors settle and you don’t burn your mouth. Trust me on this one—I’ve been impatient too many times.
Presentation: Ladle into wide, shallow bowls so the toppings have room to shine. A swirl of sour cream, a fan of avocado slices, a sprinkle of crushed tortilla chips, and a few cilantro leaves make it look restaurant-worthy.
Complementary Dishes: Serve with warm cornbread, crusty bread for dipping, or a simple side salad with lime vinaigrette. A cold Mexican beer or a salted margarita pairs beautifully. For a non-alcoholic option, try sparkling water with lime.
Storage: Let the chili cool completely before storing. Transfer to an airtight container and refrigerate for up to 4 days. The flavors actually improve after a day or two—the green enchilada sauce melds with the cream and spices beautifully.
Freezing: This chili freezes well, but leave out the cream and cheese if you plan to freeze it. Cool the chili completely, transfer to freezer-safe containers, and freeze for up to 3 months. When ready to eat, thaw in the refrigerator overnight, reheat gently, then stir in the cream and cheese at the end.
Reheating: Reheat on the stovetop over low heat, stirring occasionally. Add a splash of chicken broth or water if it’s too thick. You can also microwave individual portions in 30-second bursts, stirring between each. Don’t boil it—remember what I said about the dairy.
Flavor Development: This chili is one of those rare dishes that tastes better the next day. The green enchilada sauce mellows and melds, the spices deepen, and the chicken soaks up all that goodness. I often make it a day ahead on purpose.
Nutritional Information & Benefits
Here’s an approximate nutritional breakdown per serving (based on 6 servings, without optional toppings):
| Nutrient | Amount per Serving |
|---|---|
| Calories | 385 |
| Protein | 32g |
| Fat | 18g |
| Saturated Fat | 9g |
| Carbohydrates | 28g |
| Fiber | 7g |
| Sugar | 5g |
| Sodium | 890mg |
This chili is packed with protein from the chicken and beans, keeping you full and satisfied. White beans are rich in fiber and folate, while the green enchilada sauce provides a dose of vitamin C from the tomatillos. The cumin and oregano offer anti-inflammatory properties, and the cilantro helps with digestion.
For a lighter option, use half-and-half instead of heavy cream and reduce the cheese by half. You can also use low-sodium broth and no-salt-added beans to control the sodium content. This recipe is naturally gluten-free (check your enchilada sauce label) and can be made dairy-free with the substitutions mentioned above.
I love that this cozy white chicken chili with green enchilada sauce feels indulgent but is actually pretty balanced. It’s the kind of meal that nourishes you from the inside out—comfort food that doesn’t leave you feeling heavy or guilty.
Conclusion
So there it is—the recipe that started with a neighbor’s simple question and a can of green enchilada sauce I almost ignored. This cozy white chicken chili with green enchilada sauce has become my most-requested dish, the one I bring to new moms and sick friends and gatherings where I want to impress without stress. It’s proof that sometimes the best ideas come from letting go of what we think we know.
I hope you make this your own. Add more spice, swap the beans, pile on the toppings—there’s no wrong way to do it. That’s the beauty of a recipe like this. It’s forgiving, adaptable, and always delicious.
I’d love to hear how it turns out for you. Leave a comment below and let me know what toppings you used, or if you tried a fun variation. Share a photo if you’re feeling fancy—tag me so I can see your beautiful bowls. And if you have a recipe that changed because someone asked a simple question, I want to hear about that too. Sometimes the best stories start with “why not?”
Now go make some chili. Your cozy night in is waiting.
Frequently Asked Questions
Can I make this white chicken chili in an Instant Pot?
Absolutely. Use the sauté function to cook the onions and garlic, then add the enchilada sauce, broth, beans, and chicken. Pressure cook on high for 10 minutes, then quick release. Stir in the cream, cheese, cilantro, and lime juice before serving.
Is this recipe spicy?
It depends on the enchilada sauce you use. Mild green enchilada sauce gives a gentle warmth without heat. Medium or hot sauces will add more kick. You can also control the spice level by adjusting the chili powder or adding a diced jalapeño.
Can I use leftover turkey instead of chicken?
Yes! This is a fantastic way to use up leftover Thanksgiving turkey. Just shred the turkey and add it in place of chicken. The flavors work beautifully together.
Why did my chili turn out watery?
This usually happens if you added too much broth or didn’t let it simmer long enough. Let the chili simmer uncovered for 10-15 minutes to reduce and thicken. You can also mash some of the beans to release their starch as a natural thickener.
Can I double this recipe?
Absolutely. This recipe doubles beautifully. Just use a larger pot and increase the cooking time slightly. Leftovers freeze well, so making a big batch is always a good idea.
Pin This Recipe!

Easy White Chicken Chili with Green Enchilada Sauce

A creamy, tangy white chicken chili made with green enchilada sauce for a quick and cozy meal. Ready in about 40 minutes, this crowd-pleaser is perfect for busy weeknights.
- Prep Time: 10 minutes
- Cook Time: 30 minutes
- Total Time: 40 minutes
- Yield: 6 servings 1x
- Category: Main Course
- Cuisine: Mexican-American
Ingredients
- 3 cups cooked chicken, shredded (about 1 rotisserie chicken)
- 1 (28-ounce) can green enchilada sauce (mild or medium)
- 2 cups low-sodium chicken broth
- 2 (15-ounce) cans white beans (Great Northern or cannellini), drained and rinsed
- 1 medium yellow onion, diced (about 1 cup)
- 4 cloves garlic, minced
- 2 teaspoons ground cumin
- 1 teaspoon dried oregano (Mexican oregano preferred)
- 1 teaspoon chili powder
- 1 teaspoon salt, plus more to taste
- ½ teaspoon black pepper, plus more to taste
- ½ cup heavy cream (or half-and-half or full-fat coconut milk for dairy-free)
- 1 cup shredded Monterey Jack cheese (or Pepper Jack for more heat)
- ¼ cup fresh cilantro, chopped, plus more for garnish
- 2 tablespoons fresh lime juice (from 1 lime)
- Optional toppings: sliced avocado, sour cream, crushed tortilla chips, extra cheese, pickled jalapeños
Instructions
- Prep your ingredients first: dice the onion, mince the garlic, drain and rinse the beans, shred the chicken, and juice the lime.
- Heat 1 tablespoon olive oil or butter in a large Dutch oven or heavy-bottomed pot over medium heat. Add the diced onion and cook for 4-5 minutes until softened and translucent. Add the minced garlic and cook for 30 seconds until fragrant.
- Add the cumin, oregano, and chili powder to the pot. Stir constantly for 30-45 seconds to bloom the spices.
- Pour in the green enchilada sauce and chicken broth. Stir to combine, scraping up any browned bits from the bottom. Bring to a gentle simmer.
- Stir in the drained white beans and shredded chicken. Let simmer for 10-12 minutes to meld flavors.
- Reduce heat to low. Stir in the heavy cream, then add the shredded Monterey Jack cheese a handful at a time, stirring until each addition melts completely.
- Turn off the heat. Stir in the chopped cilantro and fresh lime juice. Taste and adjust seasoning with more salt, lime, or cumin as needed.
- Let the chili rest for 5 minutes before serving to allow flavors to settle and texture to thicken.
- Ladle into bowls and garnish with desired toppings.
Notes
Don’t boil after adding dairy to prevent separation. Use room temperature cream and freshly shredded cheese for best melting. For thicker chili, mash half the beans before adding. This chili tastes even better the next day.
Nutrition
- Serving Size: 1 bowl (about 1.5 cu
- Calories: 385
- Sugar: 5
- Sodium: 890
- Fat: 18
- Saturated Fat: 9
- Carbohydrates: 28
- Fiber: 7
- Protein: 32
Keywords: white chicken chili, green enchilada sauce, easy chili, quick dinner, cozy soup, chicken chili recipe


