Love this? Save it for later!
Share the inspiration with your friends
My sister asked why I couldn’t just brown the butter first, then mix everything in one bowl. I started to explain why that wouldn’t work — something about the sugar structure, the pumpkin moisture, the delicate balance of a snickerdoodle. Then I stopped. I mean, honestly, I had never actually tried it. I was just repeating what I’d read somewhere, probably on a baking forum at 2 AM while procrastinating. So I said, “You know what? Let’s find out.”
Three batches later, I was eating my words along with a cookie that had this incredible nutty depth I’d never managed to get before. The brown butter changed everything. It added this warmth that regular butter just can’t touch, and the pumpkin kept the centers impossibly soft while the cinnamon-sugar coating gave that classic crackly top. I’d been making snickerdoodles for years, but I’d never made them like this.
Look, I’m not someone who usually messes with tradition. A classic snickerdoodle is a beautiful thing, and I respect that. But this version? It’s the one I keep coming back to. The one I made four times in one week just to prove it wasn’t a fluke. (It wasn’t.) The brown butter adds a toasty, almost caramel-like flavor that pairs so perfectly with the pumpkin and warm spices that you’ll wonder why nobody thought of it sooner. Maybe you’ve been there — holding onto a recipe so tightly you forget to ask if it could be better. This is your permission to try something new.
Why You’ll Love This Recipe
These Perfect Brown Butter Pumpkin Snickerdoodle Cookies are everything you want in a fall cookie and nothing you don’t. They’re soft, they’re chewy, they have that signature crackly cinnamon-sugar top, and the brown butter adds a nutty complexity that makes them taste like you spent hours in the kitchen. (You didn’t. It takes about 25 minutes of active time.)
- Quick & Easy : From start to finish, you’re looking at about 30 minutes. The brown butter takes five minutes, the dough comes together in one bowl, and the chilling time is just 20 minutes. Perfect for when a cookie craving hits hard and fast.
- Simple Ingredients : No weird specialty items here. Butter, sugar, pumpkin puree, flour, eggs, and spices. You probably have most of this already, and if you don’t, a quick trip to the store will cover it.
- Perfect for Fall Gatherings : These cookies are the star of any Thanksgiving dessert table, Friendsgiving spread, or cozy weekend baking session. They also freeze beautifully, so you can make them ahead.
- Crowd-Pleaser : I’ve brought these to three different gatherings this fall, and every single time, someone asked for the recipe. Kids love them. Adults love them. Even my friend who “doesn’t like pumpkin desserts” ate three.
- Unbelievably Delicious : The brown butter adds a depth that regular butter can’t match. Combined with the pumpkin and warm spices, each bite has this layered flavor that’s both familiar and completely new. The texture is soft and tender with slightly crisp edges — the perfect cookie.
What makes these different from every other pumpkin snickerdoodle recipe out there? It’s the brown butter, hands down. Most recipes skip this step because it adds an extra few minutes, but those few minutes transform the entire cookie. The brown butter brings out the natural sweetness of the pumpkin, enhances the cinnamon and nutmeg, and adds a richness that makes these taste bakery-quality. This isn’t just another version of a pumpkin cookie. It’s the version that will ruin all other versions for you.
Honestly, this is the kind of cookie that makes you close your eyes after the first bite. It’s comfort food reimagined — familiar enough to feel like home, but special enough to feel like an occasion. Whether you’re baking for a crowd or just treating yourself on a quiet Tuesday, these cookies deliver.
What Ingredients You Will Need
This recipe uses simple, wholesome ingredients to deliver big flavor without the fuss. Most are pantry staples, and the ones that aren’t are easy to find at any grocery store. Here’s what you’ll need and why each one matters.
- Unsalted butter, 1 cup (2 sticks) : You’ll brown this, so unsalted is important. Salted butter can foam unpredictably and make it harder to see when the butter is properly browned. I use Kerrygold for its rich flavor, but any good-quality unsalted butter works.
- Granulated sugar, 1 cup : This gives the cookies their structure and sweetness. Don’t substitute with a liquid sweetener here — the sugar is crucial for the texture.
- Light brown sugar, ½ cup, packed : Adds moisture and a hint of molasses flavor that pairs beautifully with the brown butter and pumpkin. Dark brown sugar works too, but it will make the cookies slightly darker and more molasses-forward.
- Pumpkin puree, ½ cup : Not pumpkin pie filling! Make sure you’re getting 100% pure pumpkin puree. Libby’s is my go-to brand because it has a consistent moisture level. If using a different brand, you may need to blot the pumpkin with a paper towel to remove excess water.
- Large egg, 1 : Room temperature is best. It incorporates more easily into the brown butter and helps create a tender crumb.
- Vanilla extract, 2 teaspoons : Use pure vanilla extract if you can. It adds a warmth that complements the brown butter and spices. I’m partial to Nielsen-Massey, but store-brand pure vanilla works fine too.
- All-purpose flour, 2 cups : Spoon and level your flour. Scooping directly from the bag can pack in too much flour and make the cookies dry. If you want a slightly chewier texture, you can replace ¼ cup of the all-purpose flour with bread flour.
- Cream of tartar, 2 teaspoons : This is the secret to the snickerdoodle’s signature tangy flavor and soft texture. Don’t skip it! Baking powder is not a substitute here.
- Baking soda, 1 teaspoon : Helps the cookies spread and rise just enough. Make sure it’s fresh — if it’s been sitting in your pantry for over a year, it’s time to replace it.
- Salt, ½ teaspoon : Balances the sweetness and enhances the brown butter flavor. I use fine sea salt for baking.
- Ground cinnamon, 1½ teaspoons : Divided. You’ll use 1 teaspoon in the dough and ½ teaspoon in the coating. Fresh cinnamon makes a noticeable difference — I like Penzeys or Simply Organic.
- Ground nutmeg, ½ teaspoon : Freshly grated nutmeg is amazing here if you have it. It has a brighter, more aromatic flavor than pre-ground.
- Ground ginger, ¼ teaspoon : Adds a subtle warmth that complements the pumpkin without overpowering it. Optional, but highly recommended.
- Ground cloves, ⅛ teaspoon : Just a pinch. Cloves are potent, so a little goes a long way. This adds that “something extra” that makes people ask what’s in the cookies.
- For the coating : ¼ cup granulated sugar mixed with 2 teaspoons ground cinnamon. You can also add a pinch of nutmeg or cardamom for a twist.
Ingredient Selection Tips : When buying pumpkin puree, look for cans that feel heavy for their size — that means the pumpkin is dense and not watery. If your pumpkin puree looks watery when you open it, spread it on a paper towel-lined plate and blot gently before using. This prevents the cookies from spreading too much.
Substitution Guidance : For a dairy-free version, use plant-based butter. I’ve had good results with Miyoko’s European Style Cultured Vegan Butter. Just note that it browns slightly differently, so watch it carefully. For a gluten-free option, use a 1:1 gluten-free baking flour blend. I recommend Bob’s Red Mill 1-to-1 Baking Flour. The texture will be slightly more tender, but still delicious.
Equipment Needed
You don’t need a lot of fancy equipment for these cookies, which is part of their charm. Here’s what you’ll need:
- Large skillet or saucepan : For browning the butter. A light-colored pan is best so you can see the butter change color. I use a stainless steel skillet, but a non-stick pan works too.
- Mixing bowls : One large bowl for the dough and one small bowl for the cinnamon-sugar coating. Glass or stainless steel is fine.
- Whisk : For mixing the wet ingredients and the dry ingredients. A wooden spoon or silicone spatula works too, but a whisk helps incorporate everything smoothly.
- Rubber spatula : For scraping every last bit of brown butter from the pan. Trust me, you don’t want to waste any of that liquid gold.
- Measuring cups and spoons : Accurate measurements are key for baking. I prefer metal measuring cups for dry ingredients and glass for liquids.
- Baking sheets : Two large baking sheets. I like Nordic Ware aluminum sheets because they heat evenly and don’t warp.
- Parchment paper or silicone baking mats : Parchment paper is my preference because it’s disposable and the cookies slide right off. Silicone mats work too, but the cookies may spread slightly more.
- Cookie scoop : A 1.5-tablespoon scoop makes uniform cookies that bake evenly. If you don’t have one, use two spoons to portion the dough.
- Cooling rack : For cooling the cookies properly. A wire rack allows air to circulate so the bottoms don’t get soggy.
Budget-Friendly Options : If you don’t have a light-colored pan for browning butter, just watch it closely in whatever pan you have. A cookie scoop is nice but not essential — two spoons work perfectly fine. And if you don’t have a cooling rack, you can cool the cookies on the baking sheet, just slide them onto a plate after 5 minutes to prevent over-baking from the residual heat.
Preparation Method
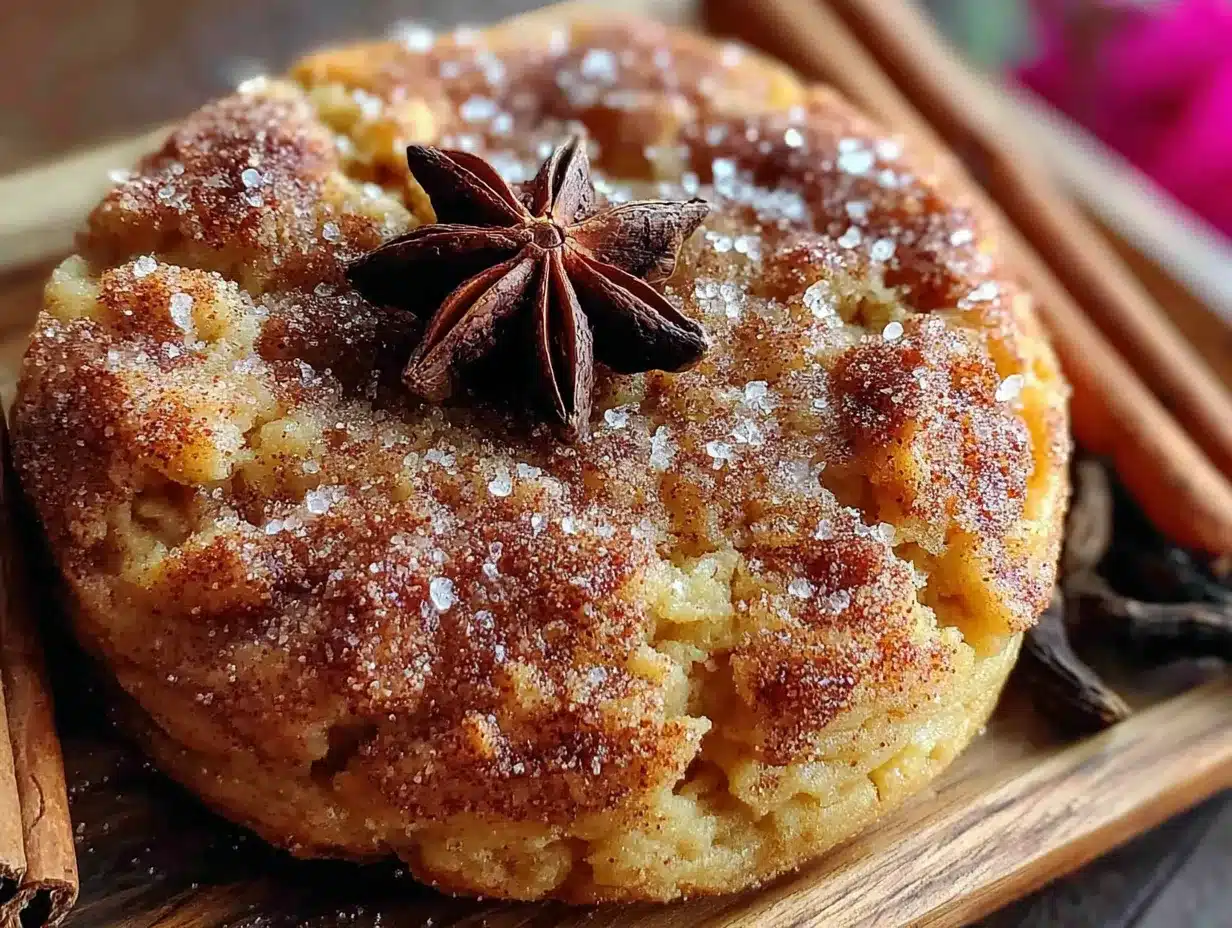
Let’s make these Perfect Brown Butter Pumpkin Snickerdoodle Cookies. I’ll walk you through every step, including what to look for and what to avoid.
- Brown the butter : Place the 1 cup of unsalted butter in a large skillet or saucepan over medium heat. Stir constantly with a rubber spatula or wooden spoon. The butter will melt, then foam, then start to sizzle. After about 4-5 minutes, you’ll see brown specks forming at the bottom of the pan. The butter will smell nutty and toasty. Once it reaches a deep amber color and the specks are golden brown, remove it from the heat immediately. Pour it into a large mixing bowl, scraping every bit of those brown specks into the bowl. Let it cool for 10 minutes. Pro tip: If you’re nervous about burning it, err on the side of lighter brown. Burnt butter is bitter and can’t be saved.
- Mix the wet ingredients : To the cooled brown butter, add 1 cup granulated sugar and ½ cup packed light brown sugar. Whisk until combined — it will look a little grainy, that’s normal. Add the ½ cup pumpkin puree, 1 large egg, and 2 teaspoons vanilla extract. Whisk until smooth and fully incorporated. The mixture should look glossy and uniform.
- Combine the dry ingredients : In a separate medium bowl, whisk together 2 cups all-purpose flour, 2 teaspoons cream of tartar, 1 teaspoon baking soda, ½ teaspoon salt, 1 teaspoon cinnamon, ½ teaspoon nutmeg, ¼ teaspoon ginger, and ⅛ teaspoon cloves. Whisk thoroughly to distribute the leavening agents and spices evenly. This step matters — nobody wants a pocket of baking soda in their cookie.
- Combine wet and dry : Add the dry ingredients to the wet ingredients in two additions, mixing gently with a rubber spatula or wooden spoon after each addition. Mix just until no streaks of flour remain. Overmixing will develop gluten and make the cookies tough. The dough will be soft and slightly sticky — that’s exactly what you want.
- Chill the dough : Cover the bowl with plastic wrap and refrigerate for at least 20 minutes. This step is non-negotiable. Chilling solidifies the brown butter, prevents the cookies from spreading too much, and allows the flavors to meld. If you skip this, your cookies will be flat and greasy. I’ve made that mistake so you don’t have to.
- Preheat the oven : While the dough chills, preheat your oven to 350°F (175°C). Line two baking sheets with parchment paper.
- Make the coating : In a small bowl, mix ¼ cup granulated sugar with 2 teaspoons cinnamon. You can add a pinch of nutmeg or cardamom here if you’re feeling fancy.
- Shape the cookies : Use a 1.5-tablespoon cookie scoop to portion the dough. Roll each portion into a smooth ball between your palms. The dough should be firm enough to roll easily after chilling. If it’s too sticky, chill it for another 10 minutes. Roll each ball in the cinnamon-sugar mixture until fully coated, then place on the prepared baking sheets, spacing them about 2 inches apart.
- Bake : Bake for 10-12 minutes, or until the edges are set and the tops are crackled and slightly puffed. The centers will look soft and slightly underdone — that’s good. They’ll continue to set as they cool. For softer cookies, bake for 10 minutes. For slightly crisper edges, go for 12. I usually rotate the pans halfway through for even baking.
- Cool : Let the cookies cool on the baking sheets for 5 minutes. The residual heat will finish setting the centers. Then transfer them to a wire rack to cool completely. If you try to move them too soon, they’ll fall apart. Trust me on this one — I’ve lost a few cookies to impatience.
Sensory Cues : When the cookies are done, the edges should be lightly golden and the tops should have that classic snickerdoodle crackle. The kitchen should smell like a fall bakery — warm cinnamon, nutmeg, and that unmistakable nutty aroma from the brown butter. The centers will look slightly puffy and soft, but they shouldn’t look wet or raw.
Troubleshooting : If your cookies spread too much, your butter was too warm, or you didn’t chill the dough long enough. If they didn’t spread enough, your oven might be running cool, or you added too much flour. If the bottoms are burning, your oven runs hot — try baking on the middle rack and using a lighter-colored baking sheet.
Cooking Tips & Techniques
I’ve made these cookies more times than I care to admit, and I’ve learned a few things along the way. Here are the tips that make the biggest difference.
Master the brown butter : This is the most important technique in the recipe. The key is patience and attention. Keep stirring constantly, and don’t walk away. The butter goes from perfectly browned to burnt in about 30 seconds. I like to use a light-colored pan so I can see the color change clearly. When the foam subsides and you see golden specks forming, it’s done. Pour it into your mixing bowl immediately — the residual heat from the pan can continue to cook it.
Room temperature ingredients matter : I know, I know, nobody has time for this. But the egg and pumpkin puree incorporate much more smoothly into the brown butter if they’re at room temperature. Cold ingredients can cause the brown butter to seize up and become grainy. If you forgot to take them out ahead of time, place the egg in a bowl of warm water for 5 minutes, and microwave the pumpkin puree for 10 seconds.
Don’t overmix the dough : This is the mistake I made the first time I tried this recipe. I wanted everything perfectly combined, so I kept mixing. The result? Tough, dense cookies. Mix just until the flour disappears. A few streaks are fine — they’ll work themselves out as you scoop and roll.
Chill the dough, seriously : I know it’s tempting to skip this step when you’re craving cookies right now. But the 20-minute chill is what gives these cookies their perfect texture. It solidifies the brown butter so the cookies hold their shape, and it allows the pumpkin and spices to meld with the butter. If you’re in a hurry, you can pop the dough in the freezer for 10 minutes instead.
Use a cookie scoop for uniform size : This isn’t just about aesthetics. Uniform cookies bake evenly, so you don’t end up with some burnt and some underdone. A 1.5-tablespoon scoop is the perfect size. If you don’t have one, use a measuring spoon to portion the dough.
Rotate your pans : Halfway through baking, swap the top and bottom pans and rotate them front to back. Most ovens have hot spots, and this ensures all your cookies bake evenly. I learned this the hard way after pulling out a tray of perfectly baked cookies and a tray of burnt ones.
Let them cool on the pan : The 5-minute rest on the hot baking sheet is crucial. The cookies are very soft when they come out of the oven, and they need that time to set. Moving them too soon will result in broken cookies. I speak from experience — and from the crumbs I’ve cried over.
Variations & Adaptations
One of the best things about this recipe is how adaptable it is. Here are some variations I’ve tried and loved.
Gluten-Free Version : Substitute the all-purpose flour with a 1:1 gluten-free baking flour blend. I’ve had excellent results with Bob’s Red Mill 1-to-1 Baking Flour. Add ½ teaspoon xanthan gum if your blend doesn’t already include it. The texture will be slightly more tender, but the flavor is spot-on. Chill the dough for an extra 10 minutes since gluten-free dough can be stickier.
Dairy-Free Version : Use plant-based butter for the brown butter step. Miyoko’s European Style Cultured Vegan Butter is my favorite for this. It browns beautifully and has a rich flavor. Just watch it carefully, as plant-based butters can go from browned to burnt more quickly than dairy butter. The texture of the cookies will be slightly more delicate, so handle them gently.
Vegan Version : Follow the dairy-free instructions and replace the egg with a flax egg (1 tablespoon ground flaxseed mixed with 3 tablespoons water, let sit for 5 minutes). The cookies will be slightly less tender, but still delicious. Add an extra tablespoon of pumpkin puree to compensate for the missing moisture from the egg.
Spice It Up : For a bolder flavor, add ½ teaspoon cardamom to the dough and a pinch to the coating. Cardamom pairs beautifully with pumpkin and cinnamon. I made a batch with cardamom for a holiday party, and they disappeared in minutes.
Chocolate Lover’s Version : Add ½ cup white chocolate chips or dark chocolate chunks to the dough. The sweetness of white chocolate complements the warm spices, while dark chocolate adds a rich contrast. I prefer dark chocolate because it balances the sweetness of the cookie.
Pumpkin Seed Crunch : Add ¼ cup toasted pepitas (pumpkin seeds) to the dough for a nutty crunch. This adds texture and makes the cookies feel even more fall-inspired. Just make sure the seeds are cooled before adding them to the dough.
Maple Glaze Drizzle : For an extra-special treat, whisk together ½ cup powdered sugar, 2 tablespoons maple syrup, and 1 tablespoon milk (dairy or non-dairy) until smooth. Drizzle over the cooled cookies. This turns them into a showstopper for holiday cookie exchanges.
Serving & Storage Suggestions
These cookies are best served slightly warm, when the brown butter flavor is at its peak and the centers are still soft and tender. If you can wait — and I know it’s hard — let them cool for about 10 minutes after baking before digging in. The flavor really develops as they cool.
Serving Ideas : These cookies are perfect on their own, but they’re also amazing with a glass of cold milk, a hot cup of coffee, or a mug of spiced chai. For a dessert platter, arrange them with other fall favorites like pumpkin bread and apple cider donuts. They also make a lovely addition to a Thanksgiving dessert table alongside pie and cheesecake.
Presentation Tips : Stack the cookies on a rustic wooden board or a pretty cake stand. Dust with a little extra cinnamon sugar just before serving for that bakery-fresh look. If you’re giving them as gifts, layer them in a tin with parchment paper between each layer to prevent sticking.
Storage Instructions : Store the cookies in an airtight container at room temperature for up to 5 days. Place a slice of bread in the container to keep them soft — the bread absorbs excess moisture and releases it slowly. Replace the bread slice every other day. I’ve kept cookies fresh for almost a week using this trick.
Freezer Instructions : These cookies freeze beautifully. To freeze baked cookies, let them cool completely, then layer them in a freezer-safe container with parchment paper between each layer. They’ll keep for up to 3 months. To thaw, let them sit at room temperature for about 30 minutes. You can also freeze the unbaked dough balls. Roll them into balls, coat them in cinnamon sugar, and place them on a baking sheet in the freezer until solid. Transfer to a freezer bag and store for up to 3 months. Bake from frozen, adding 2-3 minutes to the baking time.
Reheating Tips : To revive leftover cookies, pop them in a 300°F (150°C) oven for 3-5 minutes. This brings back the soft, fresh-from-the-oven texture. You can also microwave them for 10-15 seconds, but be careful not to overdo it — they can become tough.
Flavor Development : These cookies actually taste better the next day. The brown butter flavor deepens as the cookies rest, and the spices meld together beautifully. So if you can resist eating them all on day one, you’re in for a treat on day two.
Nutritional Information & Benefits
While these are definitely a treat, they do have some redeeming qualities. Here’s the estimated nutritional breakdown per cookie (based on 24 cookies):
| Nutrient | Amount Per Cookie |
|---|---|
| Calories | 175 |
| Total Fat | 8g |
| Saturated Fat | 5g |
| Cholesterol | 25mg |
| Sodium | 95mg |
| Total Carbohydrates | 24g |
| Dietary Fiber | 1g |
| Sugars | 14g |
| Protein | 2g |
| Vitamin A | 15% DV |
| Calcium | 1% DV |
| Iron | 4% DV |
Health Benefits of Key Ingredients : Pumpkin puree is packed with vitamin A, which supports eye health and immune function. It’s also a good source of fiber, which aids digestion. The cinnamon in these cookies has anti-inflammatory properties and may help regulate blood sugar. And while brown butter isn’t exactly a health food, it does contain conjugated linoleic acid, which has been linked to some health benefits in moderation.
Dietary Considerations : These cookies are vegetarian and can be made gluten-free, dairy-free, or vegan with the substitutions mentioned above. They contain wheat, dairy, and eggs in their standard form, so they’re not suitable for those with allergies to those ingredients. The sugar content is moderate for a cookie, but if you’re watching your sugar intake, you can reduce the sugar in the dough by ¼ cup without significantly affecting the texture.
Personal Wellness Perspective : I believe in balance. These cookies are a treat, and they should be enjoyed as such. I don’t try to make them “healthy” because that’s not what they’re meant to be. Instead, I savor them mindfully — one or two with a cup of coffee, shared with friends and family. Food is about joy and connection, and these cookies deliver both.
Conclusion
These Perfect Brown Butter Pumpkin Snickerdoodle Cookies are the fall cookie you didn’t know you needed. The brown butter adds a depth of flavor that transforms a classic into something truly special, and the pumpkin keeps the centers impossibly soft and tender. They’re easy enough for a weekday baking session but impressive enough for holiday gatherings.
I love this recipe because it proves that sometimes the best ideas come from questioning the rules. My sister’s suggestion to brown the butter first seemed wrong to me at first, but it turned out to be exactly right. These cookies are a reminder that the best things in life often come from being open to new ideas — even when they come from someone who’s “just watching.”
So go ahead and give these a try. Make them your own. Add chocolate chips, swap the spices, drizzle them with maple glaze. However you make them, I promise they’ll become a fall favorite. And when you do make them, I’d love to hear about it. Leave a comment below and tell me how they turned out, or share your own twist on the recipe. Happy baking!
Frequently Asked Questions
Can I use pumpkin pie filling instead of pumpkin puree?
No, please don’t. Pumpkin pie filling is pre-sweetened and spiced, which will throw off the sugar and spice balance in this recipe. Stick with 100% pure pumpkin puree. If you accidentally bought pie filling, you can still use it — just reduce the sugar in the dough by ¼ cup and skip the added spices.
Why did my cookies turn out flat?
Flat cookies usually mean one of three things: the butter was too warm when you mixed the dough, you didn’t chill the dough long enough, or you used too much sugar. Make sure your brown butter is cooled to room temperature before adding the other ingredients, and don’t skip the 20-minute chill. If your kitchen is warm, chill for 30 minutes.
Can I make the dough ahead of time?
Absolutely. The dough can be refrigerated for up to 3 days in an airtight container. Let it sit at room temperature for about 10 minutes before scooping and rolling — it will be too firm to scoop straight from the fridge. You can also freeze the dough balls for up to 3 months, as mentioned in the storage section.
How do I know when the brown butter is done?
Look for three signs: the butter will smell nutty and toasty, it will have golden brown specks forming at the bottom of the pan, and the color will be a deep amber. The whole process takes about 4-5 minutes over medium heat. When you see those golden specks, remove the pan from the heat immediately and pour the butter into your mixing bowl to stop the cooking.
Can I use salted butter instead of unsalted?
You can, but reduce the added salt in the recipe to ¼ teaspoon. Salted butter has varying amounts of salt depending on the brand, so it’s harder to control the final saltiness. I prefer unsalted for baking because it gives me full control over the seasoning. If you only have salted butter on hand, it will work — just be mindful of the salt level.
Pin This Recipe!
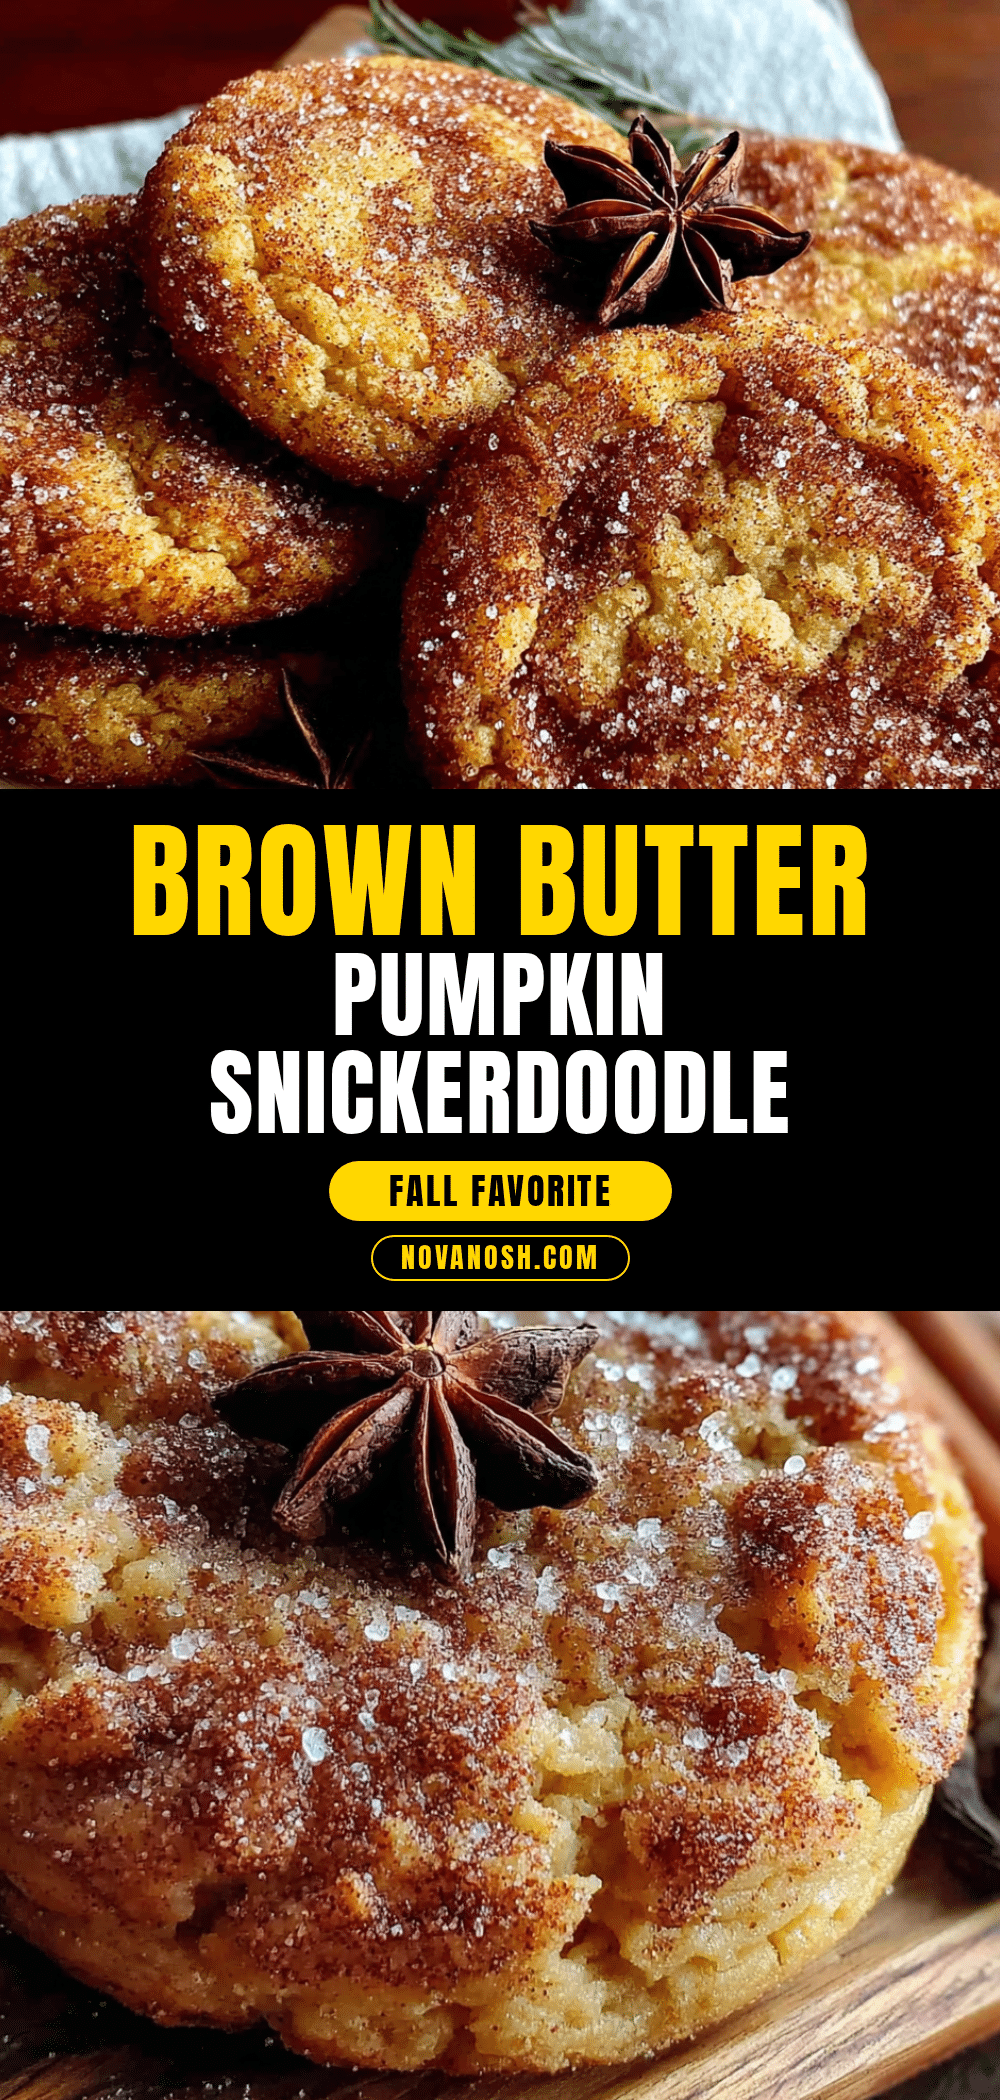
Perfect Brown Butter Pumpkin Snickerdoodle Cookies
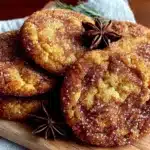
These soft and chewy snickerdoodles feature nutty brown butter and pumpkin, creating a warm, spiced fall cookie with a classic crackly cinnamon-sugar top. They’re quick to make with simple ingredients and are perfect for holiday gatherings or cozy baking sessions.
- Prep Time: 25 minutes
- Cook Time: 10-12 minutes
- Total Time: 30 minutes (plus 20 minutes chilling)
- Yield: 24 cookies 1x
- Category: Dessert
- Cuisine: American
Ingredients
- 1 cup (2 sticks) unsalted butter
- 1 cup granulated sugar
- ½ cup light brown sugar, packed
- ½ cup pumpkin puree (100% pure, not pie filling)
- 1 large egg, room temperature
- 2 teaspoons vanilla extract
- 2 cups all-purpose flour
- 2 teaspoons cream of tartar
- 1 teaspoon baking soda
- ½ teaspoon salt
- 1½ teaspoons ground cinnamon, divided
- ½ teaspoon ground nutmeg
- ¼ teaspoon ground ginger
- ⅛ teaspoon ground cloves
- For the coating: ¼ cup granulated sugar mixed with 2 teaspoons ground cinnamon
Instructions
- Brown the butter: Place 1 cup unsalted butter in a large skillet or saucepan over medium heat. Stir constantly with a rubber spatula or wooden spoon. The butter will melt, foam, then sizzle. After about 4-5 minutes, golden brown specks will form at the bottom and the butter will smell nutty. Remove from heat immediately and pour into a large mixing bowl, scraping all brown specks into the bowl. Let cool for 10 minutes.
- Mix the wet ingredients: To the cooled brown butter, add 1 cup granulated sugar and ½ cup packed light brown sugar. Whisk until combined (it will look grainy). Add ½ cup pumpkin puree, 1 large egg, and 2 teaspoons vanilla extract. Whisk until smooth and glossy.
- Combine the dry ingredients: In a separate medium bowl, whisk together 2 cups all-purpose flour, 2 teaspoons cream of tartar, 1 teaspoon baking soda, ½ teaspoon salt, 1 teaspoon cinnamon, ½ teaspoon nutmeg, ¼ teaspoon ginger, and ⅛ teaspoon cloves until evenly distributed.
- Combine wet and dry: Add the dry ingredients to the wet ingredients in two additions, mixing gently with a rubber spatula or wooden spoon after each addition. Mix just until no streaks of flour remain. The dough will be soft and slightly sticky.
- Chill the dough: Cover the bowl with plastic wrap and refrigerate for at least 20 minutes. This step is non-negotiable for proper texture.
- Preheat the oven: While the dough chills, preheat oven to 350°F (175°C). Line two baking sheets with parchment paper.
- Make the coating: In a small bowl, mix ¼ cup granulated sugar with 2 teaspoons cinnamon.
- Shape the cookies: Use a 1.5-tablespoon cookie scoop to portion the dough. Roll each portion into a smooth ball between your palms. Roll each ball in the cinnamon-sugar mixture until fully coated, then place on prepared baking sheets, spacing them about 2 inches apart.
- Bake: Bake for 10-12 minutes, or until edges are set and tops are crackled and slightly puffed. Centers will look soft and slightly underdone. For softer cookies, bake 10 minutes; for crisper edges, bake 12 minutes. Rotate pans halfway through for even baking.
- Cool: Let cookies cool on baking sheets for 5 minutes (residual heat finishes setting the centers). Then transfer to a wire rack to cool completely.
Notes
Brown butter is key—watch it carefully as it goes from browned to burnt in about 30 seconds. Chill the dough for at least 20 minutes to prevent spreading. For best flavor, let cookies cool completely before serving; they taste even better the next day. Store in an airtight container at room temperature for up to 5 days, or freeze for up to 3 months.
Nutrition
- Serving Size: 1 cookie
- Calories: 175
- Sugar: 14
- Sodium: 95
- Fat: 8
- Saturated Fat: 5
- Carbohydrates: 24
- Fiber: 1
- Protein: 2
Keywords: brown butter, pumpkin, snickerdoodle, fall cookies, cinnamon sugar, easy cookie recipe, Thanksgiving dessert