Love this? Save it for later!
Share the inspiration with your friends
“I wasn’t planning on making cookies that night,” I confessed to my friend Lisa as I scrambled around my kitchen with flour on my cheeks and royal icing dripping from my fingertips. It was the evening before my niece’s graduation party, and last-minute plans had me chasing an idea I hadn’t dared to try before: perfect graduation cap sugar cookies with elegant royal icing. Honestly, I wasn’t sure if I could pull it off—royal icing had always felt a little intimidating, like a delicate art form meant for pros.
But there I was, armed with a cracked mixing bowl that wobbled just enough to keep things interesting, and a set of cookie cutters that had seen better days. The sound of the mixer humming, the scent of vanilla filling the air, and a little bit of mess on the countertop somehow made it all feel right. Maybe you’ve been there, too—racing the clock, hoping these cookies would turn out more charming than chaotic.
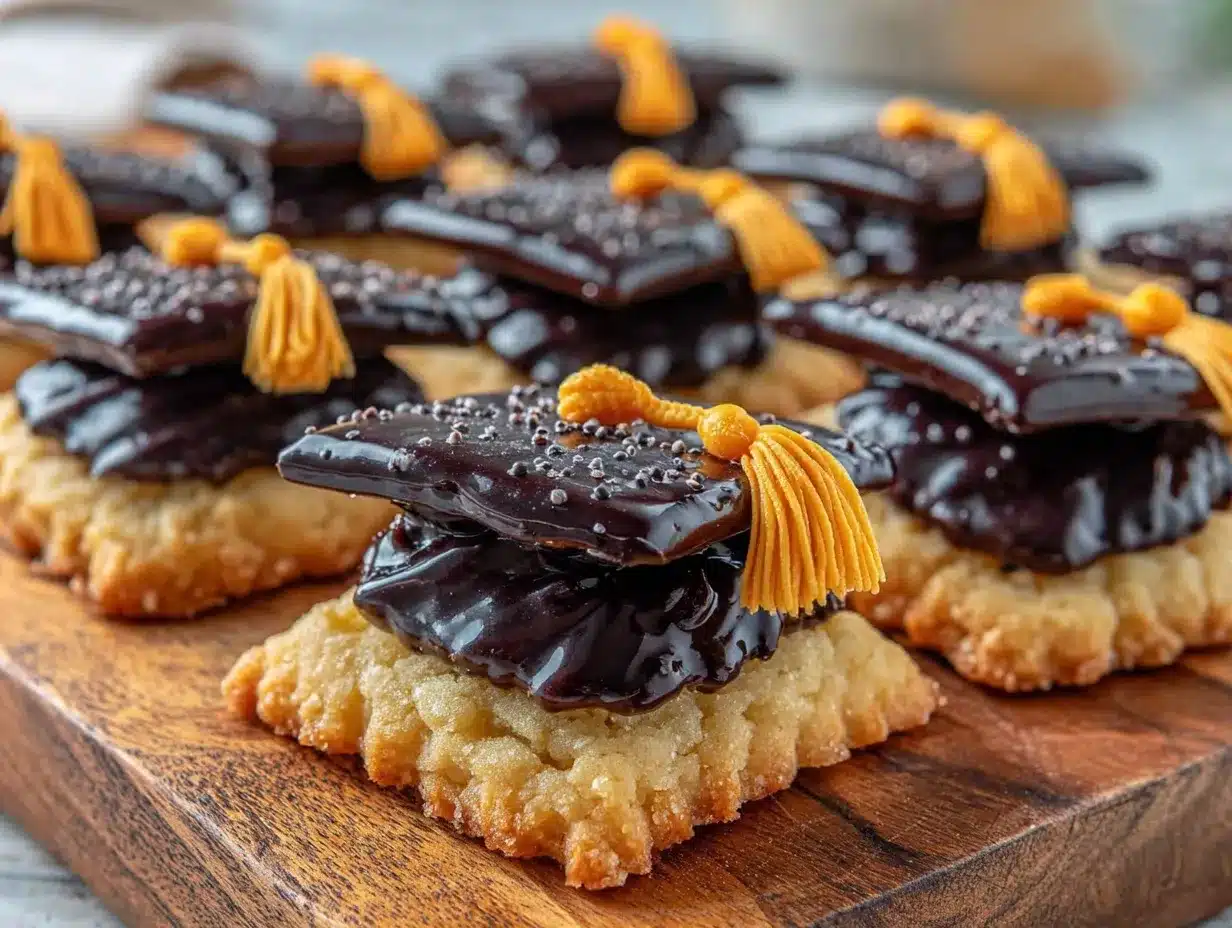
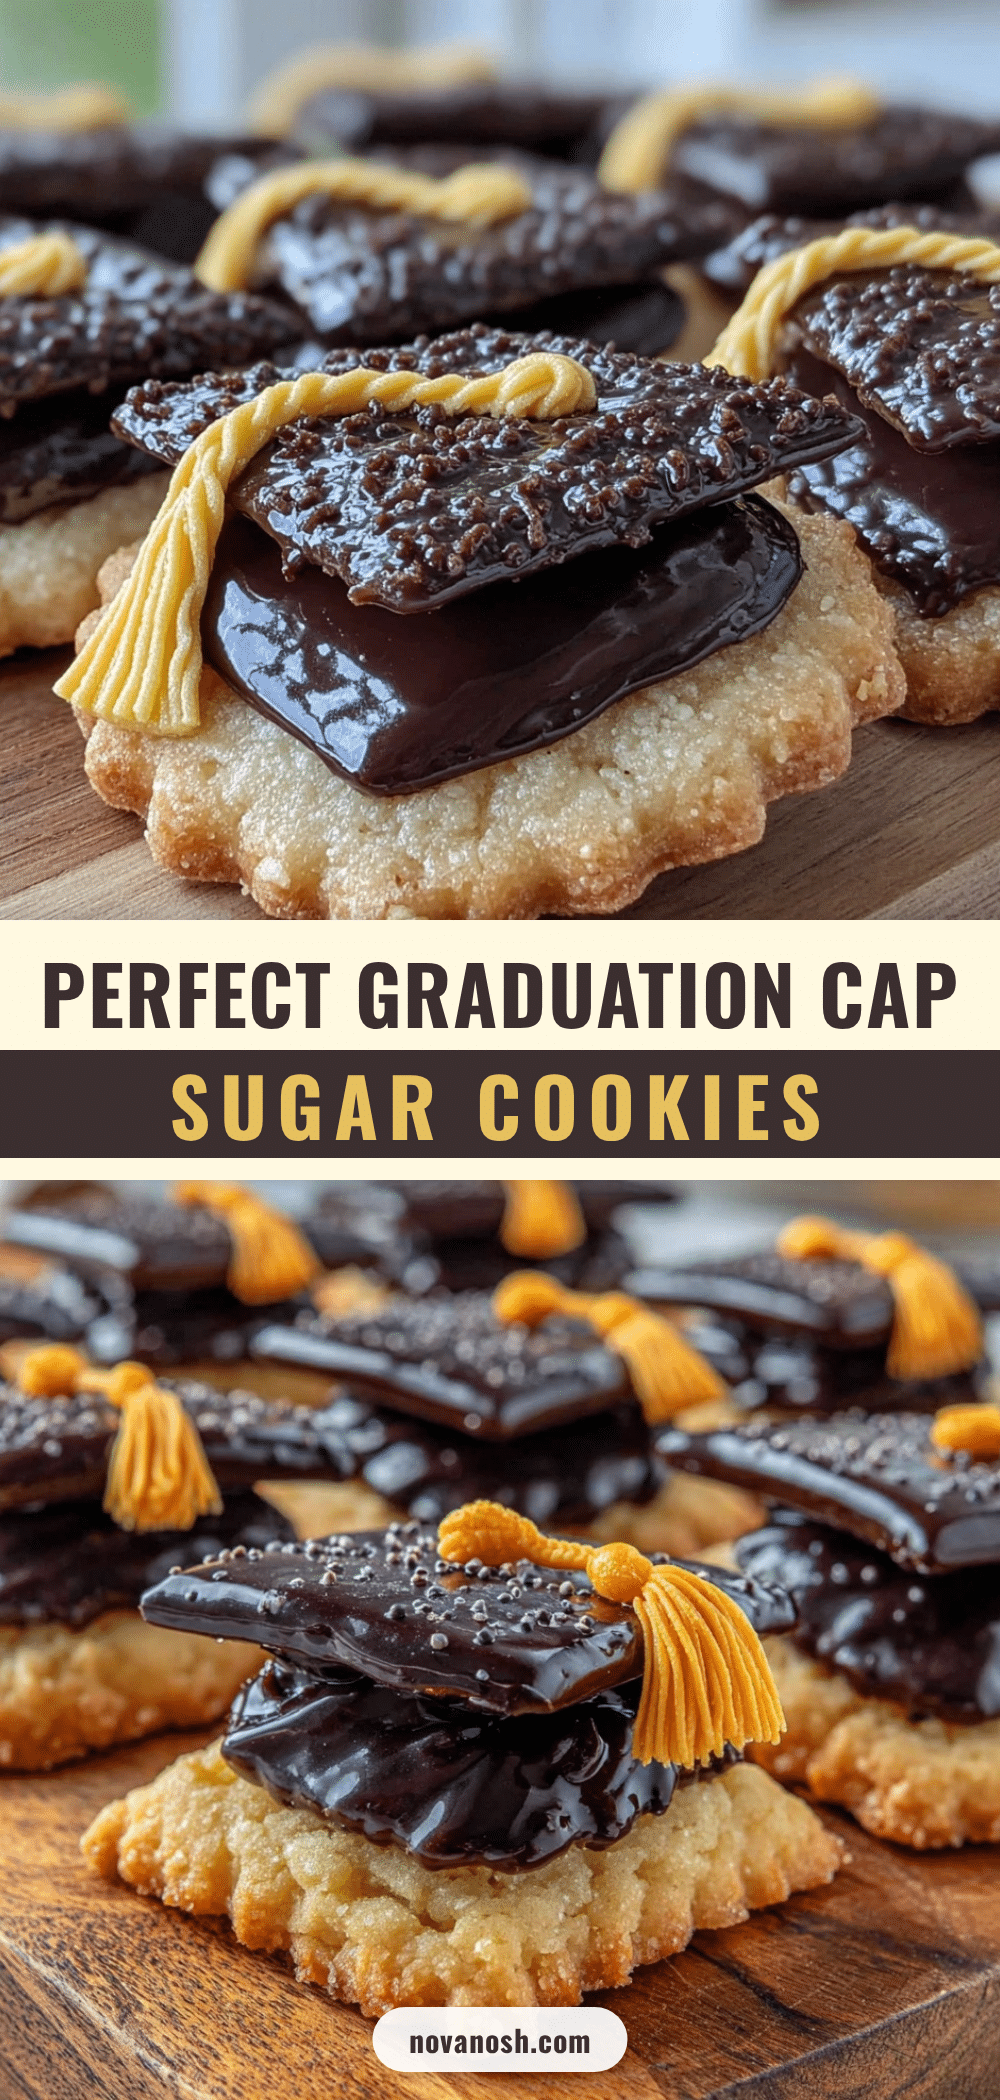
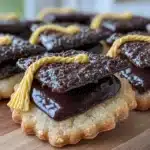
What started as a last-minute experiment turned into a beloved tradition. These graduation cap sugar cookies not only stole the show at the party but also became my go-to recipe for celebrations. Let me tell you, the balance between the buttery cookie base and that smooth, glossy royal icing is something special. And yes, there was a tiny moment when I realized I forgot the baking powder—but hey, the cookies still came out perfect!
Why You’ll Love This Recipe
After testing this recipe over several graduation seasons, I can say this is the easiest way to create stunning, delicious cookies that impress without the stress. Here’s why you’ll want to keep this one handy:
- Quick & Easy: These cookies come together in under 45 minutes, perfect for busy nights or last-minute celebrations.
- Simple Ingredients: No complicated or hard-to-find items here—just pantry staples you likely already have.
- Perfect for Graduation Parties: The classic cap design adds an elegant touch to any celebration, making you look like a baking pro.
- Crowd-Pleaser: Kids and adults alike can’t resist these sweet bites, and they’re great for gift bags or dessert tables.
- Unbelievably Delicious: The buttery sugar cookie base pairs perfectly with the smooth, melt-in-your-mouth royal icing.
This isn’t just your average sugar cookie recipe. The secret lies in the royal icing technique I perfected after many tries—thin enough to pipe smoothly, thick enough to hold crisp edges and delicate details. It’s the kind of recipe that makes you close your eyes with that first bite and say, “Yeah, this is celebration-worthy.”
What Ingredients You Will Need
This recipe uses simple, wholesome ingredients to deliver bold flavor and satisfying texture without the fuss. Most are pantry staples, and you can easily swap a few to suit your preferences.
- For the Sugar Cookies:
- 2 ¾ cups (345 g) all-purpose flour (I recommend King Arthur for consistent results)
- 1 teaspoon baking powder
- ½ teaspoon salt
- 1 cup (227 g) unsalted butter, softened (room temperature is key for easy mixing)
- 1 ½ cups (300 g) granulated sugar
- 1 large egg, room temperature
- 1 teaspoon pure vanilla extract (quality matters—Nielsen-Massey is my go-to)
- 2 tablespoons whole milk (or dairy-free milk such as almond milk for a subtle twist)
- For the Royal Icing:
- 3 cups (360 g) powdered sugar, sifted (to avoid lumps)
- 2 tablespoons meringue powder (Wilton brand works well)
- 5-6 tablespoons warm water (adjust for desired consistency)
- Gel food coloring (black and gold for the traditional graduation cap look; AmeriColor gels are vibrant and stable)
- Optional: ½ teaspoon vanilla or almond extract for added flavor
If you want to play with seasonal colors, swap the black gel for navy or burgundy, or add edible gold glitter for a touch of sparkle. For those avoiding gluten, almond flour can replace up to half the all-purpose flour, though the texture will be slightly different.
Equipment Needed
Here’s what you’ll need to make these graduation cap sugar cookies come to life:
- Mixing bowls – I use a set of glass bowls because they’re easy to clean and don’t retain odors.
- Electric hand mixer or stand mixer – essential for creaming butter and sugar smoothly.
- Measuring cups and spoons – precise measurements make all the difference.
- Rolling pin – a medium-weight one helps roll the dough evenly.
- Graduation cap cookie cutter (about 3 inches) – if you don’t have this, a square cutter plus a circle cutter for the top works fine.
- Parchment paper or silicone baking mats – to prevent sticking and for easy cleanup.
- Piping bags and small round piping tips (size #1 or #2) – for detailed royal icing work.
- Spoons and spatulas – for mixing and spreading icing.
If you don’t have a stand mixer, a hand mixer works just fine—just be prepared for a little extra arm work. For budget-friendly piping bags, disposable ones work great, and you can clean and reuse zip-top bags with a corner snipped off.
Preparation Method
- Preheat your oven to 350°F (175°C) and line baking sheets with parchment paper or silicone mats.
- Combine dry ingredients: In a medium bowl, whisk together 2 ¾ cups (345 g) flour, 1 teaspoon baking powder, and ½ teaspoon salt. Set aside.
- Cream butter and sugar: In a large bowl, beat 1 cup (227 g) softened unsalted butter with 1 ½ cups (300 g) granulated sugar using an electric mixer on medium speed until light and fluffy, about 3-4 minutes.
- Add egg and vanilla: Beat in 1 large room-temperature egg and 1 teaspoon pure vanilla extract until combined.
- Incorporate dry ingredients: Gradually add the flour mixture to the wet ingredients in thirds, alternating with 2 tablespoons milk. Mix on low speed until just combined—don’t overmix or the cookies may become tough.
- Chill the dough: Shape the dough into a disk, cover with plastic wrap, and refrigerate for at least 30 minutes. This helps the dough firm up and keeps cookie shapes crisp.
- Roll and cut: On a lightly floured surface, roll out dough to about ¼ inch (6 mm) thickness. Use your graduation cap cookie cutter to cut shapes, transferring them carefully to the prepared baking sheets.
- Bake: Bake cookies for 8-10 minutes, until edges are just starting to turn golden. Remove from oven and let cool on the baking sheet for 5 minutes before transferring to wire racks to cool completely.
- Prepare royal icing: In a bowl, combine 3 cups (360 g) powdered sugar and 2 tablespoons meringue powder. Add 5 tablespoons warm water and beat on medium speed until stiff peaks form (about 5-7 minutes). Adjust water as needed for piping consistency.
- Color the icing: Divide the royal icing into two bowls. Color one black for the cap top and tassel, and leave one white or tint lightly for the base.
- Pipe the icing: Use piping bags fitted with small round tips to outline and flood the cookie cap areas. Let the black icing dry for about 20 minutes before adding details like tassels or borders.
- Let dry: Allow cookies to dry completely at room temperature, ideally overnight, before stacking or packaging.
Pro tip: If your icing is too thick to pipe, add a few drops of water and mix again. Too thin? Add a bit more powdered sugar. And if you notice the cookies puffing during baking, chill the dough longer next time or try docking (pricking) the dough gently with a fork before baking.
Cooking Tips & Techniques
Working with royal icing can be tricky, but a few tricks make all the difference:
- Start with room temperature ingredients: Butter and eggs mix better, giving you a smoother dough.
- Don’t overmix the dough: Overworking the flour can cause tough cookies, so mix just until combined.
- Chill the dough thoroughly: This prevents spreading and helps keep sharp edges on your graduation caps.
- Use a piping consistency test: Ready-to-pipe icing should hold a peak but be smooth enough to flow when flooded.
- Practice makes perfect: If you’re new to royal icing, test your piping on parchment before decorating the cookies.
- Work in small batches: Royal icing dries quickly, so keep unused portions covered with plastic wrap to prevent drying out.
- Patience is key: Let each layer dry before adding details to avoid bleeding colors.
One time, I was so eager to finish that I flooded the entire batch and then rushed to add details while still wet—let’s just say they looked like abstract art! Since then, I always wait at least 20 minutes between layers. Trust me, your cookies will thank you.
Variations & Adaptations
Feel free to customize these sugar cookies to your taste or occasion:
- Flavor twists: Add a teaspoon of almond extract or lemon zest to the dough for a different flavor profile.
- Color variations: Swap the black royal icing for navy blue, maroon, or school colors to personalize your caps.
- Dietary adaptations: Use gluten-free all-purpose flour blends and dairy-free butter/milk alternatives to make these allergy-friendly.
- Alternative shapes: Instead of graduation caps, try diploma-shaped cookies using a simple rectangle cutter and piping details.
- Mini cookies: Make bite-sized versions for party favors or dessert platters.
Personally, I once made these with a hint of orange zest and swapped black icing for deep navy to match a friend’s alma mater. The guests loved the subtle twist! Experimenting with colors and flavors can make this recipe your own special tradition.
Serving & Storage Suggestions
These graduation cap sugar cookies are best served at room temperature once the royal icing has fully dried—usually after a few hours or overnight. They make a charming centerpiece on dessert tables or packaged in clear bags tied with ribbons for party favors.
Pair them with sweet tea, coffee, or a light sparkling punch to balance the sweetness. For a savory contrast, serve alongside a cheese and fruit platter.
To store, place cookies in an airtight container layered with parchment paper to prevent sticking. They keep well at room temperature for up to 5 days. For longer storage, freeze in a single layer wrapped in plastic wrap, then transfer to a freezer-safe container for up to 3 months.
When reheating, let frozen cookies thaw at room temperature—avoid microwaving, as it can soften the icing. Over time, the flavors meld nicely, so making them a day ahead can actually improve the taste.
Nutritional Information & Benefits
Each cookie (based on a 3-inch size) contains approximately 150 calories, 6 grams of fat, 22 grams of carbohydrates, and 1 gram of protein. These treats do contain gluten, dairy, and eggs, so keep that in mind for guests with allergies.
The recipe’s simplicity means no artificial additives, and using real vanilla extract adds natural flavor without extra sugar. The butter provides richness, and powdered sugar keeps the icing smooth and glossy.
While these cookies are a sweet indulgence, sharing them with loved ones during celebrations adds a joyful, wholesome experience that’s about more than just nutrition—it’s about the memories baked in.
Conclusion
Perfect graduation cap sugar cookies with elegant royal icing are more than just a dessert—they’re a celebration you can hold in your hand. This recipe combines straightforward ingredients with a frosting technique that’s surprisingly easy once you get the hang of it.
Whether you’re baking for a big party or a small family gathering, these cookies bring a touch of charm and a lot of smiles. Honestly, I keep making them because each batch feels like a little victory, a sweet way to honor milestones.
I’d love to hear how your cookies turn out—feel free to share your versions, tips, or even your mishaps in the comments. Let’s keep this celebration going, one perfect cookie at a time!
Frequently Asked Questions
Can I make the dough ahead of time?
Yes! You can prepare the dough and refrigerate it wrapped in plastic for up to 2 days or freeze it for up to 3 months. Just thaw before rolling and cutting.
How do I fix royal icing that’s too runny or too thick?
If it’s too runny, add a little more powdered sugar. If it’s too thick, add a few drops of water at a time until you reach the desired consistency.
What if I don’t have a graduation cap cookie cutter?
You can use a square cookie cutter for the cap and a small circle or triangle for the tassel. Alternatively, freehand cutting with a knife works if you’re comfortable.
Can I store decorated cookies for a party the next day?
Absolutely. Store them in an airtight container at room temperature once the icing is fully dry. They’ll stay fresh and delicious.
Is royal icing gluten-free?
Royal icing itself is typically gluten-free, but since this recipe uses all-purpose flour in the cookies, it’s not gluten-free unless you use a gluten-free flour substitute.
For related baking inspiration, you might enjoy my classic vanilla sugar cookies or the easy chocolate chip cookie bars perfect for celebrations. Also, check out my homemade vanilla extract guide to boost your baking flavor naturally.
Pin This Recipe!
Perfect Graduation Cap Sugar Cookies Easy Elegant Royal Icing Recipe
These graduation cap sugar cookies feature a buttery sugar cookie base paired with smooth, glossy royal icing, perfect for celebrations and last-minute parties.
- Prep Time: 15 minutes
- Cook Time: 10 minutes
- Total Time: 45 minutes
- Yield: 24 cookies 1x
- Category: Dessert
- Cuisine: American
Ingredients
- 2 ¾ cups (345 g) all-purpose flour
- 1 teaspoon baking powder
- ½ teaspoon salt
- 1 cup (227 g) unsalted butter, softened (room temperature)
- 1 ½ cups (300 g) granulated sugar
- 1 large egg, room temperature
- 1 teaspoon pure vanilla extract
- 2 tablespoons whole milk (or dairy-free milk such as almond milk)
- 3 cups (360 g) powdered sugar, sifted
- 2 tablespoons meringue powder
- 5–6 tablespoons warm water
- Gel food coloring (black and gold recommended)
- Optional: ½ teaspoon vanilla or almond extract
Instructions
- Preheat your oven to 350°F (175°C) and line baking sheets with parchment paper or silicone mats.
- In a medium bowl, whisk together 2 ¾ cups (345 g) flour, 1 teaspoon baking powder, and ½ teaspoon salt. Set aside.
- In a large bowl, beat 1 cup (227 g) softened unsalted butter with 1 ½ cups (300 g) granulated sugar using an electric mixer on medium speed until light and fluffy, about 3-4 minutes.
- Beat in 1 large room-temperature egg and 1 teaspoon pure vanilla extract until combined.
- Gradually add the flour mixture to the wet ingredients in thirds, alternating with 2 tablespoons milk. Mix on low speed until just combined—do not overmix.
- Shape the dough into a disk, cover with plastic wrap, and refrigerate for at least 30 minutes.
- On a lightly floured surface, roll out dough to about ¼ inch (6 mm) thickness. Use a graduation cap cookie cutter to cut shapes and transfer to prepared baking sheets.
- Bake cookies for 8-10 minutes, until edges just start to turn golden. Let cool on baking sheet for 5 minutes, then transfer to wire racks to cool completely.
- Prepare royal icing by combining 3 cups (360 g) powdered sugar and 2 tablespoons meringue powder. Add 5 tablespoons warm water and beat on medium speed until stiff peaks form (5-7 minutes). Adjust water for piping consistency.
- Divide royal icing into two bowls. Color one black for the cap top and tassel; leave one white or lightly tinted for the base.
- Use piping bags with small round tips to outline and flood the cookie cap areas. Let black icing dry about 20 minutes before adding details like tassels or borders.
- Allow cookies to dry completely at room temperature, ideally overnight, before stacking or packaging.
Notes
If royal icing is too thick, add a few drops of water; if too thin, add powdered sugar. Chill dough thoroughly to prevent spreading and maintain sharp edges. Let each icing layer dry before adding details to avoid bleeding. Dough can be refrigerated up to 2 days or frozen up to 3 months.
Nutrition
- Serving Size: 1 cookie (3-inch siz
- Calories: 150
- Fat: 6
- Carbohydrates: 22
- Protein: 1
Keywords: graduation cookies, sugar cookies, royal icing, celebration cookies, easy cookies, party treats