Love this? Save it for later!
Share the inspiration with your friends
Introduction
“I wasn’t expecting to become the unofficial dessert chef for my niece’s graduation party,” I admit, laughing as I recall the chaos of that Saturday afternoon. The backyard was buzzing with family, neighbors, and friends, all eager to celebrate her big accomplishment. But honestly, I was caught off guard when she whispered, “Could you make something sweet and special, but easy? Maybe little bites?”
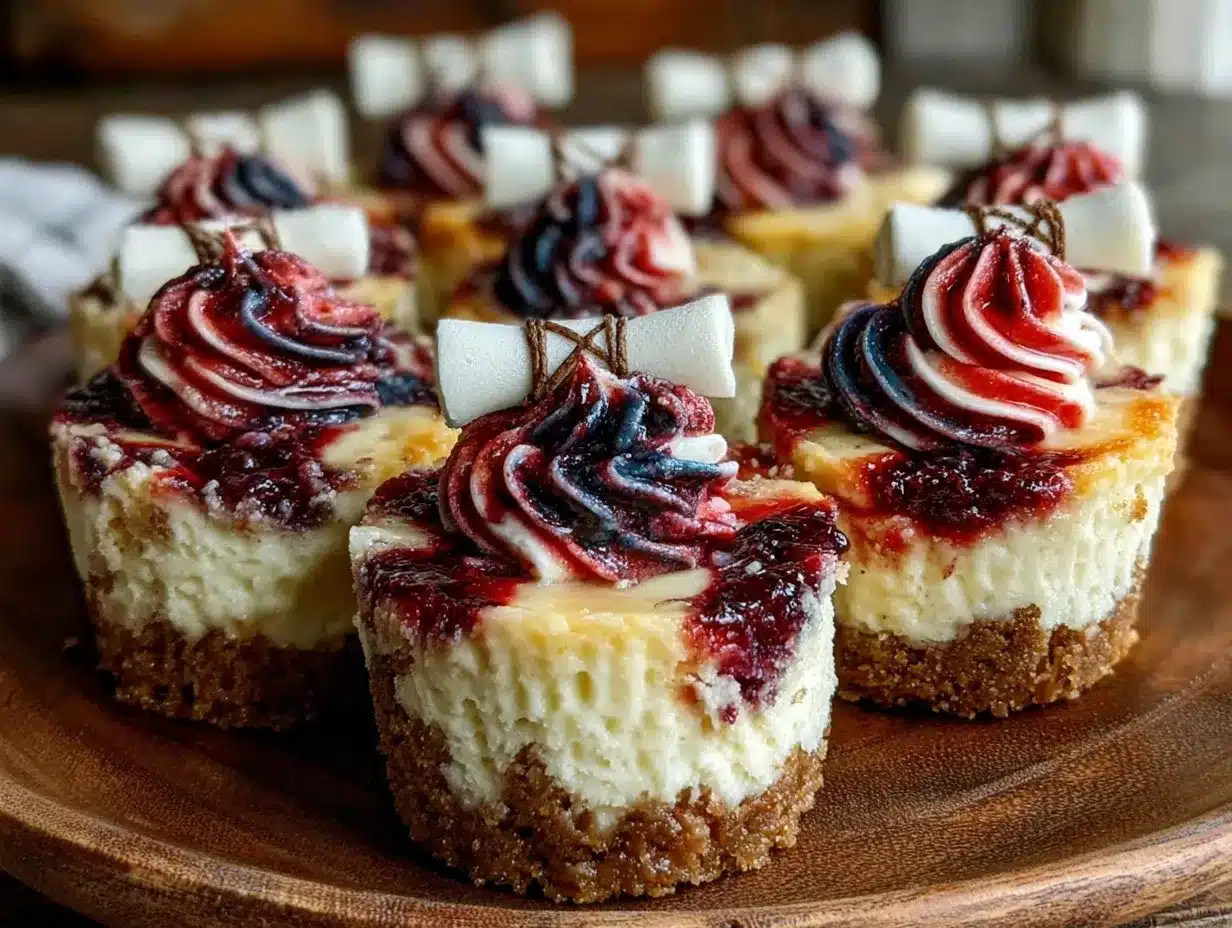
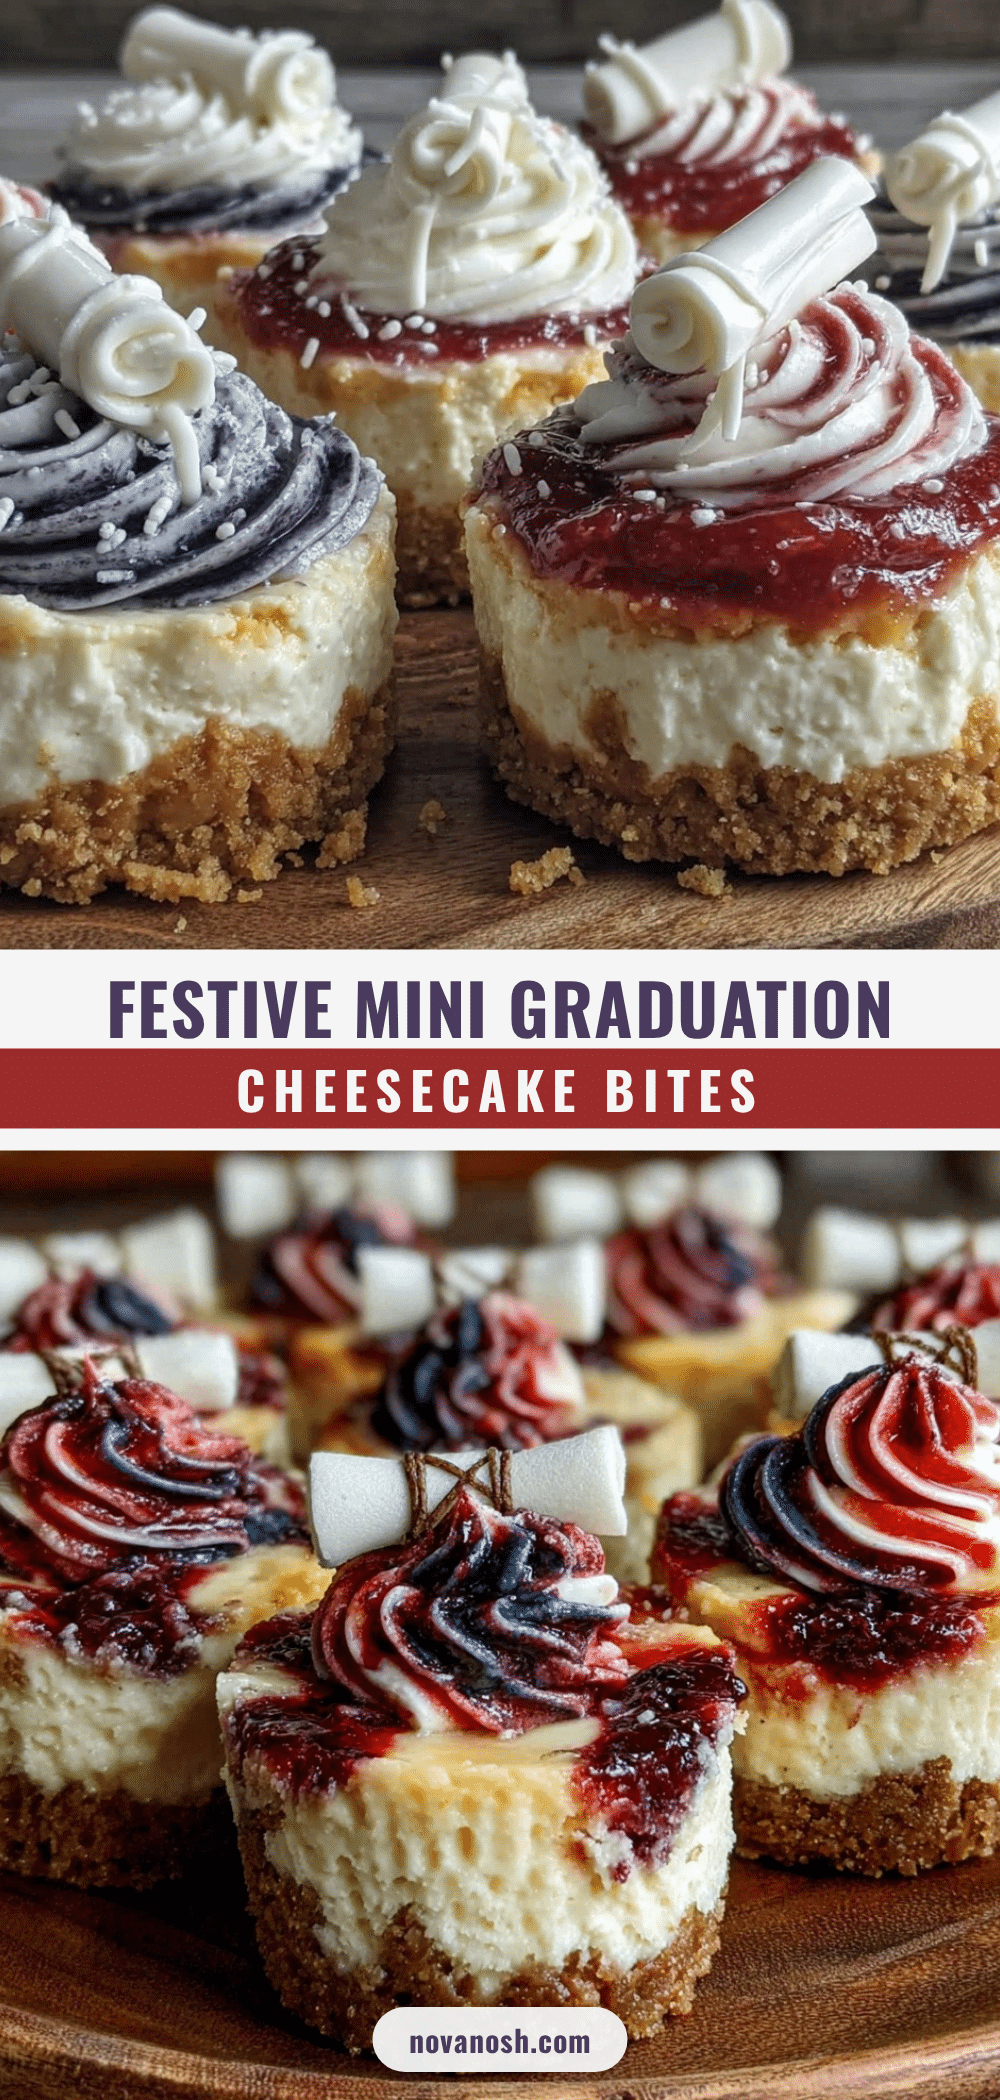
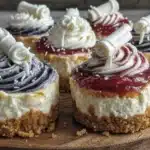
Well, I didn’t have a plan, and my kitchen was a mess from the morning’s attempts at something fancy. But then, inspiration hit as I noticed the leftover cream cheese and those tiny cupcake liners tucked away in a drawer. The result? These perfect mini graduation cheesecake bites topped with tiny diploma toppers — a quirky little treat with just the right balance of creamy and crunchy, and a festive flair that stole the show.
Maybe you’ve been there—the pressure to whip up something memorable without turning your kitchen into a disaster zone. Let me tell you, these cheesecake bites not only looked adorable but tasted like a celebration all on their own. The way the rich cheesecake filling met the crisp graham cracker crust was a small slice of heaven. And those diploma toppers? They added just the right touch of whimsy that had everyone smiling (and snapping pics!).
So here I am, sharing this recipe that’s become my go-to for graduations, potlucks, or any time I want a fuss-free yet impressive dessert. Trust me, once you try these, you’ll keep making them again and again—whether or not you have a diploma to hand out!
Why You’ll Love This Recipe
Honestly, I’ve tried plenty of mini cheesecake recipes, but this one ticks all the boxes in my cookbook (and my heart). Tested through several family gatherings and approved by a loved one who claims to be “picky about desserts,” this recipe brings together ease and elegance like few others.
- Quick & Easy: These bites come together in under 30 minutes, perfect for busy weeknights or last-minute celebrations.
- Simple Ingredients: No fancy shopping trips required—you probably already have the basics in your pantry and fridge.
- Perfect for Graduations & Parties: Tiny enough to pop in your mouth, they make snacking a breeze during standing-room-only celebrations.
- Crowd-Pleaser: Kids and adults alike can’t resist these creamy, crunchy treats.
- Unbelievably Delicious: The smooth cheesecake filling paired with a buttery graham cracker crust is pure comfort food, but bite-sized.
What sets these cheesecake bites apart? It’s the little details—like using full-fat cream cheese for that rich, silky texture and a hint of vanilla that sings in every bite. Plus, the festive diploma toppers aren’t just decoration; they’re a conversation starter, making your dessert table stand out without extra fuss.
This recipe isn’t just about dessert; it’s about marking milestones with something sweet, fun, and totally doable. And you know, I’ve found it’s the kind of treat that makes you close your eyes for just a second after the first bite—pure satisfaction.
What Ingredients You Will Need
This recipe uses simple, wholesome ingredients to deliver bold flavor and a satisfying texture without the fuss. Most of these are pantry staples, and if not, easy swaps can help you whip these cheesecake bites up in no time.
- For the Crust:
- 1 1/2 cups (150g) graham cracker crumbs (I prefer Honey Maid for consistent texture)
- 1/3 cup (75g) unsalted butter, melted (adds richness and binds the crust)
- 2 tablespoons granulated sugar (balances the buttery crust)
- For the Filling:
- 16 ounces (450g) cream cheese, softened (full-fat for best creaminess)
- 2/3 cup (130g) granulated sugar
- 2 large eggs, room temperature
- 1 teaspoon pure vanilla extract (I personally use Nielsen-Massey for its deep flavor)
- 1/3 cup (80ml) sour cream (adds tang and smoothness)
- For the Diploma Toppers:
- Miniature rolled paper scrolls (DIY or store-bought)
- Thin ribbon or twine to tie the scrolls
- Optional: edible glitter or small sugar stars for extra festivity
Ingredient Tips: If you’re dairy-free, swap cream cheese for a plant-based version and use coconut yogurt instead of sour cream. For a gluten-free crust, almond flour or gluten-free graham crackers work well, though texture will differ slightly.
Equipment Needed
- Mini muffin tin (24-cup size works best for uniform bites)
- Mixing bowls (one large for the crust, one medium for the filling)
- Electric hand mixer or stand mixer (to get that super smooth cheesecake batter)
- Measuring cups and spoons (accuracy helps with texture)
- Spatula (for scraping the bowl clean)
- Cooling rack (to cool cheesecake bites evenly)
- Optional: piping bag or zip-top bag with corner snipped (makes filling cups neat and faster)
If you don’t have a mini muffin tin, silicone molds or even a regular muffin tin can work; just adjust baking times slightly and expect larger bites. My budget-friendly tip: a basic muffin tin with paper liners works just fine and makes cleanup easy. Also, keep your cream cheese at room temp before mixing—it seriously saves you elbow grease!
Preparation Method
- Preheat your oven to 325°F (160°C). Line your mini muffin tin with paper liners or lightly grease the cups. This helps the bites release easily after baking. (5 minutes prep)
- Make the crust: In a medium bowl, combine 1 ½ cups graham cracker crumbs, 1/3 cup melted butter, and 2 tablespoons sugar. Stir until the mixture looks like wet sand. You want it to hold together if you pinch it between your fingers. (3 minutes)
- Press the crust mixture firmly into the bottom of each muffin cup. Use the back of a spoon or a small glass bottom to pack it down evenly. This step is key for a sturdy crust that won’t crumble when you eat it. (5 minutes)
- Prepare the filling: In a large bowl, beat 16 ounces softened cream cheese with 2/3 cup sugar until smooth and creamy—no lumps! Add 2 eggs one at a time, mixing well after each addition. Stir in 1 teaspoon vanilla extract and 1/3 cup sour cream until just combined. Overmixing can add air and cause cracks, so mix gently but thoroughly. (7-8 minutes)
- Fill each crust-lined cup with cheesecake batter about 2/3 full. For neatness and speed, I like to use a piping bag or a zip-top bag with the corner snipped. (5 minutes)
- Bake in the preheated oven for 18-20 minutes. The edges should be set, but the centers will still jiggle slightly—this is exactly right for a creamy bite. Overbaking leads to dry cheesecake, so keep an eye on them. (20 minutes)
- Cool the cheesecake bites in the pan for 10 minutes. Then transfer to a wire rack to cool completely. Once cool, refrigerate for at least 2 hours to let them firm up fully. (2+ hours chilling)
- Add your festive diploma toppers just before serving. Tie miniature paper scrolls with thin ribbon or twine and gently place one on each cheesecake bite for that perfect graduation touch. (5 minutes)
Pro tip: If your cream cheese wasn’t fully softened, you might notice tiny lumps in the batter. To fix, beat a little longer or briefly warm the bowl over warm water while mixing (careful not to cook it!). Also, if you’re pressed for time, these can be made a day ahead—just keep covered in the fridge.
Cooking Tips & Techniques
Making mini cheesecakes sounds fancy, but honestly, a few tricks make all the difference between “meh” and “wow.”
- Room Temperature Ingredients: Always bring cream cheese and eggs to room temp. Cold ingredients cause lumps and uneven baking.
- Don’t Overmix: Overbeating incorporates air that can cause cracks or a spongey texture. Mix just until smooth.
- Crust Packing: Firmly press the crust to avoid crumbly bites. I learned this the hard way when my first batch fell apart before the party!
- Watch Baking Time: Mini cheesecakes bake faster than full-size. Check at 18 minutes and use the jiggle test for perfect doneness.
- Use a Water Bath (Optional): For ultra-smooth texture, you can bake mini cheesecakes in a water bath, but honestly, I find them perfect without the fuss.
- Chill Thoroughly: Patience is key. Don’t skip the refrigerating step—it firms up the filling and enhances flavor.
I once tried skipping the chilling because I was in a rush—big mistake. The texture was off and the bites were too soft to handle. Lesson learned: cheesecake deserves the wait!
Variations & Adaptations
These mini cheesecakes are a great base for creativity. Here are some ways I’ve switched things up depending on mood or occasion:
- Fruit Swirl: Add a tablespoon of your favorite jam or fruit puree (like raspberry or blueberry) swirled into the batter before baking for a pop of color and flavor.
- Chocolate Lovers: Mix 1/4 cup cocoa powder into the filling for chocolate mini cheesecakes, or sprinkle mini chocolate chips into the crust.
- Nutty Crunch: Swap half the graham cracker crumbs for finely chopped pecans or almonds to add a toasty crunch to the crust.
- Dairy-Free Version: Use dairy-free cream cheese and coconut yogurt; baking times remain the same but texture may be slightly softer.
- Gluten-Free Crust: Use almond flour or gluten-free graham crackers for the crust, pressing firmly as usual.
Personally, I once tried adding a pinch of cinnamon to the crust for a warm twist and it was a hit at a fall graduation party. Don’t hesitate to personalize these bites—just keep the filling smooth and the crust packed tight!
Serving & Storage Suggestions
These mini cheesecake bites are best served chilled but not too cold—about 10 minutes out of the fridge softens the texture just right for eating. Arrange them on a festive platter with the diploma toppers standing out for a charming presentation that guests love.
They pair beautifully with sparkling cider or a light coffee after the ceremony. For a brunch spread, I like serving them alongside fresh berries and a drizzle of honey.
Storage: Store leftover cheesecake bites in an airtight container in the refrigerator for up to 4 days. They freeze well too—just pop them in the freezer for up to 2 months, wrapped tightly. Thaw overnight in the fridge before serving.
Reheat is not recommended, but letting them sit at room temperature a bit before serving helps bring out the creamy texture and flavors. In fact, I find the bites taste even better the next day as the flavors mellow and meld.
Nutritional Information & Benefits
Each mini cheesecake bite contains roughly 120 calories, with about 8 grams of fat, 9 grams of carbs, and 2 grams of protein. Using full-fat cream cheese provides satisfying richness, while sour cream adds a tang that balances sweetness.
Graham cracker crust contributes some fiber and whole grain elements, especially if you choose whole wheat or gluten-free versions. This dessert is gluten-friendly if you substitute the crust accordingly and is naturally lower in sugar than many other celebratory sweets.
From a wellness perspective, these bites offer a small indulgence without going overboard—perfect for savoring a treat while still keeping mindful of portion size. If you want an even lighter version, try swapping half the cream cheese for Greek yogurt (though texture changes slightly).
Allergen note: contains dairy, eggs, and gluten (unless modified). Always adjust ingredients to fit your dietary needs.
Conclusion
In the end, these Perfect Mini Graduation Cheesecake Bites with Festive Diploma Toppers are more than just a dessert—they’re a little celebration you can make in your own kitchen with simple ingredients and a touch of love. Whether you’re marking a milestone, hosting a party, or just craving something sweet and special, these cheesecake bites deliver on flavor and fun.
Feel free to tweak the recipe to suit your taste or dietary needs—maybe try my chocolate variation or a fresh fruit swirl next time. I keep coming back to this recipe because it’s reliable, crowd-pleasing, and honestly, it brings a smile every time I serve it.
If you try making these for your own graduation party (or any occasion), I’d love to hear how they turned out! Drop a comment below, share your diploma topper ideas, or even your favorite cheesecake twists.
Here’s to sweet celebrations and even sweeter memories!
Frequently Asked Questions
Can I make these mini cheesecakes ahead of time?
Yes! They can be made a day or two in advance and stored in the refrigerator. Just add the diploma toppers right before serving for the best look.
What if I don’t have a mini muffin pan?
You can use a regular muffin pan, but expect larger portions and slightly longer baking times (about 25-30 minutes). Silicone molds also work well.
How do I prevent cracks in the cheesecake filling?
Mix ingredients gently to avoid excess air, bake at a lower temperature, and avoid overbaking. Also, letting the cheesecake cool gradually helps.
Can I freeze these cheesecake bites?
Absolutely! Freeze them in an airtight container for up to 2 months. Thaw overnight in the fridge before serving.
What can I use instead of cream cheese?
For a dairy-free option, plant-based cream cheese works well. You can also try blending silken tofu or using mascarpone for a richer taste.
By the way, if you enjoy bite-sized desserts, you might want to check out my crispy garlic chicken recipe for another crowd-friendly favorite, or the easy homemade pizza crust guide to perfect your party spread even further!
Pin This Recipe!
Perfect Mini Graduation Cheesecake Bites Easy Festive Diploma Recipe
These mini cheesecake bites are a quick, easy, and festive dessert perfect for graduations and parties, featuring a creamy filling and a crunchy graham cracker crust topped with cute diploma toppers.
- Prep Time: 20 minutes
- Cook Time: 20 minutes
- Total Time: 2 hours 40 minutes
- Yield: 24 mini cheesecake bites 1x
- Category: Dessert
- Cuisine: American
Ingredients
- 1 1/2 cups (150g) graham cracker crumbs
- 1/3 cup (75g) unsalted butter, melted
- 2 tablespoons granulated sugar
- 16 ounces (450g) cream cheese, softened (full-fat)
- 2/3 cup (130g) granulated sugar
- 2 large eggs, room temperature
- 1 teaspoon pure vanilla extract
- 1/3 cup (80ml) sour cream
- Miniature rolled paper scrolls (DIY or store-bought)
- Thin ribbon or twine to tie the scrolls
- Optional: edible glitter or small sugar stars
Instructions
- Preheat your oven to 325°F (160°C). Line your mini muffin tin with paper liners or lightly grease the cups.
- In a medium bowl, combine graham cracker crumbs, melted butter, and sugar. Stir until the mixture looks like wet sand and holds together when pinched.
- Press the crust mixture firmly into the bottom of each muffin cup using the back of a spoon or a small glass bottom.
- In a large bowl, beat softened cream cheese with sugar until smooth and creamy. Add eggs one at a time, mixing well after each addition. Stir in vanilla extract and sour cream until just combined, mixing gently.
- Fill each crust-lined cup with cheesecake batter about 2/3 full. Use a piping bag or zip-top bag with the corner snipped for neatness.
- Bake in the preheated oven for 18-20 minutes until edges are set but centers still jiggle slightly.
- Cool the cheesecake bites in the pan for 10 minutes, then transfer to a wire rack to cool completely. Refrigerate for at least 2 hours to firm up.
- Add festive diploma toppers just before serving by tying miniature paper scrolls with ribbon or twine and placing one on each cheesecake bite.
Notes
Bring cream cheese and eggs to room temperature before mixing to avoid lumps. Do not overmix the filling to prevent cracks. Press crust firmly to avoid crumbly bites. Use the jiggle test to check doneness. Chill thoroughly for best texture. Can be made a day ahead and stored covered in the fridge. Freeze up to 2 months, thaw overnight before serving.
Nutrition
- Serving Size: 1 mini cheesecake bi
- Calories: 120
- Fat: 8
- Carbohydrates: 9
- Protein: 2
Keywords: mini cheesecake bites, graduation dessert, easy cheesecake recipe, party dessert, creamy cheesecake, graham cracker crust, festive dessert