Love this? Save it for later!
Share the inspiration with your friends
My neighbor Kate asked me last Tuesday why I couldn’t just dump all the candy on a big cutting board and call it a day. I was in the middle of explaining my elaborate plan for tiered platters and color-coordinated candy bowls for our building’s Halloween get-together. I started to explain why that wouldn’t work—then stopped. Honestly, I had no good reason. I was just overcomplicating things, as I tend to do when I’m trying to impress people. So I tried it. I grabbed the biggest wooden board I owned, dumped out the bags of candy, and just… arranged it. No fuss, no theme, no Pinterest-worthy labels. And you know what? It was the first thing to disappear. People loved grazing on it while they talked, and I didn’t spend half the party stressing over a snack. That’s when I realized that sometimes the simplest idea is actually the smartest one. This quick Halloween candy board in 10 minutes has become my go-to for every October gathering since. Maybe you’ve been there too—staring at a pile of candy bags and wondering why we make this so hard on ourselves.
Why You’ll Love This Quick Halloween Candy Board in 10 Minutes
Let’s be real—Halloween is already chaotic enough without adding complicated recipes to the mix. Between getting the kids ready, answering the door every five minutes, and trying to keep the dog from eating every dropped piece of candy, who has time to make an elaborate spread? This candy board solves that problem completely.
- Truly 10 Minutes: I timed myself, and it took me exactly 8 minutes from opening the first bag to stepping back to admire my work. No baking, no chopping, no waiting.
- Zero Special Ingredients: You’re literally using the candy you already bought for trick-or-treaters or the stash you’ve been hiding in the pantry. No grocery store run required.
- Perfect for Halloween Chaos: Whether it’s a last-minute playdate, a neighborhood gathering, or just a fun family movie night, this board adapts instantly.
- Crowd-Pleaser Guaranteed: I’ve brought this to three different Halloween parties this month, and it’s been the first thing emptied every single time.
- Minimal Cleanup: One board, one knife (if you’re cutting anything), and you’re done. No bowls to wash, no serving spoons to track down.
What makes this quick Halloween candy board different from just dumping candy in a bowl? It’s the arrangement. When you take two extra minutes to group candies by color and texture, it suddenly looks intentional. It feels like an event, not an afterthought. And honestly, it makes people happy in a way that a sad bowl of mixed wrappers just doesn’t.
This is the kind of recipe that makes you close your eyes after that first bite of chocolate and caramel—because you didn’t stress to get there. It’s Halloween hosting reimagined: faster, easier, and with the same soul-soothing satisfaction of sharing something sweet with people you love.
What Ingredients You Will Need
This quick Halloween candy board in 10 minutes uses the candy you already have on hand. The trick is variety—different textures, colors, and sizes make the board feel abundant and exciting without needing to buy anything fancy.
- Chocolate Bars (full-size or fun-size): Think Snickers, Milky Way, Hershey’s, or Twix. I prefer a mix of milk and dark chocolate for balance. (Pro tip: break full-size bars into pieces so people can grab just a bite.)
- Gummy Candies: Gummy worms, bears, or spiders add that chewy texture and bright colors. I look for brands like Albanese or Black Forest for the best texture—they don’t get hard or stale as quickly.
- Caramel or Nougat Candies: Caramel squares, Rolos, or Milky Way bites bring that soft, sticky sweetness that contrasts nicely with crunchier options.
- Crunchy or Wafer Candies: Kit Kats, Butterfingers, or Nestle Crunch add that satisfying snap. I always include at least one of these for texture contrast.
- Sour Candies: Sour Patch Kids, Warheads, or sour gummy worms give a tangy pop that cuts through all the sweetness. This is a non-negotiable for me now—it balances the board perfectly.
- Licorice or Twizzlers: Pull-apart Twizzlers or black licorice add a fun, stringy element that people love to grab and nibble on during conversation.
- Mini Peanut Butter Cups: Reese’s are basically a Halloween staple. I scatter these throughout the board for little pockets of salty-sweet goodness.
- Seasonal or Novelty Items: Candy corn, candy pumpkins, or mellowcremes add that festive orange-and-yellow color palette. Even if you’re not a candy corn fan, it adds visual interest.
- Optional Extras: Pretzel sticks or rods (for salty contrast), popcorn (plain or caramel), dried apple rings, or small cookies like Nutter Butters. These aren’t required, but they add depth if you have them.
For the best visual effect, I recommend picking at least five different types of candy from different categories. The mix of chocolate, gummy, crunchy, and sour keeps people coming back for “just one more piece.” If you’re shopping specifically for this board, hit up Target or Walmart for their seasonal candy aisles—they usually have variety packs that save you money.
Equipment Needed
You don’t need anything fancy for this quick Halloween candy board in 10 minutes. Here’s what I use:
- Large Cutting Board or Serving Platter: A wooden board (about 16×12 inches) works best, but any large flat surface works—a baking sheet, a marble slab, even a clean pizza pan. I use my IKEA bamboo board because it’s lightweight and easy to carry.
- Small Bowls or Ramekins: For loose candies like M&Ms, candy corn, or mini peanut butter cups. This keeps them from rolling off the board. I use three or four small ramekins.
- Parchment Paper or Cheese Paper: Optional, but if your board is old or stained, a sheet of parchment underneath makes cleanup even easier and looks rustic.
- Knife and Cutting Surface: If you’re breaking down full-size candy bars into pieces, you’ll need a sharp chef’s knife. A serrated knife works best for chocolate to get clean cuts.
- Tongs or Small Spoons: For serving, especially if you’re worried about hygiene. I keep a pair of small tongs on the side for gummy candies.
- Budget-Friendly Option: Don’t have a nice board? A rimmed baking sheet lined with a festive kitchen towel or napkin works perfectly. Nobody cares what it’s on when there’s chocolate involved.
Preparation Method
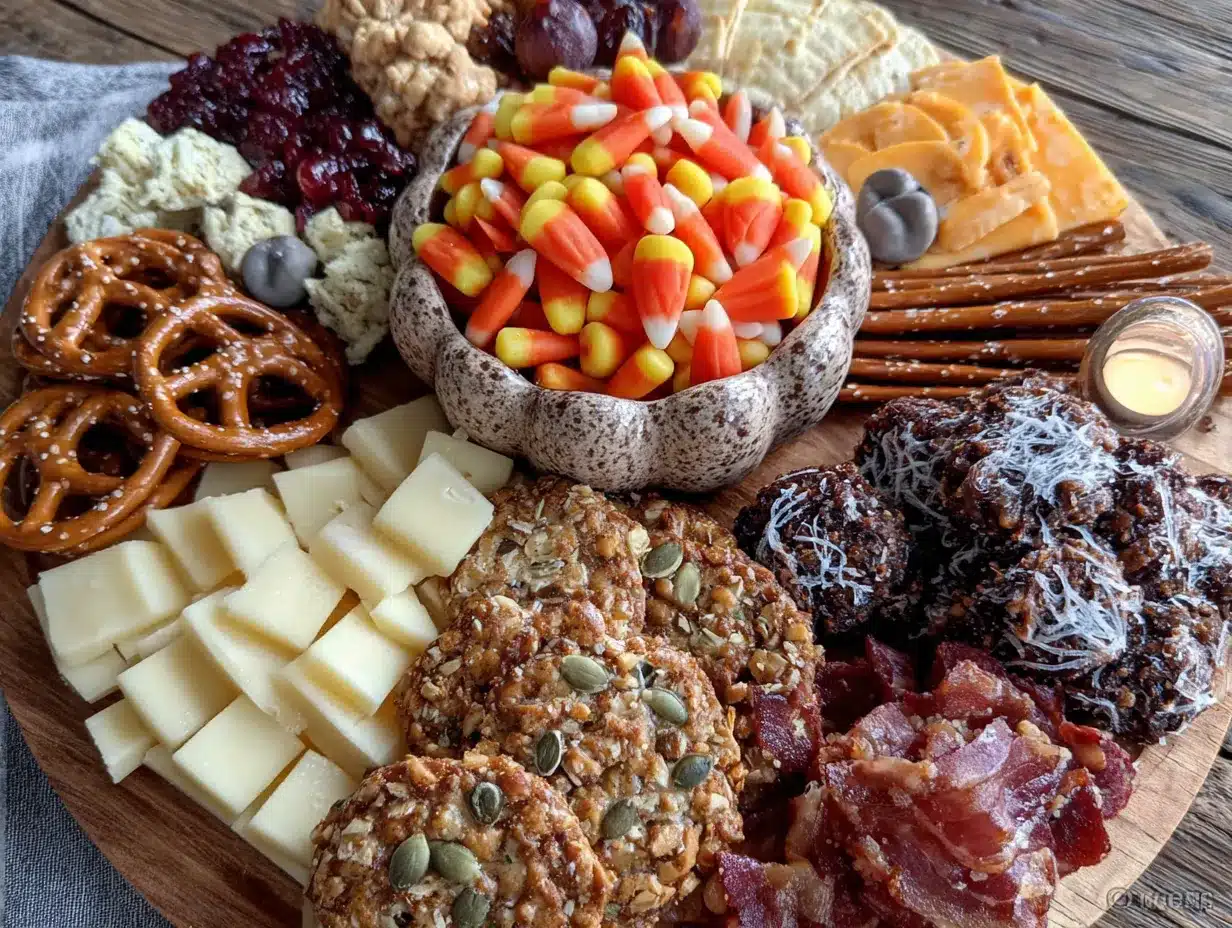
This quick Halloween candy board in 10 minutes comes together faster than you can find a parking spot at the grocery store. Here’s exactly how I do it:
- Prep Your Board (1 minute): Place your board or platter on the counter. If you’re using parchment, lay it down now and trim the edges so it doesn’t hang over too much. I like to leave a little overhang for a rustic look.
- Place Your Bowls (1 minute): Set your small ramekins or bowls on the board first. I space them out—one in each corner or in a triangle pattern if I’m using three. This creates structure for the rest of the arrangement.
- Fill the Bowls (2 minutes): Pour loose candies into the bowls. Candy corn goes in one, M&Ms in another, mini peanut butter cups in the third. Don’t overfill—you want them to look abundant, not overflowing and messy.
- Add the Large Items (2 minutes): Place your full-size candy bars and larger items around the bowls. I break Snickers and Milky Way bars into two or three pieces and fan them out. Twizzlers get laid in a loose pile or zigzag pattern. This is where the visual weight comes from.
- Fill the Gaps (2 minutes): Now go in with the medium-sized candies. Gummy worms get twisted into little nests or scattered. Kit Kats stand up on their edges for height. I tuck them into any empty spaces so nothing looks sparse.
- Add the Small Details (1 minute): Sprinkle mini candies (think individual M&Ms, small gummy bears, or candy corn) into any remaining gaps. This fills the board completely and makes it look intentional and lush.
- Final Adjustments (1 minute): Step back and look at your board. Is there a big empty spot? Tuck a few more gummy worms in there. Does one side look heavier than the other? Swap a couple items around. I always end up moving two or three things at this stage.
- Serve Immediately: That’s it. Walk it to the table and watch it disappear. If you’re making it ahead, cover loosely with plastic wrap and keep at room temperature—don’t refrigerate or the chocolate will bloom.
A quick note: if you’re using chocolate that’s been sitting in a warm car or near a window, let it cool down in the fridge for 10 minutes before arranging. Soft chocolate gets smudgy and messy on the board.
Cooking Tips & Techniques
I’ve made this quick Halloween candy board in 10 minutes about eight times this month, and I’ve learned a few things the hard way. Here’s what I wish I’d known from the start:
- Color blocking is your friend: Group candies by color when possible. Put all the orange and yellow stuff (candy corn, orange gummies) together, then the brown and gold items (chocolate, caramels) in another section. It looks way more intentional than a random mix.
- Don’t forget height: Flat boards look boring. Stand some Kit Kats on their edges, lean Twizzlers against a bowl, or stack a few candy bars on top of each other. The visual variety makes people stop and look.
- Watch out for melting: If your kitchen is warm, chocolate can get soft fast. I keep my board in the coolest part of the room and avoid putting it near the stove or in direct sunlight. For outdoor parties, I set the board out just before serving.
- Keep wrappers on some items: I know this sounds lazy, but leaving a few candies in their wrappers (especially brightly colored ones) adds visual interest and makes the board feel more like a candy store display. Plus, it keeps the chocolate from getting sticky.
- My biggest failure: I once made this board for a Halloween potluck and put all the gummy candies in one corner. By the time people got to them, they’d absorbed moisture from the air and were sticky and hard to separate. Now I spread gummy items out across the board so they stay fresh and easy to grab.
Variations & Adaptations
This quick Halloween candy board in 10 minutes is endlessly adaptable. Here are some ways I’ve customized it:
- Healthy-ish Version: Swap half the candy for fresh fruit (apple slices, grapes, clementines), popcorn, and dark chocolate-covered almonds. It still feels festive but has a bit more nutritional value for kids who’ve already had their sugar quota.
- Adult Halloween Board: Add dark chocolate bars with sea salt, bourbon caramels, and candied pecans. Toss in some dried figs or apricots for sophistication. I did this for a grown-up Halloween party and it was a hit.
- Nut-Free Option: Many candies contain nuts or are processed on shared equipment. For nut-free gatherings, stick with Skittles, Starburst, Twizzlers, Dots, and plain Hershey bars. Always check labels—ingredients change.
- Vegan Candy Board: Surprisingly easy! Many dark chocolate bars, sour gummy candies (check for gelatin), and fruit-based candies are vegan. Brands like Enjoy Life make allergy-friendly chocolate that works great.
- Gluten-Free Focus: Most candy is naturally gluten-free, but watch out for items like Twix, Kit Kat, and some wafer bars. Stick with plain chocolate bars, gummy candies, and peanut butter cups for a safe board.
- Seasonal Swaps: For Christmas, use red and green candies. For Easter, pastel colors and chocolate bunnies. The method stays exactly the same—just change the color palette.
Serving & Storage Suggestions
This quick Halloween candy board in 10 minutes is best served at room temperature, right when you make it. The chocolate should be firm but not hard, and the gummy candies should be soft and chewy—not refrigerated and tough.
For presentation, I place the board in the center of the table where people can reach it from all sides. If you’re worried about double-dipping, provide small tongs or cocktail napkins for each person. I also like to scatter a few extra napkins nearby because, let’s face it, chocolate gets everywhere.
If you’re serving this alongside other treats, it pairs beautifully with hot apple cider, pumpkin spice lattes, or even a simple glass of cold milk. For adult gatherings, a dark stout or bourbon complements the chocolate perfectly.
Storage: This board doesn’t keep well once assembled—candies start to absorb moisture from each other and lose their individual textures. If you have leftovers, separate them back into their original bags or airtight containers. Chocolate goes in a cool, dark place (not the fridge unless it’s very warm). Gummy candies stay fresh at room temperature in sealed bags.
Make-Ahead Note: You can prep the board up to 2 hours ahead by covering it loosely with plastic wrap and keeping it in a cool spot. Don’t refrigerate it—the condensation will make chocolate bloom and gummy candies sticky. If you’re making it the night before, just prep the ingredients and assemble the board right before serving.
Nutritional Information & Benefits
Let’s be honest—this quick Halloween candy board in 10 minutes is a treat, not a health food. But here’s the thing: when you share a board like this, people tend to eat less than they would from a bowl because they’re grazing and socializing. A study from Cornell actually found that people eat less candy when it’s arranged attractively because they take time to choose each piece.
Estimated per serving (about 1/4 cup of mixed candy):
- Calories: 180-250 (varies widely by candy type)
- Fat: 8-12g
- Carbohydrates: 28-35g
- Sugar: 20-28g
- Protein: 2-4g
Potential allergens: This board typically contains dairy (chocolate), nuts (peanut butter cups, Snickers), soy (many chocolate bars), and gluten (wafer candies). Always label your board if you’re serving guests with allergies.
On the bright side, dark chocolate contains antioxidants and flavonoids that support heart health. Peanuts provide protein and healthy fats. And honestly? A little bit of sugar and nostalgia is good for the soul—especially during the chaos of Halloween.
Conclusion
This quick Halloween candy board in 10 minutes has honestly changed how I approach Halloween hosting. It’s proof that you don’t need fancy recipes or hours in the kitchen to create something that feels special. Sometimes the best ideas are the ones that come from someone asking “why not?”—like my neighbor Kate did that Tuesday afternoon.
I love this board because it respects your time while still delivering on the festive fun. It’s the kind of thing that makes you look like you put in effort when you really just dumped candy on a board and arranged it nicely. And honestly? That’s the kind of cooking I need in my life right now.
I’d love to hear how your candy board turns out! Drop a comment below with your favorite candy combination—I’m always looking for new ideas. And if you try a fun variation, share a photo and tag me. Happy Halloween, and remember: it’s okay to take the easy route sometimes. The candy doesn’t care how it gets to the board.
Frequently Asked Questions
Can I make this candy board ahead of time?
Yes, but no more than 2 hours before serving. Cover it loosely with plastic wrap and keep it in a cool spot. Don’t refrigerate it—condensation will ruin the chocolate and make gummy candies sticky.
How much candy do I need for a board?
For a standard 16×12 inch board, plan on about 2-3 pounds of mixed candy. That’s roughly 8-10 full-size candy bars plus a couple bags of smaller candies. For a crowd of 10-12 people, this should be plenty.
What if I don’t have a wooden board?
No problem! Use a large baking sheet, a marble slab, a clean pizza pan, or even a large cutting board. You can line it with parchment paper or a festive kitchen towel for extra flair. The board itself doesn’t matter—it’s the candy that gets the attention.
How do I keep chocolate from melting?
Keep your board in the coolest part of the room, away from direct sunlight, heat vents, or the stove. If your kitchen is warm, refrigerate the chocolate for 15 minutes before arranging. For outdoor parties, set the board out just before serving and bring it in quickly after.
Can I use leftover Halloween candy from trick-or-treating?
Absolutely! That’s actually the best use for this board. Just sort through the candy and pick out a good variety of textures and colors. Mixing store-bought with trick-or-treat candy makes the board feel even more abundant and fun.
Pin This Recipe!
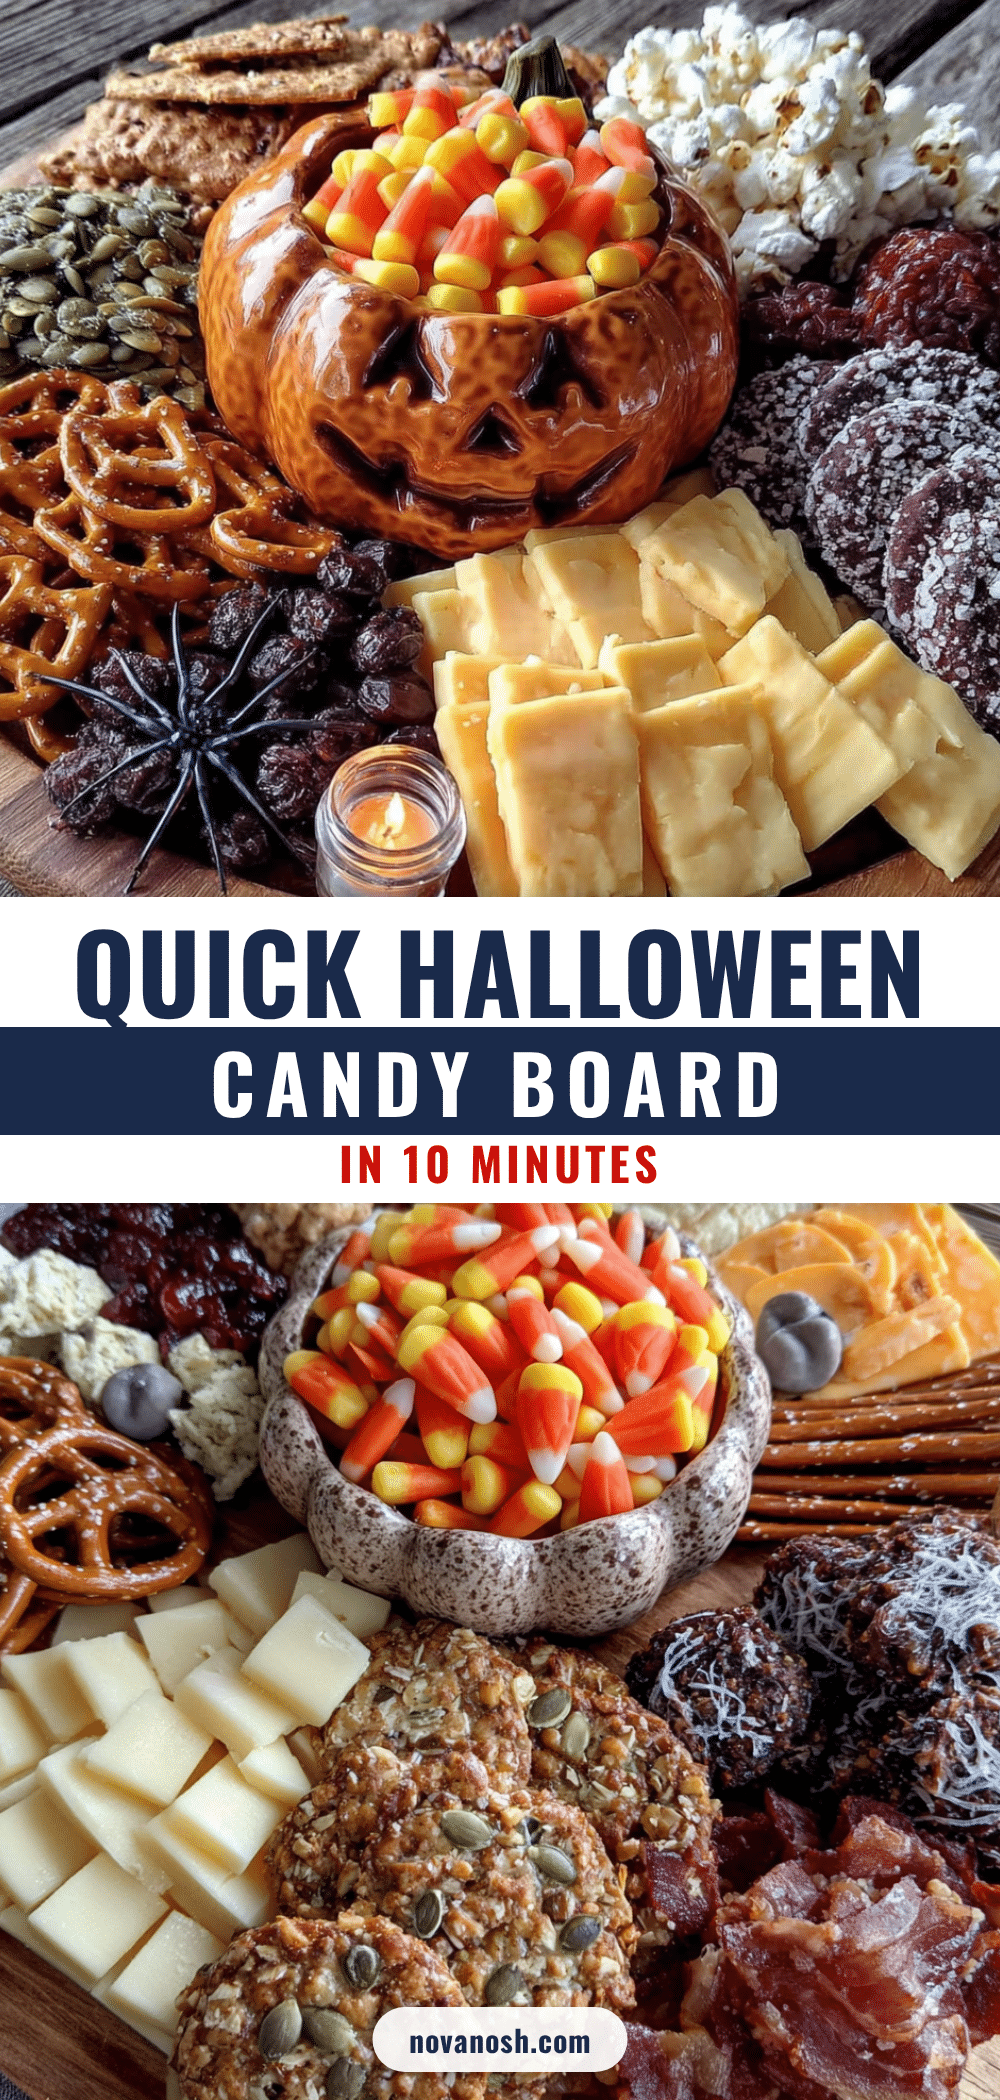
Quick Halloween Candy Board in 10 Minutes Easy Recipe
A super simple Halloween candy board that comes together in just 10 minutes. Perfect for last-minute gatherings, this no-fuss arrangement of your favorite candies is a guaranteed crowd-pleaser with minimal cleanup.
- Prep Time: 10 minutes
- Cook Time: 0 minutes
- Total Time: 10 minutes
- Yield: 10-12 servings
- Category: Appetizer
- Cuisine: American
Ingredients
- Chocolate Bars (full-size or fun-size): Snickers, Milky Way, Hershey’s, or Twix
- Gummy Candies: Gummy worms, bears, or spiders
- Caramel or Nougat Candies: Caramel squares, Rolos, or Milky Way bites
- Crunchy or Wafer Candies: Kit Kats, Butterfingers, or Nestle Crunch
- Sour Candies: Sour Patch Kids, Warheads, or sour gummy worms
- Licorice or Twizzlers: Pull-apart Twizzlers or black licorice
- Mini Peanut Butter Cups: Reese’s
- Seasonal or Novelty Items: Candy corn, candy pumpkins, or mellowcremes
- Optional Extras: Pretzel sticks or rods, popcorn (plain or caramel), dried apple rings, or small cookies like Nutter Butters
Instructions
- Prep Your Board (1 minute): Place your board or platter on the counter. If using parchment, lay it down now and trim the edges, leaving a little overhang for a rustic look.
- Place Your Bowls (1 minute): Set small ramekins or bowls on the board first, spacing them out in each corner or in a triangle pattern.
- Fill the Bowls (2 minutes): Pour loose candies into the bowls (candy corn, M&Ms, mini peanut butter cups). Don’t overfill.
- Add the Large Items (2 minutes): Place full-size candy bars and larger items around the bowls. Break bars into pieces and fan them out. Lay Twizzlers in a loose pile or zigzag pattern.
- Fill the Gaps (2 minutes): Add medium-sized candies like gummy worms (twisted into nests) and Kit Kats (standing on edges). Tuck into empty spaces.
- Add the Small Details (1 minute): Sprinkle mini candies (individual M&Ms, small gummy bears, candy corn) into remaining gaps.
- Final Adjustments (1 minute): Step back and adjust for balance—fill empty spots or swap items as needed.
- Serve Immediately: Walk it to the table. If making ahead, cover loosely with plastic wrap and keep at room temperature (do not refrigerate).
Notes
Color blocking by candy color makes the board look intentional. Add height by standing Kit Kats on edges or leaning Twizzlers against bowls. Keep chocolate cool to avoid melting. For outdoor parties, set board out just before serving. Leftovers should be separated back into original bags or airtight containers.
Nutrition
- Serving Size: 1/4 cup of mixed can
- Calories: 180250
- Sugar: 2028
- Fat: 812
- Carbohydrates: 2835
- Protein: 24
Keywords: Halloween candy board, easy Halloween snack, candy platter, last-minute Halloween, no-bake Halloween, candy board, quick Halloween recipe