Love this? Save it for later!
Share the inspiration with your friends
The Halloween party was in four hours and I’d completely forgotten. Not the party itself—I’d remembered that. I’d even bought a costume. What I forgot was the dessert I promised to bring. Everyone else would be showing up with those elaborate witch-hat cupcakes and graveyard dirt cakes that look like they took three days. I had a bag of candy eyes, some store-bought cookie dough, and honestly, a mild panic setting in.
I stared at my pantry for a solid minute, hoping something magical would appear. That’s when I spotted the round pizza pan I’d bought on clearance months ago and never used. A cookie cake. Of course. I could make a giant cookie, wrap it up like a mummy, and call it a day. I mean, how hard could it be? The answer, let me tell you, was not hard at all. In fact, it was almost embarrassingly easy.
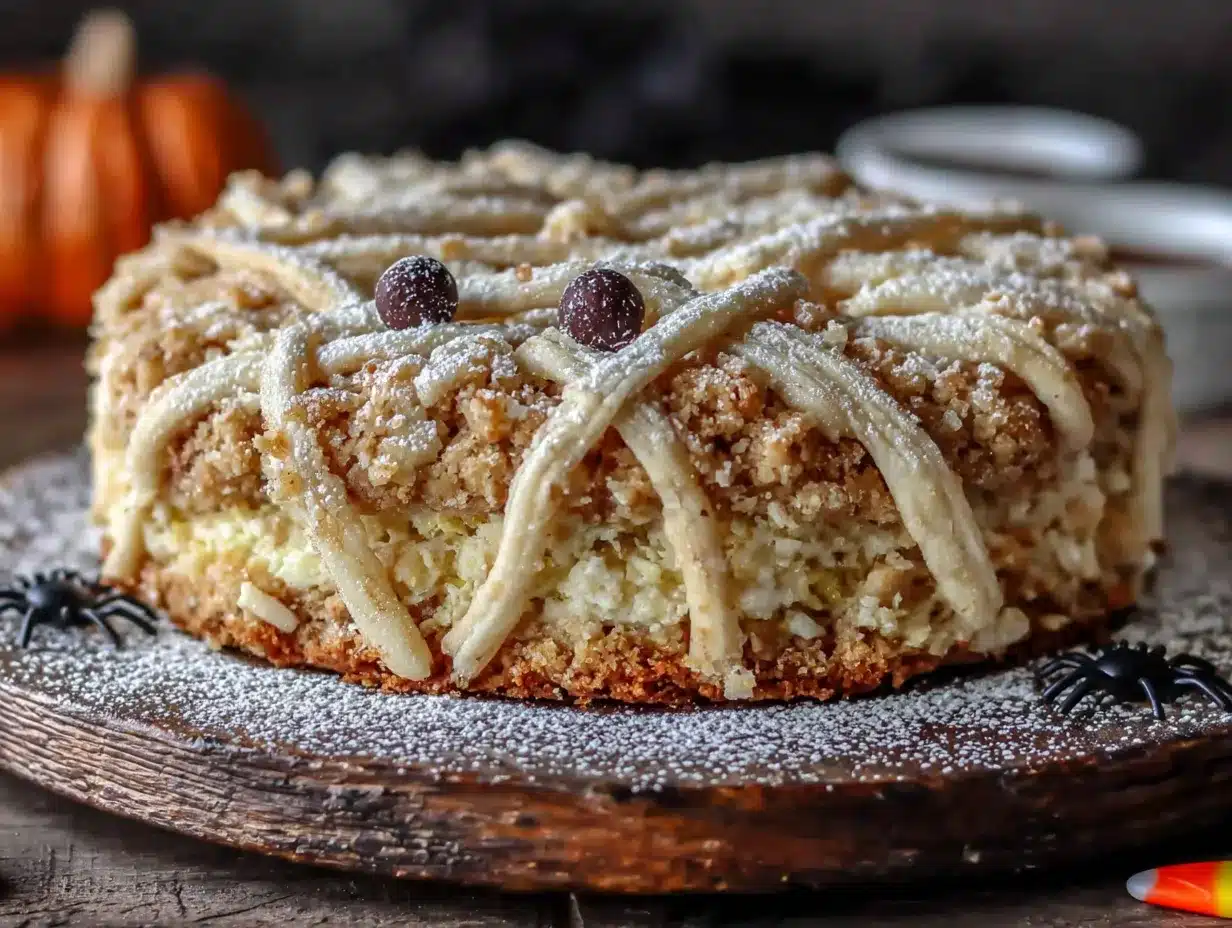
I threw the dough onto the pan, baked it until it was golden, and started layering on those white icing strips to look like mummy bandages. My hands were shaking a little from the caffeine I’d downed to wake up, and one strip fell sideways. I just left it there. It looked more mummy-like that way anyway. I stuck two candy eyes right in the middle, and honestly, it stared back at me like a little ghost that was mildly judgmental of my life choices.
When I walked into the party with that slightly lopsided, googly-eyed mummy cookie cake, I expected a few polite smiles. Instead, people lost it. Kids wanted a picture. Adults wanted a slice. By the end of the night, the pan was empty, and three people asked for the recipe. Maybe you’ve been there—the underdog dessert that somehow steals the show. This one stayed with me because it wasn’t just cute. It was genuinely delicious. And it saved me from showing up empty-handed.
Why You’ll Love This Recipe
Let me be real with you for a second. I’ve tested this mummy cookie cake about six times now, tweaking the dough thickness and the icing technique each time. What I landed on is the perfect balance of fun and flavor. This isn’t just a Halloween novelty—it’s a dessert you’ll actually want to eat again and again.
- Quick & Easy: From start to finish, you’re looking at under 40 minutes. That includes baking and decorating. Perfect for the night before Halloween or even the morning of.
- Simple Ingredients: You probably have most of this already. Butter, sugar, flour, vanilla. The only “special” thing is the candy eyes, and those are everywhere in October.
- Perfect for Halloween Parties: Whether it’s a school celebration, office potluck, or family gathering, this cake fits right in. It’s festive without being fussy.
- Crowd-Pleaser: I’ve watched kids and adults fight over the last slice. There’s something about the googly eyes that makes everyone smile.
- Unbelievably Delicious: The edges get slightly crisp while the center stays soft and chewy. The vanilla buttercream icing adds just the right sweetness. It’s comfort food dressed up in a costume.
What makes this recipe different from the dozens of other Halloween desserts out there? It’s the texture, honestly. Most cookie cakes turn out either too cakey or too hard. This one hits that perfect chewy middle ground. Plus, the decorating method I’ll show you is foolproof. You don’t need piping skills or a steady hand. In fact, a little wobble makes it look better. It’s the kind of dessert that makes you close your eyes after the first bite, even while it’s staring at you with those little candy eyes.
What Ingredients You Will Need
This recipe uses simple, everyday ingredients to create something that looks way more complicated than it actually is. The magic is in how they come together. Here’s what you’ll need to gather.
For the Cookie Base
- 1 cup (226g) unsalted butter, softened to room temperature. I prefer using Land O’Lakes for consistent results, but any good-quality butter works.
- 1 cup (200g) granulated sugar — adds sweetness and helps create those slightly crispy edges.
- 1 large egg, room temperature. Cold eggs can make the dough seize up, so let it sit out for 15 minutes.
- 2 teaspoons vanilla extract — pure vanilla makes a noticeable difference here. Imitation works in a pinch.
- 2 cups (250g) all-purpose flour, spooned and leveled. Don’t scoop directly from the bag or you’ll pack in too much.
- 1/2 teaspoon baking soda — helps the cookie spread just enough without puffing up too much.
- 1/2 teaspoon salt — balances the sweetness and enhances the vanilla flavor.
- 1 cup (175g) semi-sweet chocolate chips — you can use milk chocolate if you prefer a sweeter cookie. I’ve used Ghirardelli and Toll House both with great success.
For the Mummy Decorating
- 1/2 cup (113g) unsalted butter, softened for the icing.
- 2 cups (240g) powdered sugar — sifted if it’s clumpy.
- 2 tablespoons milk — whole milk gives a creamier texture, but any kind works.
- 1 teaspoon vanilla extract — keeps the flavor consistent with the cookie.
- 24-30 candy eyes — you can find these at most grocery stores in the baking aisle during October. Wilton brand is reliable. Buy two packs just in case some get eaten before you decorate.
Ingredient Tips & Substitutions
If you’re dairy-free, swap the butter for a plant-based baking stick. I’ve tried it with Earth Balance and it worked fine, though the cookie was slightly less crisp on the edges. For a gluten-free version, use a 1:1 gluten-free flour blend. Avoid coconut flour or almond flour—they change the texture completely. The candy eyes are the one thing you can’t really substitute, but you could use mini chocolate chips if you’re in a real pinch. They just won’t have that same funny look.
Equipment Needed
You don’t need a fancy kitchen to pull this off. Here’s what I use every time I make this mummy cookie cake.
- 12-inch round pizza pan or baking sheet — I use a non-stick Chicago Metallic pan. A regular baking sheet works too, but the circle shape is part of the look.
- Electric hand mixer or stand mixer — you can mix by hand, but it takes some elbow grease. A $20 hand mixer from Hamilton Beach does the job.
- Large mixing bowl — any bowl works, but I prefer glass so I can see if the butter is fully creamed.
- Spatula — for scraping down the sides and smoothing the dough onto the pan.
- Piping bag or zip-top bag — for the icing strips. A quart-size bag is perfect. No need to buy a fancy piping set.
- Cooling rack — helps the cookie cool evenly so the icing doesn’t melt.
- Measuring cups and spoons — accuracy matters more than you’d think with cookie dough.
If you don’t have a pizza pan, try a cast iron skillet. The edges get extra crispy and it looks rustic. Just adjust the baking time by a few minutes since cast iron holds heat differently.
Preparation Method
Alright, let’s get to the fun part. I’ll walk you through each step like we’re cooking together in my kitchen. Don’t worry about being perfect—I’ve messed up every step at least once and it still turned out fine.
- Preheat your oven to 350°F (175°C). Get this going first so it’s ready when you are. Lightly grease your 12-inch round pan with butter or non-stick spray. I use a paper towel to spread it evenly.
- Cream the butter and sugar. In your large mixing bowl, beat the softened butter and granulated sugar together on medium speed for 2-3 minutes. You’re looking for a light, fluffy texture. It should look pale yellow and almost grainy. Scrape down the sides once halfway through. I once forgot to soften the butter and ended up with chunks—don’t do that. Let it sit out for at least 30 minutes.
- Add the egg and vanilla. Crack the egg into a small bowl first (just in case of shells). Add it to the butter mixture along with the vanilla extract. Beat on low until just combined. The mixture might look a little separated at this point—that’s normal.
- Mix the dry ingredients separately. In a medium bowl, whisk together the flour, baking soda, and salt. This ensures the leavening is evenly distributed. I learned this the hard way after biting into a pocket of baking soda once. Not fun.
- Combine wet and dry ingredients. Gradually add the flour mixture to the butter mixture, mixing on low speed. Stop as soon as you don’t see any more white streaks. Overmixing makes the cookie tough. The dough will be thick and slightly sticky.
- Fold in the chocolate chips. Use your spatula to stir them in by hand. Make sure they’re evenly distributed. I like to reserve a few to press onto the top of the dough later for visual appeal.
- Press the dough onto the pan. Transfer the dough to your greased pan. Use your fingers or the back of a spoon to press it into an even circle. Aim for about 1/4-inch thickness. If the dough sticks to your fingers, lightly wet them with water. The edges should be slightly thicker than the center so they don’t burn.
- Bake for 15-18 minutes. Place the pan on the middle rack. At 15 minutes, check it. The edges should be golden brown and the center should look set but still soft. A toothpick inserted in the center should come out with a few moist crumbs. Overbaking dries it out. I pulled mine at 16 minutes last time and it was perfect.
- Cool completely on the pan. This is crucial. Let the cookie cake sit on the pan for 10 minutes, then transfer the pan to a cooling rack. Wait until it’s fully cool to room temperature before decorating. If you put icing on a warm cookie, it’ll turn into a puddle. Trust me, I’ve done it.
- Make the icing. While the cookie cools, beat the softened butter for the icing on medium speed until smooth. Gradually add the powdered sugar, one cup at a time, beating on low. Add the milk and vanilla, then increase to medium-high and beat for 2 minutes until fluffy. If it’s too thick, add another teaspoon of milk. Too thin, add a tablespoon of powdered sugar.
- Decorate the mummy. Transfer the icing to a piping bag or a zip-top bag with the corner snipped off. Starting from the outer edge, pipe horizontal strips across the cookie, leaving small gaps between each strip. Don’t worry about making them straight—mummies are supposed to look messy. Leave a small area in the middle clear for the eyes. Press two candy eyes into the icing. Pipe a few more thin strips over the top to look like loose bandages.
- Let the icing set. Pop the decorated cookie cake in the fridge for 10-15 minutes. This helps the icing firm up so it doesn’t smudge when you cut it. Slice and serve.
Cooking Tips & Techniques
After making this mummy cookie cake more times than I care to admit, I’ve picked up a few tricks that make a real difference.
Don’t overwork the dough. This is the number one mistake people make. Once you add the flour, mix only until it disappears. Overmixing develops gluten, which makes the cookie tough instead of tender. I learned this after making a batch that could have doubled as a frisbee.
Chill the dough if you have time. If you can refrigerate the pressed dough for 20-30 minutes before baking, do it. It prevents the cookie from spreading too much and keeps the center thick and chewy. I skipped this step once when I was in a rush, and the cookie spread into a thin, crispy disc. Still tasty, but not as satisfying.
Use a serrated knife to slice. A sharp chef’s knife can crack the cookie or smudge the icing. A serrated knife saws through cleanly. Run it under hot water and wipe dry between cuts for the neatest slices.
Test your oven temperature. Ovens run hot or cold more often than you’d think. I keep an oven thermometer hanging on the middle rack. My oven runs 25 degrees hot, so I set it to 325°F instead of 350°F. That simple adjustment saved me from burned edges.
Make the icing the right consistency. It should be thick enough to hold its shape when piped but soft enough to squeeze easily. If it’s too stiff, it’ll tear the cookie surface. Add milk one teaspoon at a time until it feels right.
Variations & Adaptations
One of the best things about this recipe is how easy it is to change up. Here are some ways I’ve adapted it over the years.
Gluten-Free Version
Swap the all-purpose flour for a 1:1 gluten-free baking blend. I’ve used Bob’s Red Mill with great results. Add an extra tablespoon of milk to the dough since gluten-free flours absorb more moisture. The texture is slightly more crumbly but still delicious.
Dairy-Free Version
Use plant-based butter sticks for both the cookie and the icing. Miyoko’s is my favorite for baking. Use oat milk or almond milk in the icing. The cookie will be a bit less golden, but the flavor holds up well.
Chocolate Mummy
Replace 1/4 cup of the flour with unsweetened cocoa powder. Reduce the chocolate chips to 1/2 cup. The dark cookie looks amazing against the white icing strips. I made this for a friend who’s a chocoholic and she said it was the best Halloween dessert she’d ever had.
Pumpkin Spice Version
Add 1 teaspoon pumpkin pie spice and 1/4 cup pumpkin puree to the dough. Reduce the butter to 3/4 cup. The dough will be stickier, so chill it for 30 minutes before pressing onto the pan. This version tastes like fall in cookie form.
Mini Mummy Cookies
Instead of one large cake, scoop the dough into 2-tablespoon balls and flatten slightly. Bake for 8-10 minutes. Decorate each one as a mini mummy. These are perfect for classroom parties or goody bags.
Serving & Storage Suggestions
This mummy cookie cake is best served at room temperature. The texture is softest and the icing has the right amount of give. If you’ve refrigerated it, let it sit out for 15-20 minutes before slicing.
For presentation, I like to place the whole cookie cake on a round wooden board or a white cake stand. The contrast makes the googly eyes pop. You can also scatter a few extra candy eyes around the board for a fun, creepy effect. Add some orange and black sprinkles if you’re feeling extra festive.
Pair it with a glass of cold milk, a scoop of vanilla ice cream, or a warm mug of apple cider. For an adult gathering, it goes surprisingly well with a dark stout beer. The roasted notes complement the chocolate chips nicely.
Storage: Keep the cookie cake in an airtight container at room temperature for up to 3 days. Layer parchment paper between slices if stacking. Do not refrigerate it uncovered—the cookie will dry out and the icing will get hard. If you need to store it longer, wrap the entire cake tightly in plastic wrap and then foil, and freeze for up to 2 months. Thaw overnight in the fridge, then bring to room temperature before serving.
The flavors actually get better after a day. The cookie softens slightly and the icing melds into the top layer. My family fights over the leftovers more than the fresh cake.
Nutritional Information & Benefits
Here’s the honest truth—this is a treat, not a health food. But that doesn’t mean it can’t fit into a balanced lifestyle. One slice (based on 12 servings) contains approximately:
- Calories: 380
- Fat: 20g
- Carbohydrates: 48g
- Protein: 4g
- Sugar: 32g
The butter provides a small amount of vitamin A, and the chocolate chips offer antioxidants from cocoa. If you use dark chocolate chips, you’ll get a bit more flavonoid content. The vanilla extract has trace amounts of vanillin, which has been studied for its calming properties. Okay, that last one is a stretch, but every little bit counts, right?
For those with dietary concerns, this recipe contains gluten, dairy, and eggs. The candy eyes may contain soy lecithin. Always check labels if you’re serving someone with allergies. I’ve included substitution options above for gluten-free and dairy-free versions.
My personal philosophy? Desserts like this are about joy and connection. One slice of mummy cookie cake at a Halloween party isn’t going to derail anyone’s health goals. It’s going to make people smile. And honestly, that’s a pretty good kind of nutrition.
Frequently Asked Questions
Can I use store-bought cookie dough?
Absolutely. If you’re short on time, a 16-ounce tube of refrigerated sugar cookie or chocolate chip dough works perfectly. Just press it into the pan and follow the baking instructions on the package. The homemade version tastes better in my opinion, but the store-bought version saves you 10 minutes.
How far in advance can I make this?
You can bake the cookie base up to 2 days ahead and store it wrapped tightly at room temperature. Decorate it the day you plan to serve it. The icing stays fresh for about 24 hours before it starts to dry out slightly. If you need to make it further ahead, freeze the undecorated cookie for up to 2 months.
Why did my cookie spread too much?
This usually happens for one of three reasons: the butter was too soft, the dough wasn’t chilled, or the pan was too greased. Use butter that’s softened but still cool to the touch. If your kitchen is warm, pop the pressed dough in the fridge for 20 minutes before baking. And only use a light coating of grease on the pan.
Can I use different candy decorations?
Sure! Instead of candy eyes, try using mini chocolate chips, M&M’s, or even small sprinkles for the eyes. You can also add orange and black nonpareils on top of the icing for extra color. Just keep in mind that heavier decorations might sink into the icing if it’s too soft.
How do I get clean slices?
Use a long, serrated knife and a gentle sawing motion. Wipe the blade clean between cuts. For the neatest slices, chill the decorated cookie cake for 30 minutes before cutting. This firms up the icing so it doesn’t smudge. Run the knife under hot water and dry it before the first cut for even cleaner edges.
Conclusion
This mummy cookie cake has become my go-to Halloween dessert for a reason. It’s fun without being fussy, delicious without being complicated, and it always, always gets a reaction. Whether you’re making it for a classroom party, a family gathering, or just because you want to eat a cookie that stares back at you, this recipe delivers.
I love how forgiving this recipe is. The icing doesn’t have to be perfect. The eyes don’t have to be straight. In fact, the more imperfect it looks, the more it looks like a real mummy. That’s my kind of baking—low pressure, high reward. I’ve made it for Halloween parties, movie nights, and even a “just because” Tuesday, and it’s never let me down.
Now I want to see your versions! Tag me when you make it, leave a comment below with your twist, or tell me how many candy eyes your kids ate before you could decorate. Seriously, I want to hear it all. This recipe is meant to be shared, laughed over, and devoured. So go ahead—get a little spooky in the kitchen. Your mummy is waiting.
Pin This Recipe!
Spooky Mummy Cookie Cake: Easy Halloween Dessert Recipe

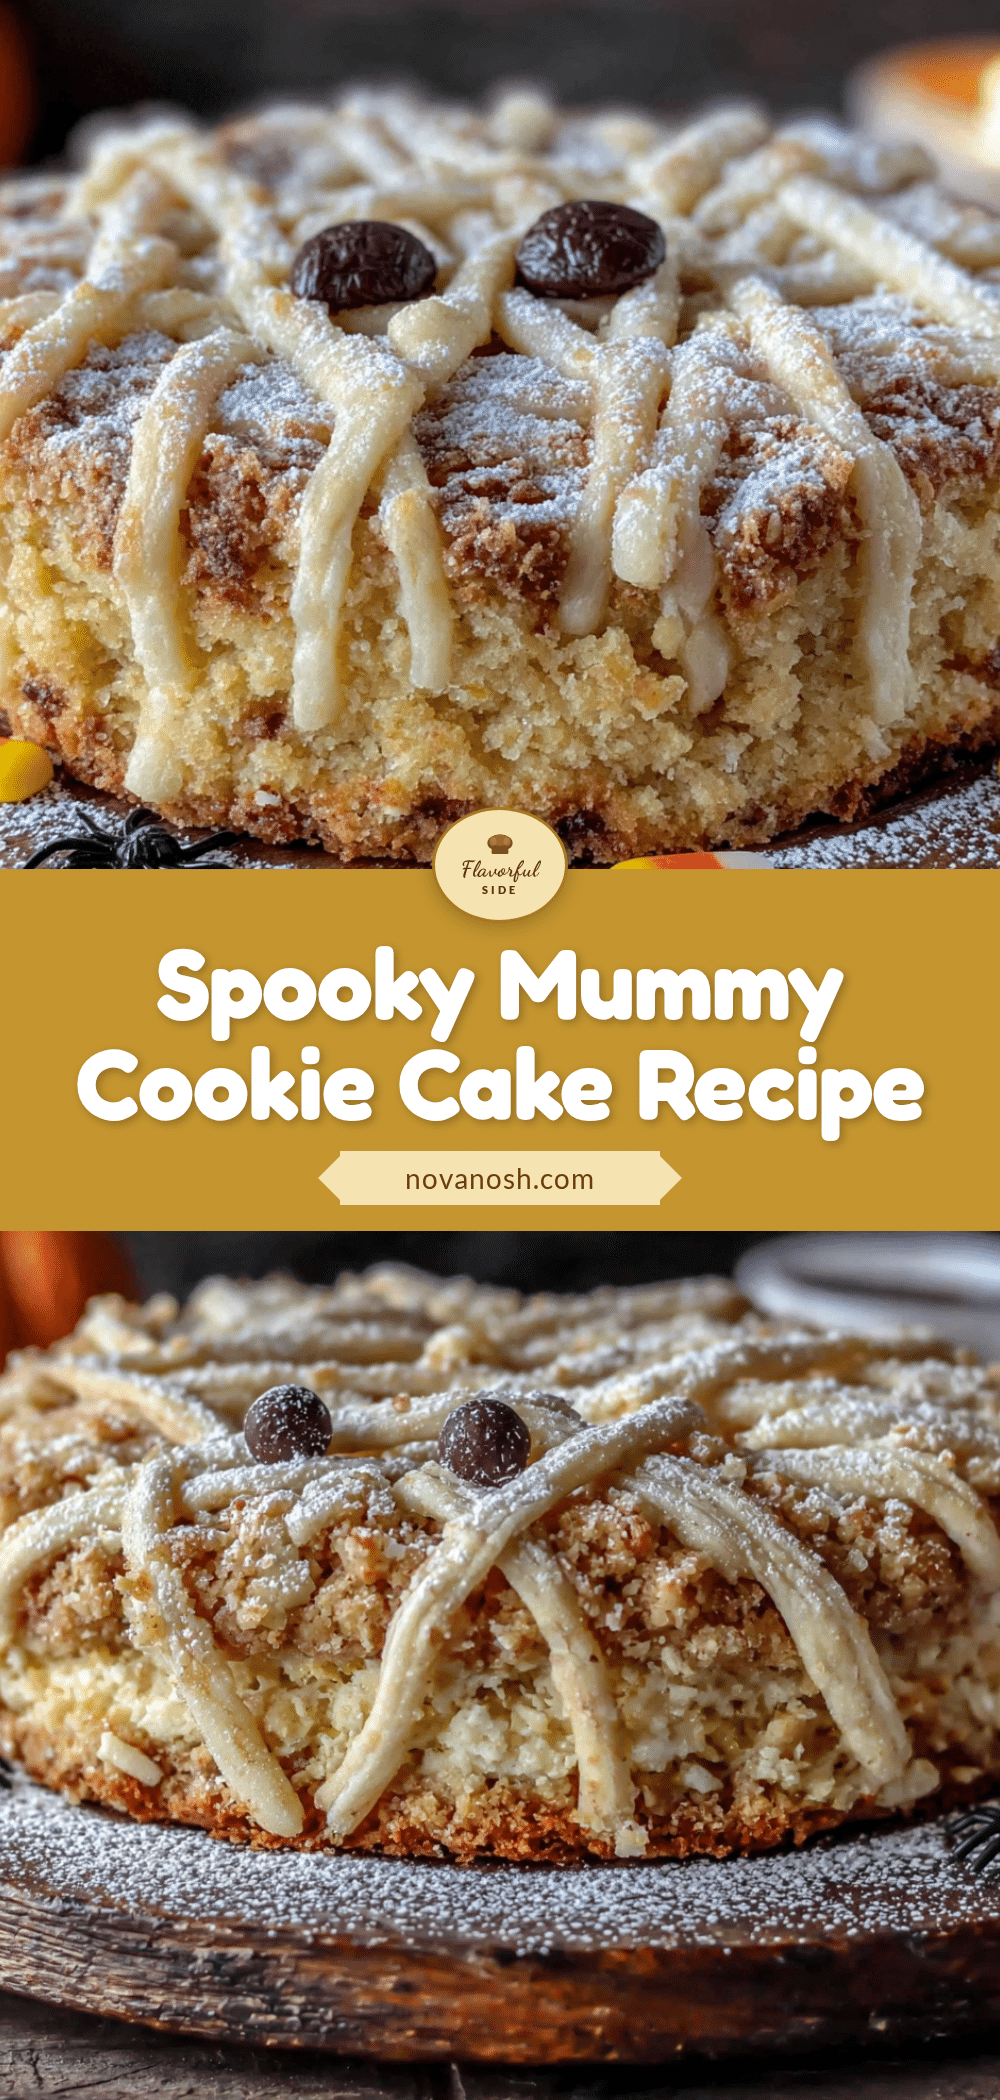
A quick and easy Halloween dessert featuring a giant chocolate chip cookie decorated like a mummy with vanilla buttercream icing and candy eyes. Perfect for parties, this chewy cookie cake comes together in under 40 minutes and is sure to be a crowd-pleaser.
- Prep Time: 20 minutes
- Cook Time: 16 minutes
- Total Time: 36 minutes
- Yield: 12 servings 1x
- Category: Dessert
- Cuisine: American
Ingredients
- 1 cup (226g) unsalted butter, softened to room temperature
- 1 cup (200g) granulated sugar
- 1 large egg, room temperature
- 2 teaspoons vanilla extract
- 2 cups (250g) all-purpose flour, spooned and leveled
- 1/2 teaspoon baking soda
- 1/2 teaspoon salt
- 1 cup (175g) semi-sweet chocolate chips
- 1/2 cup (113g) unsalted butter, softened (for icing)
- 2 cups (240g) powdered sugar, sifted if clumpy
- 2 tablespoons milk (whole milk preferred)
- 1 teaspoon vanilla extract (for icing)
- 24–30 candy eyes
Instructions
- Preheat your oven to 350°F (175°C). Lightly grease a 12-inch round pizza pan or baking sheet with butter or non-stick spray.
- In a large mixing bowl, beat the softened butter and granulated sugar together on medium speed for 2-3 minutes until light and fluffy. Scrape down the sides once halfway through.
- Crack the egg into a small bowl, then add it to the butter mixture along with the vanilla extract. Beat on low until just combined.
- In a medium bowl, whisk together the flour, baking soda, and salt.
- Gradually add the flour mixture to the butter mixture, mixing on low speed until no white streaks remain. Do not overmix.
- Fold in the chocolate chips with a spatula until evenly distributed. Reserve a few to press onto the top of the dough for visual appeal.
- Transfer the dough to the greased pan. Use your fingers or the back of a spoon to press it into an even circle about 1/4-inch thick, with edges slightly thicker than the center.
- Bake for 15-18 minutes, until the edges are golden brown and the center is set but still soft. A toothpick inserted in the center should come out with a few moist crumbs.
- Let the cookie cake cool on the pan for 10 minutes, then transfer the pan to a cooling rack. Cool completely to room temperature before decorating.
- While the cookie cools, make the icing: Beat the softened butter on medium speed until smooth. Gradually add the powdered sugar, one cup at a time, beating on low. Add the milk and vanilla, then increase to medium-high and beat for 2 minutes until fluffy. Adjust consistency if needed.
- Transfer the icing to a piping bag or a zip-top bag with the corner snipped off. Starting from the outer edge, pipe horizontal strips across the cookie, leaving small gaps between each strip. Leave a small area in the middle clear for the eyes.
- Press two candy eyes into the icing. Pipe a few more thin strips over the top to look like loose bandages.
- Refrigerate the decorated cookie cake for 10-15 minutes to let the icing set. Slice and serve.
Notes
For best results, chill the pressed dough for 20-30 minutes before baking to prevent spreading. Use a serrated knife to slice cleanly. The cookie can be stored in an airtight container at room temperature for up to 3 days, or frozen for up to 2 months. For a gluten-free version, use a 1:1 gluten-free flour blend. For a dairy-free version, use plant-based butter and milk alternatives.
Nutrition
- Serving Size: 1 slice
- Calories: 380
- Sugar: 32
- Sodium: 180
- Fat: 20
- Saturated Fat: 12
- Carbohydrates: 48
- Fiber: 2
- Protein: 4
Keywords: mummy cookie cake, Halloween dessert, cookie cake, easy Halloween recipe, chocolate chip cookie cake, mummy dessert, Halloween party dessert