Love this? Save it for later!
Share the inspiration with your friends
It was 10:47 PM on a damp Tuesday in October, and I was supposed to be watching a horror movie. Honestly, I was more focused on the fact that I had a block of sharp cheddar cheese staring at me from the fridge and absolutely zero party plans for the weekend. I didn’t have the fancy crackers I wanted for a cheese board, but I had puff pastry, a ton of paprika, and the weird idea that maybe—just maybe—I could make something that looked like a witch’s hand. The movie was forgotten. The cheese straws became the main event.
I started rolling out the dough, and a little voice in my head said, “Make them creepy.” So I did. I shaped them into long, knobby fingers, added an almond sliver for a witchy nail, and baked them until they were golden and flaky. They came out of the oven looking like something out of a fairy tale—if the fairy tale involved a snack that was both delicious and delightfully disturbing. The best part? They disappeared faster than a ghost at sunrise.
Maybe you’ve been there, staring at ingredients with no clear plan, only to stumble onto something magical. That’s exactly how these Spooky Witch’s Finger Cheese Straws were born. They are buttery, cheesy, and have that perfect savory crunch. Plus, they look like actual witch fingers, which is the kind of energy I want at my Halloween table. I keep making them because they are the perfect conversation starter—and honestly, they taste way better than any candy corn. Let me show you how to make your own.
Why You’ll Love This Recipe
Let’s be real—Halloween snacks can be a gamble. Some are all looks and no flavor, while others are just regular food with a spooky name slapped on. These Spooky Witch’s Finger Cheese Straws are the real deal. They are the appetizer that does double duty: they look incredible on a party platter and taste even better than they look.
- Quick & Easy: You can have these ready in under 30 minutes. No complicated techniques or hours of chilling dough. Perfect for when you realize the party starts in an hour.
- Simple Ingredients: You likely already have puff pastry, cheese, and paprika in your kitchen. No need for a special trip to the store for weird Halloween ingredients.
- Perfect for Halloween Parties: These are the star of any spooky spread. They work for adult gatherings, kid-friendly events, or just a fun night in with a scary movie.
- Crowd-Pleaser: I have seen kids and adults alike fight over the last “finger.” The savory, cheesy flavor is universally loved.
- Unbelievably Delicious: The combination of flaky puff pastry, melted cheddar, and a hint of smoked paprika is next-level comfort food. It is the kind of snack that makes you close your eyes after the first bite.
What makes this recipe different from the rest? It is the texture. Most cheese straws are either too hard or too greasy. These are perfectly flaky, with a satisfying crunch that comes from the puff pastry. The almond “nail” adds a subtle nutty flavor that complements the cheese beautifully. This isn’t just another Halloween snack—it is my best version of a classic appetizer, reimagined for the spookiest night of the year.
What Ingredients You Will Need
This recipe uses simple, wholesome ingredients to deliver bold flavor and that signature witchy look. You probably have most of these in your pantry already, which makes this a last-minute Halloween hero.
- 1 sheet (about 250g) frozen puff pastry, thawed (I recommend Pepperidge Farm or Dufour for the best flaky layers; the butter content makes all the difference)
- 1 cup (100g) sharp cheddar cheese, finely grated (Use a block and grate it yourself—pre-shredded cheese has anti-caking agents that prevent smooth melting)
- 1/4 cup (30g) grated Parmesan cheese (adds a salty, umami kick that deepens the flavor)
- 1 teaspoon smoked paprika (for that earthy, slightly smoky taste and a touch of orange color)
- 1/2 teaspoon garlic powder (optional, but I never skip it—it adds a savory backbone)
- 1/4 teaspoon black pepper (freshly ground is best)
- 1 large egg, beaten (for the egg wash that gives the straws that golden-brown finish)
- 24-30 whole almonds (about 30g), skin on (these become the witch’s fingernails; skin-on almonds look more realistic)
- Flaky sea salt, for sprinkling (a pinch on top before baking adds that perfect crunch)
Ingredient Selection Tips: Look for a puff pastry that uses real butter, not shortening. The flavor is incomparable. For the cheese, a good sharp cheddar gives the most pronounced flavor, but you can use a mix of cheddar and Gruyère for a more sophisticated taste. If you want a milder version, use Monterey Jack. For a dairy-free option, use a vegan puff pastry and a dairy-free cheddar shred that melts well.
Substitution Guidance: No puff pastry? You can use crescent roll dough in a pinch, though the texture will be different. No almonds? Use a slivered macadamia nut or a small piece of red bell pepper for a bloody fingernail effect. Smoked paprika can be swapped for regular paprika, but you will lose that subtle smoky depth.
Equipment Needed
You don’t need a professional kitchen to pull these off. Here is what you will need:
- Baking sheet (a standard half-sheet pan works perfectly)
- Parchment paper (non-negotiable—it prevents sticking and makes cleanup a breeze)
- Rolling pin (if your puff pastry needs a little evening out)
- Sharp knife or pizza cutter (for cutting the dough into finger shapes)
- Small bowl (for the egg wash)
- Pastry brush (for applying the egg wash; you can use a clean silicone brush or even a folded paper towel in a pinch)
- Grater (a box grater or microplane for the cheese)
- Cooling rack (optional, but helps keep the straws crispy)
I have made these with a dull knife and a chopstick for shaping, and they still turned out great. Do not stress if you don’t have fancy equipment. Budget-friendly tip: use a clean ruler to measure even strips of dough if you want perfectly uniform fingers.
Preparation Method
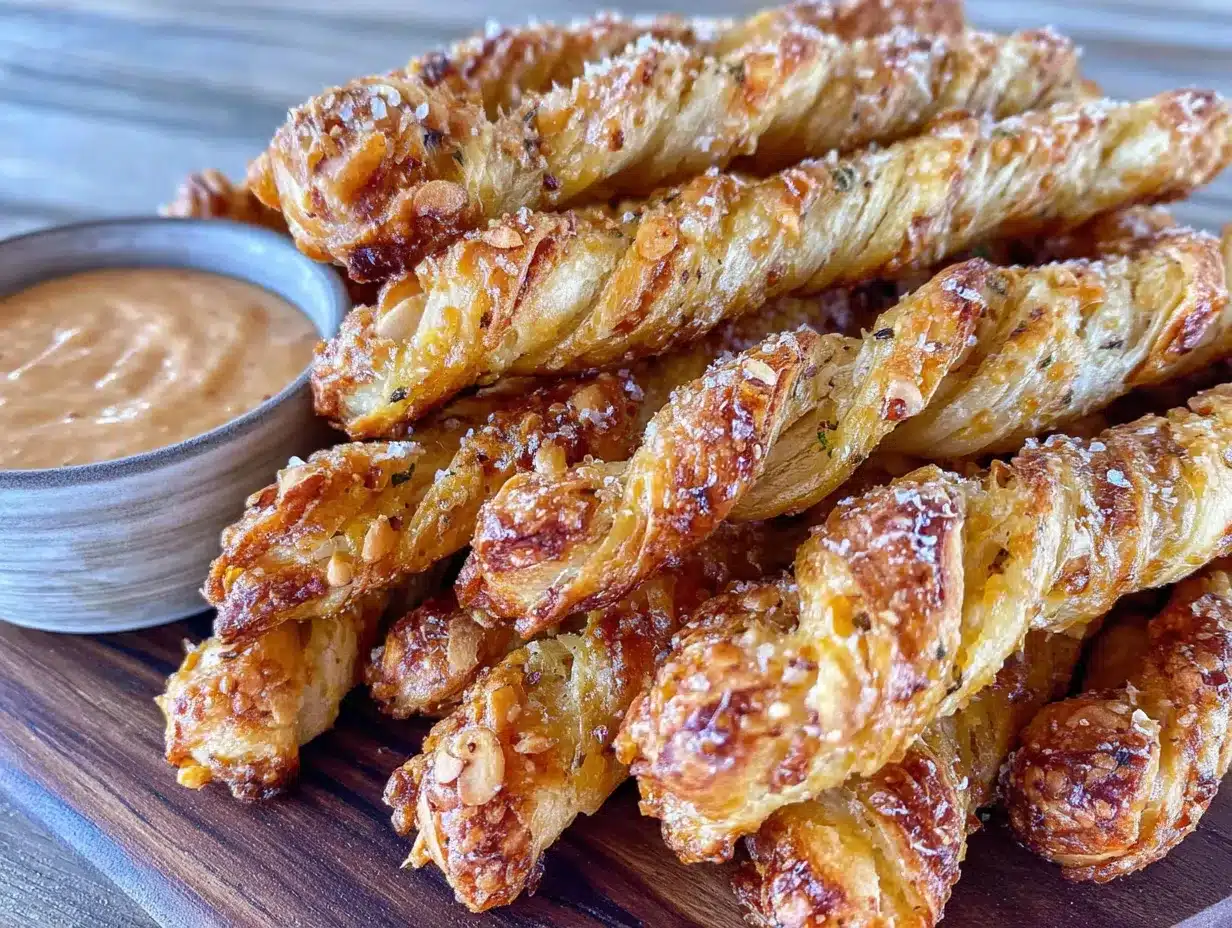
Let’s turn those ingredients into something spooky. Follow these steps, and you will have a platter of witch fingers that will impress everyone.
- Preheat your oven to 400°F (200°C). Line a baking sheet with parchment paper. This is a small step, but it makes a big difference—no sticking, no burnt edges.
- Prepare your puff pastry. On a lightly floured surface, gently roll out the thawed puff pastry sheet to a 12×10-inch rectangle (about 30×25 cm). Do not overwork it—you want those layers to stay intact. If the dough feels sticky, dust it with a tiny bit of flour.
- Mix the cheese filling. In a small bowl, combine the grated cheddar, Parmesan, smoked paprika, garlic powder, and black pepper. Mix well with a fork. Taste a tiny pinch—yes, it is that good raw.
- Sprinkle the cheese mixture evenly over the puff pastry. Use your hands to gently press the cheese into the dough so it sticks. Don’t pile it too thick in one spot; you want an even layer.
- Cut the dough into finger shapes. Using a sharp knife or pizza cutter, slice the dough into long strips, about 4 inches (10 cm) long and 1 inch (2.5 cm) wide. You should get about 12-15 strips. If they aren’t perfectly uniform, that is fine—real fingers aren’t either.
- Shape the fingers. Take each strip and gently roll it between your palms to create a rounded, finger-like shape. Pinch one end slightly to create a “knuckle” and taper the other end to look like a fingertip. Use the back of a knife to press a few shallow lines into the dough to mimic knuckle creases. This is where the magic happens—don’t be shy with the details.
- Attach the almond nails. Press one almond, pointed side down, into the tapered end of each finger. Push it in just enough so it stays put during baking. The almond should look like a long, witchy fingernail.
- Apply the egg wash. In a small bowl, beat the egg with a teaspoon of water. Using a pastry brush, lightly coat each finger with the egg wash. This gives them that golden, glossy finish. Sprinkle a tiny pinch of flaky sea salt on top.
- Bake for 12-15 minutes. Place the baking sheet on the middle rack. Bake until the straws are puffed, golden brown, and the cheese is bubbling slightly. Keep an eye on them after 12 minutes—ovens vary, and you don’t want burnt fingers (pun intended).
- Cool slightly before serving. Transfer the baked fingers to a cooling rack for 5 minutes. They will be fragile when hot, so let them set. Serve warm or at room temperature.
Sensory Cues: When you roll the dough, it should feel smooth and slightly cold. The cheese mixture should smell smoky and savory. During baking, your kitchen will fill with the most incredible buttery, cheesy aroma. The finished fingers should be golden brown with visible flaky layers and a slight crunch when you bite into them.
Cooking Tips & Techniques
I have made these more times than I care to admit, and I have learned a few things the hard way. Here are my best tips for perfect witch fingers every time.
- Keep the puff pastry cold. Puff pastry is all about the butter layers. If the dough gets too warm, the butter melts before it hits the oven, and you will get flat, greasy straws. If your dough feels soft, pop it in the fridge for 10 minutes before cutting.
- Don’t over-roll the dough. You want it thin enough to cut easily, but not so thin that the layers compress. A 1/4-inch (6 mm) thickness is perfect.
- Use a sharp knife or pizza cutter. A dull blade will drag through the dough and squish the layers. A clean cut means better puffing.
- Press the almond firmly. I once had an almond pop off during baking, and it looked sad. Press it in until it feels secure, but don’t push it all the way through the dough.
- Watch the bake time. I have burned a batch because I got distracted by a scary movie. Set a timer for 12 minutes and check. They should be golden, not dark brown.
- Make ahead tip: You can assemble the fingers up to the egg wash step, then refrigerate them on the baking sheet for up to 2 hours. Bake just before serving for the freshest result.
Common Mistake to Avoid: Do not skip the egg wash. It is what gives the straws that beautiful color and helps the salt stick. Without it, they will look pale and sad.
Variations & Adaptations
One of the best things about this recipe is how easy it is to customize. Here are some variations I have tried and loved.
- Spicy Witch Fingers: Add 1/2 teaspoon of cayenne pepper or red pepper flakes to the cheese mixture. The heat pairs beautifully with the smoky paprika and gives the fingers a devilish kick.
- Herb-Infused Version: Mix in 1 tablespoon of finely chopped fresh rosemary or thyme with the cheese. The herbal notes make these feel more sophisticated—perfect for an adult Halloween party.
- Bloody Fingernails: Instead of almonds, use a small slice of roasted red pepper or a dab of tomato paste on the tip of each finger. It looks like a bloody nail, which is extra creepy and perfect for a gory theme.
- Gluten-Free Adaptation: Use a gluten-free puff pastry (many brands are available now) and ensure your cheeses are gluten-free. The technique remains the same.
- Vegan Version: Use a vegan puff pastry, a dairy-free cheddar shred, and a flax egg (1 tablespoon ground flaxseed mixed with 3 tablespoons water) for the wash. The texture will be slightly different, but still delicious.
I once made a batch with blue cheese and walnuts instead of cheddar and almonds. They were… an acquired taste. Stick with the classic cheddar for the best crowd-pleaser, but feel free to experiment with your favorite cheese blend.
Serving & Storage Suggestions
These witch fingers are best served warm, straight from the oven, when the cheese is still melty and the pastry is at its flakiest. But they are also fantastic at room temperature, which makes them perfect for a party buffet.
Serving Ideas: Arrange them on a black platter or a wooden board for a witchy vibe. Sprinkle a few fresh rosemary sprigs around for a “cauldron” look. Serve them alongside a bowl of marinara sauce or a spicy aioli for dipping—the tanginess cuts through the richness of the cheese. They pair beautifully with a crisp white wine like Sauvignon Blanc or a cold beer.
Storage: If you have leftovers (unlikely, but possible), store them in an airtight container at room temperature for up to 2 days. Do not refrigerate them, as the moisture will make the pastry soggy.
Reheating: To bring back the crunch, reheat the straws in a 350°F (175°C) oven for 3-5 minutes. Do not use a microwave—it will turn them into sad, chewy strips.
Freezing: You can freeze the unbaked, shaped fingers on a baking sheet until solid, then transfer them to a freezer bag. Bake from frozen, adding 2-3 minutes to the baking time. This is my secret for last-minute Halloween parties.
Nutritional Information & Benefits
Let’s be honest—these are a treat, not a health food. But they are made with real ingredients, and that counts for something.
- Estimated per serving (2 straws): Calories: 220, Fat: 15g, Saturated Fat: 6g, Carbohydrates: 14g, Protein: 7g, Sodium: 280mg.
- Health Benefits: The cheese provides calcium and protein, while the almonds add healthy fats and vitamin E. Puff pastry, in moderation, gives you energy from carbohydrates.
- Dietary Considerations: This recipe is vegetarian. For a gluten-free version, use gluten-free puff pastry. For a lower-fat option, use a reduced-fat cheese and a light egg wash.
- Potential Allergens: Contains dairy, gluten, and tree nuts (almonds). Always check your puff pastry label for potential allergens.
I believe in balance. These witch fingers are for the joy of the season, not for everyday eating. Enjoy them with a clear conscience and a full heart.
Conclusion
These Spooky Witch’s Finger Cheese Straws are more than just a Halloween snack—they are a memory in the making. I still remember the first time I served them at a party, watching guests do a double-take before laughing and grabbing a handful. They are the kind of recipe that sparks joy, conversation, and a little bit of playful creepiness.
I encourage you to make them your own. Add extra spice, experiment with different cheeses, or try a bloody nail variation. The beauty of this recipe is its flexibility. Whether you are hosting a big Halloween bash or just want a fun snack for a movie night, these fingers will deliver.
I would love to hear how yours turn out! Did you add a twist? Did the kids love them? Share your creations in the comments below, and don’t forget to pin this recipe for later. Happy Halloween, and may your cheese straws be perfectly flaky and delightfully spooky!
Frequently Asked Questions
Can I make these ahead of time?
Yes! You can assemble the fingers up to the egg wash step, then refrigerate them on the baking sheet for up to 2 hours. Bake just before serving for the best texture.
Can I use a different type of cheese?
Absolutely. Sharp cheddar is classic, but you can use Gouda, Monterey Jack, or even a spicy pepper jack for a kick. Just make sure it melts well.
My puff pastry is too soft. What should I do?
Pop it in the fridge for 10-15 minutes to firm up. Cold dough is easier to handle and will puff better in the oven.
Can I make these without almonds?
Of course! Use a slivered macadamia nut, a small piece of red bell pepper, or simply leave them off. They will still look like witch fingers without the nails.
How do I keep the cheese from burning?
Keep an eye on the oven after 12 minutes. If the cheese starts to brown too quickly, tent the baking sheet loosely with foil for the last few minutes of baking.
Pin This Recipe!
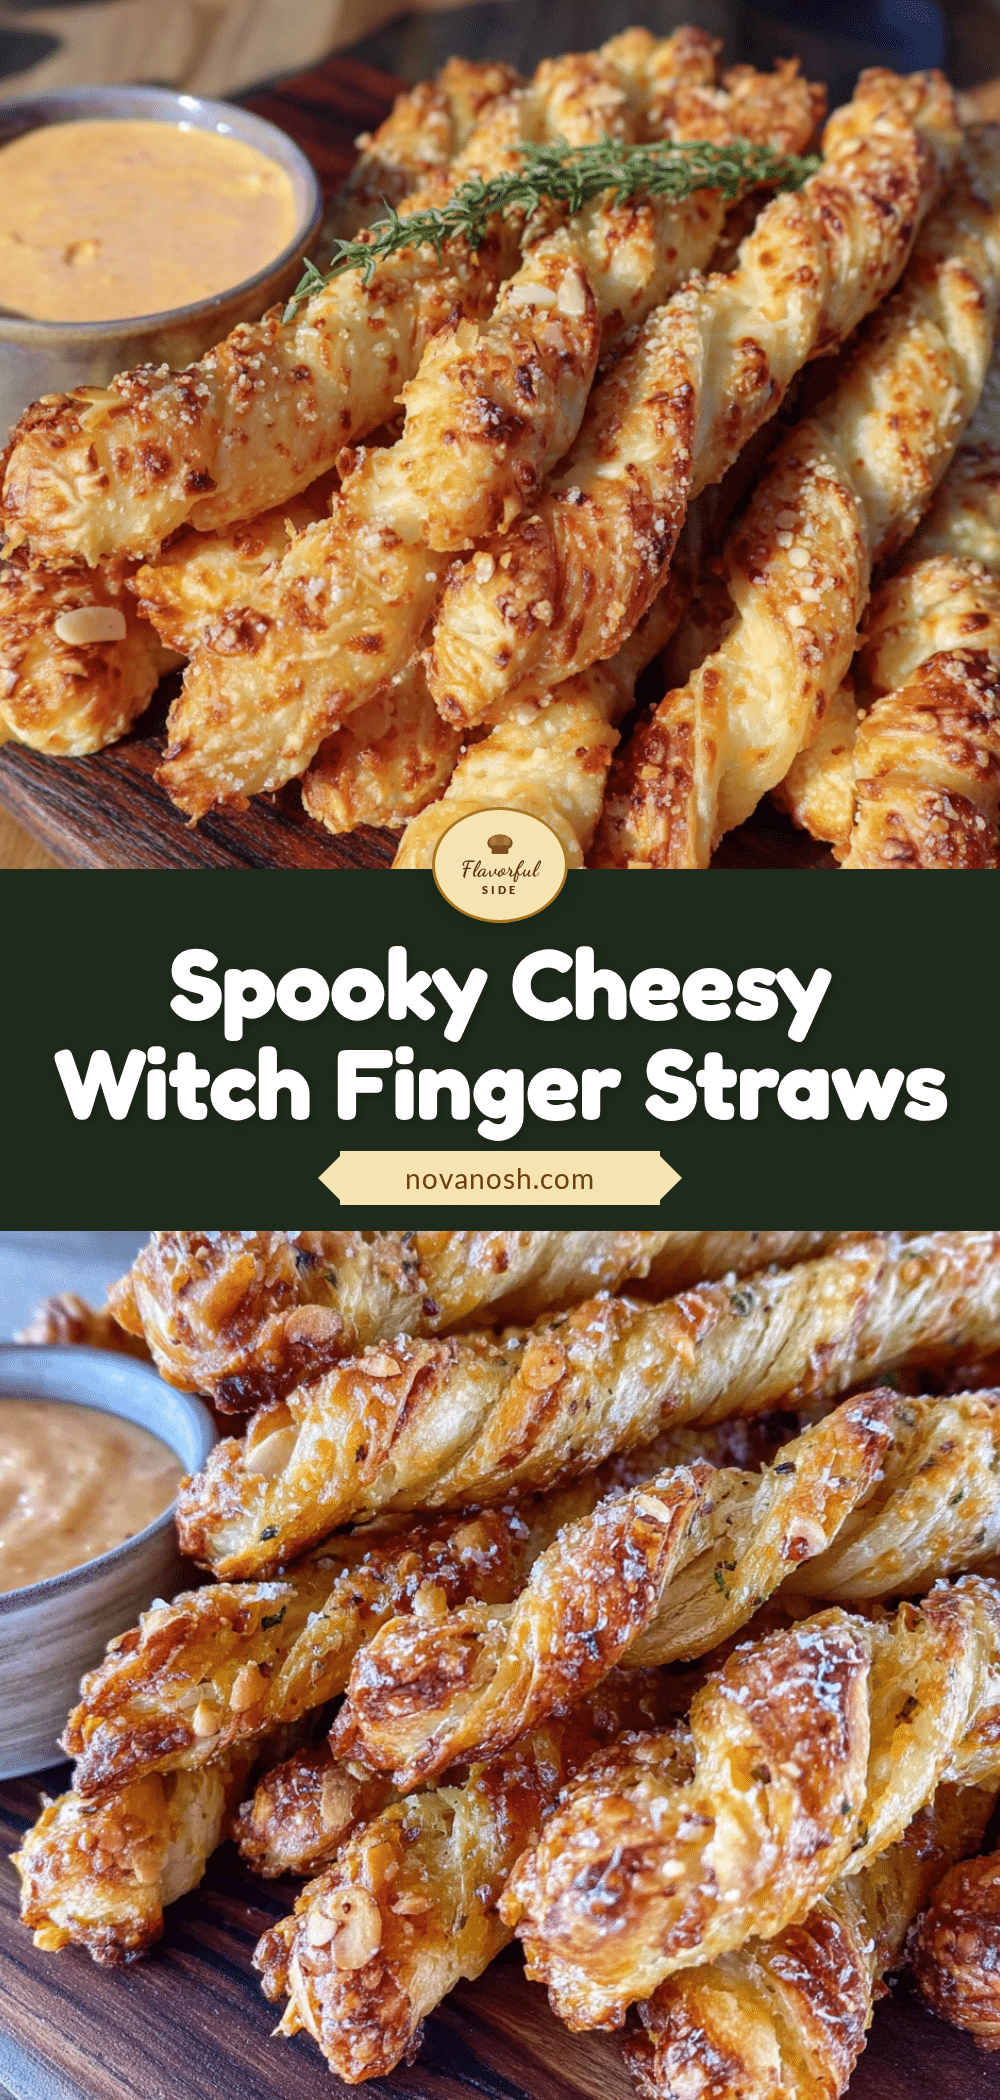
Spooky Witch Finger Cheese Straws: Easy Halloween Appetizer
These buttery, cheesy puff pastry straws are shaped like witch fingers with almond nails, making them a delightfully creepy and delicious Halloween appetizer. Ready in under 30 minutes, they are perfect for parties and movie nights.
- Prep Time: 15 minutes
- Cook Time: 15 minutes
- Total Time: 30 minutes
- Yield: 6 servings 1x
- Category: Appetizer
- Cuisine: American
Ingredients
- 1 sheet (about 250g) frozen puff pastry, thawed
- 1 cup (100g) sharp cheddar cheese, finely grated
- 1/4 cup (30g) grated Parmesan cheese
- 1 teaspoon smoked paprika
- 1/2 teaspoon garlic powder (optional)
- 1/4 teaspoon black pepper, freshly ground
- 1 large egg, beaten
- 24–30 whole almonds (about 30g), skin on
- Flaky sea salt, for sprinkling
Instructions
- Preheat your oven to 400°F (200°C). Line a baking sheet with parchment paper.
- On a lightly floured surface, gently roll out the thawed puff pastry sheet to a 12×10-inch rectangle (about 30×25 cm).
- In a small bowl, combine the grated cheddar, Parmesan, smoked paprika, garlic powder, and black pepper. Mix well.
- Sprinkle the cheese mixture evenly over the puff pastry. Gently press the cheese into the dough.
- Using a sharp knife or pizza cutter, slice the dough into long strips, about 4 inches (10 cm) long and 1 inch (2.5 cm) wide. You should get about 12-15 strips.
- Take each strip and gently roll it between your palms to create a rounded, finger-like shape. Pinch one end slightly to create a ‘knuckle’ and taper the other end to look like a fingertip. Use the back of a knife to press a few shallow lines into the dough to mimic knuckle creases.
- Press one almond, pointed side down, into the tapered end of each finger. Push it in just enough so it stays put during baking.
- In a small bowl, beat the egg with a teaspoon of water. Using a pastry brush, lightly coat each finger with the egg wash. Sprinkle a tiny pinch of flaky sea salt on top.
- Bake for 12-15 minutes, until the straws are puffed, golden brown, and the cheese is bubbling slightly.
- Transfer the baked fingers to a cooling rack for 5 minutes. Serve warm or at room temperature.
Notes
Keep puff pastry cold for best results. Do not over-roll the dough. Press almond firmly to prevent popping off. Watch bake time to avoid burning. Can be assembled up to 2 hours ahead and refrigerated before baking.
Nutrition
- Serving Size: 2 straws
- Calories: 220
- Sugar: 1
- Sodium: 280
- Fat: 15
- Saturated Fat: 6
- Carbohydrates: 14
- Fiber: 1
- Protein: 7
Keywords: Halloween appetizer, witch fingers, cheese straws, puff pastry, spooky snack, easy Halloween recipe


