Love this? Save it for later!
Share the inspiration with your friends
My neighbor wasn’t trying to impress me. I’d stopped by to return her garden shears—the ones I’d borrowed three weeks earlier and felt increasingly guilty about—and the smell hit me before I even got to her screen door. Butter. Vanilla. Something warm and slightly nutty. She was standing at her kitchen counter in an old t-shirt, flour dusted across her forearm like she’d been wrestling a ghost, and she just glanced up and said, “Oh, good, you’re here. You can help me shape the knuckles.”
I thought she was joking. She wasn’t.
That’s how I found myself sitting at her worn oak table, rolling out little ropes of dough, pinching them into finger shapes, and pressing a sliced almond onto the tip for a nail while she told me about her grandmother who made these every Halloween. She wasn’t putting on a show. She wasn’t trying to be clever or spooky. She was just making cookies—the same ones her family had been making for decades—and she acted like it was nothing. But let me tell you, the casualness is the whole point. Here she was, turning butter and sugar into something that looked genuinely creepy, and she was more worried about whether I thought the dough was too sticky.
I mean, honestly, I’ve made a lot of cookies in my time. But these witch finger cookies? They stopped me cold. There’s something about a cookie that looks like a severed finger but tastes like a warm, buttery shortbread that just works. It’s funny, unsettling, and absolutely delicious. Maybe you’ve been there—looking for a Halloween treat that’s actually worth eating, not just a sugar bomb shaped like a pumpkin. These are that recipe. They’re the ones that make people laugh, then reach for a second one.
I’ve been making them every October since that afternoon. And the best part? My neighbor still pretends it’s no big deal. But we both know.
Why You’ll Love This Recipe
These witch finger cookies aren’t just a Halloween novelty. They’re genuinely good shortbread cookies that happen to look like something from a haunted house. I’ve tested this recipe at least a dozen times across different ovens and humidity levels, and I can tell you—it works every single time. Here’s why you’ll find yourself reaching for this recipe year after year:
- Quick & Easy : From start to finish, these come together in about 45 minutes. The dough chills for 30 minutes, and the baking time is only 12 to 14 minutes. Perfect for a last-minute Halloween party or a fun afternoon project with kids.
- Simple Ingredients : Butter, sugar, flour, egg, vanilla, and almonds. That’s it. No weird extracts, no specialty flours, no grocery store scavenger hunts. You probably have everything right now.
- Perfect for Halloween : These are the star of any spooky spread. They look impressive and creepy without requiring advanced piping skills or fondant work. Anyone can shape a finger.
- Crowd-Pleaser : Kids think they’re hilarious. Adults pretend to be grossed out while sneaking a third one. They disappear faster than any candy corn ever could.
- Unbelievably Delicious : The texture is crisp on the outside, tender on the inside, with that rich, buttery flavor that only good shortbread has. The almond nail adds a subtle nuttiness and a satisfying crunch.
What makes these different from every other witch finger recipe out there? It’s the ratio. I spent three batches getting the butter-to-flour balance just right—too much butter and the fingers lose their shape, too little and they’re dry and crumbly. This version holds its shape perfectly, even with the knuckle indentations, and it melts in your mouth without falling apart. Plus, the egg yolk gives it a slight golden color that makes the “fingers” look eerily realistic without any artificial coloring.
This is the kind of recipe that makes you close your eyes after the first bite. It’s comfort food with a spooky twist—familiar, but fun. Perfect for making memories with your kids, impressing your friends, or just treating yourself on a cozy October evening.
What Ingredients You Will Need
This recipe uses simple, wholesome ingredients to deliver that classic shortbread flavor with a spooky Halloween twist. Most of these are pantry staples, which makes this an easy last-minute baking project. I’ve tested several brands and variations, so I’ll share what works best.
- 1 cup (226g) unsalted butter, softened — I prefer using a European-style butter like Kerrygold for a richer flavor and better texture. The higher fat content makes the cookies more tender. Make sure it’s truly softened, not melted—you want it pliable but still cool to the touch.
- 1 cup (200g) granulated sugar — Regular white sugar works perfectly here. Do not substitute with brown sugar, as it will change the color and texture. The sugar should be fine and not clumpy.
- 1 large egg, separated — You’ll use the yolk in the dough and the white to brush on the almonds. Room temperature egg is easier to separate. If you’re in a hurry, place the egg in warm water for 5 minutes.
- 1 teaspoon vanilla extract — Pure vanilla extract makes a noticeable difference. I recommend Nielsen-Massey or simply a good store brand without artificial flavors. Avoid imitation vanilla if you can.
- 1/2 teaspoon almond extract — This is optional but highly recommended. It reinforces the almond flavor and adds a subtle marzipan-like note. If you don’t have it, increase the vanilla to 1 1/2 teaspoons.
- 1/4 teaspoon salt — Fine sea salt is best. It balances the sweetness and enhances the buttery flavor. If using salted butter, reduce this to a tiny pinch.
- 2 1/4 cups (280g) all-purpose flour — Spoon and level your flour for accuracy. Scooping directly from the bag can pack in too much flour, resulting in dry cookies. I like King Arthur Flour for consistent results.
- 1/2 cup (about 60g) whole blanched almonds — These become the fingernails. Look for almonds that are relatively uniform in size and shape. Do not use slivered or chopped almonds—you need the whole almond to create that realistic nail look.
- Red food coloring (optional) — A few drops mixed with a little water can be brushed onto the “cuticle” area for a blood effect. Totally optional, but fun for a more gruesome look.
- Jam or preserves (optional) — A tiny dab of red jam (strawberry or raspberry) at the base of the nail mimics blood. I’ve used Smucker’s seedless raspberry jam with great results.
Substitution Guidance:
- For a dairy-free version, use a high-quality vegan butter stick (not margarine). I’ve had success with Miyoko’s European Style Cultured Vegan Butter. The texture will be slightly less tender, but still delicious.
- If you don’t have almond extract, simply omit it. The cookies will still taste wonderful—just more like classic vanilla shortbread.
- For a gluten-free option, substitute with a 1:1 gluten-free baking flour blend that contains xanthan gum. I recommend Bob’s Red Mill 1:1 Baking Flour. Do not use almond flour or coconut flour as a substitute here.
Equipment Needed
You don’t need anything fancy for these witch finger cookies, which is part of their charm. Here’s what I use every time:
- Electric mixer — A stand mixer with the paddle attachment is ideal, but a hand mixer works perfectly. You just need to cream the butter and sugar until light and fluffy. I’ve made these with both, and honestly, the hand mixer gives me more control over not overmixing.
- Large mixing bowl — Any bowl will do, but a wider bowl makes it easier to incorporate the flour without making a mess.
- Baking sheets — Two standard half-sheet pans work well. I recommend lining them with parchment paper or silicone baking mats. The cookies don’t spread much, so you can fit about 12 fingers per sheet.
- Parchment paper or silicone baking mats — Parchment is my go-to because it’s inexpensive and makes cleanup effortless. Silicone mats are great too, but they can sometimes cause cookies to spread slightly more.
- Small knife or bench scraper — For creating the knuckle indentations and cuticle lines. A butter knife works in a pinch, but a small paring knife gives you more precision.
- Small pastry brush — For brushing the egg white onto the almonds. A cheap silicone brush is fine. If you don’t have one, you can dip the almond in the egg white using your fingers.
- Plastic wrap — For chilling the dough. You can also use a reusable beeswax wrap if you’re trying to reduce waste.
- Cooling rack — Essential for letting the cookies cool evenly. If you don’t have one, you can transfer them to a clean kitchen towel, but they might get slightly soggy on the bottom.
Budget-friendly tip: If you don’t have an electric mixer, you can cream the butter and sugar by hand with a wooden spoon. It takes about 5 minutes of vigorous stirring, but it’s totally doable. I’ve done it when my mixer was broken, and the cookies turned out just as good.
Preparation Method
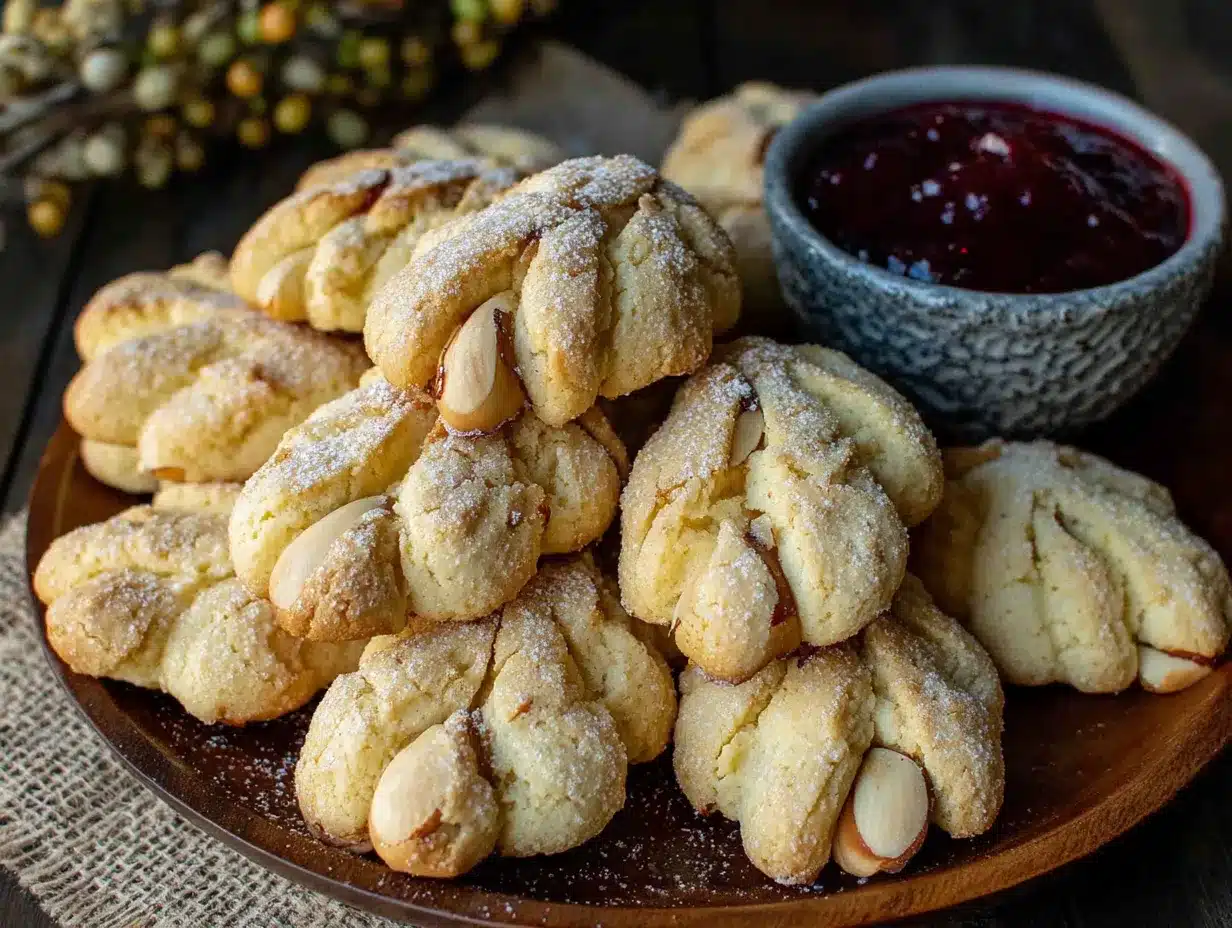
Let’s get to the fun part. Making these witch finger cookies is surprisingly straightforward, but shaping the fingers takes a little patience. Here’s how I do it, step by step.
- Cream the butter and sugar. In your large mixing bowl, beat the softened butter and granulated sugar together on medium speed until light, fluffy, and pale in color. This takes about 3 to 4 minutes with a stand mixer, or 5 minutes with a hand mixer. Scrape down the sides of the bowl halfway through. You’re looking for a texture that’s almost like a thick, spreadable frosting. If it looks greasy or separated, your butter was too soft—pop the bowl in the fridge for 10 minutes and try again.
- Add the wet ingredients. Drop in the egg yolk (save the white in a small bowl for later), vanilla extract, and almond extract if using. Beat on low speed just until combined—about 30 seconds. Don’t overmix here, or the cookies can become tough. The mixture will look a little curdled at this point, but that’s normal. It will come together once you add the flour.
- Incorporate the dry ingredients. In a separate small bowl, whisk together the flour and salt. Gradually add this to the wet mixture, mixing on low speed. Stop as soon as the flour disappears into the dough. You should have a soft, slightly crumbly dough that holds together when pressed. If it feels too sticky, add an extra tablespoon of flour. If it’s too dry and crumbly, add a teaspoon of cold water.
- Chill the dough. Turn the dough out onto a piece of plastic wrap. Pat it into a flat disk (this helps it chill faster), wrap it tightly, and refrigerate for at least 30 minutes. You can chill it for up to 3 days. Do not skip this step—warm dough is impossible to shape into realistic fingers. I learned this the hard way on my first attempt, and my “fingers” looked more like sad little slugs.
- Preheat your oven. About 10 minutes before you’re ready to bake, preheat your oven to 325°F (163°C). Line your baking sheets with parchment paper.
- Shape the fingers. Remove the chilled dough from the refrigerator. Pinch off a piece about the size of a walnut (roughly 1 to 1.5 tablespoons). Roll it between your palms into a log shape about 3 to 4 inches long and slightly thicker than your index finger. Place it on the prepared baking sheet. Repeat with the remaining dough, spacing the fingers about 2 inches apart. They don’t spread much, but you want some room for air circulation.
- Create the knuckles. Using the back of a small knife or your fingernail, gently press 2 to 3 horizontal indentations into each finger to create knuckle lines. Don’t press too hard—you want the indentation to be visible after baking, but not so deep that the cookie breaks. I usually press about 1/4 inch deep.
- Shape the fingertips. Slightly flatten the tip of each finger and use your knife to create a small, shallow cut at the very end—this is where the almond nail will sit. You want a little divot so the almond stays in place.
- Attach the almond nails. Lightly beat the reserved egg white with a fork until it’s frothy. Using your pastry brush (or your finger), brush a small amount of egg white onto the cuticle area of each finger. Press a whole blanched almond onto the tip, pointed end facing outward. The almond should look like a fingernail. Brush a little more egg white over the top of the almond to give it a subtle shine.
- Bake. Place the baking sheets in the preheated oven and bake for 12 to 14 minutes, or until the cookies are just barely golden on the bottom and the edges. The tops should remain pale—that’s what makes them look more realistic. Rotate the pans halfway through if your oven has hot spots.
- Cool. Let the cookies cool on the baking sheet for 5 minutes. They will be very delicate when hot. After 5 minutes, transfer them to a wire rack to cool completely. They will firm up as they cool.
- Optional blood effect. If you want to add a “bloody” look, mix a few drops of red food coloring with a teaspoon of water. Using a clean brush, dab a tiny amount at the base of the almond nail. Alternatively, use a small dot of red jam. I prefer the jam—it looks more realistic and adds a hint of fruity flavor.
Sensory cues to watch for: The dough should feel cool and slightly firm when you shape it, not sticky. The cookies are done when the bottoms are light golden brown—lift one gently with a spatula to check. The smell in your kitchen will be incredible: buttery, sweet, and warm. Don’t be alarmed if some of the almonds shift during baking; you can gently nudge them back into place while the cookies are still warm.
Cooking Tips & Techniques
I’ve made these witch finger cookies more times than I care to count, and I’ve definitely had my share of failures. Here’s what I’ve learned so you don’t have to make the same mistakes.
Don’t skip the chill time. I know it’s tempting to rush, but warm dough is impossible to shape. The first time I made these, I only chilled the dough for 10 minutes. The fingers spread into blobs, the almonds fell off, and I ended up with something that looked more like alien toes than witch fingers. Chilling solidifies the butter, which means the cookies hold their shape during baking. Thirty minutes is the minimum—an hour is better.
Keep your hands cool. If the dough starts getting sticky while you’re shaping it, run your hands under cold water and dry them thoroughly. The heat from your hands can soften the butter in the dough, making it greasy and hard to work with. I sometimes work in batches, keeping half the dough in the fridge while I shape the other half.
Use a light touch for knuckles. You want the indentations to be visible, but not so deep that the cookie cracks. I press gently with the back of a butter knife, then go over it a second time if needed. Think of it like drawing a line in soft clay—firm but gentle.
Almond placement matters. Press the almond firmly into the dough, but not so hard that it sinks in completely. You want about half the almond visible. If the almond is too loose, it might fall off during baking. A dab of egg white acts like glue—don’t skip it.
Watch your oven like a hawk. These cookies go from perfectly baked to overdone very quickly. Start checking at the 10-minute mark. The bottoms should be light golden, but the tops should remain pale. If your oven runs hot, bake at 315°F (157°C) instead and add a couple of minutes to the time.
Multitasking strategy: While the first batch bakes, shape the second batch. This keeps the dough cold and makes the process efficient. By the time the first batch comes out, the second batch is ready to go in.
My biggest failure: I once forgot to add the egg yolk. The cookies were dry, crumbly, and fell apart when I tried to pick them up. The egg yolk is crucial for tenderness and structure. Don’t skip it, and don’t accidentally use the whole egg. Save that white for brushing the almonds.
Variations & Adaptations
One of the best things about this recipe is how adaptable it is. Here are some variations I’ve tried and loved.
Chocolate Witch Fingers: Replace 1/4 cup (30g) of the all-purpose flour with 1/4 cup (20g) of unsweetened cocoa powder. The cookies will be darker and look even more realistic—like aged, withered fingers. Use dark chocolate almonds for the nails, or just use the regular blanched almonds. The cocoa flavor pairs beautifully with the butter.
Gluten-Free Version: As I mentioned earlier, use a 1:1 gluten-free flour blend. I’ve tested this with Bob’s Red Mill and Cup4Cup, and both worked well. The dough will be slightly more delicate, so handle it gently when shaping. You might need to chill the dough for an extra 15 minutes to make it easier to work with.
Vegan Adaptation: Use a high-quality vegan butter stick and a flax egg (1 tablespoon ground flaxseed mixed with 3 tablespoons water, let sit for 5 minutes). For the egg white wash, use a mixture of 1 tablespoon maple syrup and 1 tablespoon water. The cookies will be slightly less tender, but still delicious. I’ve made this version for a vegan friend’s Halloween party, and they were gone within the hour.
Spooky Color Variations: Add a few drops of green or purple food coloring to the dough for a more fantastical look. Green witch fingers are especially fun for a Halloween party. Just be careful not to overmix the color in—you want it evenly distributed, not streaky.
Different Nail Options: If you can’t find whole blanched almonds, try using whole cashews (they have a similar shape) or even candy corn for a sweeter, less realistic look. For a truly gruesome effect, use sliced almonds that are slightly larger than the fingertip—they look like jagged, broken nails.
Herb-Infused Version: Add 1 teaspoon of dried rosemary or thyme to the dough for an earthy, savory twist. This sounds weird, but trust me—the herb flavor cuts through the sweetness and makes the cookies feel more sophisticated. I served these at a Halloween dinner party, and the adults couldn’t get enough.
My personal favorite variation? The chocolate version with a tiny dab of raspberry jam at the base of the nail. The combination of dark chocolate and raspberry is incredible, and the red jam looks genuinely alarming against the dark cookie. It’s become my signature Halloween treat.
Serving & Storage Suggestions
These witch finger cookies are best served at room temperature, and they look absolutely spectacular arranged on a platter. Here’s how I like to present them.
Presentation ideas: Arrange the cookies on a black or dark gray platter to make the pale “fingers” stand out. I sometimes scatter a few whole almonds around the plate for texture, or add a fake spider or two for extra spookiness. For a truly dramatic effect, place them in a small basket lined with a dark cloth, as if you’ve just harvested them from a grave. Yes, it’s morbid. That’s the point.
Complementary dishes: These cookies pair beautifully with a warm cup of spiced apple cider, a pumpkin spice latte, or a mug of hot chocolate. For a Halloween party spread, serve them alongside other spooky treats like mummy hot dogs, ghost-shaped cheese crackers, or a bowl of “witches’ brew” punch. They also work well as part of a dessert table with caramel apples and pumpkin pie.
Storage instructions: Store the cookies in an airtight container at room temperature for up to 5 days. Layer them between sheets of parchment paper to prevent the almonds from scratching the surface of other cookies. Do not refrigerate—the cold will dry them out and make them lose their texture.
Freezer instructions: These cookies freeze beautifully. Place them in a single layer on a baking sheet and freeze until solid (about 1 hour), then transfer to a freezer-safe bag or container. They’ll keep for up to 3 months. To thaw, let them sit at room temperature for about 20 minutes. The almonds might lose a little of their crunch, but they’ll still taste wonderful.
Reheating tips: These cookies are meant to be eaten at room temperature, but if you want to refresh them, pop them in a 300°F (150°C) oven for 3 to 4 minutes. Let them cool completely before serving. I don’t recommend microwaving—it makes them soft and soggy.
How flavors develop: Honestly, these cookies are even better the next day. The flavors meld together, and the texture becomes slightly more tender. I often make them a day ahead for parties. Just store them in an airtight container, and they’ll be perfect.
Nutritional Information & Benefits
Let’s be real—these are cookies, not health food. But here’s the nutritional breakdown for one witch finger cookie (based on the recipe making about 24 cookies).
| Nutrient | Amount per Cookie |
|---|---|
| Calories | 145 |
| Total Fat | 9g |
| Saturated Fat | 5g |
| Cholesterol | 30mg |
| Sodium | 50mg |
| Total Carbohydrates | 15g |
| Dietary Fiber | 1g |
| Sugars | 8g |
| Protein | 2g |
Health highlights: On the positive side, almonds are a great source of vitamin E, magnesium, and healthy monounsaturated fats. They’re good for your heart and your skin. The butter provides some vitamin A, and the egg yolk contains choline, which supports brain health. Plus, there’s something to be said for the mental health benefits of baking—the process is meditative, and sharing treats with loved ones boosts mood.
Dietary considerations: This recipe contains gluten, dairy, eggs, and tree nuts (almonds). It is not suitable for those with celiac disease, dairy allergies, egg allergies, or tree nut allergies without modifications. For a gluten-free version, see the variations section. For a vegan version, see the adaptations above.
My personal perspective: I believe in balance. These cookies are a treat for special occasions, not an everyday snack. They’re meant to be enjoyed with joy and without guilt. One cookie is perfectly satisfying, and the almond adds a little protein to balance out the sugar. Plus, the fun factor is off the charts—that counts for something, right?
Conclusion
These witch finger cookies with almond nails are everything I want in a Halloween treat: fun, delicious, and just a little bit creepy. They’re the kind of recipe that brings people together—kids giggle, adults laugh, and everyone reaches for one more. The shortbread is buttery and tender, the almond adds the perfect crunch, and the whole thing comes together with ingredients you probably already have in your kitchen.
I love that this recipe isn’t just about the final product. It’s about the process—sitting around the table with your family, shaping the dough, pressing in the knuckles, laughing at how ridiculous and wonderful they look. It’s about the smell of butter and vanilla filling your kitchen on a cool October evening. It’s about the moment you set the platter down and watch people’s faces go from surprise to delight.
I encourage you to make these your own. Add red jam for blood, use green food coloring for a witchy twist, or try the chocolate version for something darker. Experiment, have fun, and don’t worry if some of them look a little wonky—that’s part of the charm. Honestly, the imperfect ones are the most realistic.
If you make these, I’d love to hear about it. Leave a comment below and tell me how they turned out, or share a photo on Pinterest and tag me. Did your kids love them? Did you try a fun variation? I read every comment, and your stories make my day. Happy Halloween, and happy baking!
Frequently Asked Questions
Can I make the dough ahead of time?
Absolutely. You can prepare the dough up to 3 days in advance and keep it tightly wrapped in the refrigerator. When you’re ready to bake, let it sit at room temperature for about 10 minutes to soften slightly before shaping. You can also freeze the dough for up to 3 months—just thaw it overnight in the fridge before using.
Why did my cookies spread and lose their shape?
This usually happens for one of three reasons: the dough wasn’t chilled long enough, the butter was too soft when you mixed it, or your oven wasn’t hot enough. Make sure you chill the dough for at least 30 minutes, and check your oven temperature with an oven thermometer. If your oven runs cool, the butter will melt slowly and cause the cookies to spread.
Can I use almond flour instead of all-purpose flour?
I don’t recommend it. Almond flour doesn’t have the same structure as all-purpose flour, and the cookies will spread, flatten, and lose their finger shape entirely. If you need a gluten-free option, use a 1:1 gluten-free baking flour blend that contains xanthan gum. It will give you much better results.
How do I keep the almond nails from falling off?
The egg white is your best friend here. Brush a generous amount onto the fingertip before pressing the almond into place. Make sure you create a small divot for the almond to sit in—this gives it a little pocket to hold onto. Also, press firmly but gently. If an almond does fall off after baking, you can glue it back on with a tiny dab of melted white chocolate or royal icing.
Can I make these cookies with kids?
Yes, and I highly recommend it! Kids love shaping the fingers and pressing in the knuckles. It’s a great way to get them involved in Halloween preparations. Just be prepared for a little chaos—the dough will get warm from little hands, so you might need to chill it again between batches. Also, supervise the use of knives for creating the knuckle lines. A butter knife or the back of a spoon works well for little fingers.
Pin This Recipe!
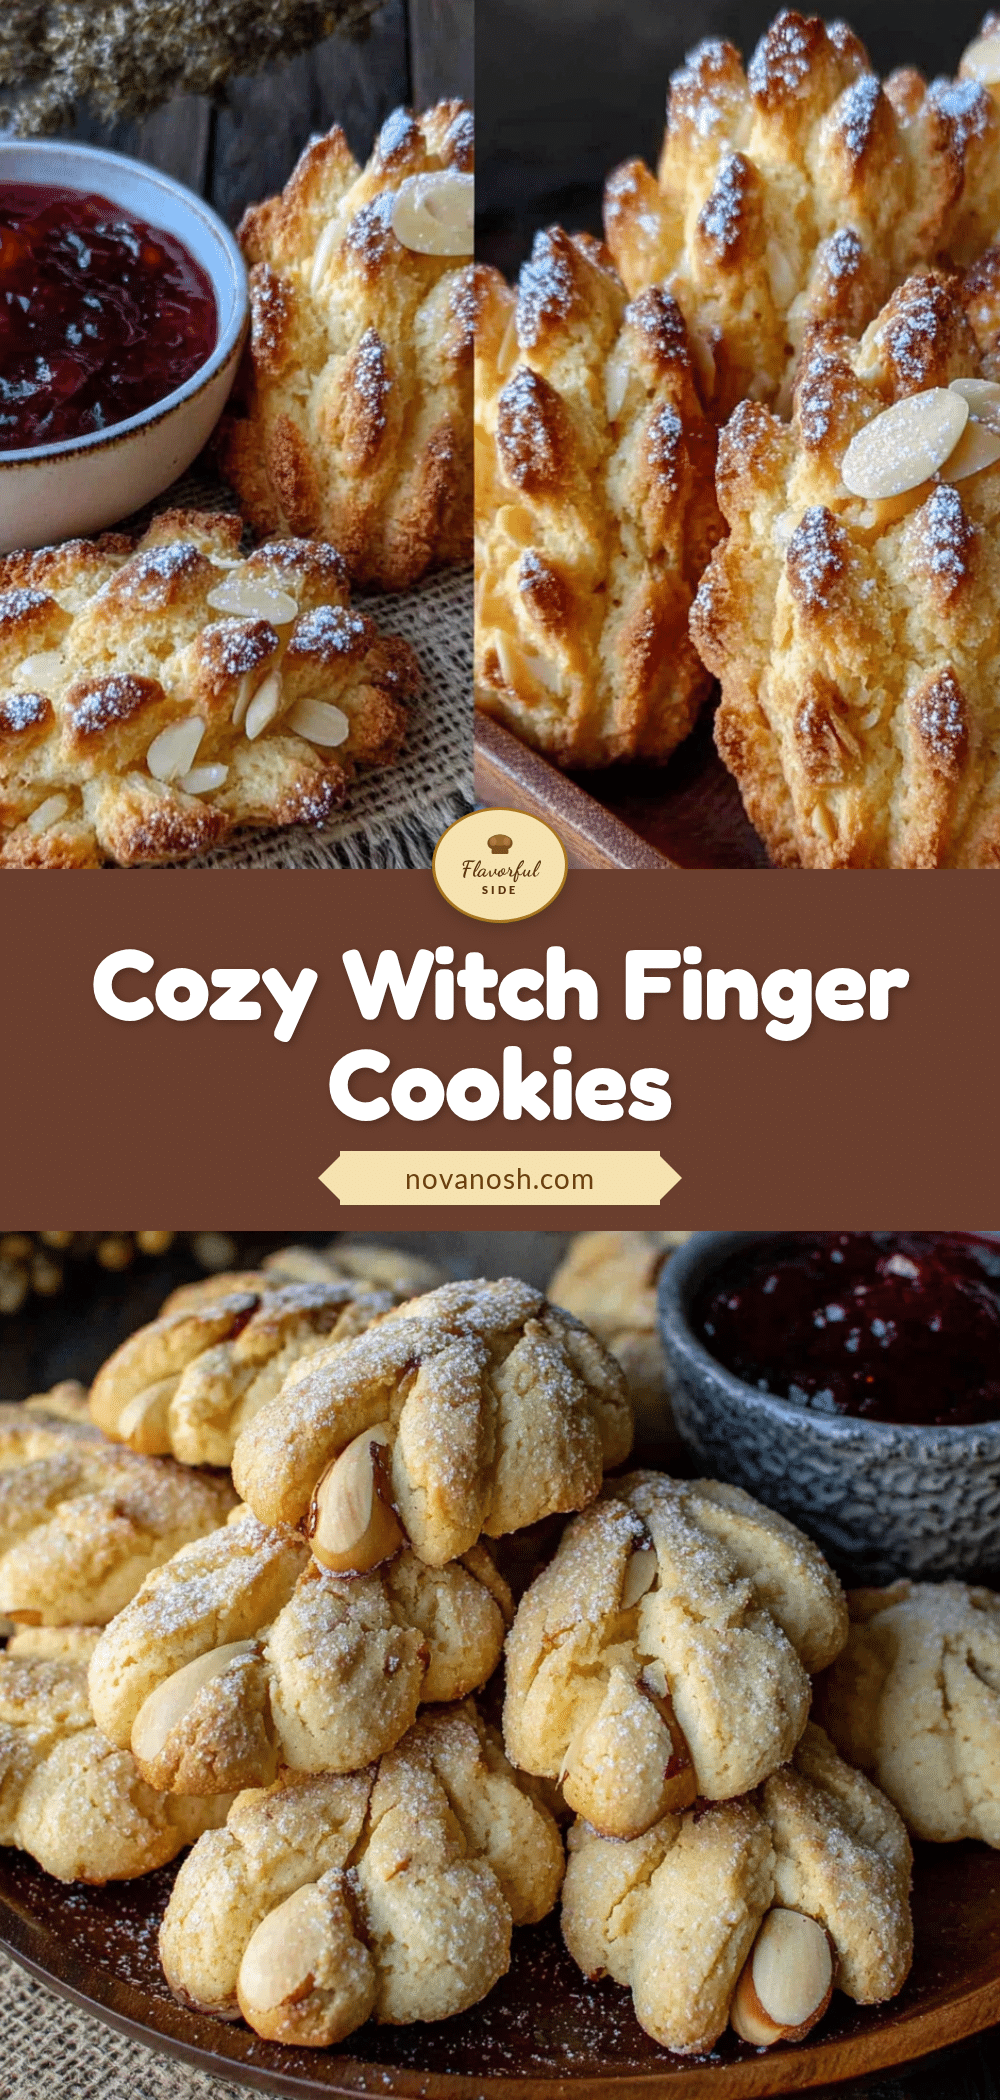
Best Easy Witch Finger Cookies with Almond Nails
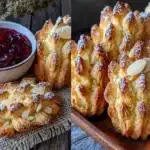
These witch finger cookies are a fun and delicious Halloween treat. Made with a buttery shortbread dough and topped with an almond nail, they look spooky but taste amazing.
- Prep Time: 15 minutes
- Cook Time: 14 minutes
- Total Time: 45 minutes
- Yield: 24 servings 1x
- Category: Dessert
- Cuisine: American
Ingredients
- 1 cup (226g) unsalted butter, softened
- 1 cup (200g) granulated sugar
- 1 large egg, separated
- 1 teaspoon vanilla extract
- 1/2 teaspoon almond extract (optional)
- 1/4 teaspoon salt
- 2 1/4 cups (280g) all-purpose flour
- 1/2 cup (about 60g) whole blanched almonds
- Red food coloring (optional)
- Jam or preserves (optional)
Instructions
- Cream the butter and sugar together until light and fluffy.
- Add the egg yolk, vanilla extract, and almond extract (if using) and beat until combined.
- In a separate bowl, whisk together the flour and salt. Gradually add to the wet mixture, mixing until just combined.
- Turn the dough out onto plastic wrap, pat into a disk, and refrigerate for at least 30 minutes.
- Preheat oven to 325°F (163°C) and line baking sheets with parchment paper.
- Pinch off walnut-sized pieces of dough and roll into finger shapes about 3-4 inches long.
- Use the back of a knife to create 2-3 knuckle indentations on each finger.
- Flatten the tip of each finger and make a small cut for the almond nail.
- Brush the cuticle area with beaten egg white and press a whole almond onto the tip.
- Brush the almond with more egg white for shine.
- Bake for 12-14 minutes until bottoms are light golden. Cool on the baking sheet for 5 minutes, then transfer to a wire rack.
- Optional: Add red food coloring or jam at the base of the nail for a bloody effect.
Notes
Chill the dough for at least 30 minutes to prevent spreading. Keep hands cool while shaping. For a gluten-free version, use a 1:1 gluten-free flour blend. For a vegan version, use vegan butter and a flax egg.
Nutrition
- Serving Size: 1 cookie
- Calories: 145
- Sugar: 8
- Sodium: 50
- Fat: 9
- Saturated Fat: 5
- Carbohydrates: 15
- Fiber: 1
- Protein: 2
Keywords: witch finger cookies, Halloween cookies, shortbread cookies, almond nails, spooky treats