Love this? Save it for later!
Share the inspiration with your friends
I swore I’d never make a one-pan ground beef skillet for company. For years, I thought of it as that thing you throw together on a Tuesday when the fridge is bare and you have zero energy to impress anyone. It felt too humble, too ordinary for the kind of dinner parties I wanted to throw. Then I made this version for a casual get-together last fall, and my neighbor Mark—who never finishes his plate—asked for seconds. Then thirds. I caught him scraping the pan with a tortilla chip when he thought no one was looking.
Honestly, I didn’t set out to prove myself wrong. I was just tired, it was raining, and I had a pound of ground beef thawing on the counter. The power had flickered twice that afternoon, and I needed something forgiving and fast. I grabbed a skillet, some pantry staples, and a block of cheese I’d been saving for something fancier. By the time the peppers hit the hot oil, that smell—sweet and savory and a little smoky—started pulling people into the kitchen. My friend Jen walked in and said, “What are you making? It smells like my grandma’s house.” That’s when I knew I had something.
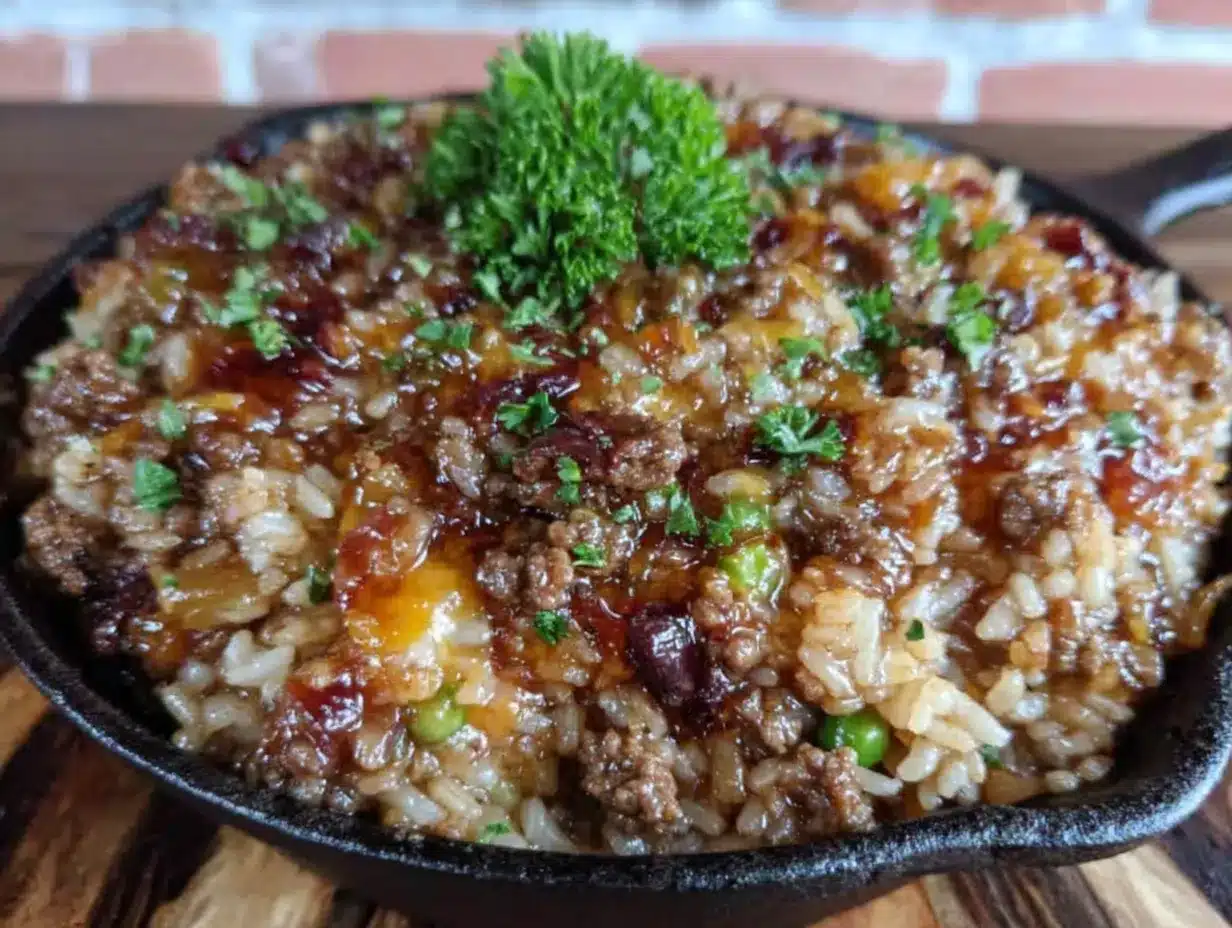
Maybe you’ve been there—wanting to serve something that feels special but doesn’t chain you to the stove while your guests are mingling. This one-pan cheesy ground beef skillet is that recipe. It’s the dish that makes you look like you tried harder than you actually did. The cheese gets all melty and golden on top, the beef stays juicy, and the whole thing comes together in one skillet with minimal cleanup. I keep making it because it’s the kind of meal that makes people lean in, grab a spoon, and help themselves without waiting for an invitation.
Why You’ll Love This Recipe
I’ve tested this one-pan cheesy ground beef skillet more times than I care to admit. My family has become my unofficial taste-testing panel, and they’ve yet to complain. Here’s why this version won me over—and why it’ll win your dinner guests over too.
- Quick & Easy: From start to table in about 35 minutes. No complicated steps, no fancy techniques. Just honest cooking that works.
- Simple Ingredients: Everything you need is likely in your kitchen right now. No trips to specialty stores or hunting down obscure spices.
- Perfect for Crowds: This recipe scales beautifully. Double it for a potluck, halve it for a quiet dinner—it’s forgiving either way.
- Crowd-Pleaser: Kids devour it. Adults ask for the recipe. Even picky eaters go back for more. I’ve watched it happen.
- Unbelievably Delicious: The combination of seasoned beef, tender vegetables, and that bubbly cheese topping is pure comfort food magic.
What makes this recipe different from the dozens of other skillet dinners out there? It’s the layering of flavors. Most recipes dump everything in at once and hope for the best. I take a few extra minutes to build flavor step by step—browning the beef until it’s deeply caramelized, softening the peppers and onions until they’re sweet, and letting the cheese melt slowly so it forms that irresistible golden crust. It’s not complicated, but it makes all the difference.
This isn’t just another weeknight dinner. It’s the kind of meal that makes you close your eyes after the first bite. It’s comfort food reimagined—hearty, satisfying, and impressive enough to serve at your next gathering without breaking a sweat. Perfect for impressing guests without stress, or turning a simple meal into something memorable.
What Ingredients You Will Need
This recipe uses simple, wholesome ingredients to deliver bold flavor and satisfying texture without the fuss. Most of these are pantry staples, so you can whip this up on a whim.
For the Skillet Base
- 2 tablespoons olive oil (adds richness; use avocado oil if preferred)
- 1 large yellow onion, diced (about 1½ cups; sweet onion works too)
- 1 red bell pepper, diced (adds color and sweetness)
- 1 green bell pepper, diced (for a slightly bitter contrast)
- 4 cloves garlic, minced (fresh is best; jarred minced garlic works in a pinch)
- 2 pounds ground beef (80/20 blend gives the best flavor; drain excess fat if needed)
- 1 teaspoon salt (adjust to taste)
- ½ teaspoon black pepper
- 1 tablespoon chili powder (I prefer homemade chili powder for deeper flavor)
- 1 teaspoon cumin (adds warmth and earthiness)
- 1 teaspoon smoked paprika (not regular—trust me on this)
- ½ teaspoon oregano (dried is fine)
For the Cheesy Topping
- 1 can (14.5 oz) diced tomatoes, drained (fire-roasted adds a nice smoky note)
- 1 can (8 oz) tomato sauce (no-salt-added helps control sodium)
- 1 cup beef broth (low-sodium preferred; chicken broth works too)
- 1 cup long-grain white rice, uncooked (basmati or jasmine work beautifully)
- 2 cups shredded sharp cheddar cheese (shred your own for better melting; pre-shredded has anti-caking agents)
- ½ cup shredded Monterey Jack cheese (adds creaminess; mozzarella is a fine substitute)
- Fresh parsley or cilantro for garnish (optional but pretty)
Ingredient Tips: For the best texture, I recommend using Tillamook sharp cheddar or Cabot Vermont sharp cheddar. If you’re feeding a crowd that prefers milder flavors, swap half the cheddar for Colby Jack. For a gluten-free version, this recipe is naturally gluten-free as written—just double-check your broth and tomato sauce labels. If you want to lighten it up, use ground turkey instead of beef and add an extra tablespoon of olive oil to prevent dryness.
Equipment Needed
You don’t need a fancy kitchen to pull this off. Here’s what you’ll need:
- A large skillet or Dutch oven (12-inch with a lid is ideal; cast iron or stainless steel both work beautifully)
- A wooden spoon or spatula (for breaking up the beef)
- A sharp knife and cutting board (for dicing vegetables)
- Measuring cups and spoons (eyeballing works for some, but not for the spices)
- A cheese grater (if you’re shredding your own cheese—please do)
- Aluminum foil (for covering the skillet if your lid doesn’t fit perfectly)
I’ve made this in everything from a $20 nonstick skillet from the grocery store to my prized Le Creuset Dutch oven. Honestly, they all worked fine. The nonstick skillet required a little more attention to prevent sticking, but the end result was just as good. If you don’t have a lid that fits, a baking sheet placed on top works in a pinch—I learned that trick during a power outage when I couldn’t find my lid.
One tip: if you’re using a cast iron skillet, make sure it’s well-seasoned before you start. I learned this the hard way when my first attempt turned into a sticky mess because I rushed the preheating. Take the extra two minutes to heat it slowly, and you’ll be rewarded with a perfect crust on your beef.
Preparation Method
Let me walk you through this step by step. I’ve made this dish more times than I can count, and these are the exact moves that get you that perfect, crowd-pleasing result every time.
- Heat the olive oil in your large skillet over medium-high heat. You want it shimmering but not smoking—about 2 minutes. Add the diced onion and both bell peppers. Cook for 5-6 minutes, stirring occasionally, until the onions turn translucent and the peppers start to soften. The kitchen should smell sweet and slightly smoky at this point.
- Add the minced garlic and cook for 30 seconds, stirring constantly. Garlic burns fast, so don’t walk away. You’ll know it’s ready when you can smell it—that warm, pungent aroma that signals good things to come.
- Push the vegetables to one side of the skillet and add the ground beef. Break it up with your wooden spoon into crumbles about the size of a nickel. Let it brown undisturbed for 3-4 minutes before stirring. This is where the magic happens—that deep, caramelized crust adds so much flavor. If you stir too early, you’ll steam the meat instead of browning it.
- Season the beef with salt, pepper, chili powder, cumin, smoked paprika, and oregano. Stir everything together and cook for another 2 minutes until the spices are fragrant. You might notice the bottom of the pan getting a little brown—that’s flavor, not a problem.
- Add the diced tomatoes, tomato sauce, and beef broth. Stir to combine, scraping up any browned bits from the bottom of the skillet. Those bits are liquid gold. Bring the mixture to a gentle simmer—you should see small bubbles breaking the surface, not a rolling boil.
- Stir in the uncooked rice, making sure it’s evenly distributed. Reduce the heat to low, cover the skillet with a tight-fitting lid, and let it simmer for 18-20 minutes. Do not lift the lid during this time. I know it’s tempting, but every time you lift it, you release steam that the rice needs to cook properly.
- After 18 minutes, check the rice. It should be tender and have absorbed most of the liquid. If it’s still a little crunchy, add 2 tablespoons of water, re-cover, and cook for another 3-4 minutes. This happens sometimes—don’t panic, just adjust.
- Sprinkle both cheeses evenly over the top of the skillet. Cover again and cook for 2-3 minutes until the cheese is melted and bubbly. For a golden brown top, transfer the skillet to a preheated broiler for 1-2 minutes—watch it closely so it doesn’t burn.
- Remove from heat and let it rest for 5 minutes before serving. This allows the flavors to settle and the rice to finish absorbing any remaining moisture. Garnish with fresh parsley or cilantro if you’re feeling fancy.
Sensory Cue: When it’s done, you’ll see the cheese gently bubbling around the edges, and the rice will have puffed up slightly. The smell is intoxicating—smoky, cheesy, and deeply savory. Your guests will start hovering near the kitchen, and that’s how you know you’ve nailed it.
Cooking Tips & Techniques
I’ve made every mistake in the book with this recipe so you don’t have to. Here’s what I’ve learned:
Don’t rush the browning. The biggest mistake people make is stirring the beef too soon. Let it sit in the hot pan for a solid 3-4 minutes before breaking it up. That crust is where the flavor lives. I once rushed this step because I was hungry and impatient, and the resulting dish was good but not great. The patience pays off.
Watch your heat. Medium-high for browning, then low for simmering. If you keep the heat too high after adding the liquid, the rice will cook unevenly and the bottom might burn. I learned this the hard way when I tried to speed things up and ended up with crunchy rice and a scorched pan.
Shred your own cheese. Pre-shredded cheese contains anti-caking agents that prevent it from melting smoothly. Take the extra 3 minutes to shred a block of cheddar yourself—the texture difference is night and day. Your cheese sauce will be creamy instead of grainy.
Multitasking tip: While the beef browns, dice your vegetables and measure your spices. This saves about 10 minutes total and keeps you from scrambling when things start cooking. I keep a small bowl of pre-measured spices on my counter so I can add them all at once.
Consistency check: If your skillet seems too liquidy after the rice is cooked, remove the lid and let it simmer uncovered for 2-3 minutes. If it’s too dry, add a splash of broth or water. Every stovetop runs a little differently, so trust your eyes more than the timer.
Variations & Adaptations
This recipe is wonderfully flexible. Here are some ways I’ve adapted it for different crowds and cravings:
Spicy Southwest Version: Add 1 diced jalapeño with the onions, use pepper jack instead of cheddar, and stir in a can of drained black beans with the tomatoes. Top with sliced avocado and a squeeze of lime. My brother-in-law requests this version every time he visits.
Low-Carb Adaptation: Skip the rice entirely and replace it with 2 cups of cauliflower rice. Add it in the last 5 minutes of cooking so it doesn’t get mushy. You’ll lose some of the heartiness, but the flavor is still spot-on. I’ve served this to keto friends who didn’t even miss the carbs.
Vegetarian Twist: Replace the ground beef with 2 cans of drained and rinsed black beans plus 1 cup of cooked lentils. The texture is different but equally satisfying. Add an extra teaspoon of cumin to boost the savory flavor. My vegetarian neighbor loves this version and says it’s her go-to for potlucks.
Dairy-Free Option: Use a high-quality dairy-free cheddar shred (I like Violife or Daiya) and skip the Monterey Jack. The texture won’t be quite as gooey, but the flavor is still fantastic. Just add the cheese in the last 2 minutes and don’t broil it.
Rice Swap: Try brown rice instead of white—just increase the cooking time to 35-40 minutes and add an extra ½ cup of broth. Quinoa also works beautifully and cooks in about the same time as white rice.
Serving & Storage Suggestions
This one-pan cheesy ground beef skillet is best served hot, straight from the skillet. I like to set it in the middle of the table with a stack of warm tortillas or a basket of tortilla chips on the side. Let people scoop and build their own plates—it feels more interactive and fun.
What to serve alongside: A simple side salad with lime vinaigrette cuts through the richness beautifully. I also love serving it with creamy Mexican street corn or a bowl of fresh pico de gallo. For drinks, a cold Mexican lager or a crisp margarita pairs perfectly.
Storage instructions: Leftovers keep in an airtight container in the refrigerator for up to 4 days. The flavors actually meld and deepen overnight, so it’s even better the next day. To reheat, add a splash of water or broth and warm gently on the stovetop or in the microwave. Avoid high heat, which can dry out the rice.
Freezer-friendly: This dish freezes beautifully for up to 3 months. Let it cool completely, then transfer to a freezer-safe container. Thaw overnight in the refrigerator before reheating. I often make a double batch and freeze one for busy weeks—it’s a lifesaver when company shows up unexpectedly.
Presentation tip for crowds: If you’re serving at a potluck, transfer the finished skillet to a warm serving dish and top with fresh cilantro, sliced green onions, and a dollop of sour cream. The bright colors make it look even more appetizing.
Nutritional Information & Benefits
Here’s the approximate nutritional breakdown per serving (based on 8 servings):
| Nutrient | Amount per Serving |
|---|---|
| Calories | 485 |
| Protein | 32g |
| Fat | 24g |
| Saturated Fat | 11g |
| Carbohydrates | 32g |
| Fiber | 3g |
| Sugar | 5g |
| Sodium | 720mg |
Health benefits: Ground beef is an excellent source of high-quality protein, iron, and B vitamins—especially B12, which supports energy and brain function. Bell peppers are packed with vitamin C (more than an orange, gram for gram), and onions provide prebiotic fiber that supports gut health. The tomatoes add lycopene, a powerful antioxidant linked to heart health.
Dietary considerations: This recipe is naturally gluten-free and nut-free. For a lower-sodium version, use no-salt-added tomato products and reduce the added salt to ½ teaspoon. If you’re watching saturated fat, use lean ground beef (90/10) and reduce the cheese by half.
I personally love that this meal feels indulgent but still includes plenty of vegetables and whole ingredients. It’s comfort food that doesn’t leave you feeling guilty—just satisfied.
Conclusion
This one-pan cheesy ground beef skillet has become my secret weapon for feeding a crowd without stress. It’s the dish I turn to when I want to impress without spending all day in the kitchen, and it never lets me down. The combination of savory beef, tender rice, and that bubbling cheese topping is pure comfort—the kind of food that makes people feel welcome and well-fed.
I hope you’ll make this your own. Add more spice, swap in different vegetables, or double the cheese—there’s no wrong way to enjoy it. The best recipes are the ones that adapt to your kitchen and your people, and this one does exactly that.
If you give this recipe a try, I’d love to hear about it. Drop a comment below and tell me how it turned out, what variations you tried, or just share a story about the last time you cooked for a crowd. And don’t forget to pin this recipe for later—you’ll thank me the next time you need a quick, impressive dinner that feeds a hungry table.
Happy cooking, friends. Your skillet is waiting.
Frequently Asked Questions
Can I make this ahead of time for a party?
Absolutely. Assemble the skillet completely but don’t add the cheese topping. Cover and refrigerate for up to 24 hours. When you’re ready to serve, reheat gently on the stovetop, add the cheese, and finish under the broiler. It’s a great make-ahead option for entertaining.
Can I use ground turkey or chicken instead of beef?
Yes, but add an extra tablespoon of olive oil to prevent dryness. Ground poultry is leaner than beef, so it benefits from a little extra fat. Cook it the same way, and you’ll still get great results.
Why is my rice still crunchy after 20 minutes?
This usually happens if the heat was too low or the lid didn’t seal properly. Add ¼ cup of warm broth or water, re-cover tightly, and cook for another 5 minutes. If your lid is loose, try covering the skillet with aluminum foil before putting the lid on.
Can I freeze leftovers?
Yes! This freezes beautifully for up to 3 months. Let it cool completely, portion into freezer-safe containers, and thaw overnight in the fridge before reheating. The rice might soften slightly upon reheating, but the flavor remains excellent.
What can I serve with this to make it a complete meal?
A simple green salad with a citrus vinaigrette is my go-to. You could also serve it with roasted vegetables, a side of black beans, or warm tortillas. For a heartier meal, add a bowl of quick black bean soup as a starter.
Pin This Recipe!

Best One-Pan Cheesy Ground Beef Skillet Recipe for a Crowd

A hearty, one-pan cheesy ground beef skillet that’s perfect for feeding a crowd. This comforting dish features seasoned ground beef, tender rice, and a bubbly cheese topping, all cooked in a single skillet for minimal cleanup.
- Prep Time: 15 minutes
- Cook Time: 30 minutes
- Total Time: 45 minutes
- Yield: 8 servings 1x
- Category: Main Course
- Cuisine: American
Ingredients
- 2 tablespoons olive oil
- 1 large yellow onion, diced (about 1½ cups)
- 1 red bell pepper, diced
- 1 green bell pepper, diced
- 4 cloves garlic, minced
- 2 pounds ground beef (80/20 blend)
- 1 teaspoon salt
- ½ teaspoon black pepper
- 1 tablespoon chili powder
- 1 teaspoon cumin
- 1 teaspoon smoked paprika
- ½ teaspoon oregano
- 1 can (14.5 oz) diced tomatoes, drained
- 1 can (8 oz) tomato sauce
- 1 cup beef broth (low-sodium preferred)
- 1 cup long-grain white rice, uncooked
- 2 cups shredded sharp cheddar cheese
- ½ cup shredded Monterey Jack cheese
- Fresh parsley or cilantro for garnish (optional)
Instructions
- Heat the olive oil in a large skillet over medium-high heat until shimmering, about 2 minutes. Add the diced onion and both bell peppers. Cook for 5-6 minutes, stirring occasionally, until the onions are translucent and the peppers start to soften.
- Add the minced garlic and cook for 30 seconds, stirring constantly.
- Push the vegetables to one side of the skillet and add the ground beef. Break it up into nickel-sized crumbles. Let it brown undisturbed for 3-4 minutes before stirring.
- Season the beef with salt, pepper, chili powder, cumin, smoked paprika, and oregano. Stir everything together and cook for another 2 minutes until the spices are fragrant.
- Add the diced tomatoes, tomato sauce, and beef broth. Stir to combine, scraping up any browned bits from the bottom of the skillet. Bring the mixture to a gentle simmer.
- Stir in the uncooked rice, making sure it’s evenly distributed. Reduce the heat to low, cover the skillet with a tight-fitting lid, and let it simmer for 18-20 minutes. Do not lift the lid during this time.
- After 18 minutes, check the rice. It should be tender and have absorbed most of the liquid. If still crunchy, add 2 tablespoons of water, re-cover, and cook for another 3-4 minutes.
- Sprinkle both cheeses evenly over the top of the skillet. Cover again and cook for 2-3 minutes until the cheese is melted and bubbly. For a golden brown top, transfer the skillet to a preheated broiler for 1-2 minutes.
- Remove from heat and let it rest for 5 minutes before serving. Garnish with fresh parsley or cilantro if desired.
Notes
For best results, shred your own cheese as pre-shredded contains anti-caking agents that affect melting. Don’t rush the browning of the beef—let it sit undisturbed for 3-4 minutes to develop a deep caramelized crust. If the skillet seems too liquidy after rice is cooked, simmer uncovered for 2-3 minutes. If too dry, add a splash of broth or water.
Nutrition
- Serving Size: 1 serving
- Calories: 485
- Sugar: 5
- Sodium: 720
- Fat: 24
- Saturated Fat: 11
- Carbohydrates: 32
- Fiber: 3
- Protein: 32
Keywords: one-pan, ground beef, cheesy, skillet, crowd-pleaser, easy dinner, comfort food