Love this? Save it for later!
Share the inspiration with your friends
The Friendsgiving potluck was in six hours and I’d completely forgotten. Everyone else would be bringing their signature dishes—Kevin’s legendary mac and cheese with the three-cheese crust, Sarah’s twice-baked potatoes that she spends all morning on, and my sister-in-law’s green bean casserole that honestly deserves its own fan club. I had a single acorn squash sitting in my fruit bowl, a half-empty jar of maple syrup, and about fifteen minutes before I needed to leave for the grocery store run that wasn’t going to happen.
I stood there, staring at that lumpy, striped squash like it held the answers to life. “You’re going to have to work some magic,” I muttered, grabbing my vegetable peeler. The panic was real, folks. I mean, you know that feeling when everyone expects something amazing and you’re staring down the barrel of kitchen failure? Yeah, that was me.
So I sliced the squash into rings—partly because it felt fancy, partly because I didn’t have time to cube it properly. I whisked together a quick batter, dunked each ring, and baked them while praying to the kitchen gods. When they came out golden and crispy, I drizzled them with a quick maple butter sauce that I literally made up on the spot. I threw them on a platter, crossed my fingers, and walked into that party feeling like a fraud.
Here’s the funny thing—they disappeared first. Before Kevin’s mac and cheese. Before the twice-baked potatoes. People kept coming back for “one more ring” and asking for the recipe. My sister-in-law pulled me aside and whispered, “You’re not allowed to bring anything else ever again.” And honestly? That’s how this recipe was born—out of panic, a single squash, and the desperate need to not show up empty-handed.
Why You’ll Love This Recipe
Let me tell you why these Light & Crispy Maple Butter Acorn Squash Rings have become my most-requested dish. I’ve tested this recipe at least a dozen times since that frantic Friendsgiving, tweaking and perfecting until every ring comes out exactly right. Here’s what makes them special:
- Quick & Easy: From fridge to table in under 40 minutes. No complicated techniques, no fancy equipment, just simple steps that anyone can follow.
- Simple Ingredients: You probably have most of these in your kitchen right now. Acorn squash is cheap and available everywhere in fall, and the rest is pantry basics.
- Perfect for Fall Gatherings: Thanksgiving, Friendsgiving, Sunday dinners, or just a cozy weeknight side that makes you feel like you’re eating at a fancy restaurant.
- Crowd-Pleaser: I’ve served these to picky kids, health-conscious friends, and serious foodies—every single person has asked for seconds. They’re that good.
- Unbelievably Delicious: The contrast between the crispy, golden coating and the tender, sweet squash inside is honestly addictive. And that maple butter drizzle? It’s the kind of thing you’ll want to put on everything.
What makes this recipe different from all the other squash recipes out there? It’s the double-coating technique that gives you that light, crunchy texture without deep frying. Most baked squash rings come out soggy or heavy—not these. They’re crispy on the outside, tender on the inside, and the maple butter adds just the right amount of sweetness without being overwhelming.
This isn’t just another side dish. It’s the kind of recipe that makes you close your eyes after the first bite. It’s comfort food reimagined—healthier than fried onion rings, but with the same soul-soothing satisfaction. Perfect for impressing guests without stress, or turning a simple Tuesday dinner into something memorable.
What Ingredients You Will Need
This recipe uses simple, wholesome ingredients to deliver bold flavor and satisfying texture without the fuss. Most of these are pantry staples, especially during fall and winter when squash is at its peak.
For the Squash Rings
- 1 medium acorn squash (about 1.5 pounds or 680g) — Look for one that feels heavy for its size and has deep green skin with orange patches. That means it’s ripe and sweet.
- ½ cup all-purpose flour (60g) — I use King Arthur Flour for consistent results, but any brand works. For gluten-free, use a 1:1 gluten-free flour blend.
- ½ cup panko breadcrumbs (30g) — Regular breadcrumbs work too, but panko gives you that extra-crispy texture. Trust me on this one.
- ¼ cup grated Parmesan cheese (25g) — Adds savory depth and helps the coating get golden and crunchy. Skip it for dairy-free, but you’ll miss the flavor.
- 1 large egg — Helps the coating stick. For vegan, use 2 tablespoons of aquafaba (chickpea water) mixed with 1 tablespoon of cornstarch.
- 2 tablespoons milk (any kind works) — Thins the egg wash. I use whole milk, but oat milk or almond milk work great.
- ½ teaspoon garlic powder
- ½ teaspoon smoked paprika — Adds a subtle smoky flavor that pairs beautifully with the maple.
- ¼ teaspoon black pepper
- ½ teaspoon salt
- 1 tablespoon olive oil — For brushing the baking sheet and the rings before baking. Helps them crisp up without frying.
For the Maple Butter Drizzle
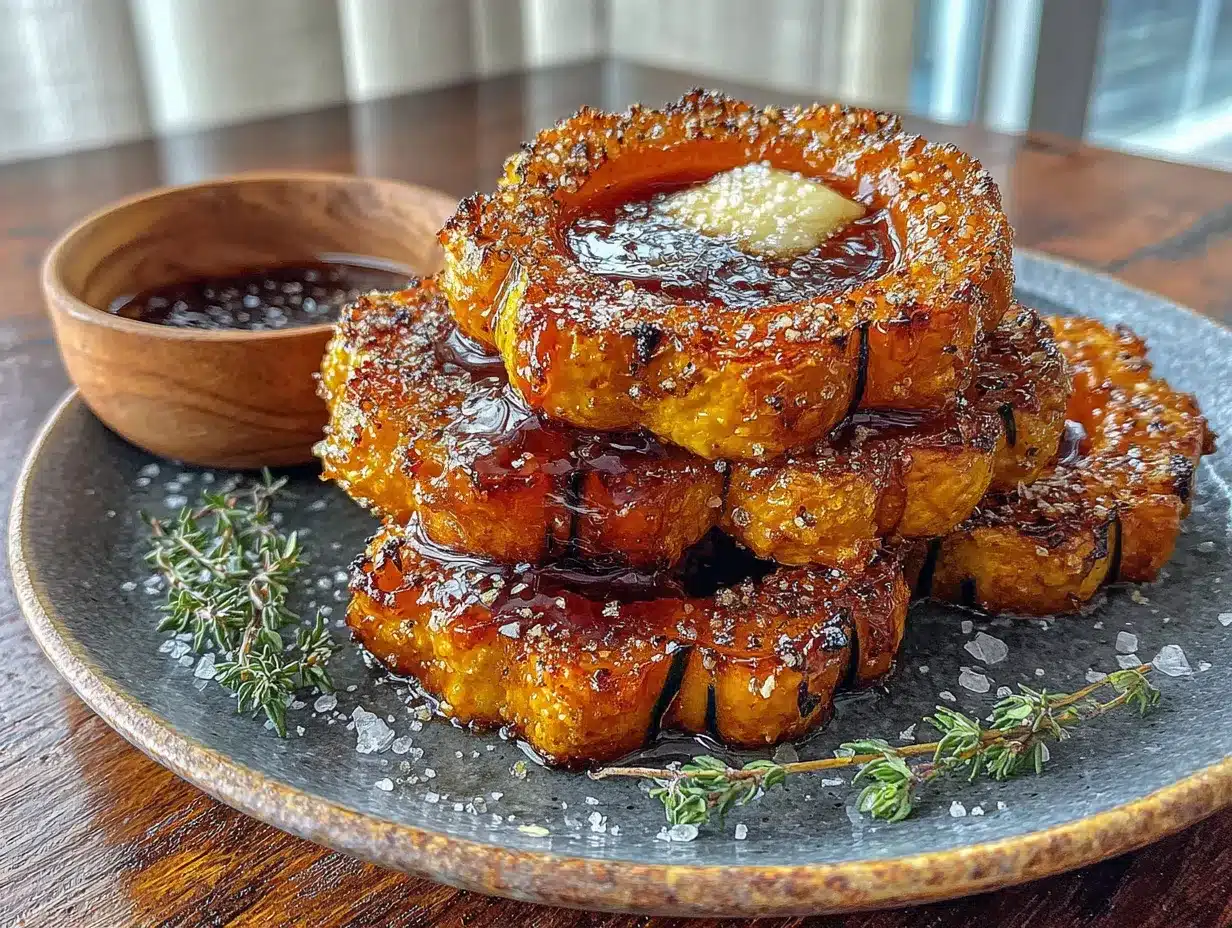
- 3 tablespoons unsalted butter (42g) — Use salted butter and reduce the added salt if that’s what you have.
- 2 tablespoons pure maple syrup — Not pancake syrup! Real maple syrup makes a huge difference in flavor. I prefer Grade A Dark Amber for its robust taste.
- Pinch of cinnamon — Optional, but highly recommended. It brings out the natural sweetness of the squash.
- Pinch of sea salt — Balances the sweetness and makes everything pop.
Ingredient Selection Tips
When choosing your acorn squash, look for one with a firm, unblemished skin and a stem that’s still attached. Avoid squash with soft spots or cracks. The orange patch on the side means it was vine-ripened and will be sweeter. I’ve found that organic squash tends to have deeper flavor, but conventional works perfectly fine.
For the maple syrup, please don’t use the artificial stuff. I know it’s cheaper, but real maple syrup has this complex, woodsy sweetness that you just can’t replicate. I recommend buying a small bottle of Grade A Dark Amber—it’s worth the extra dollar or two.
Equipment Needed
You don’t need a fancy kitchen to make these rings. Here’s what you’ll need:
- Sharp chef’s knife — Acorn squash is tough. A dull knife is dangerous. Trust me, I learned this the hard way.
- Vegetable peeler — For removing the skin. A Y-peeler works best, but any peeler will do.
- Cutting board — Preferably with a non-slip bottom.
- Large mixing bowl — For the egg wash.
- Shallow dish or pie plate — For the flour mixture and breadcrumb mixture.
- Baking sheet — A rimmed baking sheet works best to catch any drips.
- Parchment paper — Optional but makes cleanup so much easier.
- Pastry brush — For brushing the rings with oil. A silicone brush is my favorite.
- Small saucepan — For making the maple butter.
- Wire rack — Placing the baked rings on a rack keeps them crispy instead of soggy.
If you don’t have a wire rack, no worries—just serve them immediately after baking. And if you don’t have a pastry brush, you can drizzle the oil over the rings and toss them gently.
Preparation Method
Alright, let’s get cooking. I’ve broken this down into simple steps so you can follow along easily. Take your time with step one—it’s the most important part.
Step 1: Prep the Squash (5 minutes)
Wash your acorn squash thoroughly under cold water. Using a sharp chef’s knife, carefully cut off the top and bottom stems. Stand the squash upright on your cutting board and slice it in half from top to bottom. Scoop out all the seeds and stringy pulp with a spoon—save the seeds to roast later if you’re feeling ambitious!
Now here’s the trick: use your vegetable peeler to remove the skin from each half. Acorn squash skin is edible, but it gets tough when baked. Peeling it gives you that tender, melt-in-your-mouth texture. Work slowly and carefully—the ridges can be tricky. I usually go over each half twice to make sure I got all the tough bits.
Step 2: Slice into Rings (5 minutes)
Lay each peeled half flat on your cutting board and slice crosswise into ½-inch thick rings. I aim for about 6-8 rings per squash half, depending on size. Don’t make them too thin or they’ll fall apart, and not too thick or they won’t cook through. Half an inch is the sweet spot.
If some rings break, don’t panic—they’ll still taste amazing. Just press them back together when you coat them.
Step 3: Set Up Your Coating Station (5 minutes)
Preheat your oven to 425°F (220°C). Line your baking sheet with parchment paper and brush lightly with olive oil.
Set up three shallow dishes:
- Dish 1: ½ cup flour, ½ teaspoon salt, ¼ teaspoon black pepper
- Dish 2: 1 egg beaten with 2 tablespoons milk
- Dish 3: ½ cup panko breadcrumbs, ¼ cup grated Parmesan, ½ teaspoon garlic powder, ½ teaspoon smoked paprika
Step 4: Coat the Rings (10 minutes)
Working one ring at a time, dredge each ring in the flour mixture, shaking off the excess. Dip it into the egg wash, letting any extra drip off. Finally, press it into the breadcrumb mixture, coating both sides evenly. Place the coated ring on your prepared baking sheet.
Here’s a pro tip: use one hand for the dry ingredients and one hand for the wet ingredients. This keeps your hands from getting all clumpy and messy. I learned this after my first attempt left me with fingers that looked like they’d been breaded too.
Repeat with all rings, spacing them about an inch apart on the baking sheet.
Step 5: Bake the Rings (20-25 minutes)
Lightly brush the tops of the rings with olive oil—this is what makes them golden and crispy instead of pale and sad. Bake for 10 minutes, then carefully flip each ring using tongs or a spatula. Bake for another 10-15 minutes, until the rings are golden brown and crispy on the edges.
Your kitchen is going to smell incredible at this point. The combination of roasted squash, garlic, and smoked paprika is honestly intoxicating.
Step 6: Make the Maple Butter (5 minutes)
While the rings bake, make the maple butter. In a small saucepan over low heat, melt the butter. Add the maple syrup, a pinch of cinnamon, and a pinch of sea salt. Whisk until smooth and combined. Keep warm on the lowest heat setting until ready to use.
Don’t let it boil or the butter will separate. Low and slow is the way to go.
Step 7: Serve and Enjoy
Remove the rings from the oven and let them rest on the baking sheet for 2 minutes. Transfer to a serving platter, drizzle generously with the maple butter, and serve immediately. The contrast between the hot, crispy rings and the warm, sweet maple butter is pure magic.
Cooking Tips & Techniques
After making these Light & Crispy Maple Butter Acorn Squash Rings more times than I can count, I’ve picked up a few tricks that make all the difference.
Don’t skip the double coating. I tried skipping the flour step once to save time, and the breadcrumbs just slid right off. The flour creates a dry surface that the egg wash can cling to, and the egg wash gives the breadcrumbs something to stick to. It’s like building a house—you need a good foundation.
Use a wire rack for maximum crispiness. If you have a wire rack that fits inside your baking sheet, place the coated rings on the rack instead of directly on the sheet. The air circulates all around the rings, making them crispy on both sides without needing to flip. Game changer, honestly.
Don’t overcrowd the pan. Those rings need breathing room. If they’re touching each other, they’ll steam instead of crisp. Use two baking sheets if you need to, and rotate them halfway through baking.
My biggest failure? The first time I made these, I forgot to peel the squash. The skin turned tough and chewy, and everyone was politely eating around it. My sister-in-law (yes, the same one from the potluck) pulled me aside and said, “Next time, peel it.” So yeah, learn from my mistakes—peel that squash.
Timing tip: You can prep the rings up to the coating step and refrigerate them for up to 2 hours before baking. This is perfect if you’re hosting and want to get ahead. Just add 2-3 minutes to the baking time since they’ll be cold.
Variations & Adaptations
One of the best things about this recipe is how adaptable it is. Here are some of my favorite variations:
Savory Herb Version
Skip the maple butter and add 1 teaspoon dried rosemary and 1 teaspoon dried thyme to the breadcrumb mixture. After baking, sprinkle with fresh parsley and a squeeze of lemon juice. This version is amazing alongside roasted chicken or pork.
Spicy Maple Version
Add ½ teaspoon cayenne pepper and ¼ teaspoon chili powder to the breadcrumb mixture. The heat pairs beautifully with the sweet maple butter. I made this for a game day party and they disappeared in minutes.
Vegan Version
Replace the egg wash with 2 tablespoons aquafaba mixed with 1 tablespoon cornstarch. Use vegan butter and nutritional yeast instead of Parmesan. The texture is slightly different but still deliciously crispy.
Air Fryer Version
Preheat your air fryer to 375°F (190°C). Arrange the coated rings in a single layer (you’ll need to work in batches). Spray with olive oil and cook for 8-10 minutes, flipping halfway through. They come out extra crispy in less time!
Gluten-Free Version
Use a 1:1 gluten-free flour blend instead of all-purpose flour, and gluten-free panko breadcrumbs. Everything else stays the same. My gluten-free friends absolutely love this version.
Serving & Storage Suggestions
These rings are best served immediately while they’re hot and crispy. The contrast between the warm, crunchy coating and the tender squash is at its peak right out of the oven.
Presentation tip: Arrange the rings on a large wooden board or white platter, slightly overlapping. Drizzle the maple butter right before serving so the coating stays crispy. Sprinkle with a few fresh thyme leaves or a pinch of flaky sea salt for a gorgeous finish.
What to serve with them: These rings pair beautifully with roasted chicken, grilled pork chops, or a simple green salad. They’re also amazing as an appetizer with a side of honey mustard or ranch dressing for dipping. For a full fall meal, serve them alongside maple rosemary roasted pork tenderloin and creamy herb whipped potatoes.
Storage: If you have leftovers (unlikely, but possible), store them in an airtight container in the refrigerator for up to 3 days. The coating will soften, but they’re still delicious.
Reheating: The best way to reheat these is in the oven or air fryer. Pop them in a 350°F (175°C) oven for 5-7 minutes, or in the air fryer at 350°F for 3-4 minutes. The microwave will make them soggy, so avoid it if you can.
Make ahead tip: You can bake the rings completely, let them cool, and store them in the fridge. When you’re ready to serve, reheat them in the oven and drizzle with fresh maple butter. The flavors actually develop a bit overnight—they’re even better the next day!
Nutritional Information & Benefits
These Light & Crispy Maple Butter Acorn Squash Rings are surprisingly nutritious for how indulgent they taste. Here’s the breakdown per serving (about 4-5 rings):
| Nutrient | Amount |
|---|---|
| Calories | 245 |
| Total Fat | 12g |
| Saturated Fat | 6g |
| Carbohydrates | 32g |
| Fiber | 4g |
| Sugar | 10g |
| Protein | 6g |
| Vitamin A | 25% DV |
| Vitamin C | 20% DV |
| Potassium | 15% DV |
Acorn squash is packed with vitamin A (great for eye health), vitamin C (immune support), and fiber (digestive health). The maple syrup provides natural sweetness with a lower glycemic impact than refined sugar. Plus, baking instead of frying keeps the fat content reasonable.
This recipe is naturally vegetarian and can easily be made gluten-free or vegan. It’s also nut-free and egg-free with the vegan adaptations mentioned above. For those watching their sodium, you can reduce the salt in the coating and skip the salt in the maple butter.
Honestly, I feel good serving these to my family because they’re getting a generous serving of vegetables in a form that feels like a treat. It’s the kind of recipe that makes eating well feel effortless and enjoyable.
Conclusion
These Light & Crispy Maple Butter Acorn Squash Rings started as a panic-driven experiment and turned into one of my most beloved recipes. They’ve graced Thanksgiving tables, casual weeknight dinners, and everything in between. Every time I make them, someone asks for the recipe—and I love sharing it.
What I love most about this recipe is how it transforms a humble squash into something truly special. It’s proof that you don’t need fancy ingredients or complicated techniques to create something memorable. Just a little creativity, a willingness to experiment, and maybe a looming deadline to light a fire under you.
I’d love to hear how these turn out for you! Did you try any variations? Did they disappear as fast at your table as they do at mine? Drop a comment below and let me know—your feedback and ideas inspire me to keep creating. And if you’re looking for more fall-inspired sides, check out my honey balsamic roasted Brussels sprouts or these garlic herb roasted carrots—they’re both reader favorites.
Until next time, happy cooking—and remember, sometimes the best recipes come from the moments when you least expect them.
Frequently Asked Questions
Can I use butternut squash instead of acorn squash?
Absolutely! Butternut squash works beautifully in this recipe. Just peel it, slice it into ½-inch rounds, and follow the same coating and baking instructions. The cooking time might be slightly shorter since butternut squash is denser, so start checking at 18 minutes.
Why did my coating fall off?
This usually happens for one of three reasons: the squash wasn’t dried properly before coating, the rings were too thick (over ½ inch), or you didn’t press the breadcrumbs firmly enough. Make sure to pat the rings dry with paper towels before starting the coating process, and really press those breadcrumbs in.
Can I make these in advance for a party?
Yes! You can coat the rings up to 2 hours ahead and keep them in the fridge on the baking sheet. Bake them just before serving. Alternatively, you can bake them completely, let them cool, and reheat in a 350°F oven for 5-7 minutes. The texture won’t be quite as crispy as fresh, but they’ll still be delicious.
How do I get the rings extra crispy?
Three tips: use panko breadcrumbs instead of regular ones, don’t skip the oil spray or brush on top, and bake on a wire rack set inside your baking sheet. The air circulation makes a huge difference. If you have an air fryer, that’s actually the best method for maximum crispiness.
Can I freeze these squash rings?
I don’t recommend freezing them after baking because the coating will become soggy when thawed. However, you can freeze the coated, unbaked rings on a baking sheet until solid, then transfer to a freezer bag. Bake directly from frozen, adding 5-7 minutes to the cooking time.
Pin This Recipe!
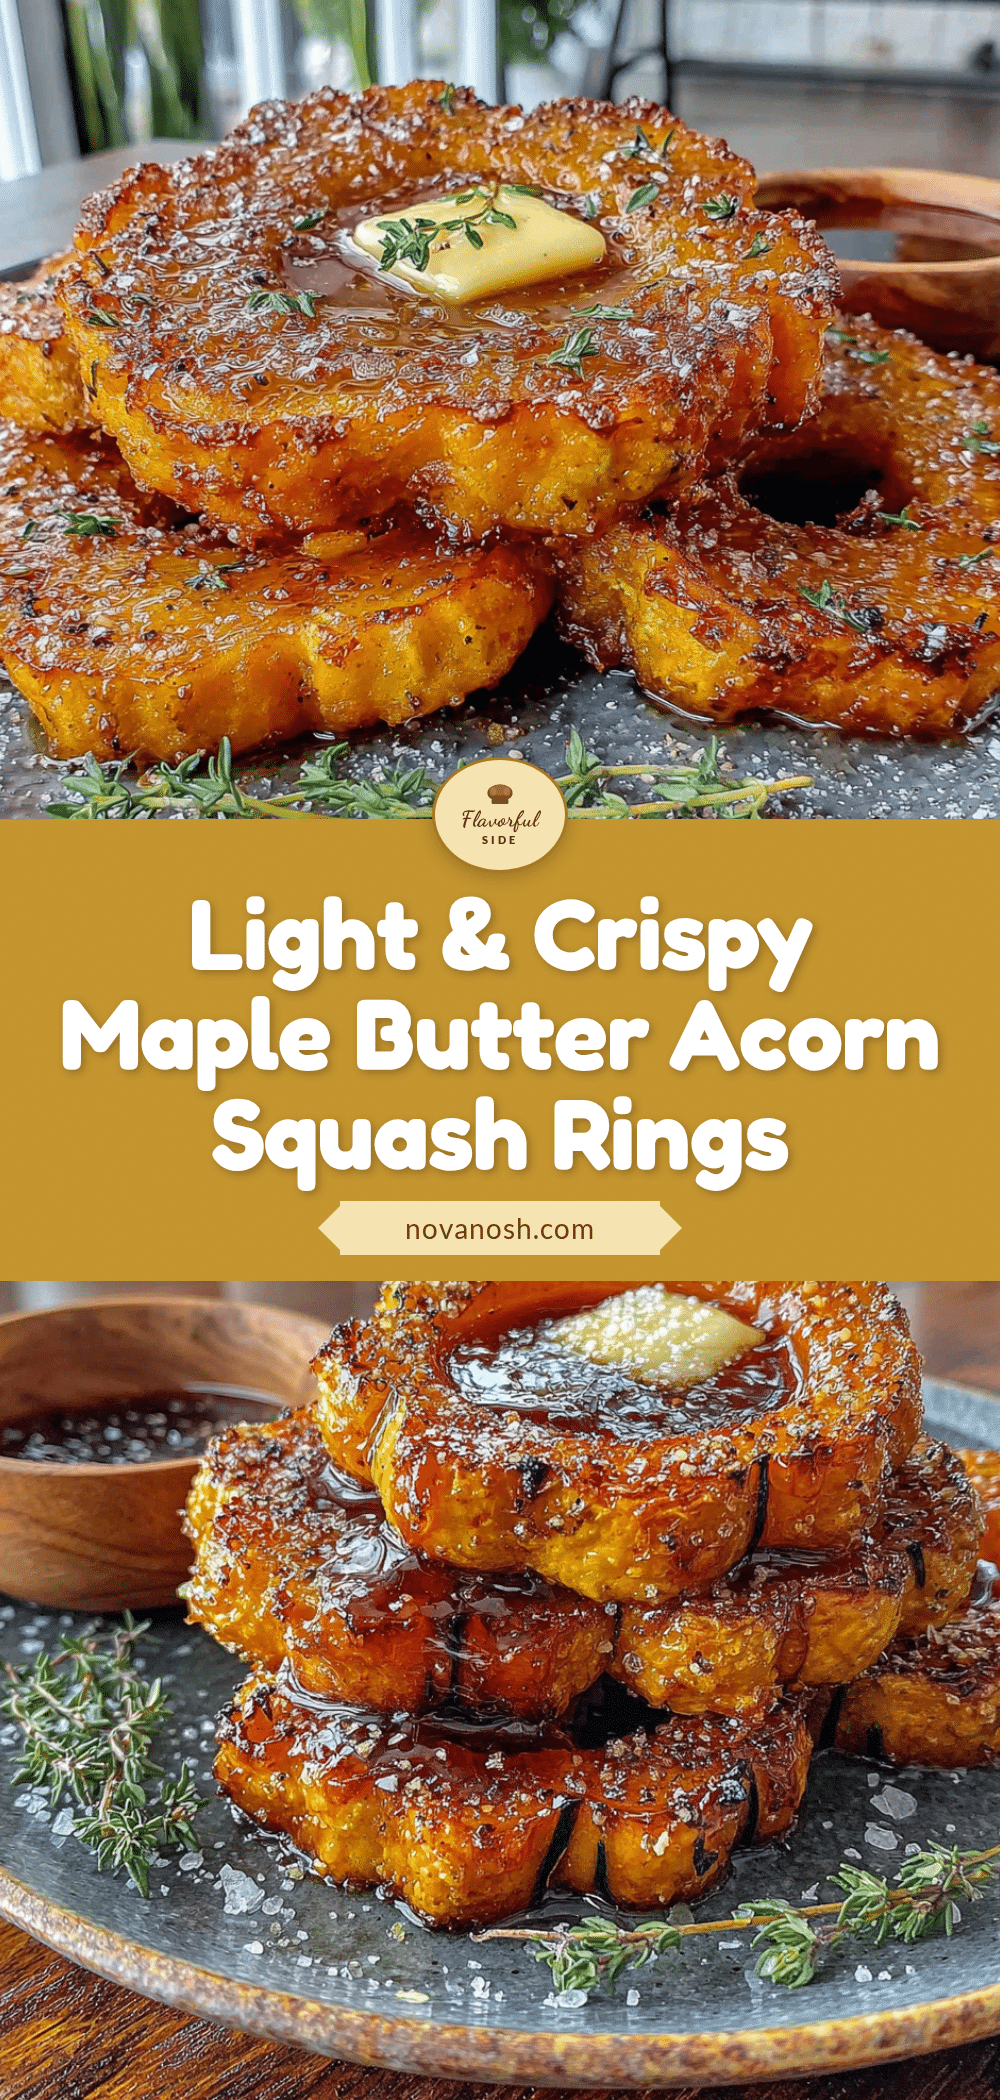
Light & Crispy Maple Butter Acorn Squash Rings: Best Easy Side

These Light & Crispy Maple Butter Acorn Squash Rings are a quick and easy side dish that transforms a humble squash into a crowd-pleasing favorite. With a crispy, golden coating and a sweet maple butter drizzle, they’re perfect for fall gatherings and weeknight dinners alike.
- Prep Time: 15 minutes
- Cook Time: 25 minutes
- Total Time: 40 minutes
- Yield: 4 servings 1x
- Category: Side Dish
- Cuisine: American
Ingredients
- 1 medium acorn squash (about 1.5 pounds or 680g)
- ½ cup all-purpose flour (60g)
- ½ cup panko breadcrumbs (30g)
- ¼ cup grated Parmesan cheese (25g)
- 1 large egg
- 2 tablespoons milk (any kind)
- ½ teaspoon garlic powder
- ½ teaspoon smoked paprika
- ¼ teaspoon black pepper
- ½ teaspoon salt
- 1 tablespoon olive oil
- 3 tablespoons unsalted butter (42g)
- 2 tablespoons pure maple syrup
- Pinch of cinnamon (optional)
- Pinch of sea salt
Instructions
- Preheat oven to 425°F (220°C). Line a baking sheet with parchment paper and brush lightly with olive oil.
- Wash the acorn squash, cut off the top and bottom stems, then slice in half from top to bottom. Scoop out seeds and stringy pulp.
- Use a vegetable peeler to remove the skin from each half. Slice crosswise into ½-inch thick rings.
- Set up three shallow dishes: Dish 1: flour, salt, and pepper. Dish 2: egg beaten with milk. Dish 3: panko, Parmesan, garlic powder, and smoked paprika.
- Working one ring at a time, dredge in flour mixture, dip in egg wash, then press into breadcrumb mixture. Place on prepared baking sheet.
- Lightly brush tops of rings with olive oil. Bake for 10 minutes, flip, then bake another 10-15 minutes until golden and crispy.
- While rings bake, make maple butter: In a small saucepan over low heat, melt butter. Add maple syrup, cinnamon, and sea salt. Whisk until smooth and keep warm.
- Remove rings from oven, let rest 2 minutes, then transfer to a platter. Drizzle with maple butter and serve immediately.
Notes
For extra crispiness, use a wire rack on the baking sheet. You can prep the rings up to the coating step and refrigerate for up to 2 hours before baking. For vegan version, use aquafaba and vegan butter.
Nutrition
- Serving Size: 4-5 rings
- Calories: 245
- Sugar: 10
- Fat: 12
- Saturated Fat: 6
- Carbohydrates: 32
- Fiber: 4
- Protein: 6
Keywords: acorn squash rings, maple butter, crispy squash, fall side dish, easy side dish, baked squash rings