Love this? Save it for later!
Share the inspiration with your friends
There used to be a tiny deli on the corner of Elm and 4th that made the best cold pasta salad I have ever eaten. When they closed suddenly last spring—literally, a “sorry, we’re done” sign taped to the door—I was genuinely devastated. Not dramatic, just honest. That pasta salad was my Tuesday lunch for three years running. After about seven tries—some were watery, one was a vinegar disaster—I finally cracked the code. And honestly? I think my version is even better.
What I figured out is that the magic wasn’t in some complicated dressing or rare ingredient. It was in the balance. The right pasta shape, the perfect crunch-to-soft ratio, and a dressing that clings to every nook without turning soggy by day three. That last part is the real trick for meal prep, you know?
So when I started making these Easy Cold Pasta Salad Lunch Cups, I had that deli memory in the back of my mind. I wanted something portable, something that actually stays good in the fridge for a few days, and something I could throw together without thinking too hard. Maybe you’ve been there—standing in front of the fridge at noon, hungry, with zero energy to cook. These lunch cups are the answer. They’re the kind of recipe that makes you feel organized and accomplished, even on a Tuesday when you forgot to set the coffee timer the night before. I keep making them because they actually work, and they taste like summer in a cup.
Why You’ll Love This Recipe
Let me tell you why these pasta salad cups have become my lunch MVP. I tested this recipe four times before I got the texture right, and I learned something important each time. The first batch was too dry. The second was swimming in dressing. The third? That was the one where I accidentally used quinoa pasta and it turned into mush. By the fourth try, I had it dialed in, and I’m sharing every hard-earned tip with you.
- Quick & Easy: Five minutes of prep. I’m not exaggerating. Boil the pasta, chop a few things, stir, and you’re done.
- Simple Ingredients: You probably have most of this in your pantry and fridge right now. No fancy grocery trips required.
- Perfect for Meal Prep: Make a batch on Sunday, grab a cup each morning. Lunch is solved for the week.
- Crowd-Pleaser: My kids actually fight over these. The neighbor’s teenager asked for the recipe. It’s that kind of recipe.
- Unbelievably Delicious: The combination of tender pasta, crunchy veggies, and that tangy dressing is pure comfort food that happens to be good for you.
What makes this different from every other cold pasta salad out there is the dressing technique. Instead of just drizzling it on top, I toss the warm pasta with half the dressing first. This lets the pasta absorb the flavor from the inside out. Then I add the rest right before serving. It’s a small step that makes a huge difference. Trust me on this one.
This recipe isn’t just good—it’s the kind that makes you close your eyes after the first bite. It’s comfort food reimagined. Healthier, faster, but with the same soul-soothing satisfaction. Perfect for impressing yourself on a busy Wednesday, or turning a simple lunch into something you actually look forward to.
What Ingredients You Will Need
This recipe uses simple, wholesome ingredients that come together to deliver bold flavor and satisfying crunch. Everything is flexible, so feel free to swap based on what you have on hand.
- Pasta (2 cups dry): I use rotini or fusilli because the little spirals grab the dressing and veggies perfectly. Gluten-free pasta works great here too—just cook it al dente so it doesn’t get mushy.
- Cherry tomatoes (1 cup, halved): Look for firm, bright red tomatoes. In summer, use whatever is freshest from the farmer’s market. Grape tomatoes work just as well.
- Cucumber (1 medium, diced): English cucumbers are my favorite because they have fewer seeds and stay crunchier. Regular cucumbers work fine—just scoop out the seeds first.
- Bell pepper (1, any color, diced): Orange or yellow adds a nice sweetness. Green gives it a sharper, more savory flavor. I usually go with orange because it looks pretty.
- Red onion (¼ cup, finely diced): Soak the diced onion in cold water for 5 minutes if you want to mellow the bite. I skip this step when I’m in a hurry, and it’s still good.
- Black olives (½ cup, sliced): Kalamata olives add a briny kick if you want to get fancy. Canned black olives are totally fine and what I use most of the time.
- Feta cheese (½ cup, crumbled): I recommend the block-style feta packed in brine for best texture. Pre-crumbled works in a pinch but doesn’t taste as creamy.
- Italian dressing (⅓ cup): Store-bought is fine—I like the brand Newman’s Own. But if you have 3 minutes, make your own with olive oil, red wine vinegar, garlic, and Italian seasoning. It’s noticeably better.
- Fresh parsley (2 tablespoons, chopped): Optional but nice for color. Basil works too if that’s what you have growing on your windowsill.
For the dressing, you can also use a simple vinaigrette of olive oil, lemon juice, salt, and pepper. The recipe is forgiving, which is honestly my favorite thing about it.
Equipment Needed
You don’t need a fancy kitchen for this recipe. Here’s what you’ll actually use:
- Large pot: For boiling the pasta. Any pot works—just make sure it’s big enough so the pasta has room to move around.
- Colander: For draining. If you don’t have one, you can use a lid to hold back the pasta while you pour the water out. I’ve done it. It’s a little risky but it works.
- Cutting board and knife: A sharp knife makes dicing vegetables so much easier. Dull knives are dangerous—they slip more. I learned that the hard way.
- Large mixing bowl: For combining everything. A big bowl means less spillage when you’re tossing.
- Measuring cups and spoons: Not strictly necessary if you’re good at eyeballing, but helpful for consistency.
- Meal prep containers or mason jars: For the lunch cups. I use 16-ounce wide-mouth mason jars because they’re cheap and seal well. Any container with a lid works.
If you’re using mason jars, I recommend the wide-mouth kind. Regular mouth jars are harder to eat from and harder to clean. Trust me on that one. I bought a case of regular mouths once and regretted it every single time.
Preparation Method
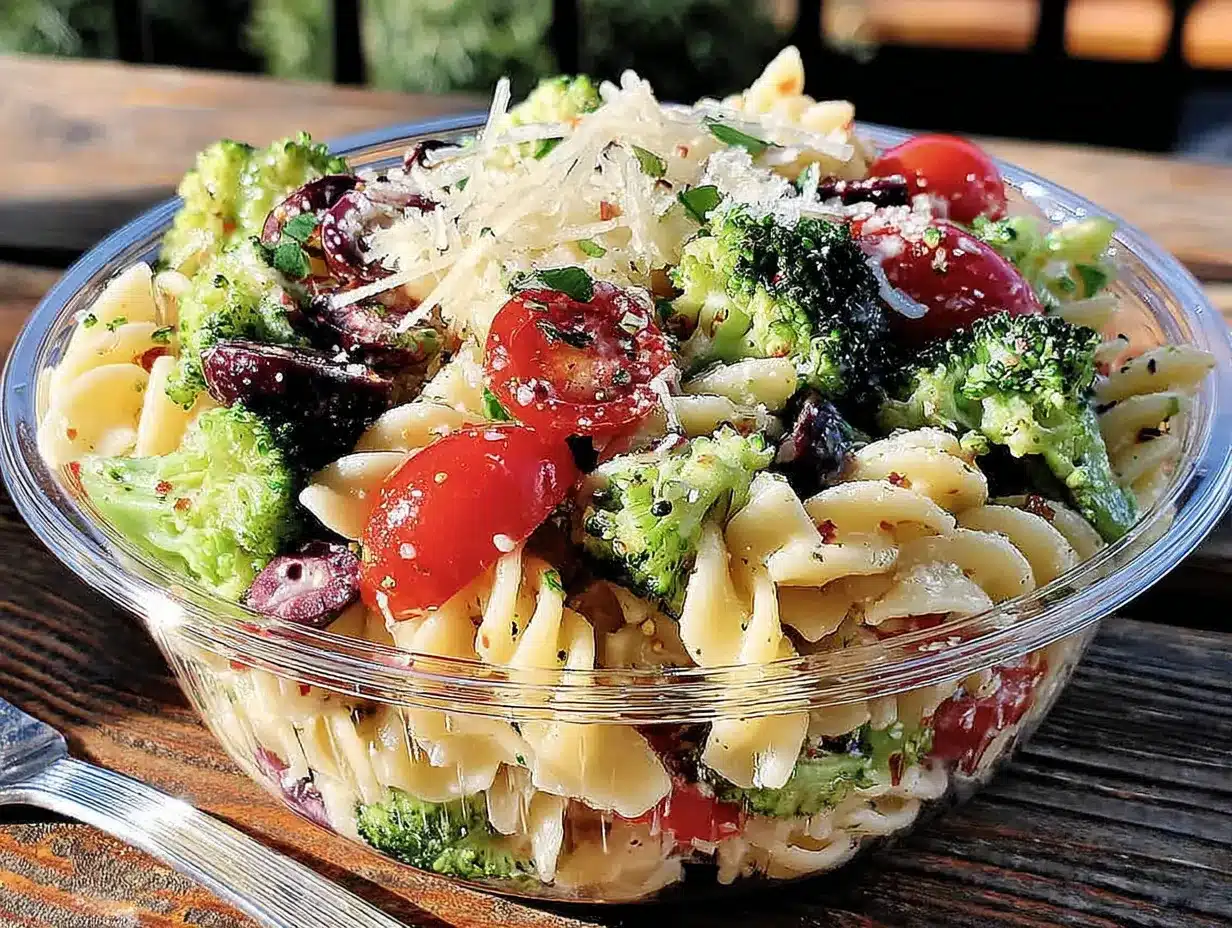
This is the easy part. I promise. Here’s how to make your cold pasta salad lunch cups in five simple steps.
- Cook the pasta (10 minutes): Bring a large pot of salted water to a rolling boil. Add 2 cups of dry rotini and cook according to package directions until al dente. For most pasta, that’s about 8-9 minutes. Drain in a colander and rinse with cold water to stop the cooking process. Shake off as much water as you can—excess water makes the dressing watery later.
- Prep the vegetables (5 minutes): While the pasta cooks, wash and chop everything. Halve the cherry tomatoes, dice the cucumber and bell pepper into bite-sized pieces, finely dice the red onion, and slice the olives. I like to keep the cucumber pieces a little bigger than the tomatoes so they don’t get lost. The texture contrast is important here.
- Make the dressing (2 minutes): In a small bowl or jar, whisk together ⅓ cup Italian dressing with a pinch of salt and pepper. If you’re making your own, combine ¼ cup olive oil, 2 tablespoons red wine vinegar, 1 minced garlic clove, ½ teaspoon Italian seasoning, and salt and pepper to taste. Give it a good shake or whisk until it’s emulsified.
- Combine and toss (3 minutes): In a large mixing bowl, combine the cooled pasta, chopped vegetables, and sliced olives. Pour half the dressing over the top and toss gently until everything is evenly coated. This is where the magic happens—the pasta absorbs that first layer of flavor. Add the crumbled feta and parsley, then toss again very gently so the feta doesn’t break apart too much.
- Portion into cups (2 minutes): Divide the pasta salad evenly among your meal prep containers or mason jars. I usually get about 4-5 cups, depending on how full I fill them. Drizzle the remaining dressing over the top of each cup—don’t stir it in. This keeps the pasta from getting soggy as it sits in the fridge. Seal the lids and refrigerate for at least 30 minutes before eating, if you can wait that long.
A quick note: If you’re using mason jars, layer the dressing at the bottom first, then the pasta, then the veggies on top. This keeps everything fresh and crunchy. When you’re ready to eat, just shake the jar or dump it into a bowl. The dressing coats everything perfectly as you mix it.
Cooking Tips & Techniques
I’ve made this recipe enough times to know where things can go wrong. Here are my best tips so you don’t have to learn the hard way.
Salt your pasta water. This is the single biggest flavor booster you can do for almost no effort. The pasta absorbs the salt as it cooks, seasoning it from the inside. I use about a tablespoon of salt per gallon of water. It sounds like a lot, but most of it goes down the drain.
Don’t overcook the pasta. Mushy pasta is the enemy of good cold pasta salad. Cook it al dente—firm to the bite—because it will continue to soften slightly as it sits in the dressing. If you’re unsure, take a piece out and taste it a minute before the package says it’s done.
Rinse with cold water. This stops the cooking immediately and removes excess starch that can make the dressing gummy. I learned this after my first batch turned into a sticky mess. Now I rinse until the pasta feels cool to the touch, then drain it really well.
Season in layers. Tossing the warm pasta with half the dressing first is the trick that makes this salad taste like it’s been marinating for hours. The warm pasta opens up and absorbs the flavors. Then the second layer of dressing right before serving adds freshness.
Pat your veggies dry. If your cucumbers or tomatoes are particularly watery, pat them with a paper towel before adding them to the bowl. Excess moisture dilutes the dressing and makes everything soggy faster. I forgot to do this once and ended up with soup instead of salad. Not my finest moment.
Let it rest. The flavors really develop after a few hours in the fridge. If you can make this the night before, do it. The pasta absorbs the dressing, the veggies soften slightly, and everything melds together beautifully.
Variations & Adaptations
This recipe is incredibly flexible. Here are some of my favorite variations.
Protein-Packed Version: Add 1 cup of diced grilled chicken, canned chickpeas, or cubed salami. My husband loves it with chopped pepperoni—it turns into a kind of antipasto salad that’s perfect for lunch. If you’re adding chicken, use leftover rotisserie chicken for the easiest option.
Mediterranean Twist: Swap the Italian dressing for a lemon-oregano vinaigrette. Add ¼ cup of chopped sun-dried tomatoes and 2 tablespoons of capers. Use kalamata olives instead of black olives. Top with a sprinkle of dried oregano before serving. This version is my personal favorite in the summer.
Vegan Option: Omit the feta cheese or use a plant-based alternative. Add ¼ cup of toasted pine nuts or sunflower seeds for crunch. Nutritional yeast can add a cheesy flavor if you miss the feta. I’ve made this version for a friend’s barbecue and nobody noticed the difference.
Low-Carb Adaptation: Substitute the pasta with 2 cups of cooked cauliflower florets or chickpea pasta. The chickpea pasta holds up surprisingly well and adds extra protein. Just be careful not to overcook it—it gets mushy faster than regular pasta.
Seasonal Veggie Swap: In spring, add blanched asparagus and peas. In fall, try roasted butternut squash cubes and dried cranberries. In winter, use chopped broccoli and shredded carrots. The formula stays the same—just swap in whatever looks good at the store.
I once made a version with roasted red peppers and artichoke hearts because that’s what I had in the pantry. It was honestly one of the best batches I’ve ever made. Don’t be afraid to experiment.
Serving & Storage Suggestions
These lunch cups are designed to be eaten cold, right out of the fridge. But here’s how to get the most out of them.
Serving Temperature: Serve cold or at room temperature. If you’re packing these for lunch, they’re perfect as-is. If you want to take the chill off, let them sit on the counter for 10 minutes before eating. The flavors actually open up a bit at room temperature.
Presentation: If you’re serving these for a party or potluck, turn the cup upside down onto a plate and tap gently. The pasta salad will come out in a nice dome shape. Top with a sprinkle of fresh parsley and a few extra feta crumbles for a pretty finish.
What to Serve With: These cups are a complete meal on their own, but they pair beautifully with a simple side of fresh fruit or a handful of crackers. For a bigger spread, serve alongside grilled chicken skewers or a cup of tomato soup. The combination is pure comfort.
Storage: Keep the cups sealed in the refrigerator for up to 5 days. The pasta will absorb more dressing as it sits, so the flavor actually improves after day one. By day four or five, the veggies start to lose their crunch, but it’s still perfectly edible. I’ve eaten it on day six and lived to tell the tale.
Freezing: I don’t recommend freezing this salad. The texture of the vegetables and pasta changes too much when thawed. If you need to meal prep further ahead, cook the pasta and chop the veggies separately, then combine with the dressing the night before you plan to eat them.
Reheating: Don’t. This is a cold pasta salad. If you want it warm, make a different recipe. Honestly, eating it cold is part of the charm.
Nutritional Information & Benefits
Here’s a rough estimate for one serving (about 1 cup) of the basic recipe, not including any add-ins.
| Nutrient | Amount Per Serving |
|---|---|
| Calories | 285 |
| Total Fat | 12g |
| Saturated Fat | 3g |
| Cholesterol | 10mg |
| Sodium | 480mg |
| Total Carbohydrates | 36g |
| Dietary Fiber | 3g |
| Sugars | 5g |
| Protein | 8g |
The vegetables in this salad provide a good dose of vitamin C from the bell peppers, vitamin K from the cucumbers, and lycopene from the tomatoes. The feta adds calcium and protein. The olive oil-based dressing provides healthy monounsaturated fats.
This recipe is naturally vegetarian and can easily be made gluten-free by using gluten-free pasta. It’s also nut-free and egg-free, making it safe for most common allergies. If you’re watching your sodium, use a low-sodium Italian dressing and reduce the feta slightly.
I personally love that this salad feels indulgent but is actually packed with vegetables. It’s the kind of meal that makes you feel good after eating it, not heavy or sluggish.
Conclusion
These Easy Cold Pasta Salad Lunch Cups are the kind of recipe that makes your life easier without sacrificing flavor. They come together in five minutes, they stay good in the fridge for days, and they actually taste better as the week goes on. What more could you ask for from a lunch?
I love that this recipe is forgiving enough for a beginner but satisfying enough for someone who cooks every day. You can customize it based on what’s in your fridge, add protein if you want, or keep it simple and classic. There’s no wrong way to make it.
So here’s my challenge to you: make a batch this weekend. Pack them in your favorite containers. Grab one on your way out the door on Monday morning. And when you take that first cold, tangy, crunchy bite at lunchtime, remember that you deserve a meal that makes you happy. Even on a Tuesday.
I’d love to hear how yours turn out. What variations did you try? Did you add something unexpected that worked? Drop a comment below and let me know. And if you loved this recipe, share it with a friend who needs an easy lunch solution. Happy cooking!
Frequently Asked Questions
Can I make this pasta salad the night before?
Absolutely. In fact, it’s better the next day. The flavors have time to meld together, and the pasta absorbs the dressing beautifully. Just add the extra drizzle of dressing right before serving to keep it from drying out.
How long does this last in the fridge?
It stays good for up to 5 days in a sealed container. The veggies will start to lose some crunch around day 4, but the flavor is still great. I usually make a batch on Sunday and finish it by Thursday or Friday.
Can I use a different type of pasta?
Yes, any short pasta shape works well. I recommend rotini, fusilli, penne, or farfalle. Long pasta like spaghetti doesn’t hold the dressing as well and is harder to eat cold. Avoid very small pasta like orzo—it tends to clump together.
What if I don’t have Italian dressing?
No problem. You can use a simple vinaigrette of olive oil, red wine vinegar, salt, pepper, and a pinch of dried oregano. Or use ranch dressing for a creamier version. I’ve even used balsamic vinaigrette in a pinch, and it was delicious.
Can I add meat to this recipe?
Definitely. Diced grilled chicken, chopped salami, pepperoni, or even canned tuna all work great. Just add the protein when you toss everything together. If you’re using chicken, make sure it’s fully cooled before adding it to the salad.
Pin This Recipe!
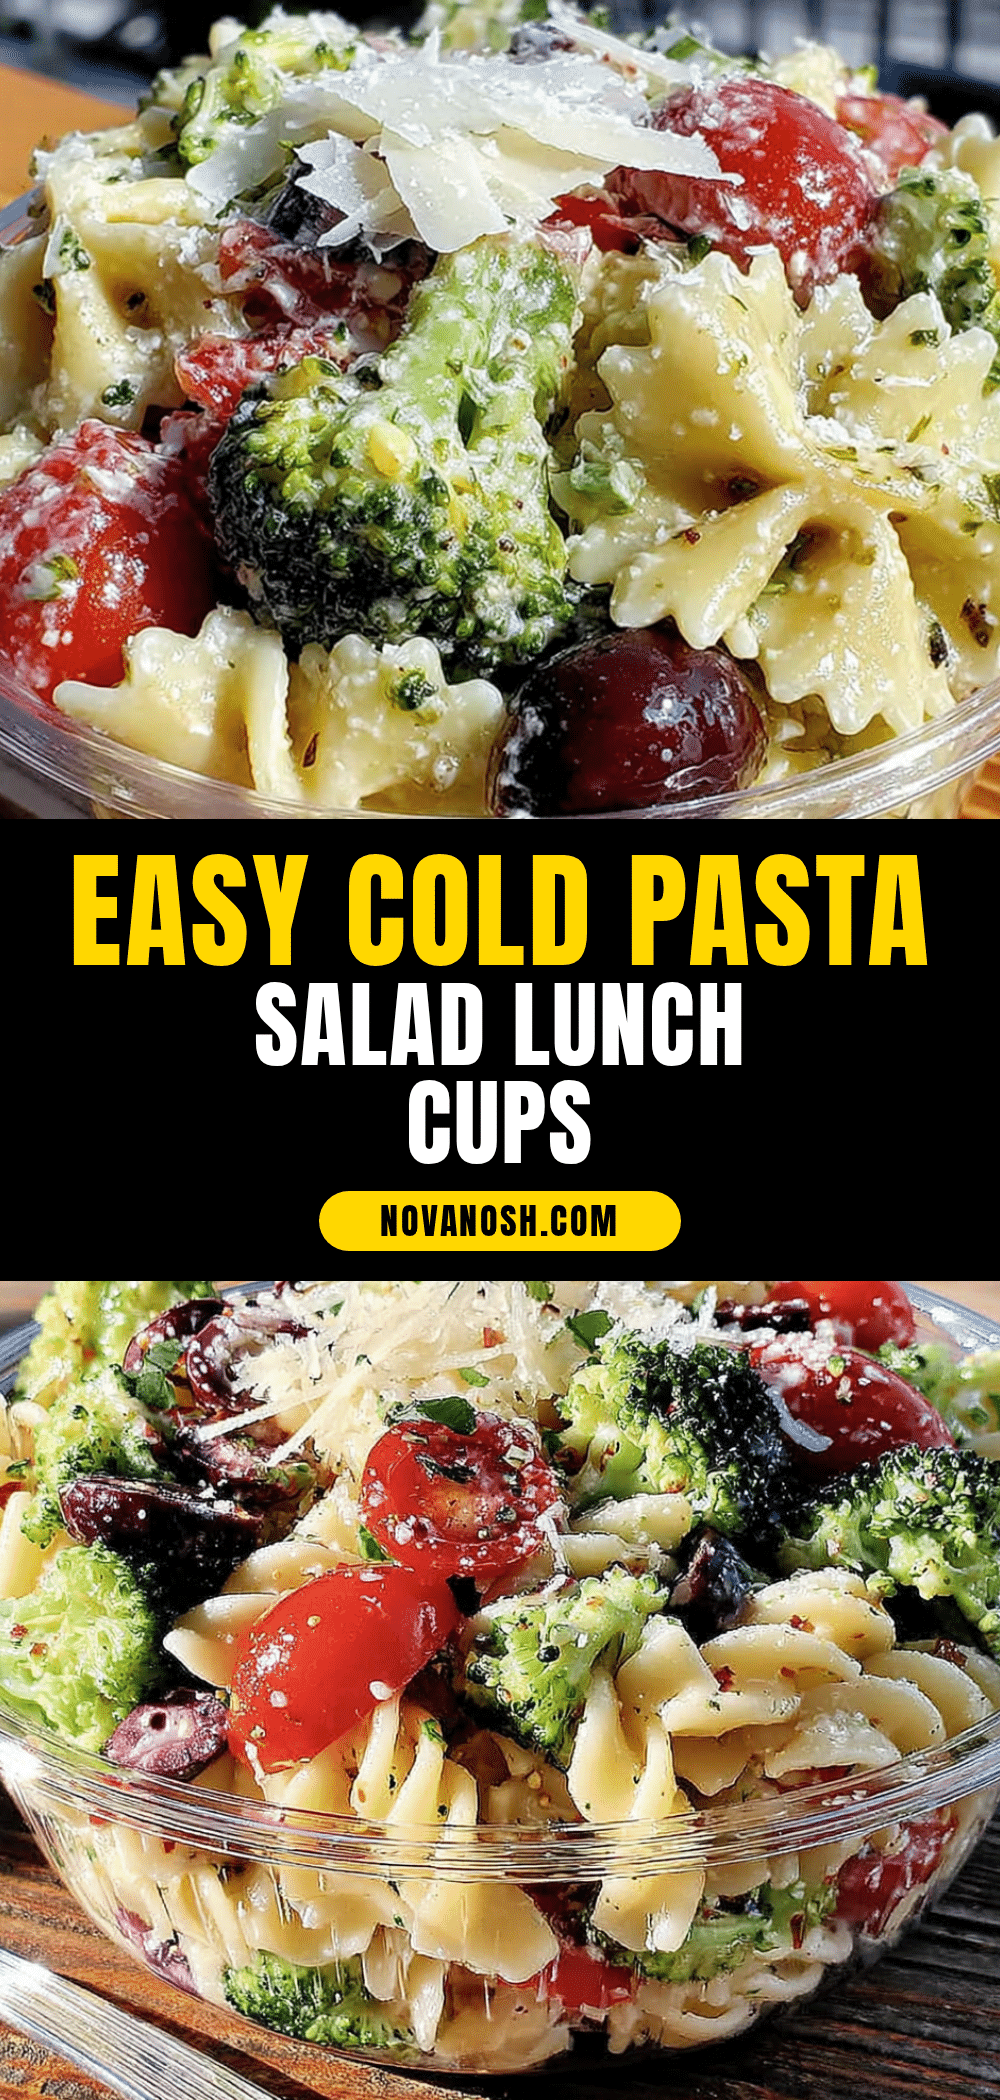
Easy Cold Pasta Salad Lunch Cups: 5-Min Prep
These Easy Cold Pasta Salad Lunch Cups are the perfect meal prep solution—ready in just 5 minutes of prep, packed with crunchy veggies and tangy Italian dressing, and they stay delicious in the fridge for days. A quick, crowd-pleasing lunch that tastes like summer in a cup.
- Prep Time: 5 minutes
- Cook Time: 10 minutes
- Total Time: 15 minutes
- Yield: 4-5 servings 1x
- Category: Main Course
- Cuisine: Italian-American
Ingredients
- 2 cups dry rotini or fusilli pasta
- 1 cup cherry tomatoes, halved
- 1 medium cucumber, diced
- 1 bell pepper (any color), diced
- 1/4 cup red onion, finely diced
- 1/2 cup black olives, sliced
- 1/2 cup feta cheese, crumbled
- 1/3 cup Italian dressing (store-bought or homemade)
- 2 tablespoons fresh parsley, chopped (optional)
Instructions
- Cook the pasta: Bring a large pot of salted water to a rolling boil. Add 2 cups of dry rotini and cook according to package directions until al dente (about 8-9 minutes). Drain in a colander and rinse with cold water to stop the cooking process. Shake off excess water.
- Prep the vegetables: While the pasta cooks, wash and chop everything. Halve the cherry tomatoes, dice the cucumber and bell pepper into bite-sized pieces, finely dice the red onion, and slice the olives.
- Make the dressing: In a small bowl or jar, whisk together 1/3 cup Italian dressing with a pinch of salt and pepper. If making your own, combine 1/4 cup olive oil, 2 tablespoons red wine vinegar, 1 minced garlic clove, 1/2 teaspoon Italian seasoning, and salt and pepper to taste. Whisk until emulsified.
- Combine and toss: In a large mixing bowl, combine the cooled pasta, chopped vegetables, and sliced olives. Pour half the dressing over the top and toss gently until everything is evenly coated. Add the crumbled feta and parsley, then toss again very gently.
- Portion into cups: Divide the pasta salad evenly among meal prep containers or mason jars (about 4-5 cups). Drizzle the remaining dressing over the top of each cup—do not stir it in. Seal the lids and refrigerate for at least 30 minutes before serving.
Notes
For best texture, toss warm pasta with half the dressing first to let it absorb flavor. Pat veggies dry if they are watery to avoid soggy salad. Let the salad rest in the fridge for a few hours or overnight for best flavor. Do not freeze. Serve cold or at room temperature.
Nutrition
- Serving Size: 1 cup
- Calories: 285
- Sugar: 5
- Sodium: 480
- Fat: 12
- Saturated Fat: 3
- Carbohydrates: 36
- Fiber: 3
- Protein: 8
Keywords: cold pasta salad, lunch cups, meal prep, easy pasta salad, vegetarian pasta salad, Italian dressing pasta salad