Love this? Save it for later!
Share the inspiration with your friends
This was supposed to be a fancy layered shortcake dessert for a dinner party I was hosting last July. I had everything planned out—biscuits from scratch, macerated berries, freshly whipped cream. But somewhere between the grocery store and my kitchen, I grabbed a can of sweetened condensed milk instead of heavy cream. Let me tell you, I didn’t realize my mistake until I was standing there, mixer in hand, staring at this thick, sticky can. The oven was already preheated, the strawberries were sliced, and I was out of cream. Honestly, I almost cried. But I had seven people showing up in two hours, and throwing in the towel wasn’t an option.
So I did what any slightly desperate home cook would do—I started experimenting. I dumped that sweetened condensed milk into a bowl, added some cold heavy cream I found hiding in the back of the fridge, and started whisking like my life depended on it. The texture looked… weird. Too soft, too runny. I tossed in some crushed vanilla wafers and strawberry puree, poured it into a loaf pan, and shoved it in the freezer, fully expecting to serve my guests store-bought ice cream with a side of embarrassment. Maybe you’ve been there—that moment when you’re convinced dinner is ruined, and you’re already planning your apology speech.
An hour later, I checked on it, and something magical had happened. The mixture had transformed into this creamy, scoopable ice cream with ribbons of strawberry and little bits of cookie throughout. My guests devoured it. They asked for the recipe. And I had to admit the truth: I made it entirely by accident. This homemade no-churn strawberry shortcake ice cream became my signature dessert that summer, and honestly, I haven’t bought a pint of the store-bought stuff since. Sometimes the best recipes come from our biggest kitchen flops, and this one proves it.
Why You’ll Love This Recipe
Let me be real with you—I’ve tested this recipe at least a dozen times since that accidental discovery, and it gets better every single time. Here is why this homemade no-churn strawberry shortcake ice cream deserves a permanent spot in your freezer:
- No Ice Cream Maker Needed: You don’t need fancy equipment. Just a bowl, a mixer, and a freezer. That is it.
- Ready in Under 30 Minutes: The active prep time is about 20 minutes. The freezer does the rest of the work for you.
- Simple Pantry Ingredients: Strawberries, sweetened condensed milk, heavy cream, and vanilla wafers. You probably have most of these already.
- Perfect for Any Occasion: Summer barbecues, birthday parties, or just a Tuesday night when you need something sweet. This ice cream fits every mood.
- Crowd-Pleaser: I’ve served this to kids, grandparents, and picky eaters. Empty bowls every single time.
- Better Than Store-Bought: The texture is creamier, the strawberry flavor is more vibrant, and you control exactly what goes in it.
What makes this recipe different from the dozens of other no-churn ice creams out there? It’s the texture. Most no-churn recipes turn into icy blocks after a day in the freezer. Not this one. The combination of sweetened condensed milk and properly whipped cream creates a silky, scoopable consistency that stays soft even after a week. Plus, the crushed vanilla wafers add that signature shortcake crumble without the fuss of baking biscuits. This isn’t just another version of strawberry ice cream—it’s the one that makes you close your eyes after the first bite and say, “Wow, I made this.”
What Ingredients You Will Need
This recipe uses simple, wholesome ingredients that come together to create something truly special. Here is everything you need to make homemade no-churn strawberry shortcake ice cream:
For the Strawberry Base
- 2 cups fresh strawberries, hulled and chopped (about 12-14 medium berries; frozen strawberries work too, just thaw them first)
- 1/4 cup granulated sugar (helps draw out the strawberry juices and creates a syrupy consistency)
- 1 tablespoon lemon juice, freshly squeezed (brightens the strawberry flavor and balances the sweetness)
For the Ice Cream Base
- 2 cups heavy cream, cold (36% milk fat or higher; I prefer Organic Valley or Horizon for consistent results)
- 1 can (14 ounces) sweetened condensed milk (this is the magic ingredient that makes no-churn ice cream work—don’t substitute evaporated milk)
- 1 teaspoon vanilla extract (pure vanilla extract, not imitation, for the best flavor)
- 1/8 teaspoon salt (just a pinch to enhance all the flavors)
For the Shortcake Crumble
- 1 cup crushed vanilla wafers (about 25-30 cookies; Nilla Wafers are my go-to, but any brand works)
- 1/4 cup freeze-dried strawberries, crushed (optional but highly recommended for extra strawberry flavor and color)
Ingredient Selection Tips: Look for strawberries that are deep red and fragrant—that is where the flavor is. If strawberries aren’t in season, frozen strawberries work beautifully; just make sure to thaw them completely and drain off any excess liquid before macerating. For the heavy cream, check the label and avoid anything labeled “ultra-pasteurized” if you can find it—it whips up slightly less stable, but it still works fine.
Substitution Guidance: Need a dairy-free version? Use full-fat coconut cream (chilled overnight) instead of heavy cream, and sweetened condensed coconut milk instead of the dairy version. For a gluten-free option, use gluten-free vanilla wafers or shortbread cookies. If you don’t have vanilla wafers, graham crackers or shortbread cookies make excellent substitutes—just adjust the sweetness slightly since graham crackers are less sweet.
Equipment Needed
One of the best things about this homemade no-churn strawberry shortcake ice cream is how little equipment it requires. Here is what you need:
- Large mixing bowl (stainless steel or glass works best; avoid plastic as it can retain odors)
- Electric hand mixer or stand mixer (you can whip by hand, but it will take about 10-12 minutes and a lot of arm strength)
- Medium bowl for macerating the strawberries
- Sharp knife and cutting board for chopping strawberries
- Rubber spatula for folding the mixture
- 9×5-inch loaf pan (or any freezer-safe container with a lid; metal pans freeze faster than glass)
- Plastic wrap or parchment paper to cover the surface
- Rolling pin or food processor for crushing the vanilla wafers (a zip-top bag and your hands work in a pinch)
Budget-Friendly Options: Don’t have a hand mixer? A whisk and some elbow grease will get the job done—just make sure the cream is very cold. No loaf pan? Use a 8×8-inch baking dish or even a metal bowl. The key is using a container that allows the ice cream to freeze evenly. I’ve made this in a plastic takeout container before, and it worked perfectly.
Personal Experience: I’ve tried making this with a hand whisk, and honestly, it’s a workout. Your arm will be sore, but the ice cream still turns out great. If you make no-churn ice cream regularly (and you will after this recipe), invest in a good hand mixer—it’s worth every penny.
Preparation Method
Follow these steps carefully, and you will have the creamiest homemade no-churn strawberry shortcake ice cream you have ever tasted. Trust me on the order here—it matters.
- Macerate the strawberries: In a medium bowl, combine the chopped strawberries, granulated sugar, and lemon juice. Stir gently to coat all the berries. Let this sit at room temperature for 20-30 minutes. During this time, the sugar will draw out the strawberry juices, creating a beautiful red syrup. You will notice the strawberries softening and the liquid becoming vibrant pink. Give it a stir halfway through.
- Prepare the strawberry swirl: After macerating, transfer the strawberry mixture to a small saucepan. Cook over medium heat for 5-7 minutes, stirring occasionally, until the berries break down and the mixture thickens slightly. You want it to be syrupy but still have some chunky bits—don’t puree it completely. Remove from heat and let it cool completely. This step concentrates the flavor and removes excess water that would make your ice cream icy. Set it aside while you prepare the base.
- Crush the vanilla wafers: Place the vanilla wafers in a zip-top bag and crush them with a rolling pin until you have a mix of fine crumbs and small chunks. You want texture here—not powder. Alternatively, pulse them in a food processor 3-4 times. Set aside.
- Whip the cream: Pour the cold heavy cream into a large mixing bowl. Using an electric hand mixer or stand mixer fitted with the whisk attachment, beat the cream on medium-high speed until stiff peaks form. This takes about 3-5 minutes. You will know it is ready when you lift the beaters and the cream stands up in firm peaks without collapsing. Be careful not to overwhip—if it starts looking grainy or separates, you have gone too far and need to start over with fresh cream.
- Fold in the sweetened condensed milk: In a separate large bowl, combine the sweetened condensed milk, vanilla extract, and salt. Stir to combine. Take about one-third of the whipped cream and fold it into the condensed milk mixture using a rubber spatula. This lightens the mixture and makes it easier to incorporate the rest of the cream. Gently fold in the remaining whipped cream until no white streaks remain. The mixture should be thick, airy, and pale ivory in color.
- Layer the ice cream: Spread one-third of the cream mixture evenly into the bottom of your loaf pan. Drizzle one-third of the cooled strawberry mixture over the top. Sprinkle one-third of the crushed vanilla wafers over the strawberries. Repeat these layers two more times, ending with a final layer of cream mixture. Use a butter knife or skewer to gently swirl the layers together—just 4-5 figure-eight motions. You want ribbons of strawberry and cookie throughout, not a fully mixed batter.
- Cover and freeze: Press a piece of plastic wrap directly onto the surface of the ice cream (this prevents ice crystals from forming). Cover the pan with foil or a lid. Freeze for at least 6 hours, but overnight is best. The ice cream needs time to set properly—rushing this step leads to a soft, soupy texture.
- Serve: Let the ice cream sit at room temperature for 5-10 minutes before scooping. This softens it just enough for perfect scoops. Use a warm ice cream scoop for the cleanest results.
Sensory Cues: When you fold the cream and condensed milk together, the mixture should feel light and billowy, like a cloud. The strawberry swirl should be thick enough that it doesn’t sink to the bottom of the pan—if it seems too runny, cook it for another 2 minutes. When you take the first scoop after freezing, the ice cream should be firm but not rock-hard, with visible ribbons of red and little cookie crumbles throughout.
Cooking Tips & Techniques
After making this homemade no-churn strawberry shortcake ice cream more times than I care to count, I have learned a few things the hard way. Here are my best tips to ensure your success:
Keep Everything Cold: The key to perfect no-churn ice cream is temperature management. Make sure your heavy cream is very cold—straight from the refrigerator, not sitting on the counter. If your kitchen is warm, chill your mixing bowl and beaters in the freezer for 10 minutes before whipping. Warm cream won’t whip properly, and you will end up with a soupy mess.
Don’t Skip the Strawberry Cooking Step: I know it seems like an extra step, but cooking the macerated strawberries is crucial. Raw strawberries contain a lot of water, which freezes into ice crystals and makes your ice cream icy. Cooking them down concentrates the flavor and removes excess moisture. I learned this the hard way when my first batch came out of the freezer tasting like frozen strawberry water.
Fold, Don’t Stir: When combining the whipped cream with the condensed milk, use a gentle folding motion. Stirring aggressively deflates all the air you just whipped into the cream, resulting in a dense, heavy ice cream. Imagine you are folding a delicate piece of fabric—slow, gentle, and patient.
Layer Strategically: Don’t just dump everything in and mix it. Layering the cream, strawberry swirl, and cookie crumble creates beautiful ribbons and pockets of flavor throughout. If you mix everything together, the cookies get soggy and the strawberries disappear into the cream. Trust me on this—layering makes a difference.
Patience with Freezing: I know it is tempting to check on it after 3 hours, but resist the urge. No-churn ice cream needs at least 6 hours to set properly. If you scoop it too early, it will be soft and melty. Overnight freezing gives you that perfect scoopable texture that rivals any premium brand.
Common Mistake to Avoid: Overwhipping the cream is the most common error. Once you see stiff peaks, stop immediately. If you keep going, the cream will start to separate and turn into butter. If this happens, there is no saving it—start over with fresh cream. I have ruined three batches this way, and it is heartbreaking every time.
Variations & Adaptations
This homemade no-churn strawberry shortcake ice cream is incredibly versatile. Here are some variations I have tried and loved:
Berry Medley Version
Swap half the strawberries for an equal amount of raspberries and blueberries. The combination creates a beautiful purple-red swirl with a more complex berry flavor. I made this for a Fourth of July party, and it disappeared in 20 minutes.
Chocolate Strawberry Shortcake
Add 1/4 cup of cocoa powder to the sweetened condensed milk before folding in the cream. Use chocolate wafer cookies instead of vanilla. The chocolate-strawberry combination is classic for a reason. My niece requests this version for every birthday party.
Vegan Version
Use full-fat coconut cream (chilled overnight) instead of heavy cream, and sweetened condensed coconut milk instead of the dairy version. The coconut flavor pairs surprisingly well with strawberries. Use vegan vanilla wafers or crushed almond cookies. This version is slightly less creamy but still delicious.
Lemon Strawberry Shortcake
Add 2 tablespoons of lemon zest to the cream mixture and use lemon-flavored shortbread cookies instead of vanilla wafers. The bright citrus cuts through the richness beautifully. This is my go-to summer version when lemons are at their peak.
Adult Version (Boozy)
Add 2 tablespoons of strawberry liqueur or limoncello to the strawberry mixture after cooking. The alcohol lowers the freezing point, resulting in a softer, more scoopable ice cream. It also adds a sophisticated flavor twist. Just don’t serve this to the kids!
Serving & Storage Suggestions
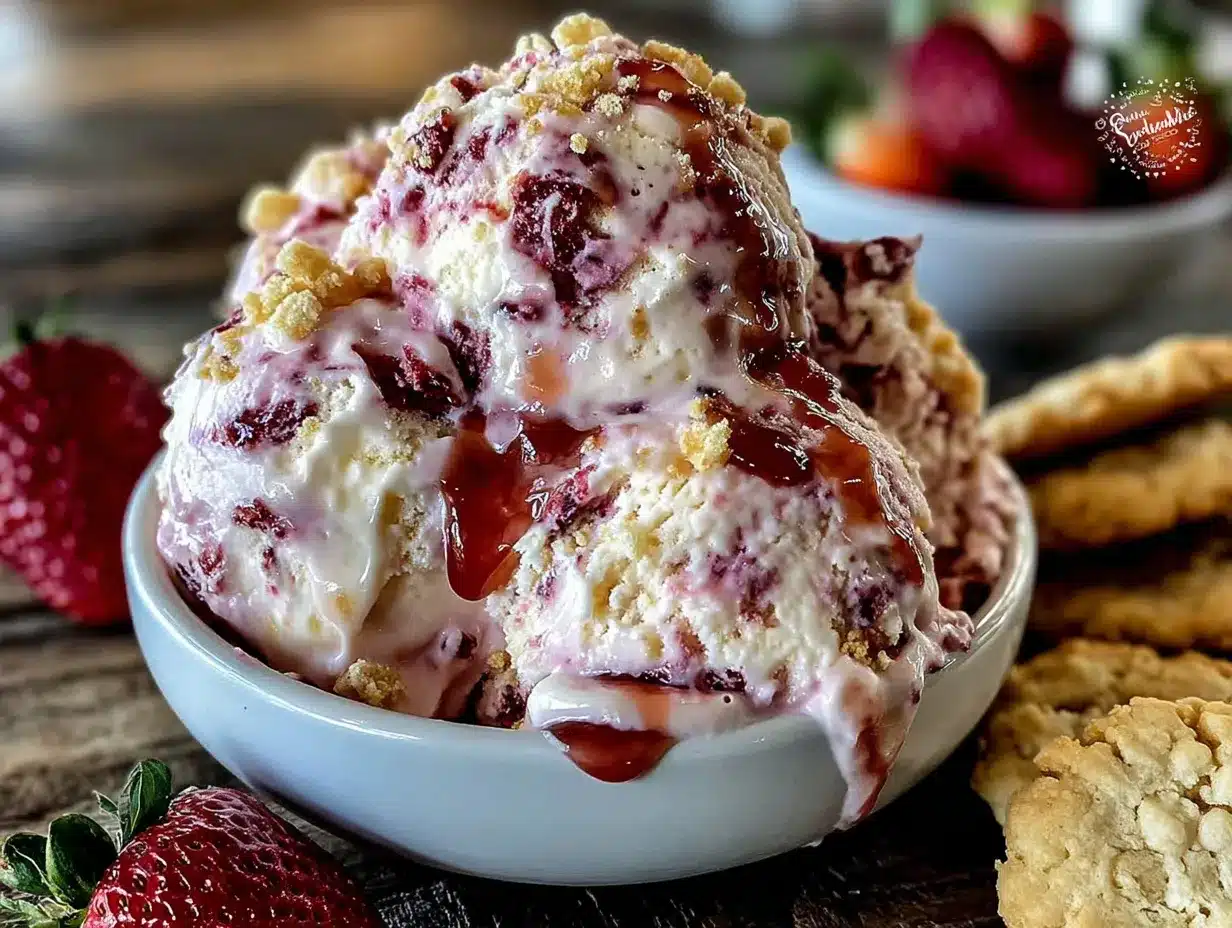
This homemade no-churn strawberry shortcake ice cream is best served slightly softened. Let it sit at room temperature for 5-10 minutes before scooping. The texture should be creamy and smooth, with visible ribbons of strawberry and crunchy cookie bits.
Serving Ideas: Serve scoops in chilled bowls or sugar cones. Top with fresh strawberries and a drizzle of strawberry syrup for an extra-special presentation. For a decadent dessert, sandwich a scoop between two vanilla wafers for an ice cream sandwich. I love serving this alongside a warm piece of pound cake or angel food cake—the temperature contrast is amazing.
Perfect Pairings: This ice cream pairs beautifully with a glass of cold milk, a cup of hot coffee, or a crisp Prosecco for adults. For a dessert board, serve it alongside fresh berries, sliced pound cake, chocolate sauce, and whipped cream. It is also incredible on top of a warm brownie or blondie.
Storage Instructions: Store the ice cream in an airtight container in the freezer for up to 2 weeks. Press a piece of plastic wrap directly onto the surface before sealing to prevent ice crystals. The texture is best within the first week—after that, the cookies start to soften and lose their crunch.
Reheating Tips: If the ice cream becomes too hard after freezing, microwave it for 10-15 seconds on low power, or let it sit at room temperature for 15-20 minutes. Never microwave it for longer than 20 seconds, or it will melt unevenly.
Flavor Development: The flavors actually deepen after 24 hours in the freezer. The strawberry flavor becomes more pronounced, and the vanilla and cookie flavors meld together beautifully. I actually prefer this ice cream on day two—it tastes more cohesive and balanced.
Nutritional Information & Benefits
Here is the estimated nutritional information for one serving (about 1/2 cup) of homemade no-churn strawberry shortcake ice cream:
| Nutrient | Amount per Serving |
|---|---|
| Calories | 285 |
| Total Fat | 18g |
| Saturated Fat | 11g |
| Cholesterol | 65mg |
| Sodium | 95mg |
| Total Carbohydrates | 30g |
| Dietary Fiber | 1g |
| Sugars | 24g |
| Protein | 3g |
| Vitamin C | 25% DV |
| Calcium | 10% DV |
Health Benefits: Strawberries are packed with vitamin C and antioxidants, which support immune health and fight inflammation. The calcium from the cream and condensed milk contributes to bone health. While this is definitely a treat (not a health food), using fresh strawberries adds real nutritional value compared to store-bought ice cream with artificial flavors and colors.
Dietary Considerations: This recipe contains dairy and gluten (from the vanilla wafers). For a gluten-free version, use certified gluten-free vanilla wafers. For a dairy-free version, follow the vegan variation above. This recipe is not suitable for low-carb or keto diets due to the sugar content.
Personal Wellness Perspective: I believe in enjoying treats in moderation. This ice cream is made with real ingredients—no artificial flavors, preservatives, or high-fructose corn syrup. When I want something sweet, I would rather have a small scoop of this than a processed alternative. It satisfies my sweet tooth without the guilt.
Conclusion
This homemade no-churn strawberry shortcake ice cream started as a kitchen disaster and became one of my most-requested recipes. It is proof that sometimes the best things in life come from happy accidents. The creamy texture, the sweet-tart strawberry swirl, the crunchy cookie bits—every spoonful is a little piece of summer, no matter what time of year it is.
I love this recipe because it is forgiving, adaptable, and genuinely impressive. You can make it with your kids on a lazy Sunday, whip it up for a last-minute dinner party, or keep a batch in the freezer for those evenings when only ice cream will do. It never fails to make people smile, and honestly, that is what cooking is all about.
I would love to hear how your batch turns out! Did you try one of the variations? Did you discover your own twist? Drop a comment below and let me know. And if you share a photo on Pinterest or Instagram, tag me so I can see your beautiful creation. Happy scooping, friends!
Frequently Asked Questions
Can I use frozen strawberries instead of fresh?
Yes, absolutely! Thaw the frozen strawberries completely, then drain off any excess liquid before macerating. Frozen strawberries are actually more convenient because they are already hulled and chopped. Just make sure to cook them down as directed to remove the extra moisture.
Why did my ice cream turn out icy?
Icy ice cream usually means there is too much water in the mixture. Make sure you cook the strawberries long enough to concentrate the flavor and evaporate excess liquid. Also, pressing plastic wrap directly onto the surface before freezing prevents ice crystals from forming. If you skipped either step, that is likely the culprit.
How long does this ice cream last in the freezer?
This ice cream stays fresh for up to 2 weeks in an airtight container. The texture is best within the first week. After that, the vanilla wafers start to soften and lose their crunch. But honestly, it rarely lasts that long in my house—it disappears too quickly!
Can I make this without a hand mixer?
Yes, you can whip the cream by hand using a whisk. It takes about 10-12 minutes of vigorous whisking, and your arm will get a workout. Make sure the cream is very cold, and use a large bowl to allow plenty of room for the cream to expand. It is totally doable, just requires patience.
Can I use a different type of cookie?
Absolutely! Vanilla wafers are traditional, but graham crackers, shortbread cookies, or even crushed pound cake work beautifully. Each cookie gives a different texture and flavor. Graham crackers add a slightly honeyed note, while shortbread is buttery and rich. Experiment and find your favorite!
Pin This Recipe!
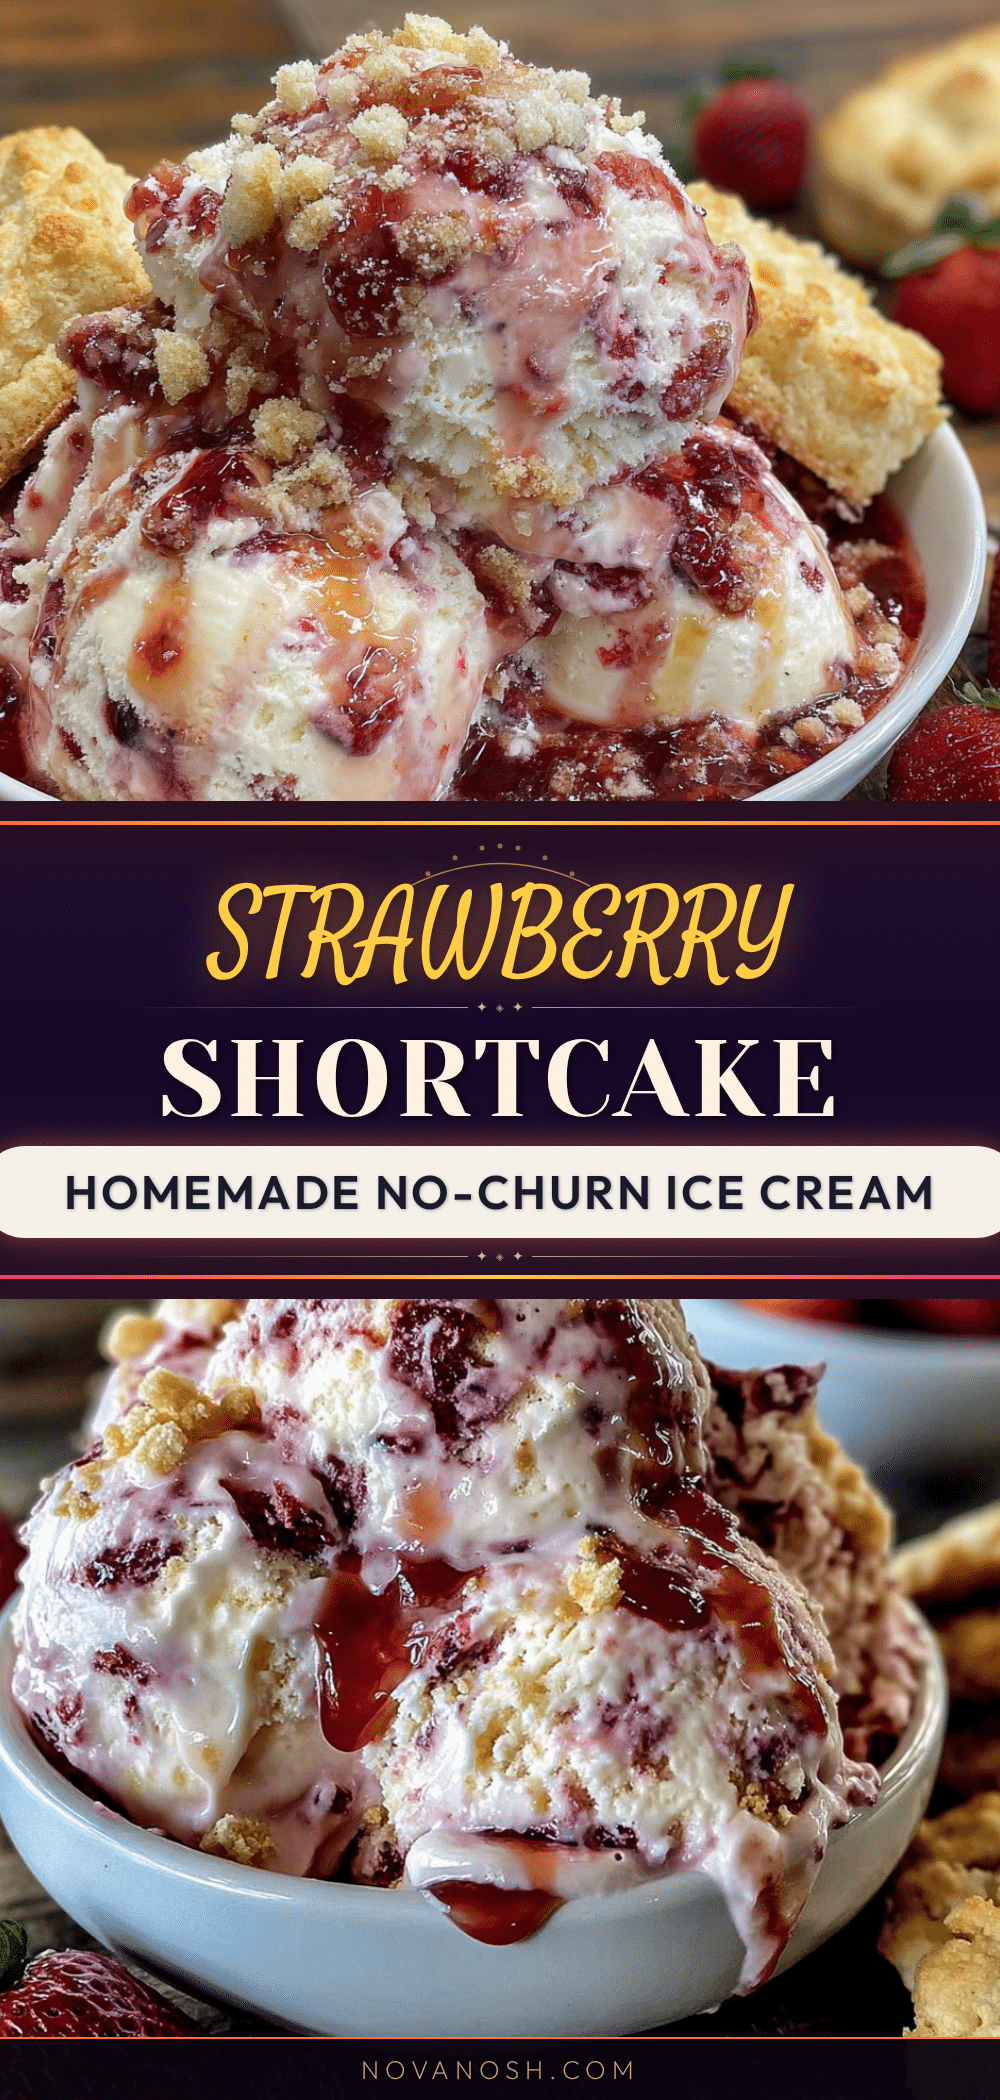
Easy Homemade No-Churn Strawberry Shortcake Ice Cream
This creamy, no-churn strawberry shortcake ice cream is made without an ice cream maker, using simple pantry ingredients. It features a silky texture, sweet-tart strawberry swirl, and crunchy vanilla wafer bits.
- Prep Time: 20 minutes
- Cook Time: 7 minutes
- Total Time: 6 hours 27 minutes (includes freezing time)
- Yield: 8 servings 1x
- Category: Dessert
- Cuisine: American
Ingredients
- 2 cups fresh strawberries, hulled and chopped (about 12–14 medium berries; frozen strawberries work too, just thaw them first)
- 1/4 cup granulated sugar
- 1 tablespoon lemon juice, freshly squeezed
- 2 cups heavy cream, cold (36% milk fat or higher)
- 1 can (14 ounces) sweetened condensed milk
- 1 teaspoon vanilla extract (pure vanilla extract, not imitation)
- 1/8 teaspoon salt
- 1 cup crushed vanilla wafers (about 25–30 cookies; Nilla Wafers are recommended)
- 1/4 cup freeze-dried strawberries, crushed (optional but highly recommended)
Instructions
- Macerate the strawberries: In a medium bowl, combine the chopped strawberries, granulated sugar, and lemon juice. Stir gently to coat all the berries. Let this sit at room temperature for 20-30 minutes. During this time, the sugar will draw out the strawberry juices, creating a beautiful red syrup. Give it a stir halfway through.
- Prepare the strawberry swirl: After macerating, transfer the strawberry mixture to a small saucepan. Cook over medium heat for 5-7 minutes, stirring occasionally, until the berries break down and the mixture thickens slightly. You want it to be syrupy but still have some chunky bits—don’t puree it completely. Remove from heat and let it cool completely.
- Crush the vanilla wafers: Place the vanilla wafers in a zip-top bag and crush them with a rolling pin until you have a mix of fine crumbs and small chunks. Alternatively, pulse them in a food processor 3-4 times. Set aside.
- Whip the cream: Pour the cold heavy cream into a large mixing bowl. Using an electric hand mixer or stand mixer fitted with the whisk attachment, beat the cream on medium-high speed until stiff peaks form. This takes about 3-5 minutes. Be careful not to overwhip.
- Fold in the sweetened condensed milk: In a separate large bowl, combine the sweetened condensed milk, vanilla extract, and salt. Stir to combine. Take about one-third of the whipped cream and fold it into the condensed milk mixture using a rubber spatula. Gently fold in the remaining whipped cream until no white streaks remain.
- Layer the ice cream: Spread one-third of the cream mixture evenly into the bottom of your loaf pan. Drizzle one-third of the cooled strawberry mixture over the top. Sprinkle one-third of the crushed vanilla wafers over the strawberries. Repeat these layers two more times, ending with a final layer of cream mixture. Use a butter knife or skewer to gently swirl the layers together—just 4-5 figure-eight motions.
- Cover and freeze: Press a piece of plastic wrap directly onto the surface of the ice cream (this prevents ice crystals from forming). Cover the pan with foil or a lid. Freeze for at least 6 hours, but overnight is best.
- Serve: Let the ice cream sit at room temperature for 5-10 minutes before scooping. This softens it just enough for perfect scoops. Use a warm ice cream scoop for the cleanest results.
Notes
Keep everything cold for best results. Don’t skip cooking the strawberries to avoid icy texture. Fold gently to retain air. Layer strategically for beautiful ribbons. Be patient with freezing—at least 6 hours, preferably overnight. Overwhipping cream is a common mistake; stop at stiff peaks.
Nutrition
- Serving Size: 1/2 cup
- Calories: 285
- Sugar: 24
- Sodium: 95
- Fat: 18
- Saturated Fat: 11
- Carbohydrates: 30
- Fiber: 1
- Protein: 3
Keywords: no-churn ice cream, strawberry shortcake ice cream, homemade ice cream, easy ice cream, summer dessert, strawberry dessert