Easy Homemade No-Churn Strawberry Shortcake Ice Cream
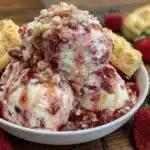
This creamy, no-churn strawberry shortcake ice cream is made without an ice cream maker, using simple pantry ingredients. It features a silky texture, sweet-tart strawberry swirl, and crunchy vanilla wafer bits.
- Prep Time: 20 minutes
- Cook Time: 7 minutes
- Total Time: 6 hours 27 minutes (includes freezing time)
- Yield: 8 servings 1x
- Category: Dessert
- Cuisine: American
Ingredients
Scale
- 2 cups fresh strawberries, hulled and chopped (about 12–14 medium berries; frozen strawberries work too, just thaw them first)
- 1/4 cup granulated sugar
- 1 tablespoon lemon juice, freshly squeezed
- 2 cups heavy cream, cold (36% milk fat or higher)
- 1 can (14 ounces) sweetened condensed milk
- 1 teaspoon vanilla extract (pure vanilla extract, not imitation)
- 1/8 teaspoon salt
- 1 cup crushed vanilla wafers (about 25–30 cookies; Nilla Wafers are recommended)
- 1/4 cup freeze-dried strawberries, crushed (optional but highly recommended)
Instructions
- Macerate the strawberries: In a medium bowl, combine the chopped strawberries, granulated sugar, and lemon juice. Stir gently to coat all the berries. Let this sit at room temperature for 20-30 minutes. During this time, the sugar will draw out the strawberry juices, creating a beautiful red syrup. Give it a stir halfway through.
- Prepare the strawberry swirl: After macerating, transfer the strawberry mixture to a small saucepan. Cook over medium heat for 5-7 minutes, stirring occasionally, until the berries break down and the mixture thickens slightly. You want it to be syrupy but still have some chunky bits—don’t puree it completely. Remove from heat and let it cool completely.
- Crush the vanilla wafers: Place the vanilla wafers in a zip-top bag and crush them with a rolling pin until you have a mix of fine crumbs and small chunks. Alternatively, pulse them in a food processor 3-4 times. Set aside.
- Whip the cream: Pour the cold heavy cream into a large mixing bowl. Using an electric hand mixer or stand mixer fitted with the whisk attachment, beat the cream on medium-high speed until stiff peaks form. This takes about 3-5 minutes. Be careful not to overwhip.
- Fold in the sweetened condensed milk: In a separate large bowl, combine the sweetened condensed milk, vanilla extract, and salt. Stir to combine. Take about one-third of the whipped cream and fold it into the condensed milk mixture using a rubber spatula. Gently fold in the remaining whipped cream until no white streaks remain.
- Layer the ice cream: Spread one-third of the cream mixture evenly into the bottom of your loaf pan. Drizzle one-third of the cooled strawberry mixture over the top. Sprinkle one-third of the crushed vanilla wafers over the strawberries. Repeat these layers two more times, ending with a final layer of cream mixture. Use a butter knife or skewer to gently swirl the layers together—just 4-5 figure-eight motions.
- Cover and freeze: Press a piece of plastic wrap directly onto the surface of the ice cream (this prevents ice crystals from forming). Cover the pan with foil or a lid. Freeze for at least 6 hours, but overnight is best.
- Serve: Let the ice cream sit at room temperature for 5-10 minutes before scooping. This softens it just enough for perfect scoops. Use a warm ice cream scoop for the cleanest results.
Notes
Keep everything cold for best results. Don’t skip cooking the strawberries to avoid icy texture. Fold gently to retain air. Layer strategically for beautiful ribbons. Be patient with freezing—at least 6 hours, preferably overnight. Overwhipping cream is a common mistake; stop at stiff peaks.
Nutrition
- Serving Size: 1/2 cup
- Calories: 285
- Sugar: 24
- Sodium: 95
- Fat: 18
- Saturated Fat: 11
- Carbohydrates: 30
- Fiber: 1
- Protein: 3
Keywords: no-churn ice cream, strawberry shortcake ice cream, homemade ice cream, easy ice cream, summer dessert, strawberry dessert