Love this? Save it for later!
Share the inspiration with your friends
I was standing in the checkout line at the grocery store last October, barely paying attention, when a kid in front of me tore open a bag of bright orange cheese puffs. The smell hit me — that fake, powdery, vaguely cheddar-ish scent — and suddenly I was eight years old at my aunt Carol’s kitchen table. She was never the “fun aunt,” honestly. She was the one who made us finish our green beans before we could even think about dessert. But every Halloween, she’d pull out this old, stained recipe card and make these creepy little pretzel snacks that looked like actual witch fingers. I mean, they were ridiculous. Green almonds for fingernails. A little dab of red jam at the “cuticle.” She’d lay them out on a black platter and cackle — actually cackle — when we’d pretend to be too scared to eat them. She passed away a few years ago, and I found myself standing there in that grocery store aisle, holding a bag of pretzel rods I didn’t need, trying to remember the exact shade of green she used for the almond “nails.” That’s the thing about food memories, you know? They don’t come to you in recipes. They come to you in smells and sounds and the way someone’s hands moved. So I bought the pretzels. I bought the almonds. I bought way too much green food coloring. And I spent an afternoon in my own kitchen, chasing a feeling I can almost but not quite hold onto. These Spooky Witch Finger Pretzel Snacks for Halloween are the closest I’ve gotten. Maybe you’ve got a memory like that too — something you’re trying to recreate, one batch at a time.
Why You’ll Love This Recipe
Let me tell you why these Easy Witch Finger Pretzels for Halloween Snacks have become my non-negotiable October tradition. I’ve tested this recipe six times over the last three years — yes, six — trying to get the almond placement just right and the candy melt coating thin enough so it doesn’t look like a monster’s swollen finger. I’ve learned a few things along the way, and I’m sharing every single one of them with you.
- Quick & Easy : These come together in about 25 minutes, start to finish. Perfect for last-minute Halloween parties or when you realize the school bake sale is tomorrow morning.
- Simple Ingredients : You need pretzel rods, candy melts, sliced almonds, and a little green food coloring. That’s it. No fancy grocery trips required.
- Perfect for Halloween : These are genuinely creepy in the best way. Kids lose their minds over them, and adults pretend to be grossed out while reaching for seconds.
- Crowd-Pleaser : I brought these to a neighborhood potluck last year, and they were gone before the punch bowl was even set up. People love the novelty factor.
- Unbelievably Delicious : The salty crunch of the pretzel against the sweet candy coating and the nutty almond “nail” is honestly addictive. It’s the perfect sweet-and-salty combo.
What makes this recipe different from every other version floating around Pinterest? It’s the technique. I learned the hard way that if you don’t chill the candy melts long enough, the almonds slide right off. I also figured out that a tiny dab of red gel icing at the base of the almond makes them look disturbingly realistic — like you just snipped them off a real witch’s hand. This isn’t just another Halloween snack. It’s the one that makes people say, “Wait, how did you do that?”
This recipe is the kind that makes you close your eyes after the first bite. It’s Halloween fun reimagined — spooky, silly, and completely delicious. Perfect for impressing your kid’s classmates without spending hours in the kitchen, or for turning a simple snack into something memorable.
What Ingredients You Will Need
This recipe uses simple, mostly pantry-staple ingredients to deliver maximum creepy factor with minimum fuss. Here’s what you’ll need to gather before you start.
- For the Fingers
- 1 bag (12 ounces) pretzel rods (I recommend Snyder’s of Hanover — they’re sturdy and don’t break easily)
- 1 bag (12 ounces) green candy melts (Wilton brand works great; you can find them at most craft stores or online)
- 1/2 cup sliced almonds (look for raw, unsalted almonds — the natural color works better for “fingernails”)
- Green gel food coloring (optional, but adds that extra witchy green tint; I use Americolor brand)
- Red gel icing or red decorating gel (for the “blood” at the cuticle — totally optional but highly recommended for maximum gross-out factor)
- For the “Blood” Detail (Optional but Fun)
- 2 tablespoons red candy melts or red melting wafers
- 1 teaspoon coconut oil (helps thin the red coating for a more realistic blood drip)
A quick note on ingredient selection: Look for pretzel rods that are relatively uniform in thickness. Some brands make really skinny rods that look more like matchsticks than fingers, and they’re harder to work with. You want rods that are about the width of your index finger — it makes the whole “witch finger” illusion much more convincing.
For the candy melts, I’ve tried both the bright green and the vanilla-flavored white melts with green food coloring added. Honestly, the pre-colored green melts give a more consistent, vibrant color without the risk of the food coloring seizing up the chocolate. If you can only find white melts, add the gel food coloring drop by drop, stirring vigorously after each addition, until you reach your desired shade.
As for the almonds, don’t use the pre-sliced ones that are paper-thin. You want sliced almonds that still have some heft — about 1/16 inch thick. They need to look like actual fingernails, not paper cutouts. I’ve also tried using whole almonds for a more realistic shape, but they’re too bulky and fall off the pretzel. Sliced is the way to go.
Equipment Needed
You don’t need a professional pastry kitchen for these, but a few specific tools will make your life much easier.
- Baking sheet lined with parchment paper or a silicone baking mat
- Microwave-safe bowl for melting the candy melts (glass is best; plastic can hold onto residual heat and scorch the chocolate)
- Small offset spatula or butter knife for spreading the candy coating
- Tweezers (yes, really) for placing the almond “fingernails” — your fingers are too big and you’ll smudge the coating
- Toothpicks for adding the red gel details
- Small piping bag or zip-top bag for the red “blood” drizzle
- Refrigerator space for chilling (a flat spot in your fridge is crucial)
If you don’t have an offset spatula, a regular butter knife works fine. Just be careful not to scrape off too much of the candy coating when you’re smoothing it. And if you don’t have tweezers, you can use a toothpick to nudge the almonds into place — it just takes a little more patience. I speak from experience. The first batch I made, I used my fingers and ended up with green fingerprints all over every single pretzel. Learn from my mistakes, friends.
Preparation Method
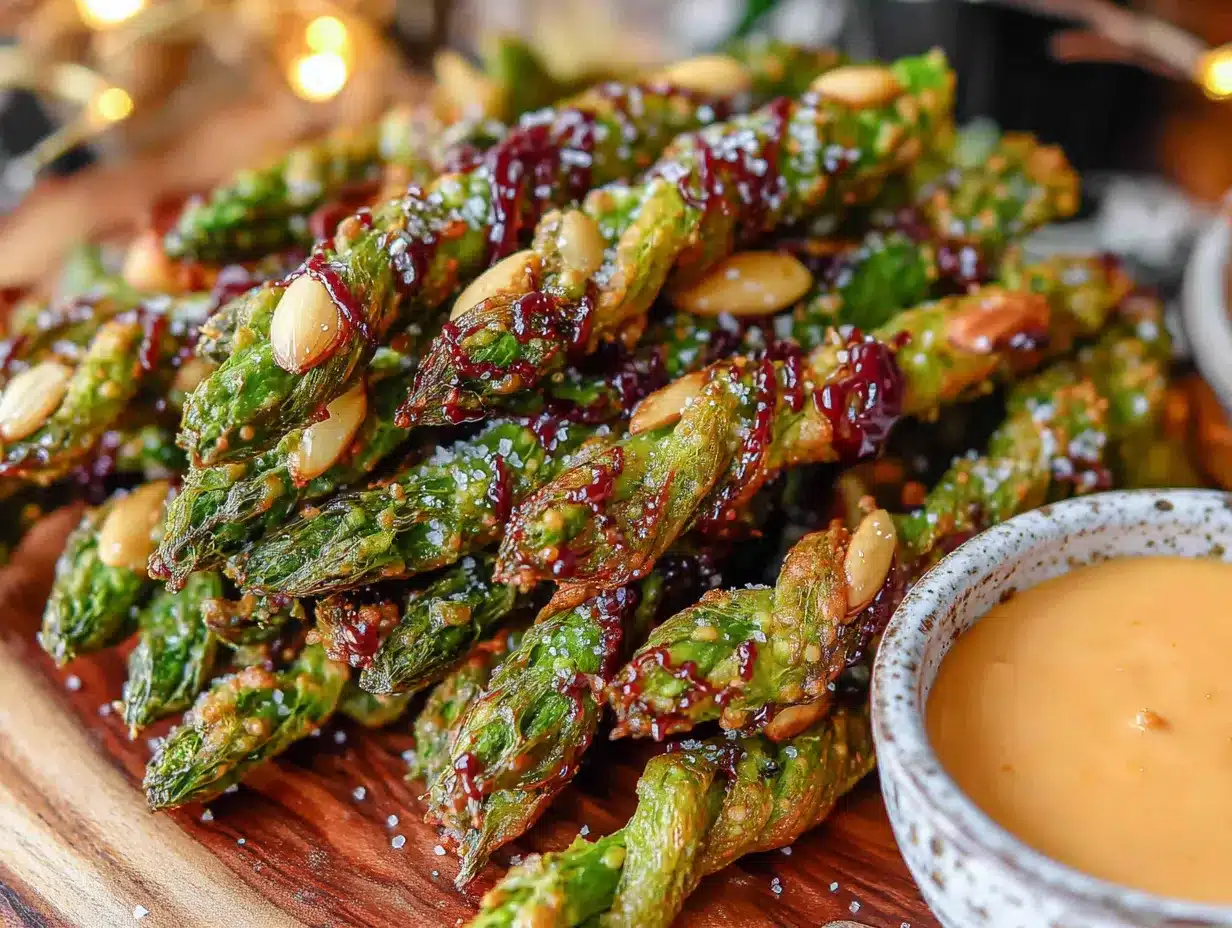
Let’s get to the fun part. Here’s how to make these Spooky Witch Finger Pretzel Snacks for Halloween, step by step.
- Prep your workstation. Line a large baking sheet with parchment paper or a silicone mat. Arrange your pretzel rods in a single layer on the sheet, leaving about an inch of space between each one. You want them to be easy to grab and coat without knocking into each other.
- Melt the green candy melts. Place the candy melts in a microwave-safe bowl. Microwave in 30-second intervals at 50% power, stirring thoroughly after each interval. It usually takes about 2 to 2.5 minutes total. Don’t rush this — overheating the melts will make them seize up into a thick, grainy mess. I’ve done it. It’s not pretty. The coating should be smooth and fluid, like thick pancake batter. If it seems too thick, add 1 teaspoon of coconut oil or vegetable shortening and stir until combined.
- Coat the pretzel rods. Holding one pretzel rod at a time, dip it into the melted green candy coating, leaving about an inch at the bottom uncoated (this will be the “base” of the finger where it would attach to the hand). Use your offset spatula or a butter knife to spread the coating evenly over the pretzel, covering all sides. Let any excess drip back into the bowl for a few seconds. Place the coated pretzel on the parchment-lined baking sheet.
- Add the fingernail. While the coating is still wet, use your tweezers to pick up one sliced almond and gently press it onto the tip of the pretzel, pointed end facing outward. The almond should overlap the tip of the pretzel by about 1/4 inch to look like a real fingernail. Press down lightly so it sticks. Repeat for all pretzels. Work quickly — the coating sets fast, especially if your kitchen is cool.
- Create the knuckle wrinkles. Using a toothpick or the tip of your offset spatula, gently drag lines across the coated pretzel to create “knuckle” wrinkles. I usually make two or three lines about halfway down the pretzel. Don’t press too hard — you just want to create indentations, not cut through the coating.
- Chill to set. Place the baking sheet in the refrigerator for 10-15 minutes, or until the candy coating is completely firm and set. The coating should feel hard to the touch, not tacky. If you’re in a hurry, you can pop them in the freezer for 5 minutes, but watch them carefully — the coating can crack if it gets too cold too fast.
- Add the “blood” detail (optional but amazing). While the fingers are chilling, melt your red candy melts or red melting wafers in a small microwave-safe bowl. Microwave in 20-second intervals at 50% power, stirring between each, until smooth. Transfer the melted red coating to a small piping bag or a zip-top bag with the tiniest corner snipped off. Once the green fingers are set, pipe a small dab of red at the base of each almond “fingernail” to look like blood or cuticle irritation. You can also add a thin line of red down the side of the pretzel for an extra gruesome effect. Let the red coating set at room temperature for about 5 minutes, or pop them back in the fridge for 2-3 minutes.
- Final touch. If you want to go full Halloween horror, you can add a few tiny dots of red gel icing along the “knuckle” lines to look like scrapes or scratches. I did this for a party last year and people were genuinely disturbed. It was fantastic.
Your Spooky Witch Finger Pretzel Snacks for Halloween are now ready to serve. Arrange them on a platter with the uncoated ends facing inward, like they’re reaching up from a grave. Or just pile them in a bowl and watch people freak out. Both options work.
Cooking Tips & Techniques
I’ve made these Easy Witch Finger Pretzels for Halloween Snacks more times than I care to admit, and I’ve collected a few hard-won tips along the way. Let me save you some trouble.
Temperature is everything. Candy melts are finicky. They don’t like humidity, they don’t like cold drafts, and they definitely don’t like being overheated. Work in a cool, dry environment if possible. If your kitchen is warm, consider working in batches — keep half the pretzels in the fridge while you coat the other half. The coating sets faster when the pretzels are cold, which actually helps the almonds stay in place.
Don’t skip the tweezers. I know it seems fussy, but trust me on this. Your fingers will leave fingerprints in the soft coating, and the warmth from your skin can cause the coating to slide off the pretzel. Tweezers give you precision without the mess. I bought a cheap pair at the dollar store specifically for this recipe, and they’ve paid for themselves a hundred times over.
My biggest failure happened two years ago when I tried to make these for my daughter’s Halloween class party. I got distracted by a phone call and left the melted candy coating sitting in the bowl for too long. By the time I came back, it had started to thicken and separate. I tried to reheat it, and it seized into a crumbly, greasy mess. I had to throw the whole batch away and start over. Lesson learned: candy melts don’t like to wait. Once they’re melted, use them immediately. If you need to take a break, pour the coating into a piping bag and keep it warm in a cup of hot water (make sure no water gets inside the bag).
Timing strategy: I like to make the pretzels the day before I need them. They store perfectly in an airtight container at room temperature (more on that below), and it takes the pressure off. You can coat and chill them one night, then add the red details the next morning. It breaks the process into manageable chunks.
For consistent results, measure your candy melts by weight rather than volume. A kitchen scale is your friend here. And always buy an extra bag of candy melts — you’ll inevitably need more than you think, and running out mid-batch is a special kind of frustration.
Variations & Adaptations
Once you’ve mastered the basic technique, the possibilities are endless. Here are a few variations I’ve tried and loved.
Zombie Fingers: Skip the green food coloring and use white candy melts instead. Add a few drops of gray or purple gel food coloring for that undead skin tone. Use slivered almonds for the fingernails and pipe a little red gel at the tips for a “just crawled out of the grave” look. I made these for a zombie-themed movie night and they were a hit.
Gluten-Free Version: Swap the pretzel rods for gluten-free pretzel sticks. Most brands make them, though they tend to be thinner and more fragile. Handle them gently during the coating process, and consider doubling up on the coating to give them more structural integrity. The flavor is slightly different, but the creepy factor remains intact.
Nut-Free Option: If you’re serving these at a school party or other nut-free event, replace the sliced almonds with small pieces of dried banana chips or even candy corn (cut in half lengthwise). The banana chips give a similar shape and texture, and candy corn adds a pop of orange that looks surprisingly realistic for a zombie finger. Just make sure whatever you use is flat enough to lie against the pretzel.
Spooky Spider Fingers: Instead of green coating, use black candy melts. Skip the almond fingernails entirely and press a few black sesame seeds onto the tip of each pretzel to look like tiny claws. Add a red dot at the tip for extra creepiness. These look less like witch fingers and more like something out of a horror movie, which is exactly what some people want.
My personal favorite variation is the “Mummy Finger” version. Coat the pretzels in white candy melts, then use a piping bag with a small round tip to drizzle thin lines of green or black candy coating across the surface in a crisscross pattern. The lines look like mummy wrappings. Add a single almond at the tip for the fingernail. It’s a little more work, but the visual payoff is huge.
Serving & Storage Suggestions
These Spooky Witch Finger Pretzel Snacks for Halloween are at their best when served at room temperature. The candy coating should be firm but not brittle, and the pretzel should still have a satisfying crunch. If you’ve stored them in the fridge, let them sit out for about 10 minutes before serving to take the chill off.
For presentation, I love arranging them on a black platter or a dark-colored serving board. The contrast makes the green fingers pop. You can also stand them upright in a small glass or jar, with the “fingernail” ends pointing up, like they’re reaching out of a grave. Add a few fake spider webs or plastic spiders around the base for extra Halloween atmosphere.
These pair beautifully with other Halloween treats. Serve them alongside a bowl of Halloween popcorn mix for a salty-sweet combo, or arrange them on a platter with pumpkin dip with gingersnaps for dipping. The sweet and salty contrast is chef’s kiss.
Storage: Store leftover witch fingers in an airtight container at room temperature for up to 5 days. Do not refrigerate them for long-term storage — the humidity in the fridge can cause the candy coating to develop a white bloom (called “fat bloom”) and lose its glossy finish. If you must refrigerate, place them in a single layer in an airtight container with a paper towel at the bottom to absorb excess moisture.
Freezing: You can freeze these for up to 2 months. Place them in a single layer on a baking sheet and freeze until solid (about 1 hour), then transfer to a freezer-safe container or zip-top bag, separating layers with parchment paper. Thaw at room temperature for about 20 minutes before serving. The texture holds up surprisingly well, though the coating may lose a bit of its shine.
One thing I’ve noticed: the flavors actually meld together after a day or two. The saltiness of the pretzel infuses the candy coating slightly, creating a more balanced sweet-and-salty bite. So if you can manage to keep your hands off them for 24 hours, they’ll taste even better.
Nutritional Information & Benefits
Let’s be real — these are a treat, not a health food. But here’s the estimated nutritional breakdown for one witch finger pretzel (based on a standard 12-ounce bag of pretzel rods yielding about 24 fingers).
- Calories: Approximately 120-140 per finger
- Total Fat: 6-8 grams (mostly from the candy coating and almonds)
- Saturated Fat: 4-5 grams
- Carbohydrates: 15-18 grams
- Sugar: 10-12 grams
- Protein: 2-3 grams
- Sodium: 200-250 mg
On the plus side, the almonds provide a small amount of vitamin E, magnesium, and healthy monounsaturated fats. Pretzels are lower in fat than many other snack options, though they’re higher in sodium. The candy coating is purely for fun — no nutritional benefits there, but honestly, that’s not why we’re making these.
Dietary considerations: This recipe contains gluten (pretzels), dairy (many candy melts contain milk solids), and tree nuts (almonds). For a dairy-free version, look for dairy-free candy melts — they do exist, and they work just as well. For nut-free, see the variation section above. The recipe is egg-free and can be made vegan with the right candy melt selection.
My personal take? These are a once-a-year indulgence. Halloween is about fun and creativity, not counting calories. Make them, enjoy them, and don’t overthink the nutrition facts. Life’s too short.
Conclusion
These Spooky Witch Finger Pretzel Snacks for Halloween are more than just a cute party snack — they’re a tradition in the making. Every time I make them, I think about my aunt Carol and her cackling laugh, and I hope that somewhere, some kid is having the same kind of memory I had standing in that grocery store aisle. That’s the magic of recipes, isn’t it? They’re not just instructions. They’re time machines.
I’d love to see your versions of these creepy little fingers. Tag me in your photos, leave a comment below with your favorite variation, or tell me about your own Halloween food memories. Did your grandma make something weird and wonderful? Did your neighbor have a signature spooky snack? Share it in the comments — I read every single one, and I love hearing how these recipes come to life in your kitchens.
Now go forth and make something delightfully disgusting. Happy Halloween, friends. May your candy melts stay smooth and your fingernails stay creepy.
Frequently Asked Questions
Can I use white chocolate instead of candy melts?
Yes, but you’ll need to add green food coloring. White chocolate is more sensitive to heat than candy melts, so melt it slowly at 50% power in 20-second intervals. Add gel food coloring drop by drop until you reach the desired shade. White chocolate also takes longer to set, so plan for extra chilling time — about 20 minutes in the fridge.
How do I keep the almonds from falling off?
This is the most common issue, and the fix is simple: press the almond into the coating while it’s still wet, and make sure the coating is thick enough to hold it. If the coating is too thin, the almond won’t have anything to grip. Also, chill the pretzels immediately after adding the almonds — the cold sets the coating quickly and locks the almond in place. If you’re still having trouble, dip the back of the almond in a tiny bit of melted coating before pressing it onto the pretzel.
Can I make these ahead of time?
Absolutely. These store beautifully for up to 5 days at room temperature in an airtight container. I actually prefer making them a day ahead — the flavors meld together, and the coating firms up perfectly. Just don’t add the red “blood” detail until the day you’re serving them, or it can bleed into the green coating over time.
What if I can’t find green candy melts?
Use white candy melts and add green gel food coloring. Start with a small amount — about 2 drops per cup of melted coating — and add more until you’re happy with the color. Remember that the color will darken slightly as it sets, so aim for a shade that’s slightly lighter than your target. Avoid liquid food coloring, as it can cause the coating to seize.
How do I get the coating smooth and even?
The key is the consistency of your melted coating. It should be fluid enough to drip slowly off a spoon, but not so thin that it runs off the pretzel in sheets. If it’s too thick, add 1/2 teaspoon of coconut oil or vegetable shortening and stir well. If it’s too thin, let it sit for a minute or two to cool and thicken slightly. Also, hold the pretzel at a slight angle when dipping, and tap it gently against the side of the bowl to encourage excess coating to drip off evenly.
Pin This Recipe!
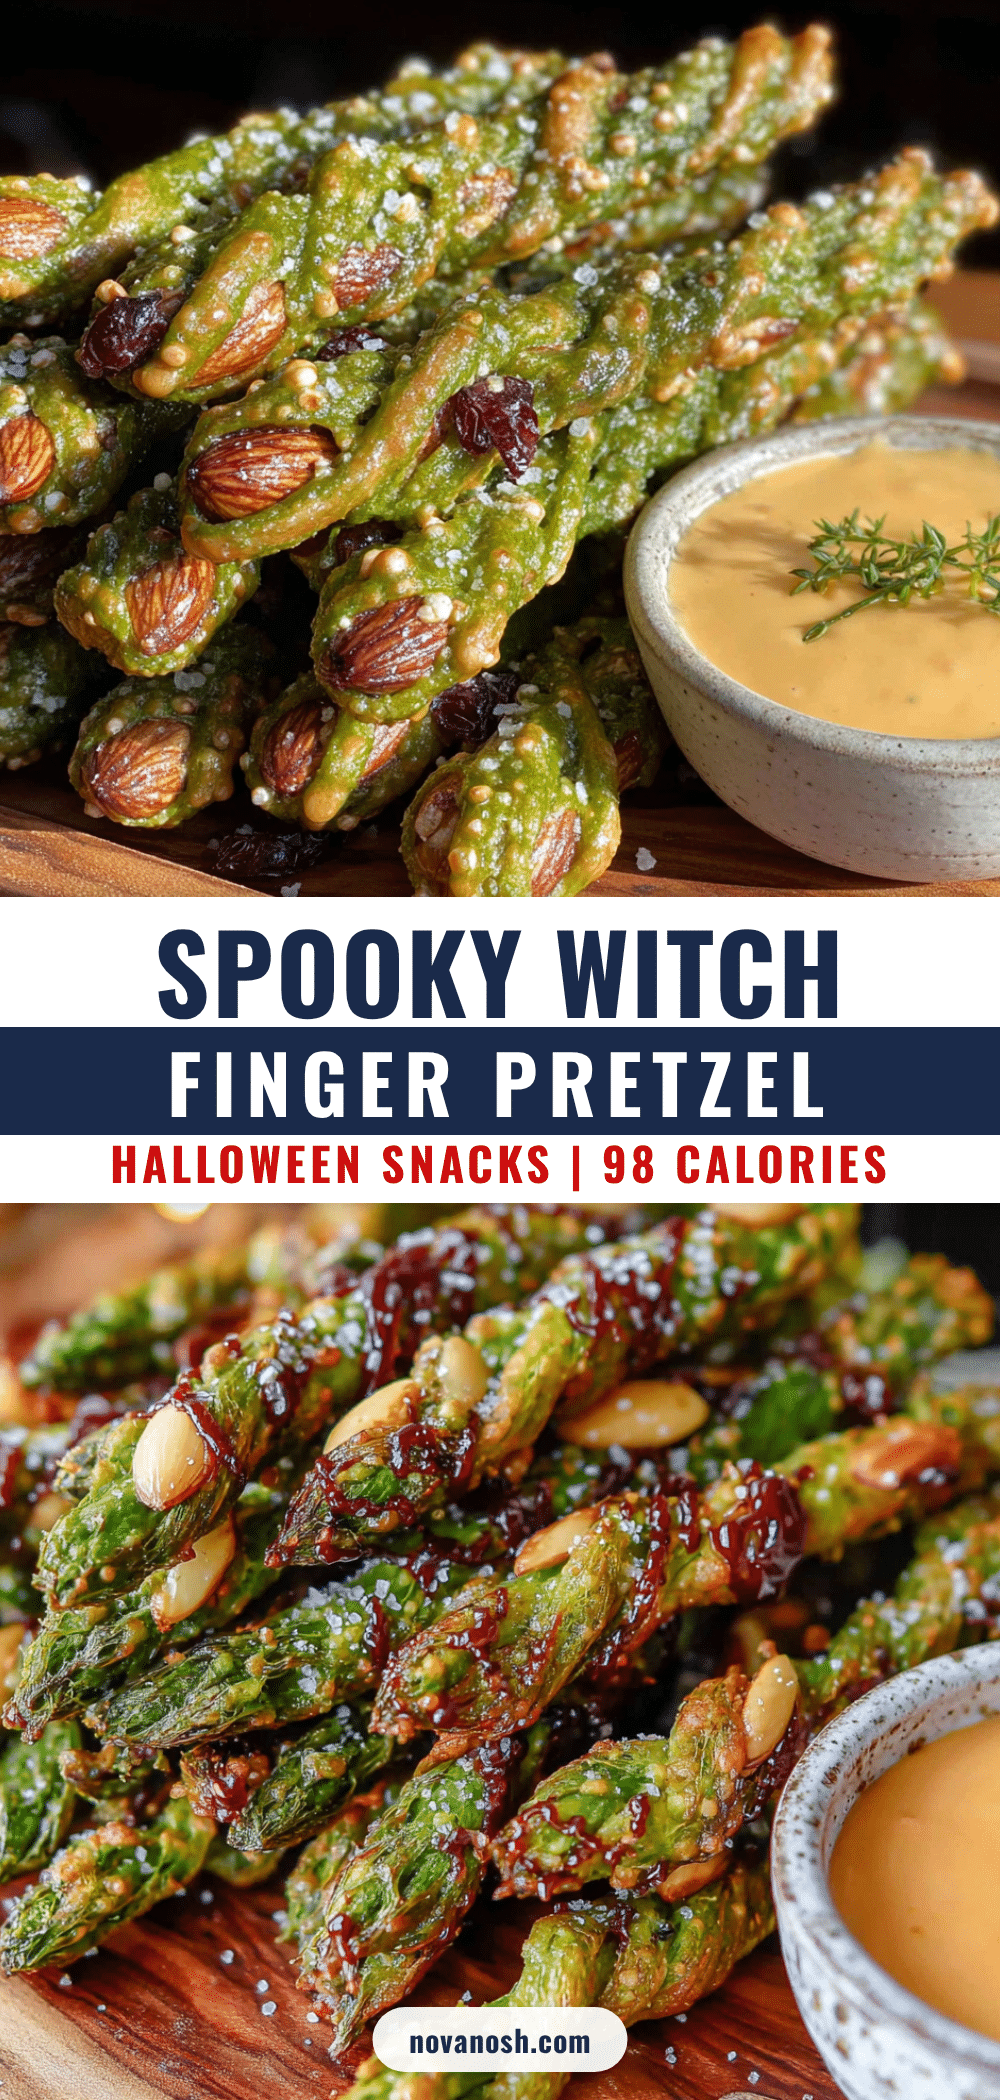
Easy Witch Finger Pretzels for Halloween Snacks

These spooky witch finger pretzels are a fun and easy Halloween snack made with pretzel rods, green candy melts, and sliced almonds for fingernails. Perfect for parties, they come together in about 25 minutes and are sure to delight kids and adults alike.
- Prep Time: 15 minutes
- Cook Time: 10 minutes
- Total Time: 25 minutes
- Yield: 24 servings 1x
- Category: Snack
- Cuisine: American
Ingredients
- 1 bag (12 ounces) pretzel rods
- 1 bag (12 ounces) green candy melts
- 1/2 cup sliced almonds (raw, unsalted)
- Green gel food coloring (optional)
- Red gel icing or red decorating gel (optional)
- 2 tablespoons red candy melts or red melting wafers (optional)
- 1 teaspoon coconut oil (optional)
Instructions
- Prep your workstation: Line a large baking sheet with parchment paper or a silicone mat. Arrange pretzel rods in a single layer with about an inch of space between each.
- Melt the green candy melts: Place in a microwave-safe bowl and microwave in 30-second intervals at 50% power, stirring after each, until smooth (about 2-2.5 minutes). If too thick, add 1 teaspoon coconut oil or vegetable shortening.
- Coat the pretzel rods: Dip each pretzel rod into the melted green coating, leaving about an inch at the bottom uncoated. Use an offset spatula or butter knife to spread evenly. Let excess drip off, then place on the prepared baking sheet.
- Add the fingernail: While coating is still wet, use tweezers to press a sliced almond onto the tip of the pretzel, pointed end outward, overlapping by about 1/4 inch. Press lightly to adhere.
- Create knuckle wrinkles: Use a toothpick or the tip of a spatula to gently drag 2-3 lines across the coated pretzel to form knuckle wrinkles. Do not press too hard.
- Chill to set: Place the baking sheet in the refrigerator for 10-15 minutes, or until the coating is firm. For a quicker set, freeze for 5 minutes but watch carefully to avoid cracking.
- Add the ‘blood’ detail (optional): Melt red candy melts in a microwave-safe bowl in 20-second intervals at 50% power. Transfer to a small piping bag or zip-top bag with a tiny corner snipped off. Pipe a small dab of red at the base of each almond ‘fingernail’ and optionally a thin line down the side of the pretzel. Let set at room temperature for 5 minutes or refrigerate for 2-3 minutes.
- Final touch (optional): Add tiny dots of red gel icing along the knuckle lines for extra gruesome effect.
Notes
Work quickly when adding almonds as the coating sets fast. For best results, chill the pretzels immediately after adding almonds. The red ‘blood’ detail is optional but adds to the creepy effect. Store in an airtight container at room temperature for up to 5 days. For a nut-free version, use dried banana chips or candy corn instead of almonds.
Nutrition
- Serving Size: 1 witch finger pretz
- Calories: 130
- Sugar: 11
- Sodium: 225
- Fat: 7
- Saturated Fat: 4.5
- Carbohydrates: 16
- Fiber: 1
- Protein: 2.5
Keywords: Halloween, pretzels, witch fingers, spooky snacks, easy Halloween treats, candy melts, party snacks