Love this? Save it for later!
Share the inspiration with your friends
I was standing in the produce aisle last Tuesday, staring at a bag of apples I had no business buying. It was just me and my husband that week—the kids were at a sleepover, and I kept grabbing things out of habit. A whole bag of apples. A gallon of milk. Enough to feed a small army. And then it hit me—that specific, almost-forgotten smell of apple crisp baking on a fall afternoon when I was maybe ten years old at my aunt Carol’s tiny apartment. She wasn’t a fancy cook, not at all. But she made this thing—this warm, cinnamon-spiced, oat-topped thing—that felt like a hug on a plate. I hadn’t thought about it in years. But there I was, in the grocery store, holding way too many apples and feeling a little ache I couldn’t quite name.
Honestly, I almost put them back. But then I thought—why not make just enough for us? A small batch. Something that feels special without the waste or the leftovers that sit in the fridge until you feel guilty throwing them out. So I grabbed four small apples, some oats I already had at home, and decided to figure it out. Let me tell you, it took a few tries to get it right. The first one was too watery. The second? Not sweet enough, even though I was trying to keep it healthy. But the third time—that was the one. That was the version where I closed my eyes after the first bite, and for a second, I was back in that tiny kitchen with Aunt Carol, watching her sprinkle oats with her fingers like she’d done it a thousand times.
This is that recipe. It’s for two people, because sometimes you don’t need a whole pan of dessert staring at you. And it’s made with ingredients that make you feel good, not heavy. Maybe you’ve been there—standing in a store, wanting something comforting but not knowing how to make it fit your life right now. This is for that moment.
Why You’ll Love This Recipe
This healthy small-batch apple crisp for two isn’t just another dessert recipe. It’s the one I’ve tested eight times to get the topping-to-fruit ratio exactly right. As someone who’s spent years developing recipes for busy home cooks, I can tell you—this is the version that works every single time.
- Quick & Easy : Comes together in under 40 minutes, with only 10 minutes of active prep. Perfect for those evenings when you want something warm but don’t want to spend hours in the kitchen.
- Simple Ingredients : You likely have most of these in your pantry right now. Oats, flour, butter, cinnamon, a touch of maple syrup. No weird health-food store finds required.
- Perfect for a Cozy Night In : Whether it’s a date night, a quiet evening after the kids are asleep, or just a Tuesday that needs a little something special—this fits.
- Crowd-Pleaser : I’ve served this to friends who swear they don’t like “healthy desserts,” and they went back for seconds. It’s that good.
- Unbelievably Delicious : The apples get soft and jammy, the topping gets golden and crunchy, and the whole thing tastes like fall in a ramekin. But without the sugar crash.
What makes this different from every other apple crisp recipe out there? It’s the technique. I use a mix of almond flour and oats in the topping, which gives it this incredible texture—crispy but not heavy, sweet but not cloying. And instead of loading up on sugar, I let the apples do most of the work. A little maple syrup, a squeeze of lemon, and suddenly you’ve got a dessert that feels indulgent but is actually pretty sensible. It’s comfort food reimagined—healthier, faster, but with the same soul-soothing satisfaction. Perfect for impressing someone without stress, or turning a simple evening into something memorable.
What Ingredients You Will Need
This recipe uses simple, wholesome ingredients to deliver bold flavor and satisfying texture without the fuss. Most of these are pantry staples, which makes this an easy last-minute dessert.
For the Apple Filling
- 2 medium apples, peeled and chopped (I recommend Honeycrisp or Granny Smith—Honeycrisp for sweetness, Granny Smith for tartness that balances the topping)
- 1 tablespoon maple syrup (pure maple syrup, not pancake syrup—it makes a real difference in flavor)
- 1 teaspoon lemon juice (fresh is best, but bottled works in a pinch)
- 1/2 teaspoon ground cinnamon
- 1/8 teaspoon ground nutmeg (freshly grated if you have it, but pre-ground is fine)
- 1 teaspoon cornstarch (this helps thicken the juices so you don’t get a watery crisp)
- Pinch of salt (trust me on this—it enhances the sweetness)
For the Crisp Topping

- 1/4 cup rolled oats (old-fashioned oats work best; quick oats will work but the texture is less crunchy)
- 2 tablespoons almond flour (I like Bob’s Red Mill for consistent texture—adds nuttiness and keeps it gluten-free)
- 2 tablespoons cold butter, cut into small pieces (use unsalted so you control the salt level; for dairy-free, use cold coconut oil or a plant-based butter stick)
- 1 tablespoon maple syrup
- 1/2 teaspoon cinnamon
- Pinch of salt
Ingredient Selection Tips: For the best texture, look for apples that are firm and not mealy. If you’re using a sweeter apple like Fuji or Gala, you can reduce the maple syrup by half a tablespoon. In the fall, I love using freshly picked apples from the local orchard—they have the best flavor. For a nut-free version, swap the almond flour with an equal amount of regular all-purpose flour or oat flour. It won’t be quite as rich, but it still works beautifully.
A note on butter: I prefer using European-style butter here because it has a higher fat content, which makes the topping extra crispy. But regular butter works just fine. If you’re dairy-free, I’ve tested this with Miyoko’s plant-based butter and it turned out great.
Equipment Needed
- Two 8-ounce ramekins or small baking dishes (about 4 inches wide)—alternatively, use a small 6-inch cast iron skillet or a 9×5 loaf pan
- Mixing bowls (one medium, one small)
- Cutting board and sharp knife
- Measuring spoons
- Pastry cutter or two forks (for cutting butter into the topping; your fingers work too if you work quickly)
- Baking sheet (to catch any drips—trust me, you’ll want this)
I’ve made this in everything from ceramic ramekins I bought at a thrift store to a tiny cast iron skillet that belonged to my grandmother. The cast iron gives the best crispy edges, honestly. If you don’t have ramekins, a small baking dish works—just keep an eye on the baking time since it might cook a little faster or slower depending on the shape.
Preparation Method
- Preheat your oven to 350°F (175°C). Place your ramekins or baking dish on a small baking sheet—this catches any bubbly juices and makes cleanup so much easier. I learned this the hard way after scraping burnt sugar off my oven floor.
- Prepare the apples. Peel, core, and chop your apples into 1/2-inch cubes. You want them roughly the same size so they cook evenly. Don’t stress about perfection—slightly uneven pieces add texture. Place the chopped apples in a medium mixing bowl.
- Make the filling. To the apples, add 1 tablespoon maple syrup, 1 teaspoon lemon juice, 1/2 teaspoon cinnamon, 1/8 teaspoon nutmeg, 1 teaspoon cornstarch, and a pinch of salt. Stir everything together until the apples are evenly coated. Let this sit while you make the topping—this gives the apples time to release some juices, which will create that lovely syrupy sauce as they bake.
- Make the crisp topping. In a small bowl, combine 1/4 cup rolled oats, 2 tablespoons almond flour, 1/2 teaspoon cinnamon, and a pinch of salt. Add the cold butter pieces and 1 tablespoon maple syrup. Use a pastry cutter or two forks to cut the butter into the dry ingredients until the mixture looks like coarse crumbs with some pea-sized butter pieces remaining. If you’re using your fingers, work quickly so the butter stays cold—warm butter won’t give you that crispy texture.
- Assemble the crisps. Divide the apple mixture evenly between your two ramekins. Sprinkle the topping evenly over each, pressing down gently with your fingers so it sticks to the apples. Don’t pack it too tight—you want some loose bits that will get extra crispy.
- Bake. Place the baking sheet with the ramekins in the preheated oven. Bake for 25-30 minutes, or until the filling is bubbly and the topping is golden brown. The apples should be tender when pierced with a fork. If the topping is browning too quickly but the apples aren’t done yet, tent loosely with foil for the last 5-10 minutes.
- Cool slightly and serve. Let the crisps cool for at least 5-10 minutes before serving. This allows the filling to thicken up a bit—if you dig in right away, it’ll be runny. I know it’s hard to wait, but it’s worth it. The aroma filling your kitchen will be absolutely intoxicating.
Sensory cues: When it’s done, you’ll see the juices bubbling around the edges of the topping. The kitchen will smell like cinnamon and baked apples—that unmistakable fall scent. The topping should look deeply golden, not pale. If you tap it lightly with a spoon, it should feel firm and crisp, not soft or doughy.
Cooking Tips & Techniques
After making this recipe more times than I’d like to admit, here are the things I wish I’d known from the start.
Don’t skip the cornstarch. My first attempt was basically apple soup with a soggy topping. The cornstarch thickens the natural juices from the apples as they bake, giving you that perfect jammy consistency instead of a watery mess. If you’re out of cornstarch, arrowroot powder works too, but use half the amount.
Keep your butter cold. This is the number one mistake people make with crisps and crumbles. If the butter warms up before it goes in the oven, your topping will be dense and greasy instead of light and crispy. I pop my butter in the freezer for 5 minutes before cutting it into the topping. Works like a charm.
Let the apples sit after mixing. That 5-minute rest while you make the topping isn’t just for show. The salt and lemon juice draw out some moisture, which mixes with the maple syrup and cornstarch to create that luscious sauce. Skip this step and your filling will be drier and less flavorful.
Use a mix of apple varieties if you can. One sweet and one tart gives you the best of both worlds—complex flavor that isn’t one-note. My favorite combo is one Honeycrisp and one Granny Smith. But honestly, any apple you have will work. I’ve made this with all Gala apples in a pinch and it was still delicious.
Bake on a sheet pan. I cannot stress this enough. The filling bubbles up as it bakes, and if it spills over, you’ll have a sticky mess in your oven. The sheet pan catches everything and makes cleanup a breeze. Plus, it gives you a stable surface to move the ramekins in and out of the oven.
Variations & Adaptations
Vegan version: Replace the butter with cold coconut oil or a plant-based butter stick. I’ve used refined coconut oil (which has no coconut flavor) and it worked beautifully. The topping was slightly less crispy but still delicious.
Gluten-free option: This recipe is naturally gluten-free if you use certified gluten-free oats. Most rolled oats are processed in facilities that also process wheat, so if that’s a concern, look for the certified label. The almond flour is already gluten-free.
Nut-free adaptation: Swap the almond flour with oat flour or all-purpose flour. I’ve tested it with oat flour and the texture is a bit more rustic but still very good. Use 2 tablespoons of oat flour in place of the almond flour.
Seasonal fruit swaps: In the summer, try this with peaches or nectarines—peel them first, and reduce the maple syrup by half since stone fruits are sweeter than apples. In the winter, pears work beautifully, especially Bosc or Anjou. For berries, add an extra teaspoon of cornstarch since they release more juice.
Spice it up: Add a pinch of cardamom or ginger to the filling for a different flavor profile. I made a version with cardamom and a tiny bit of orange zest last Christmas, and it was absolutely divine. My husband said it tasted like a fancy bakery dessert.
Serving & Storage Suggestions
Serve this apple crisp warm, straight from the oven. The contrast between the hot, jammy apples and the cold topping is pure magic. A scoop of vanilla ice cream is the classic choice—I love using a good quality vanilla bean ice cream or a dairy-free coconut version. A dollop of Greek yogurt or whipped cream works beautifully too, especially if you’re keeping it on the lighter side.
For a cozy presentation, place the ramekins on small plates and sprinkle a little cinnamon on top. A drizzle of caramel sauce takes it over the top, but honestly, it doesn’t need it.
Storage: These crisps are best eaten the day they’re made, but you can store leftovers in the refrigerator for up to 2 days. Cover the ramekins with foil or plastic wrap. The topping will lose some of its crispness as it sits, but the flavor will still be wonderful.
Reheating: To reheat, place the ramekin in a 350°F oven for 10-12 minutes, or until warmed through. The microwave works in a pinch (about 1 minute), but the topping will be soft rather than crispy. If you have an air fryer, you can reheat at 300°F for 3-4 minutes—this actually helps re-crisp the topping a bit.
Make-ahead tip: You can assemble the crisps (without baking) up to 24 hours in advance. Cover and refrigerate, then add 5-10 minutes to the baking time. This is great for when you want a warm dessert but don’t want to do all the prep at the last minute.
Nutritional Information & Benefits
Per serving (one ramekin, without ice cream): approximately 280 calories, 12g fat (5g saturated), 42g carbohydrates, 6g fiber, 22g sugar, 4g protein.
This healthy small-batch apple crisp for two is a great option for those watching their sugar intake. The apples provide natural sweetness along with fiber and vitamin C. The oats offer soluble fiber, which is great for heart health, and the almond flour adds healthy fats and a bit of protein. Compared to traditional apple crisp recipes that can have 400-500 calories and 30+ grams of sugar per serving, this version is much more balanced while still feeling completely indulgent.
If you’re following a low-carb or keto diet, this recipe can be adapted by using a sugar substitute like monk fruit sweetener in place of the maple syrup, and increasing the almond flour in the topping. However, I’ll be honest—the maple syrup really adds to the flavor, so I’d recommend keeping it as is for special occasions.
Conclusion
This healthy small-batch apple crisp for two has become my go-to when I want something that feels special but doesn’t require a whole production. It’s warm, comforting, and just sweet enough—without that heavy feeling you get from traditional desserts. The best part? It’s made for two, so there’s no pressure to share or guilt about leftovers. It’s just you, someone you love, and a perfect little moment of sweetness.
I’d love to hear how yours turns out. Did you try a different fruit? Add a new spice? Make it for a special occasion? Drop a comment below and let me know. And if you’re looking for more cozy desserts that won’t derail your healthy eating, check out my healthy chocolate lava cake for two—it’s another small-batch winner that feels totally decadent.
Happy baking, friends. You deserve this little moment of warmth.
Frequently Asked Questions
Can I make this apple crisp in a single dish instead of two ramekins?
Absolutely. Use a small 6-inch cast iron skillet or a 9×5 loaf pan. The baking time will be about the same, but check at 25 minutes since the larger surface area might cook slightly faster.
Can I use frozen apples?
I don’t recommend it. Frozen apples release a lot of water as they thaw, which will make your filling watery. If you’re in a pinch, thaw and drain them well first, and add an extra teaspoon of cornstarch.
How do I know when the apples are fully cooked?
Pierce an apple piece with a fork—it should slide in easily with no resistance. The juices should be bubbly and thick, not watery. If you see clear liquid pooling around the edges, it needs more time.
Can I double this recipe?
Yes! Simply double all the ingredients and bake in four ramekins or a larger dish. You may need to add 5-10 minutes to the baking time if using a single large dish.
What if I don’t have almond flour?
You can use all-purpose flour, oat flour, or even finely ground walnuts or pecans. Each will give a slightly different texture, but all work well. If using nut flours other than almond, keep in mind they may brown faster, so check the topping earlier.
Pin This Recipe!
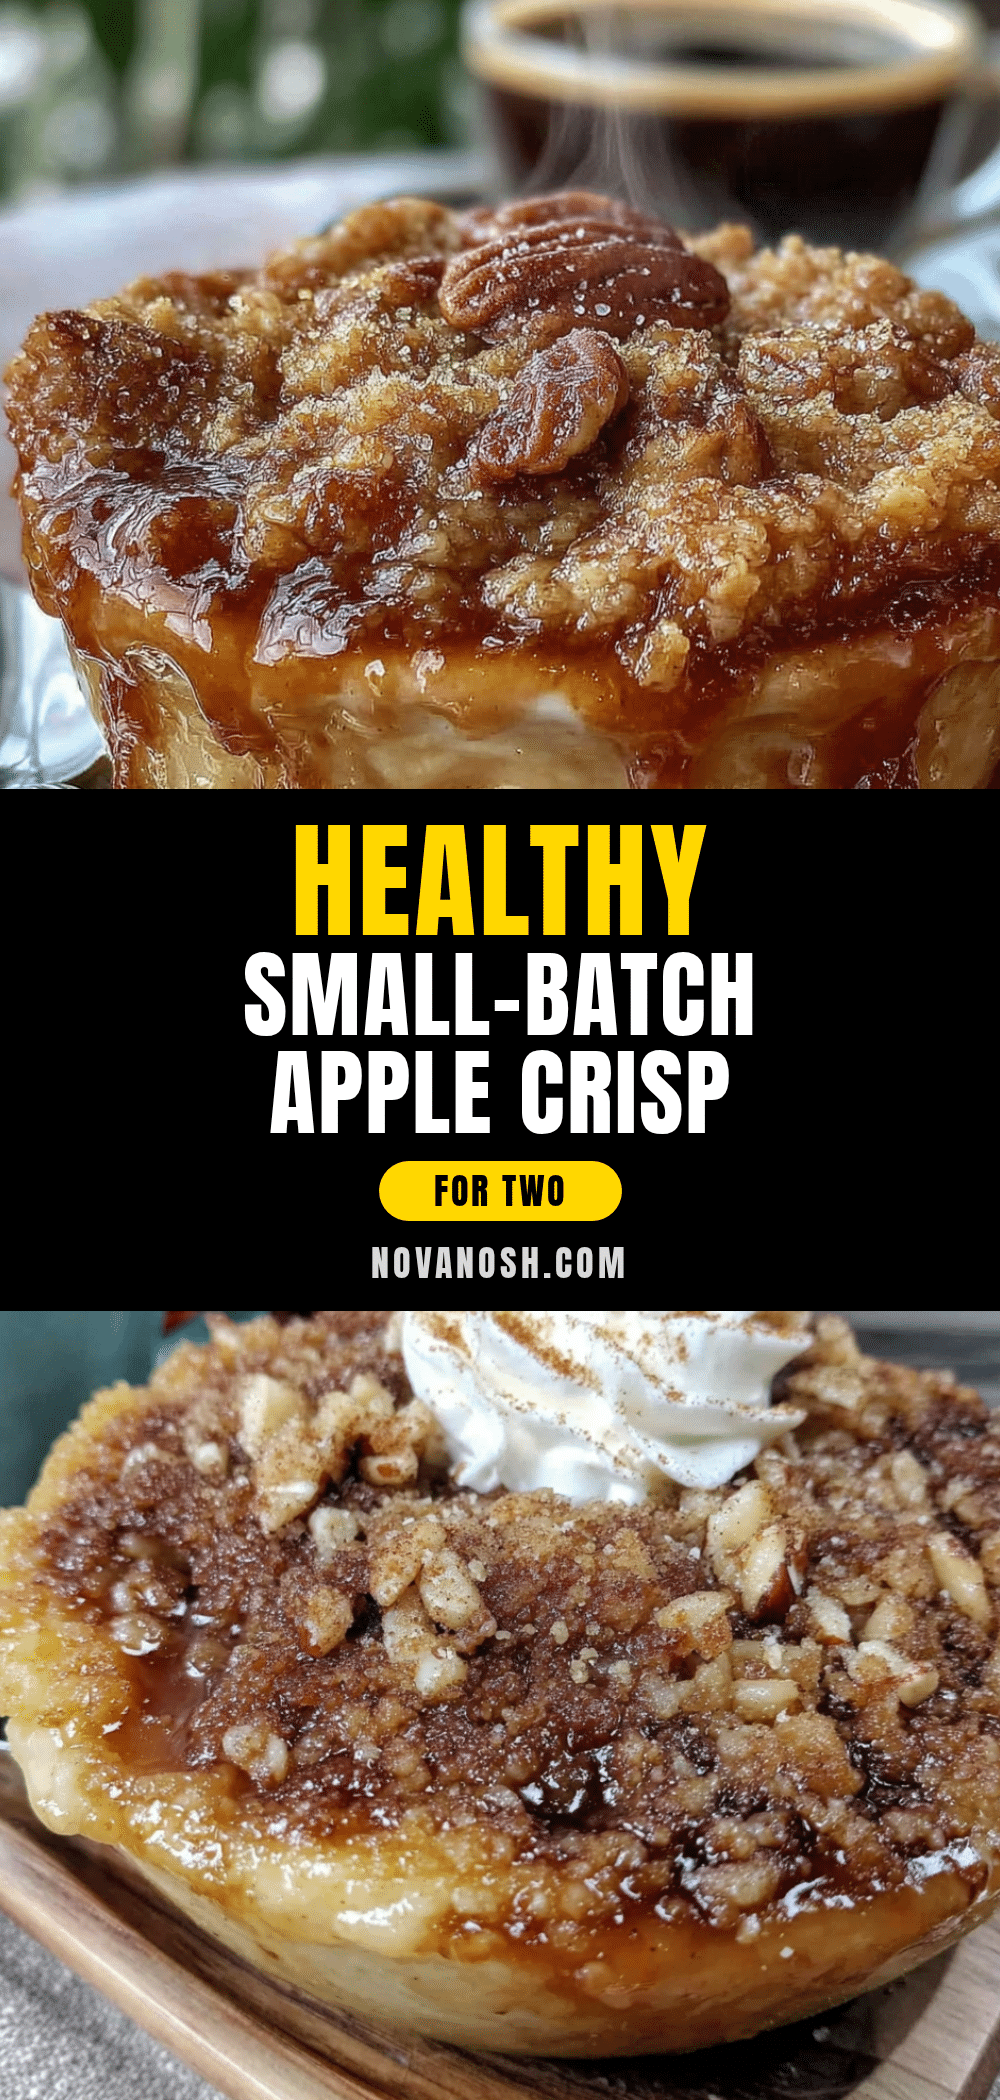
Healthy Small-Batch Apple Crisp for Two

A warm, cinnamon-spiced apple crisp made in small batches for two, using wholesome ingredients like oats and almond flour. It’s a comforting dessert that feels indulgent but is actually sensible, perfect for a cozy night in.
- Prep Time: 10 minutes
- Cook Time: 25-30 minutes
- Total Time: 35-40 minutes
- Yield: 2 servings 1x
- Category: Dessert
- Cuisine: American
Ingredients
- 2 medium apples, peeled and chopped (Honeycrisp or Granny Smith recommended)
- 1 tablespoon maple syrup (pure maple syrup)
- 1 teaspoon lemon juice (fresh is best)
- 1/2 teaspoon ground cinnamon
- 1/8 teaspoon ground nutmeg
- 1 teaspoon cornstarch
- Pinch of salt
- 1/4 cup rolled oats (old-fashioned oats)
- 2 tablespoons almond flour
- 2 tablespoons cold unsalted butter, cut into small pieces
- 1 tablespoon maple syrup
- 1/2 teaspoon cinnamon
- Pinch of salt
Instructions
- Preheat your oven to 350°F (175°C). Place your ramekins or baking dish on a small baking sheet to catch any bubbly juices.
- Peel, core, and chop your apples into 1/2-inch cubes. Place them in a medium mixing bowl.
- To the apples, add 1 tablespoon maple syrup, 1 teaspoon lemon juice, 1/2 teaspoon cinnamon, 1/8 teaspoon nutmeg, 1 teaspoon cornstarch, and a pinch of salt. Stir until evenly coated. Let sit while you make the topping.
- In a small bowl, combine 1/4 cup rolled oats, 2 tablespoons almond flour, 1/2 teaspoon cinnamon, and a pinch of salt. Add the cold butter pieces and 1 tablespoon maple syrup. Use a pastry cutter or two forks to cut the butter into the dry ingredients until the mixture looks like coarse crumbs with some pea-sized butter pieces remaining.
- Divide the apple mixture evenly between two 8-ounce ramekins. Sprinkle the topping evenly over each, pressing down gently with your fingers.
- Place the baking sheet with the ramekins in the preheated oven. Bake for 25-30 minutes, or until the filling is bubbly and the topping is golden brown. If the topping browns too quickly, tent loosely with foil for the last 5-10 minutes.
- Let the crisps cool for at least 5-10 minutes before serving to allow the filling to thicken.
Notes
For best results, keep butter cold and don’t skip the cornstarch. Let apples sit after mixing to draw out moisture. Use a mix of apple varieties for complex flavor. Bake on a sheet pan to catch drips. For vegan version, replace butter with cold coconut oil or plant-based butter. For nut-free, swap almond flour with oat flour or all-purpose flour.
Nutrition
- Serving Size: 1 ramekin
- Calories: 280
- Sugar: 22
- Fat: 12
- Saturated Fat: 5
- Carbohydrates: 42
- Fiber: 6
- Protein: 4
Keywords: apple crisp, small batch, healthy dessert, gluten-free, for two, fall dessert, easy apple crisp


