Love this? Save it for later!
Share the inspiration with your friends
The summer I turned thirty, I was helping out at a local community fundraiser when the quietest person there—a retired taxi driver named Sam—started chatting about the most unexpected thing: the perfect red velvet flag cake. Honestly, I wasn’t expecting baking tips from someone who spent his days navigating city streets, but there I was, wiping flour off my hands and listening intently as he described how to layer that rich red cake with creamy frosting so it looked like a flag. It wasn’t just the recipe that caught me off guard; it was the story behind it—how Sam’s grandmother used to make it every Fourth of July, crafting a dessert that brought neighbors together in the heat of summer.
Between the hum of the fundraiser and the clatter of plates, Sam pulled a crumpled napkin from his pocket and sketched out the layers, insisting the secret was in the cream cheese frosting—simple, tangy, and whipped just right. I admit I forgot to jot down the exact measurements at first, distracted by the smell of fresh strawberries nearby, but the recipe stuck with me. You know that feeling when a dish isn’t just tasty, but feels like a warm handshake from the past? That’s exactly what this red velvet flag cake does. It’s not fancy, but it’s the kind of dessert you want to make again and again, whether it’s Independence Day or just a weekend with friends.
Maybe you’ve been there—caught off guard by a recipe that sounds too good to be true, only to find it’s surprisingly easy and ridiculously satisfying. Well, this red velvet flag cake with cream cheese frosting is exactly that kind of recipe. I keep making it because it’s fun, festive, and honestly, it tastes like summer wrapped up in every bite.
Why You’ll Love This Recipe
After countless trials and a few frosting mishaps, this perfect red velvet flag cake recipe has become my go-to for celebrations or casual get-togethers. It’s got that nostalgic charm with a fresh twist that makes it stand out. Here’s why you’ll want this recipe in your kitchen arsenal:
- Quick & Easy: Comes together in under 90 minutes, perfect for last-minute plans or a spontaneous baking urge.
- Simple Ingredients: Uses pantry staples and accessible ingredients, so no emergency grocery runs required.
- Perfect for Patriotic Holidays: Ideal for Fourth of July, Memorial Day, or any festive occasion where a statement dessert is needed.
- Crowd-Pleaser: The rich red velvet flavor combined with tangy cream cheese frosting always gets rave reviews from kids and adults alike.
- Unbelievably Delicious: The moist crumb and silky frosting create a texture contrast that feels indulgent but never heavy.
This isn’t just another red velvet cake. The layering technique that forms a flag pattern and the perfectly balanced cream cheese frosting make this recipe truly special. It’s the kind of cake that makes you close your eyes after the first bite, savoring the familiar flavors with a little extra cheer. Plus, it’s straightforward enough to make even if you’re not a seasoned baker, but trust me, you’ll look like one when you serve it!
What Ingredients You Will Need
This recipe uses simple, wholesome ingredients to deliver bold flavor and a satisfying texture without the fuss. Most are pantry staples, but a few fresh touches make all the difference.
- For the Cake Batter:
- All-purpose flour – 2 ½ cups (312 g), sifted for a light crumb
- Granulated sugar – 2 cups (400 g), for sweetness and moisture
- Cocoa powder – 2 tablespoons (unsweetened, for subtle chocolate flavor)
- Baking soda – 1 teaspoon (helps the cake rise)
- Salt – ½ teaspoon (balances the sweetness)
- Buttermilk – 1 cup (240 ml), room temperature (adds tang and tenderness)
- Vegetable oil – 1 cup (240 ml), for moistness (I prefer a neutral oil like canola)
- Large eggs – 2, room temperature (helps with structure)
- Red food coloring – 2 tablespoons (liquid or gel works, I recommend gel for vibrant color)
- Vanilla extract – 1 teaspoon (pure vanilla for best flavor)
- White vinegar – 1 teaspoon (reacts with baking soda for lift and tang)
- For the Cream Cheese Frosting:
- Cream cheese – 16 ounces (450 g), softened (I recommend Philadelphia brand for smoothness)
- Unsalted butter – ½ cup (115 g), softened (adds richness)
- Powdered sugar – 4 cups (480 g), sifted to avoid lumps
- Vanilla extract – 1 teaspoon (for depth of flavor)
- Pinch of salt (balances sweetness)
- For Decoration:
- Fresh strawberries – sliced for stripes or garnishing
- Blueberries – for the flag’s blue section
If you want a dairy-free option, swapping cream cheese and butter for vegan alternatives works well, though the texture shifts slightly. For gluten-free, use a 1:1 baking flour substitute, but be mindful that the crumb might be denser. In summer, fresh berries are perfect, but frozen can be thawed if needed.
Equipment Needed
- Two 9-inch (23 cm) round cake pans – I have a non-stick set that makes removal easier, but you can use regular pans with parchment paper.
- Mixing bowls – medium and large sizes for combining wet and dry ingredients separately.
- Electric mixer – stand or hand-held (essential for smooth cream cheese frosting).
- Sifter or fine mesh sieve – to aerate the flour and powdered sugar.
- Rubber spatula – for folding ingredients and scraping bowls clean.
- Offset spatula – perfect for spreading frosting evenly and creating sharp edges.
- Cooling racks – to cool cakes completely before frosting.
- Knife or bench scraper – to slice the cake layers neatly for flag assembly.
If you don’t have two cake pans, you can bake in batches, but it takes longer. I once used an old springform pan in a pinch, but the layering was trickier. For frosting, an electric mixer really makes life easier—manual whisking is doable but takes more elbow grease. Keep your tools clean and dry for best results!
Preparation Method
- Prep the Pans and Oven: Preheat your oven to 350°F (175°C). Grease the two 9-inch round cake pans with butter, then dust with flour or line them with parchment paper. This step prevents sticking and ensures smooth cake release. (Approx. 10 minutes)
- Mix Dry Ingredients: In a large bowl, sift together 2 ½ cups of all-purpose flour, 2 tablespoons cocoa powder, 1 teaspoon baking soda, ½ teaspoon salt, and 2 cups granulated sugar. Whisk until well combined and aerated. (Approx. 5 minutes)
- Combine Wet Ingredients: In a separate medium bowl, whisk 1 cup buttermilk, 1 cup vegetable oil, 2 large eggs, 2 tablespoons red food coloring, 1 teaspoon vanilla extract, and 1 teaspoon white vinegar until smooth and uniform in color. (Approx. 5 minutes)
- Mix Batter: Gradually pour the wet ingredients into the dry ingredients, stirring gently with a rubber spatula until just combined. Avoid overmixing to keep the cake tender. The batter should be smooth and vibrant red. (Approx. 3 minutes)
- Bake the Cakes: Divide the batter evenly between the two prepared pans. Tap the pans gently on the counter to release air bubbles. Bake in the preheated oven for 25-30 minutes, or until a toothpick inserted in the center comes out clean. Rotate the pans halfway for even baking. (Approx. 30 minutes)
- Cool the Cakes: Remove the pans from the oven and let them cool on wire racks for 10 minutes. Run a knife around the edges, then invert cakes onto racks to cool completely before frosting. (Approx. 1 hour for full cooling)
- Prepare the Cream Cheese Frosting: In a large mixing bowl, beat 16 ounces softened cream cheese and ½ cup softened unsalted butter until smooth and creamy. Gradually add 4 cups powdered sugar and beat until fluffy. Stir in 1 teaspoon vanilla extract and a pinch of salt. (Approx. 10 minutes)
- Assemble the Flag Layers: Slice each cake horizontally into two even layers, creating four layers total. Use the cream cheese frosting to spread evenly between layers. Arrange the layers to create the flag pattern—white frosting stripes, red velvet cake stripes, and decorate the top left corner with blueberries for the blue field and sliced strawberries for the red stripes. (Approx. 20 minutes)
- Final Frosting: Use an offset spatula to frost the entire cake smoothly. Chill the cake for 30 minutes before serving to firm up the frosting and help the design hold. (Approx. 30 minutes)
If you notice the frosting is too soft, pop it in the fridge for a few minutes and then continue. The red velvet cake should be moist but firm enough to hold its shape when sliced—don’t skip the cooling step or it might crumble. Personal tip: I like to keep my frosting at room temperature briefly before spreading to avoid tearing the cake layers.
Cooking Tips & Techniques
Getting the perfect red velvet flag cake isn’t rocket science, but a few tricks from my experience can make a big difference:
- Don’t skimp on sifting: Sifting the flour and powdered sugar prevents lumps and gives your cake and frosting a light texture.
- Use room temperature ingredients: Eggs, buttermilk, cream cheese, and butter all mix better when they’re not cold.
- Gel food coloring is your friend: It delivers vibrant color without watering down the batter, unlike liquid food coloring.
- Timing matters: Bake cakes right after mixing the batter because the baking soda and vinegar reaction starts immediately.
- Frosting consistency: If your cream cheese frosting feels too runny, add a little more powdered sugar, but don’t go overboard or it gets too sweet.
- Layer cooling: Make sure the cakes are completely cool before frosting or you risk melting the cream cheese.
- Flag assembly: Use a sharp serrated knife to slice the layers neatly. I learned this the hard way after a crumbly disaster!
One time, I left the frosting out too long, and it got too soft to hold the flag pattern. Lesson learned: keep the cake chilled during assembly for cleaner lines. Also, multitasking works well here—start the frosting while the cake cools to save time.
Variations & Adaptations
This red velvet flag cake is flexible, so you can tweak it to match your dietary needs or flavor preferences:
- Gluten-Free Version: Substitute the all-purpose flour with a high-quality gluten-free blend. Keep in mind the texture will be a bit denser but still delicious.
- Vegan Adaptation: Use dairy-free cream cheese and butter alternatives, swap eggs for flaxseed “eggs” (1 tablespoon flaxseed meal + 3 tablespoons water per egg), and a plant-based milk for buttermilk substitution.
- Flavor Twist: Add a teaspoon of espresso powder to the batter to deepen the chocolate notes, or swirl in raspberry puree for a fruity surprise.
- Different Food Coloring: If you want to avoid artificial colors, use beet juice or natural red powders, but the red won’t be as vivid.
- Presentation Change: Instead of a flag, frost the cake with piped rosettes or add edible glitter for a festive look.
Personally, I once tried a pumpkin-spiced red velvet version for fall and swapped strawberries with candied cranberries. It was an unexpected hit at my book club night!
Serving & Storage Suggestions
This perfect red velvet flag cake is best served at room temperature to fully enjoy the creamy frosting and tender crumb. Let it sit out for about 20-30 minutes before slicing. It pairs beautifully with a cold glass of milk or a cup of lightly brewed coffee.
For storage, cover the cake loosely with plastic wrap or place it in an airtight container and refrigerate. It keeps well for up to 4 days. If you need to freeze it, wrap the cake tightly in plastic and aluminum foil; thaw overnight in the fridge before serving. Reheat slices gently in the microwave for 10-15 seconds to bring back softness without melting the frosting.
Keep in mind, the flavors actually develop and mellow after a day, so if you can wait, the next day’s slice will taste even better. Just don’t leave it uncovered—cream cheese frosting dries out quickly.
Nutritional Information & Benefits
On average, a slice of this red velvet flag cake (1/12th of the cake) contains approximately:
| Calories | 350 kcal |
|---|---|
| Fat | 18 g |
| Carbohydrates | 42 g |
| Protein | 4 g |
The key ingredients like cream cheese and buttermilk provide calcium and some protein, while the moderate sugar content means it’s best enjoyed as an occasional treat. This recipe is naturally gluten-containing, but the substitutions mentioned can accommodate gluten-free diets. It contains dairy and eggs, so not suitable for those with allergies to those ingredients unless adapted.
From a wellness perspective, I appreciate how this cake balances indulgence with real ingredients—no artificial preservatives, and the cream cheese frosting has a tangy richness that feels more wholesome than overly sweet buttercream. It’s a joyful dessert that fits into a balanced lifestyle when enjoyed mindfully.
Conclusion
This perfect red velvet flag cake with cream cheese frosting isn’t just a dessert; it’s a slice of celebration and memory wrapped in every bite. Whether you’re marking a holiday, a birthday, or just a weekend craving, this cake brings together simple ingredients and straightforward techniques to make something truly special. I love how it’s customizable, approachable, and always impressive without stress.
Go on, try this recipe and make it your own. Maybe you’ll add a personal twist, or use it to bring friends together like Sam’s grandmother did. I’d love to hear how it turns out for you—drop a comment or share your photo. Baking is better when it’s shared, after all!
Remember: no matter your skill level, this recipe welcomes you to create a homemade masterpiece with a touch of Americana and a whole lot of heart.
FAQs
What makes red velvet cake red?
The vibrant red color in red velvet cake comes from red food coloring combined with cocoa powder. The acidity in buttermilk and vinegar also helps the color stand out.
Can I make the cake layers ahead of time?
Yes, you can bake the cake layers a day ahead. Wrap them tightly in plastic wrap and store at room temperature or refrigerate to keep them moist.
How do I prevent the cream cheese frosting from curdling?
Make sure the cream cheese and butter are at room temperature before mixing, and add powdered sugar gradually while beating to create a smooth, stable frosting.
Can I use a different shape pan for this cake?
You can use square or rectangular pans, but adjusting the flag design might be necessary. Round pans are best for the classic layered flag look.
Is there a way to make this cake less sweet?
Reduce the powdered sugar in the frosting by up to 25% or use a tangier cream cheese brand to balance sweetness without losing flavor.
Pin This Recipe!
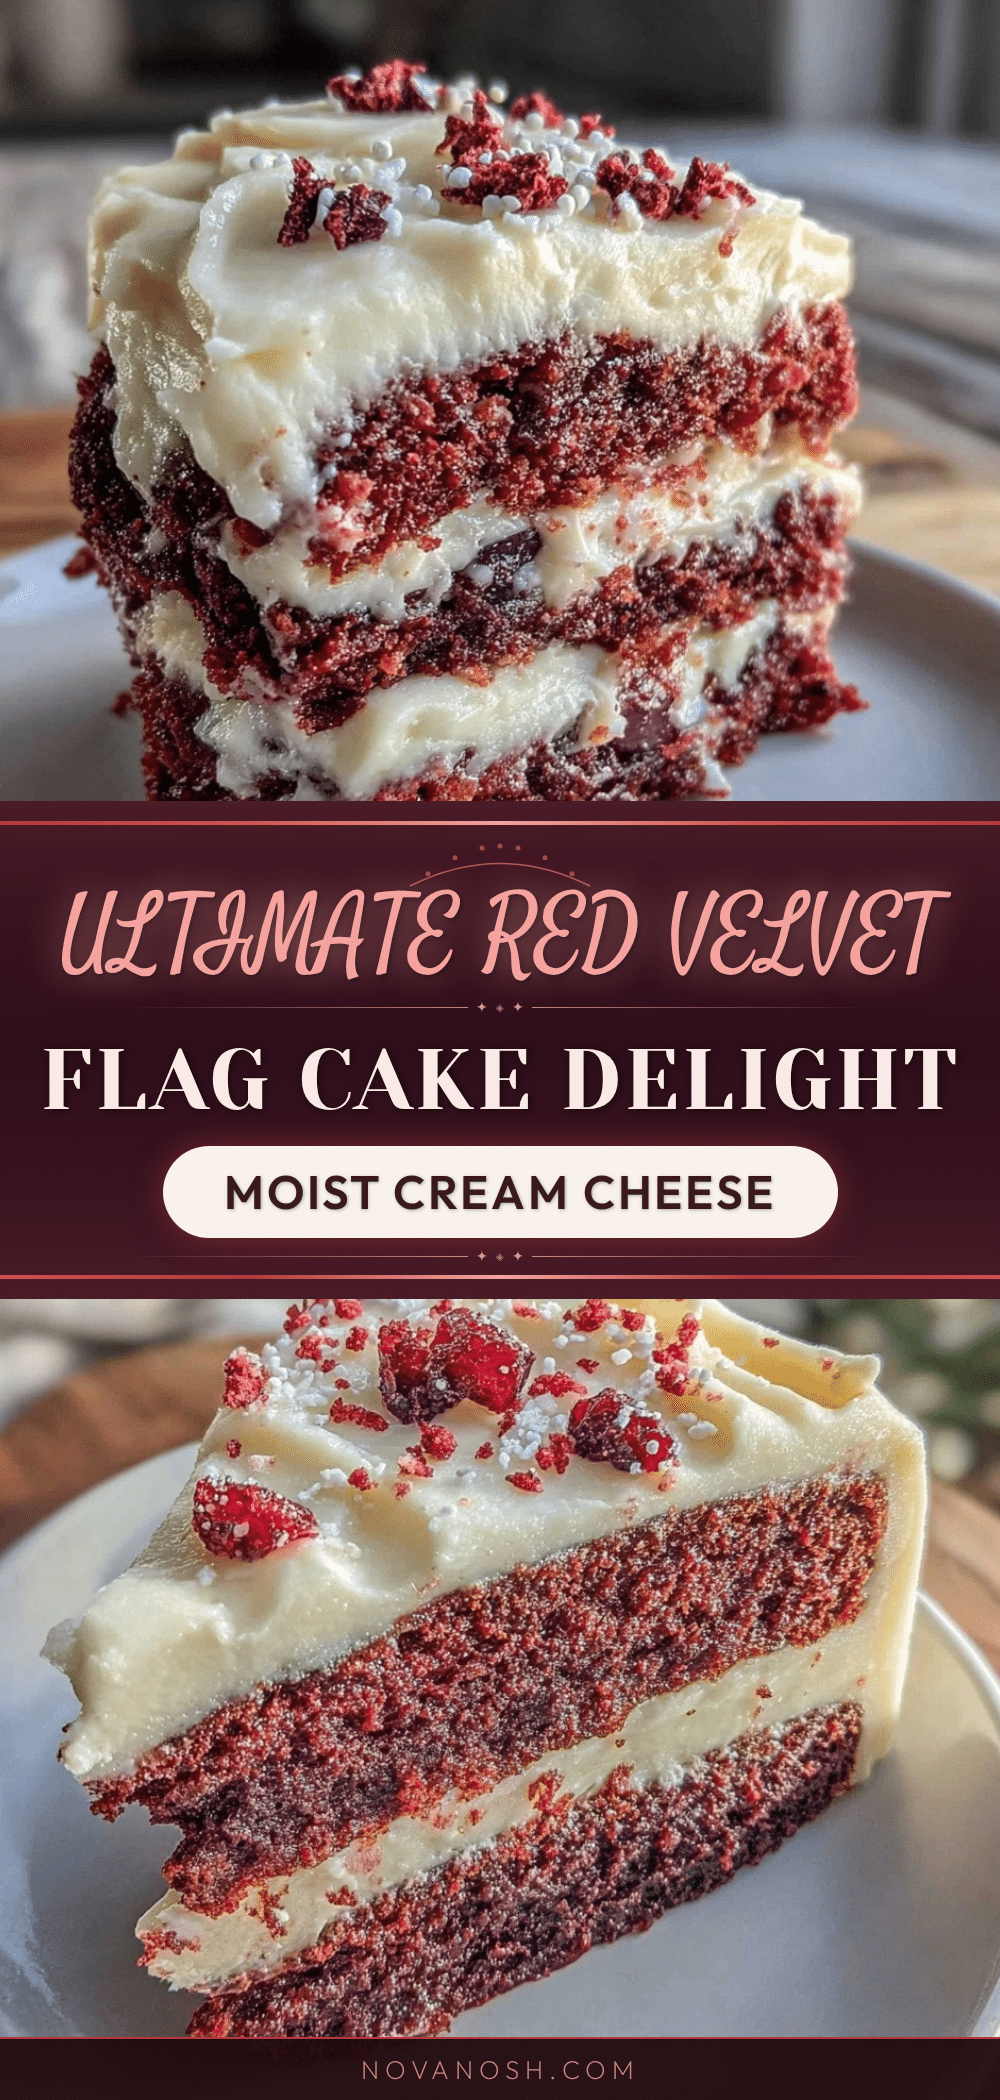
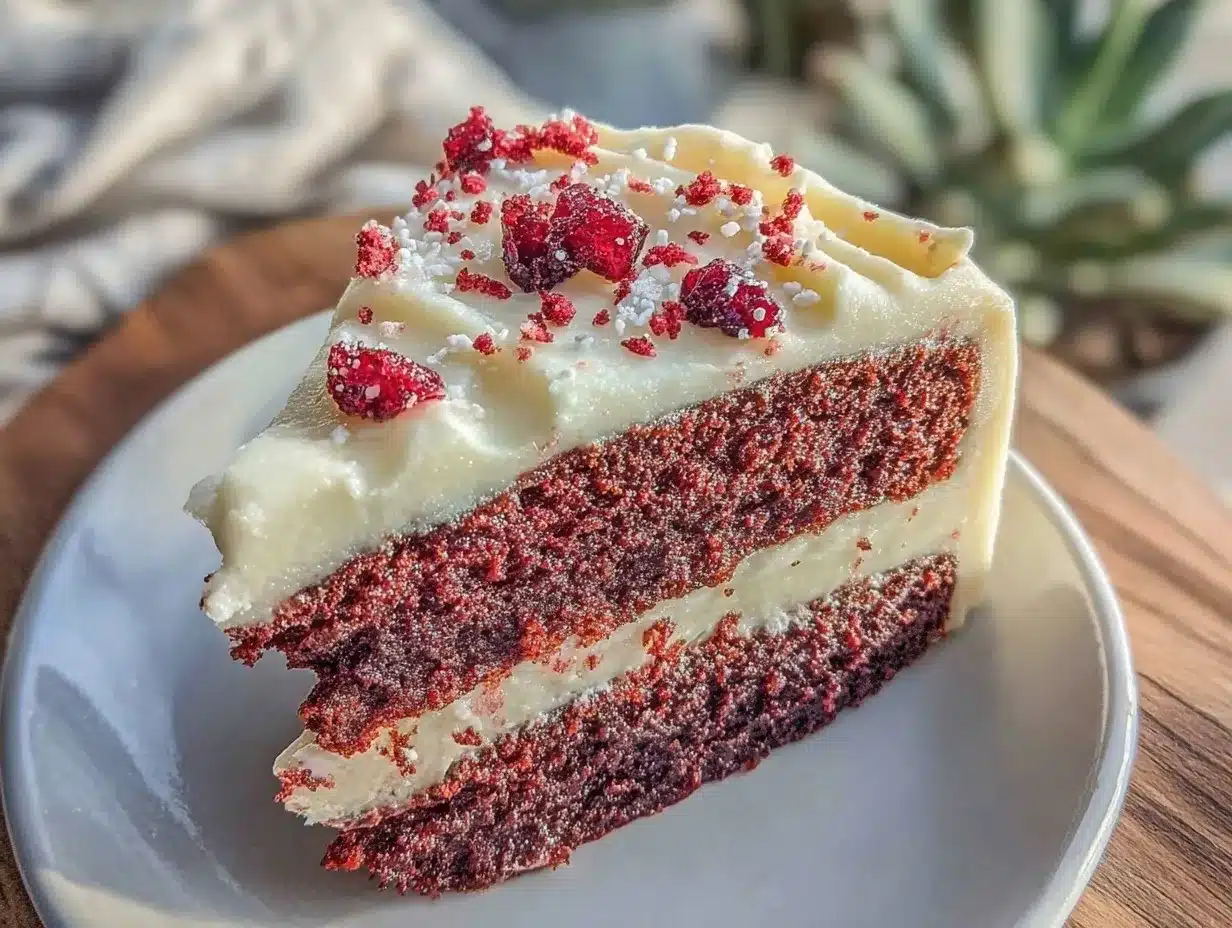
Perfect Red Velvet Flag Cake
A festive and nostalgic red velvet cake layered and decorated to resemble a flag, topped with a tangy homemade cream cheese frosting. Perfect for patriotic holidays or any celebration.
- Prep Time: 20 minutes
- Cook Time: 30 minutes
- Total Time: 1 hour 50 minutes
- Yield: 12 servings 1x
- Category: Dessert
- Cuisine: American
Ingredients
- 2 ½ cups all-purpose flour (312 g), sifted
- 2 cups granulated sugar (400 g)
- 2 tablespoons unsweetened cocoa powder
- 1 teaspoon baking soda
- ½ teaspoon salt
- 1 cup buttermilk (240 ml), room temperature
- 1 cup vegetable oil (240 ml), neutral oil like canola
- 2 large eggs, room temperature
- 2 tablespoons red food coloring (gel recommended)
- 1 teaspoon vanilla extract
- 1 teaspoon white vinegar
- 16 ounces cream cheese (450 g), softened
- ½ cup unsalted butter (115 g), softened
- 4 cups powdered sugar (480 g), sifted
- 1 teaspoon vanilla extract (for frosting)
- Pinch of salt (for frosting)
- Fresh strawberries, sliced (for decoration)
- Blueberries (for decoration)
Instructions
- Preheat oven to 350°F (175°C). Grease two 9-inch round cake pans with butter and dust with flour or line with parchment paper.
- In a large bowl, sift together flour, cocoa powder, baking soda, salt, and granulated sugar. Whisk to combine.
- In a separate medium bowl, whisk together buttermilk, vegetable oil, eggs, red food coloring, vanilla extract, and white vinegar until smooth.
- Gradually pour wet ingredients into dry ingredients, stirring gently with a rubber spatula until just combined. Avoid overmixing.
- Divide batter evenly between prepared pans. Tap pans gently to release air bubbles. Bake for 25-30 minutes or until a toothpick inserted in the center comes out clean. Rotate pans halfway through baking.
- Cool cakes in pans on wire racks for 10 minutes. Run a knife around edges, invert cakes onto racks, and cool completely (about 1 hour).
- Prepare frosting by beating cream cheese and butter until smooth. Gradually add powdered sugar and beat until fluffy. Stir in vanilla extract and salt.
- Slice each cake horizontally into two even layers, creating four layers total.
- Spread cream cheese frosting evenly between layers and assemble layers to create a flag pattern. Decorate the top left corner with blueberries and use sliced strawberries for stripes.
- Frost the entire cake smoothly with an offset spatula. Chill cake for 30 minutes before serving to firm up frosting.
Notes
Use gel food coloring for vibrant color. Ensure all ingredients are at room temperature for best mixing. Sift flour and powdered sugar to avoid lumps. Cool cakes completely before frosting to prevent melting. Chill cake after frosting to help design hold. For dairy-free or gluten-free versions, substitute ingredients accordingly.
Nutrition
- Serving Size: 1 slice (1/12th of c
- Calories: 350
- Sugar: 30
- Sodium: 300
- Fat: 18
- Saturated Fat: 7
- Carbohydrates: 42
- Fiber: 1
- Protein: 4
Keywords: red velvet cake, cream cheese frosting, flag cake, patriotic dessert, Fourth of July cake, easy red velvet, homemade frosting