Love this? Save it for later!
Share the inspiration with your friends
“You know, I never thought a dessert could steal the show at a Fourth of July picnic—until that one summer when I accidentally created this Easy No-Bake Flag Cheesecake,” my friend Jenna confessed over a cup of coffee last month. It was a bright Tuesday afternoon when she pulled out a tattered recipe card she’d found tucked inside an old cookbook she bought at a garage sale. The card was stained and a little crumbly, but the drawing of a flag-shaped cheesecake caught my eye immediately.
Jenna wasn’t much of a baker—more of a microwave meal kind of gal—but she decided to give this no-bake cheesecake a whirl, thinking it would be a simple patriotic treat. What happened next was pure magic: the cheesecake not only came together faster than expected but looked like a festive masterpiece and tasted like a creamy dream. Honestly, I was skeptical at first, but the way the fresh berries and velvety cream cheese mingled was unforgettable.
Maybe you’ve been there—needing a showstopper dessert that won’t have you sweating over a hot oven in July. This Easy No-Bake Flag Cheesecake is that sweet spot. It’s charming, straightforward, and perfect for those patriotic celebrations when you want to impress without the stress. Plus, it’s a fun way to bring a little red, white, and blue into your festivities without fuss. Let me tell you, once I made it for my own backyard bash, it became the unofficial star of the day (despite a few berry stains on my apron and a cracked mixing bowl from excitement!).
Stick with me, because I’m about to share everything you need to know to make this delightful cheesecake that’s as easy as it is eye-catching.
Why You’ll Love This Recipe
This Easy No-Bake Flag Cheesecake is a gem I’ve made countless times for family and friends, and here’s why it’s a winner every time:
- Quick & Easy: Ready in under 30 minutes—ideal when you’re juggling a million things but want to bring something special.
- Simple Ingredients: No need to hunt down fancy items; most are pantry staples like cream cheese, whipped topping, and fresh berries.
- Perfect for Patriotic Celebrations: Whether it’s Independence Day, Memorial Day, or Labor Day, this cheesecake adds a festive touch without the headache.
- Crowd-Pleaser: Kids love the colorful berry pattern, and adults appreciate the creamy, light texture.
- Unbelievably Delicious: The smooth cheesecake base combined with the juicy, vibrant berries is pure comfort in every bite.
What sets this recipe apart? It’s the no-bake method that keeps things cool and stress-free, especially when the summer heat is unforgiving. Plus, the way the cream cheese and whipped topping blend creates an ultra-smooth, fluffy texture that feels indulgent but is surprisingly light. I also like to use a perfectly crumbly graham cracker crust that adds just the right crunch without overpowering the softness above.
Honestly, this isn’t just another cheesecake—it’s the kind that makes you close your eyes and savor every mouthful, the kind you remember long after the last firework fades. If you want to impress at your next gathering without sweating over complicated steps, this is the recipe to keep on hand.
What Ingredients You Will Need
This recipe uses simple, wholesome ingredients to deliver bold flavor and a satisfying texture without fuss. Most are easy to find year-round, and substitutions are totally doable if you want to mix things up.
- For the Crust:
- 1 ½ cups graham cracker crumbs (I prefer Honey Maid for the best texture)
- ⅓ cup unsalted butter, melted (adds richness and helps the crust set)
- 2 tablespoons granulated sugar (balances the buttery flavor)
- For the Cheesecake Filling:
- 16 ounces (450 g) cream cheese, softened (full-fat for creaminess or Neufchâtel for lighter)
- 1 cup powdered sugar (sifted to avoid lumps)
- 1 teaspoon pure vanilla extract (trust me, it makes a difference)
- 1 ½ cups heavy whipping cream, cold (cold cream whips up better and faster)
- For the Flag Decoration:
- 1 cup fresh strawberries, sliced (choose firm, ripe berries for best appearance)
- 1 cup fresh blueberries (washed and patted dry)
- Optional: a handful of raspberries or blackberries for extra color variation
Substitution tips: Use coconut cream instead of heavy cream for a dairy-free version, and almond or gluten-free graham crackers if you need a gluten-free crust. If fresh berries aren’t in season, frozen berries work well—just thaw and drain excess liquid first.
Equipment Needed
- 9-inch (23 cm) springform pan or a similar round cake pan with removable sides — makes releasing the cheesecake a breeze.
- Mixing bowls — at least two: one for the crust and one for the filling.
- Electric mixer or stand mixer — a hand mixer works fine, but a stand mixer saves your wrists.
- Spatula — for scraping down the sides and folding ingredients gently.
- Measuring cups and spoons — precise measurements help the cheesecake set perfectly.
- Knife and cutting board — to slice the strawberries neatly for the flag design.
- Optional: food processor — if you prefer to crush graham crackers quickly instead of using pre-made crumbs.
If you don’t have a springform pan, a regular cake pan lined with parchment paper will work, but be extra careful when removing the cheesecake. I once tried using a pie dish—it was a bit trickier to slice cleanly but still delicious! Also, keeping your mixing bowl chilled can help the whipped cream whip up faster, which is a neat little tip I picked up from a pastry chef friend.
Preparation Method
- Prepare the Crust (10 minutes): In a medium bowl, combine 1 ½ cups graham cracker crumbs, ⅓ cup melted butter, and 2 tablespoons sugar. Mix until the crumbs are evenly coated and look like wet sand. Press the mixture firmly and evenly into the bottom of your 9-inch springform pan. Use the bottom of a glass to smooth and compact the crust. Place the pan in the refrigerator to chill while you prepare the filling.
- Make the Cheesecake Filling (15 minutes): In a large mixing bowl, beat the softened cream cheese until smooth and creamy. Add 1 cup powdered sugar and 1 teaspoon vanilla extract, mixing well to combine. In a separate chilled bowl, whip 1 ½ cups cold heavy cream until stiff peaks form—that means the cream should hold its shape when you lift the whisk.
- Combine and Fold (5 minutes): Gently fold the whipped cream into the cream cheese mixture using a spatula. Be careful not to overmix—you want to keep it light and fluffy! The filling should be smooth and airy.
- Assemble the Cheesecake (5 minutes): Pour the filling over the chilled crust, spreading it evenly with a spatula. Smooth the top as best you can.
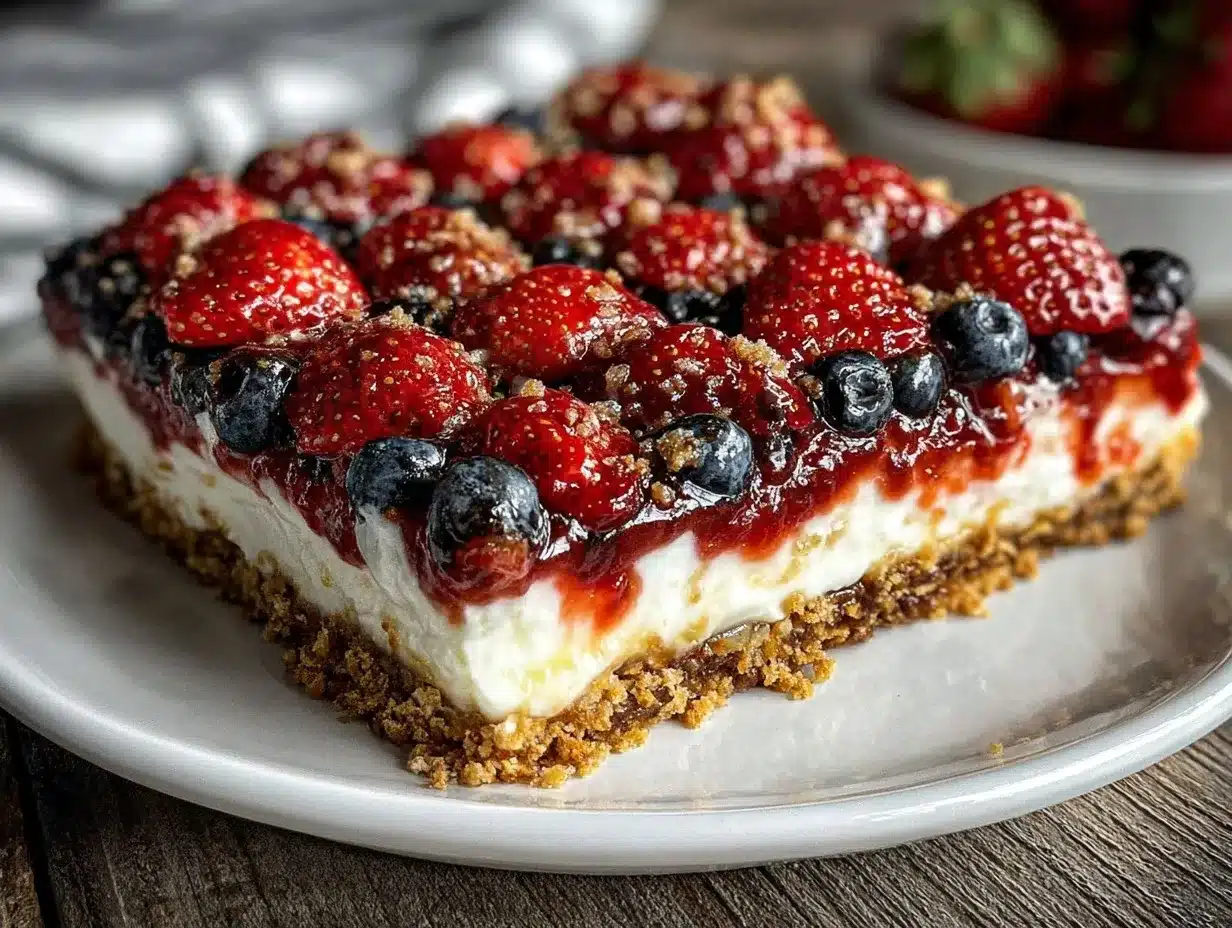
- Decorate the Flag (10 minutes): Arrange the blueberries in the upper left corner of the cheesecake to represent the stars. Next, create red stripes by laying sliced strawberries in horizontal rows across the rest of the cheesecake. Take your time here; neat placement really makes a difference visually.
- Chill and Set (At least 4 hours or overnight): Cover the cheesecake loosely with plastic wrap and refrigerate to allow it to firm up properly. The longer it chills, the better it slices.
Pro tip: If your cream cheese isn’t fully softened, you’ll get lumps in the filling—so set it out an hour before starting. Also, don’t rush the chilling step; I learned the hard way that a partially set cheesecake can be a gooey mess when sliced.
Cooking Tips & Techniques
Making this Easy No-Bake Flag Cheesecake successful is all about a few simple tricks. Here’s what I’ve learned after several joyful attempts (and a couple of kitchen mishaps):
- Softening the Cream Cheese: Let it sit at room temperature for at least an hour. If you’re in a hurry, cut it into small cubes to soften faster but avoid microwaving—it can get funky.
- Whipping the Cream: Cold cream and a chilled bowl make whipping quicker and fluffier. Stop whipping once stiff peaks form—overwhipping can turn it grainy or into butter.
- Folding Technique: Fold gently with a spatula to keep the mixture airy. Think of it like folding in egg whites for a souffle—don’t be rough!
- Crust Compaction: Press the graham cracker crust firmly to avoid crumbling when slicing. Using the bottom of a glass or measuring cup works wonders.
- Berry Placement: Dry your berries thoroughly to prevent excess moisture from seeping into the filling, which can make the crust soggy.
- Chilling Time: Patience is key! The cheesecake needs at least 4 hours in the fridge to set properly. Overnight chilling is best if you can manage it.
One time, I forgot to chill the crust before adding the filling and ended up with a crumbly mess when serving. Lesson learned: don’t skip the chilling step! Also, multitasking by prepping the crust while the cream cheese softens saves precious time.
Variations & Adaptations
Feel free to customize this Easy No-Bake Flag Cheesecake to suit your tastes or dietary needs. Here are a few ideas from my kitchen experiments:
- Gluten-Free Version: Swap graham cracker crumbs with almond flour or gluten-free cookie crumbs. I’ve used gluten-free vanilla wafers with great success.
- Dairy-Free Adaptation: Use coconut cream whipped to stiff peaks instead of heavy cream and a dairy-free cream cheese alternative. The flavor is slightly different but still deliciously creamy.
- Seasonal Berry Mix: In late summer, I swap strawberries and blueberries for fresh raspberries and blackberries for a richer color palette and flavor.
- Mini Cheesecake Cups: Make individual servings using a muffin tin lined with cupcake liners. Perfect for potlucks and easier portion control.
- Flavor Twist: Add a tablespoon of lemon zest to the filling for a bright, zesty note that cuts through the richness beautifully.
I once added a swirl of blueberry jam to the filling before chilling, which gave a surprise fruity burst inside each slice. Totally optional but fun if you want to experiment!
Serving & Storage Suggestions
This cheesecake is best served chilled straight from the fridge. The creamy texture and fresh berries really shine when it’s cool and firm.
For presentation, serve it right in the springform pan for easy slicing, or carefully transfer to a decorative plate. Adding a sprig of mint on the side can add a fresh pop of color and aroma.
It pairs wonderfully with a light sparkling wine or a classic iced tea for summer gatherings.
Store leftovers tightly covered in the refrigerator for up to 3 days. The flavors actually meld and deepen over time, so it tastes even better the next day. If you want to freeze it, wrap it well and thaw overnight in the fridge before serving. Reheat is not recommended, as this is best enjoyed cold.
Nutritional Information & Benefits
Each serving of this Easy No-Bake Flag Cheesecake (about 1/12th of the cake) contains approximately:
| Calories | 320 |
|---|---|
| Fat | 22 g |
| Carbohydrates | 25 g |
| Protein | 4 g |
| Sugar | 18 g |
This dessert offers the benefits of fresh berries, rich in antioxidants and vitamins, balanced with cream cheese that provides calcium and protein. While indulgent, the no-bake method means less fat than traditional baked cheesecakes, especially if you opt for lighter cream cheese varieties. You can also adjust the sugar level to taste.
If you’re watching gluten or dairy intake, easy substitutions make this recipe approachable for many dietary preferences. It’s a festive treat that doesn’t need to feel guilty.
Conclusion
This Easy No-Bake Flag Cheesecake is a dessert that truly brings joy to any patriotic celebration. It’s approachable, beautiful, and delicious—a trifecta that keeps me coming back every summer. I love how it turns a simple gathering into a memorable event with minimal fuss and maximum smiles.
Feel free to make it your own by customizing the berries, trying different crusts, or adding your favorite flavor twists. Let this recipe be your go-to when you want a dessert that looks impressive but doesn’t demand hours in the kitchen.
If you try it, I’d love to hear how your cheesecake turned out—and any creative spins you added! Leave a comment below or share your photos. Now, go ahead and make your next celebration a little sweeter and a lot more festive!
FAQs
Can I make this cheesecake ahead of time?
Absolutely! This cheesecake actually tastes better after chilling overnight. Just cover it tightly and keep it refrigerated until ready to serve.
What if I don’t have a springform pan?
You can use a regular cake pan lined with parchment paper, but be gentle when removing the cheesecake to avoid breaking it.
Can I use frozen berries instead of fresh?
Yes, but thaw and drain them well to avoid extra moisture that can make the crust soggy or the filling runny.
Is it possible to make this recipe vegan?
With some ingredient swaps like coconut cream and vegan cream cheese, you can make a tasty vegan version, though the texture and flavor will differ slightly.
How do I prevent the crust from becoming soggy?
Press the crust firmly and chill it before adding the filling. Also, make sure berries are dry when decorating to minimize moisture seepage.
Pin This Recipe!
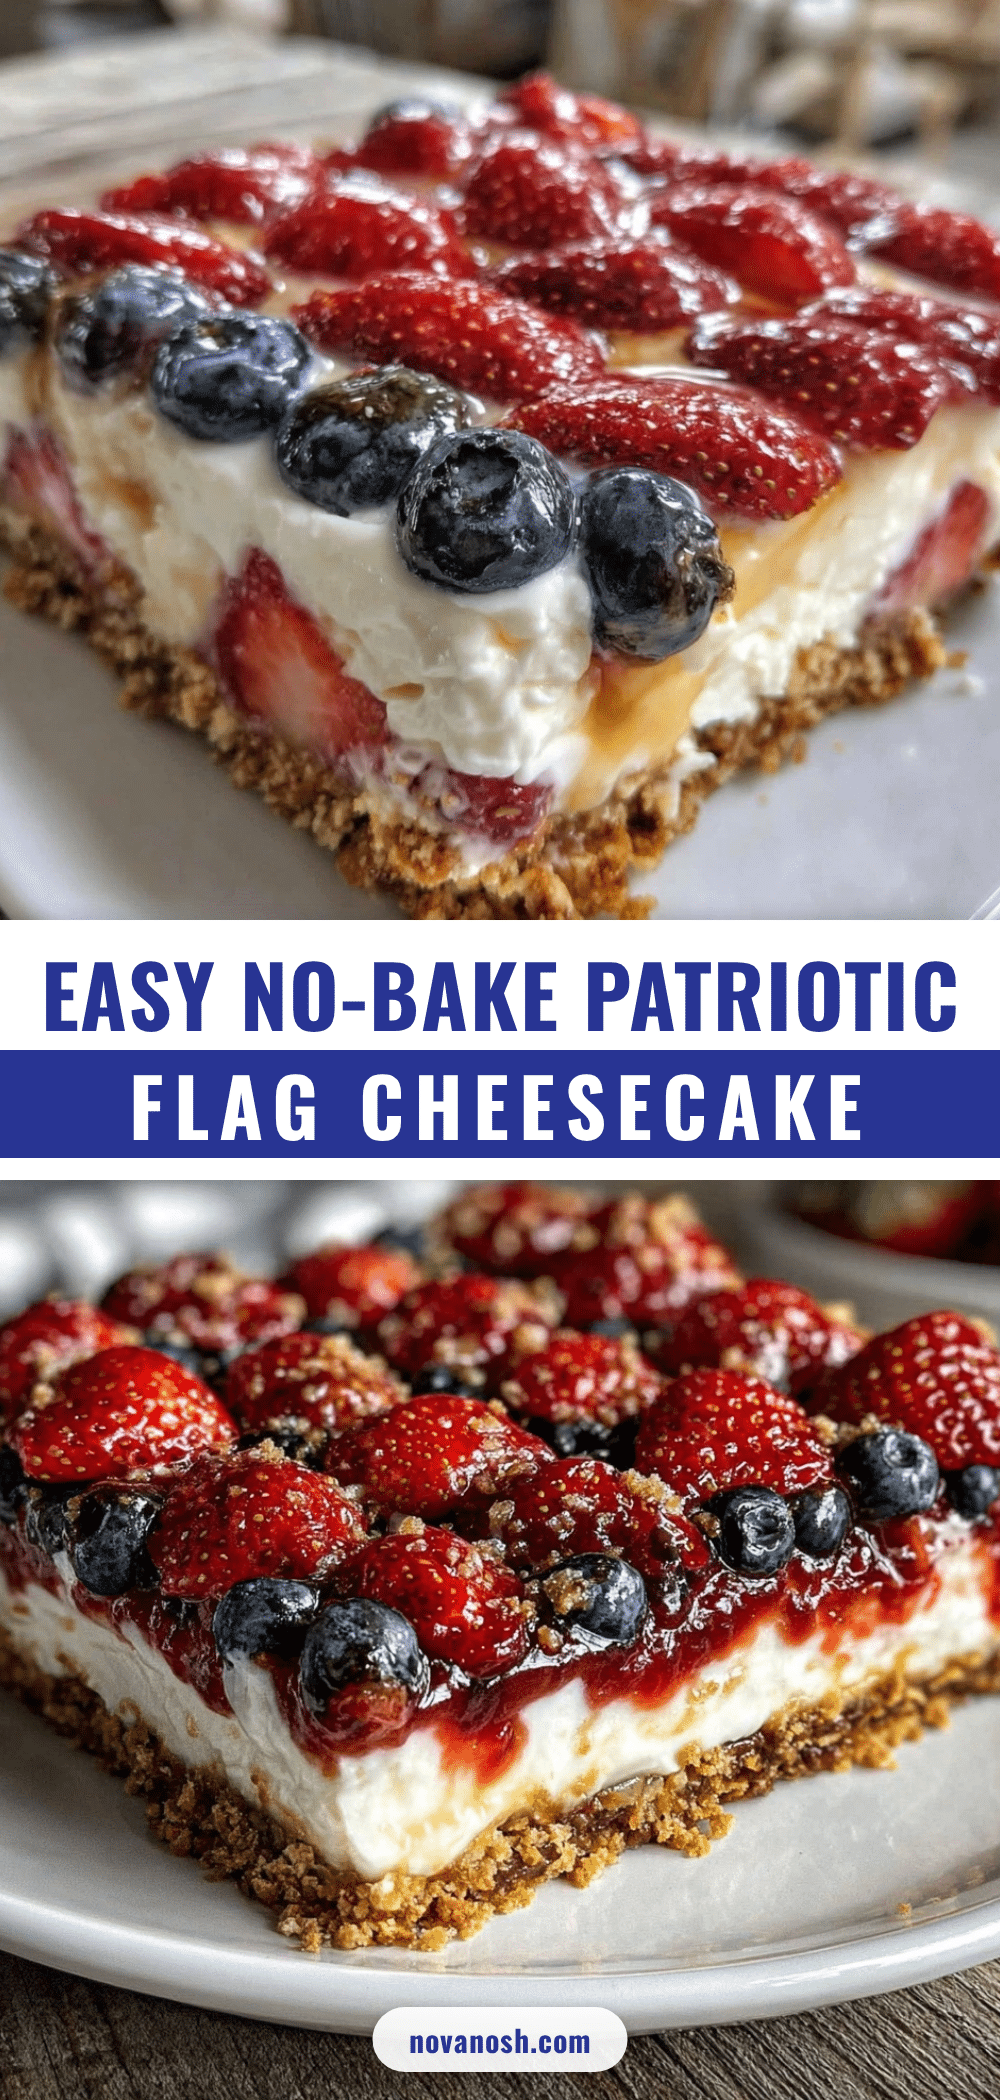
Easy No-Bake Flag Cheesecake Recipe Perfect for Patriotic Celebrations
A quick and easy no-bake cheesecake decorated with fresh berries in a flag pattern, perfect for patriotic celebrations like the Fourth of July. This creamy, light dessert requires no oven and is a crowd-pleaser for all ages.
- Prep Time: 30 minutes
- Cook Time: 0 minutes
- Total Time: 4 hours 30 minutes
- Yield: 12 servings 1x
- Category: Dessert
- Cuisine: American
Ingredients
- 1 ½ cups graham cracker crumbs
- ⅓ cup unsalted butter, melted
- 2 tablespoons granulated sugar
- 16 ounces cream cheese, softened
- 1 cup powdered sugar
- 1 teaspoon pure vanilla extract
- 1 ½ cups heavy whipping cream, cold
- 1 cup fresh strawberries, sliced
- 1 cup fresh blueberries
- Optional: a handful of raspberries or blackberries
Instructions
- Prepare the crust: In a medium bowl, combine graham cracker crumbs, melted butter, and sugar. Mix until crumbs are evenly coated and look like wet sand. Press mixture firmly and evenly into the bottom of a 9-inch springform pan. Smooth and compact the crust using the bottom of a glass. Refrigerate crust while preparing filling.
- Make the cheesecake filling: Beat softened cream cheese until smooth and creamy. Add powdered sugar and vanilla extract, mixing well. In a separate chilled bowl, whip cold heavy cream until stiff peaks form.
- Combine and fold: Gently fold whipped cream into cream cheese mixture using a spatula, keeping it light and fluffy.
- Assemble the cheesecake: Pour filling over chilled crust and spread evenly. Smooth the top.
- Decorate the flag: Arrange blueberries in the upper left corner to represent stars. Create red stripes by laying sliced strawberries in horizontal rows across the rest of the cheesecake.
- Chill and set: Cover loosely with plastic wrap and refrigerate for at least 4 hours or overnight to firm up.
Notes
Let cream cheese soften at room temperature for at least an hour to avoid lumps. Use cold heavy cream and a chilled bowl for faster whipping. Fold whipped cream gently to keep filling airy. Press crust firmly to avoid crumbling. Dry berries thoroughly before decorating to prevent soggy crust. Chill cheesecake at least 4 hours or overnight for best slicing results.
Nutrition
- Serving Size: 1 slice (1/12th of t
- Calories: 320
- Sugar: 18
- Fat: 22
- Carbohydrates: 25
- Protein: 4
Keywords: no-bake cheesecake, patriotic dessert, Fourth of July dessert, flag cheesecake, easy cheesecake, berry cheesecake